
Introduction
Thank you for choosing the Peakeep Battery Operated Digital Alarm Clock. This cordless alarm clock features large, easy-to-read numbers, adjustable brightness, and a loud alarm with volume control, making it ideal for bedrooms, especially for seniors and heavy sleepers. Its battery-powered design ensures functionality during power outages and offers placement flexibility without the need for power outlets.

Image: Front view of the Peakeep Digital Alarm Clock displaying green digits.
Important Safety Information
- Qualified alkaline batteries from a major brand are recommended for optimal performance and battery life.
- Do not use rechargeable batteries with this device.
- Ensure that the batteries are installed correctly by aligning the anode and cathode as indicated in the battery compartment.
- Keep the clock away from water or excessive moisture.
- Avoid exposing the clock to extreme temperatures or direct sunlight for prolonged periods.
Setup
Battery Installation
- Locate the battery compartment on the back of the clock.
- Open the battery compartment cover.
- Insert 4 AA alkaline batteries (not included) into the compartment, ensuring correct polarity (+ and -) as marked.
- Close the battery compartment cover securely.

Image: Product dimensions and battery installation guide, showing the clock requires 4 AA batteries.

Image: Rear view of the clock, highlighting the battery compartment and control buttons for easy setup.
Operating Instructions
Setting Time
- Press and hold the TIME SET button for 2 seconds to enter time setting mode. The hour digits will flash.
- Use the + or - buttons to adjust the hour.
- Press TIME SET again to confirm the hour and move to minute setting. The minute digits will flash.
- Use the + or - buttons to adjust the minutes.
- Press TIME SET once more to exit time setting mode.
Setting Alarm
- Press and hold the ALARM SET button for 2 seconds to enter alarm setting mode. The alarm hour digits will flash.
- Use the + or - buttons to adjust the alarm hour.
- Press ALARM SET again to confirm the alarm hour and move to alarm minute setting. The alarm minute digits will flash.
- Use the + or - buttons to adjust the alarm minutes.
- Press ALARM SET once more to exit alarm setting mode.
- To turn the alarm ON or OFF, simply press the ALARM ON/OFF button. An alarm icon will appear on the display when the alarm is active.
Adjusting Brightness (Dimmers)
The clock offers 3 different brightness settings (L01, L02, L03) and an "OFF" mode for a completely dark display.
- Press the DIMMER button repeatedly to cycle through the brightness levels: L03 (brightest) → L02 → L01 (dimmest) → OFF.

Image: The clock display at various brightness settings (L03, L02, L01, and OFF) to suit different lighting conditions.
Adjusting Alarm Volume
The alarm volume can be adjusted to 5 different levels, from quiet to super loud.
- Press the VOL button repeatedly to cycle through the 5 volume levels (U01 to U05).
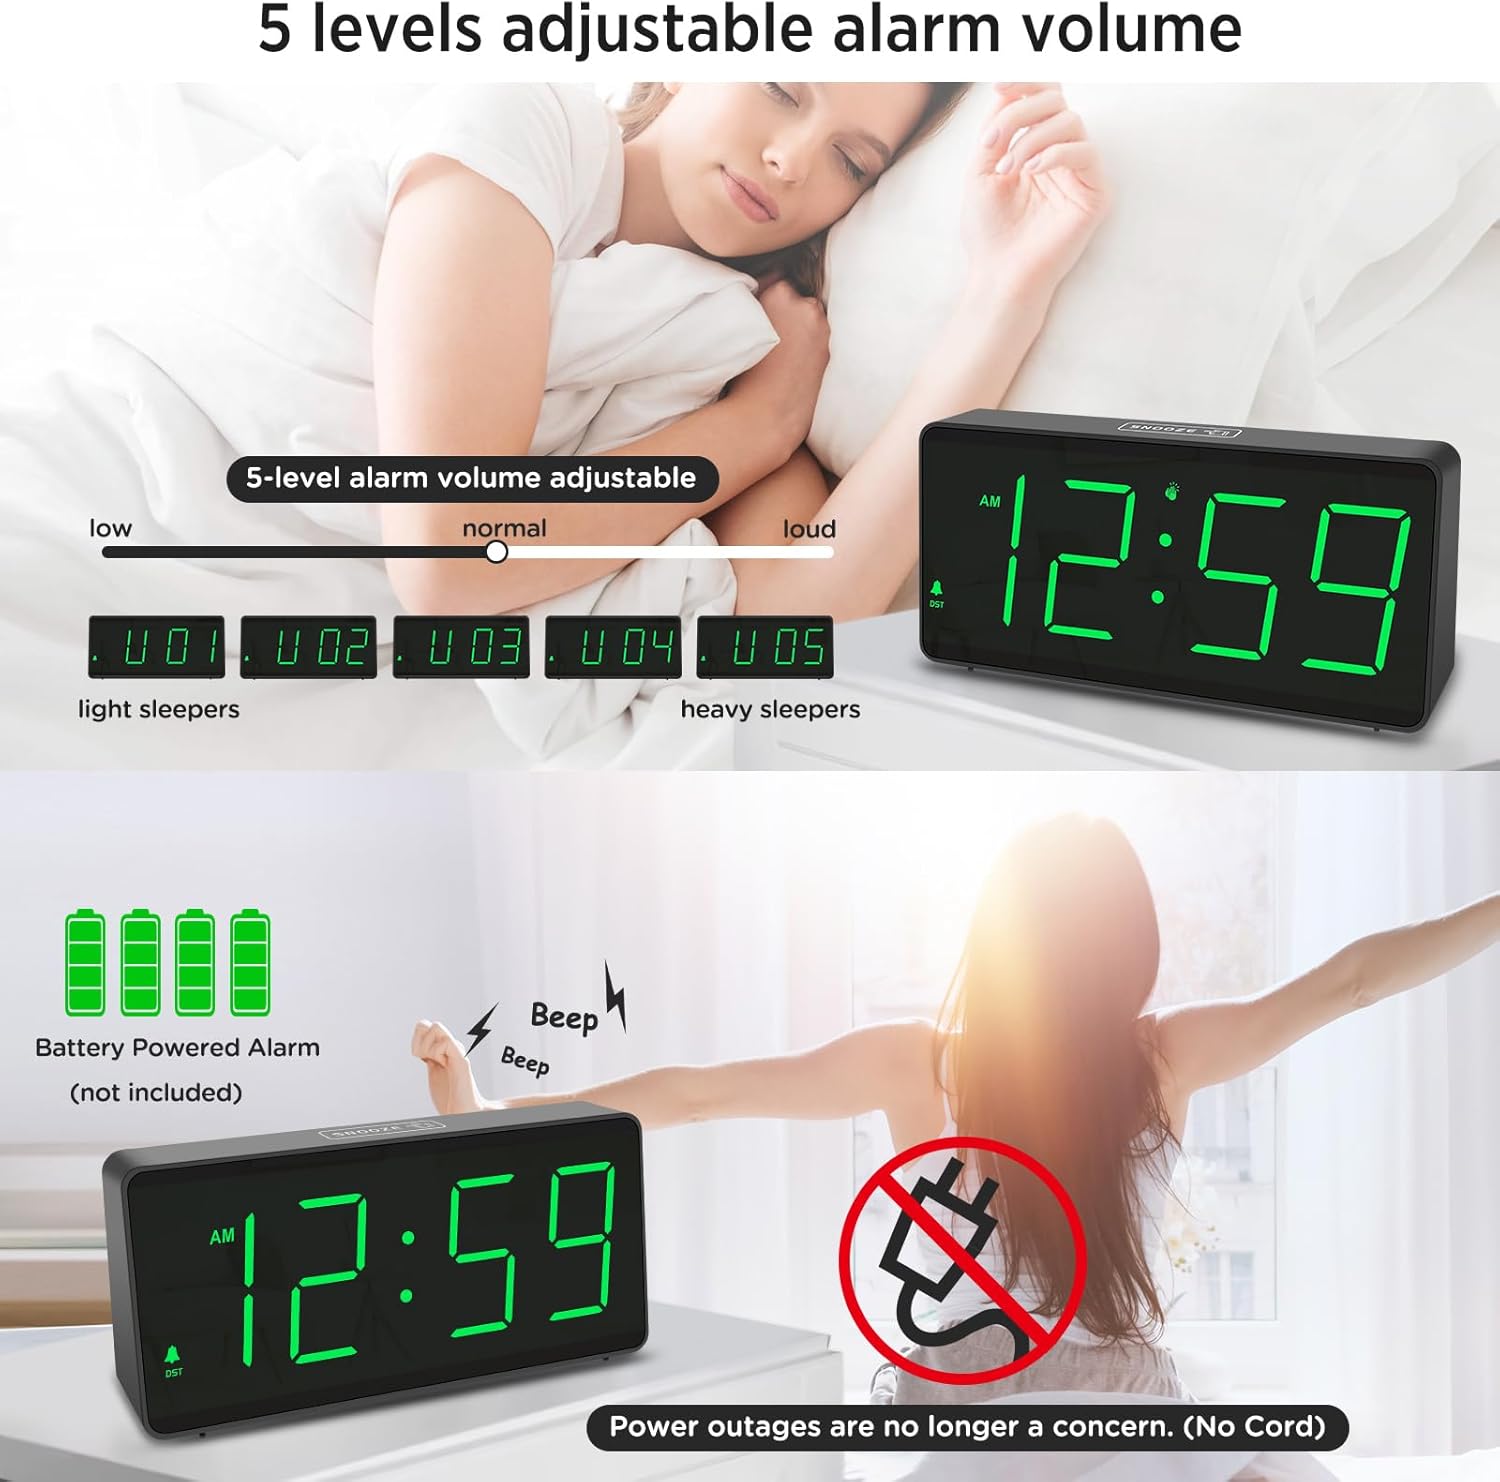
Image: Illustration of the 5-level adjustable alarm volume, catering to both light and heavy sleepers.
Snooze Function
The touch-sensitive snooze button is located on the top of the clock.
- When the alarm sounds, gently tap the SNOOZE area on the top of the clock to activate a 9-minute snooze.
- To stop the alarm completely, press any button on the back of the clock.
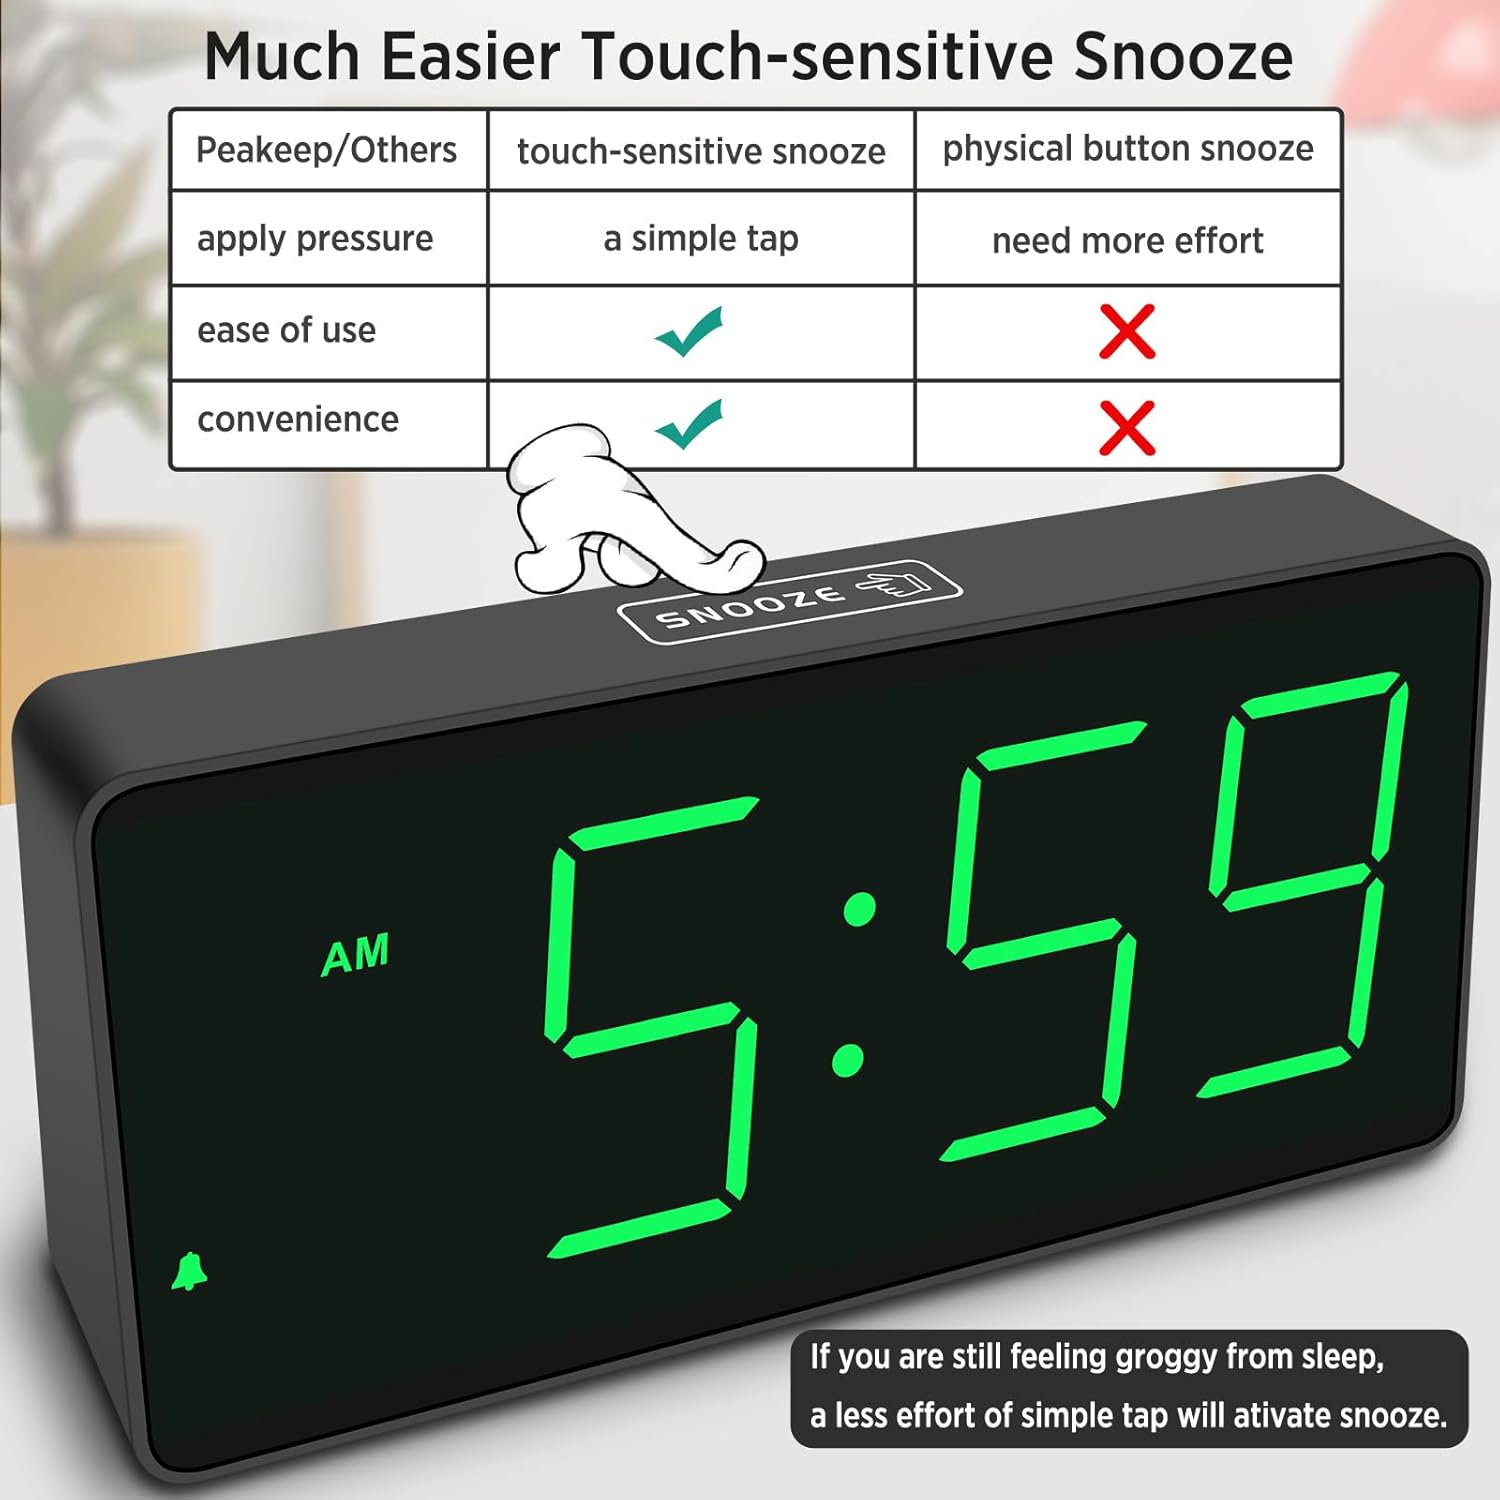
Image: Top view of the clock highlighting the touch-sensitive snooze area for easy operation.
12/24 Hour Format
- Press the 12/24HR button to switch between 12-hour (with AM/PM indicator) and 24-hour (military time) formats.
Daylight Saving Time (DST)
- Press the DST ON/OFF button to manually adjust the time forward or backward by one hour for Daylight Saving Time.
Voice-activated Mode
This mode helps conserve battery life by dimming the display to OFF when no sound is detected for 30 seconds. The display will reactivate with a gentle sound.
- To turn the voice-activated mode ON or OFF, press the VOICE-ACTIVATED ON/OFF button. When OFF, the display will remain on continuously.
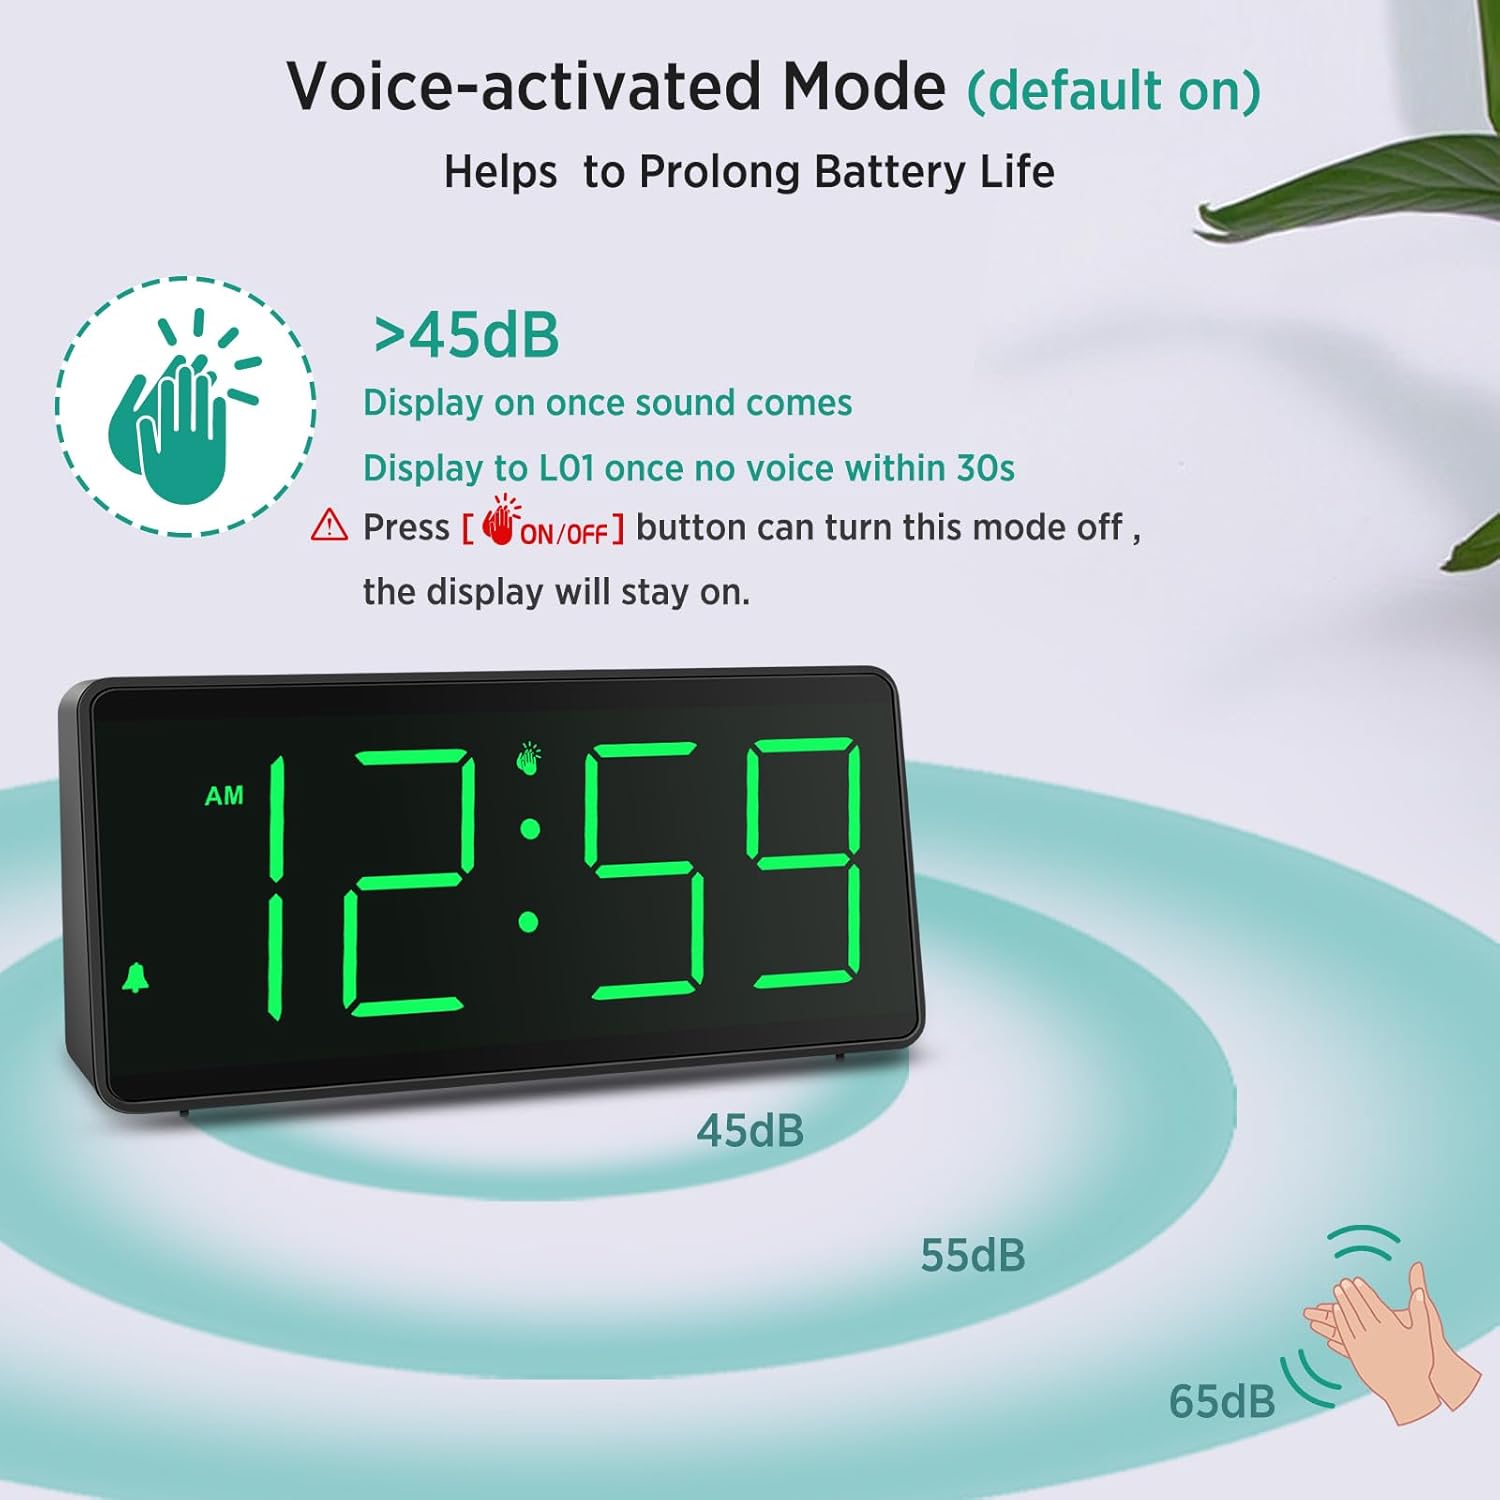
Image: Diagram explaining how the voice-activated mode works, showing the display turning on with sound and dimming after 30 seconds of silence.
Maintenance
- Clean the clock with a soft, dry cloth. Do not use abrasive cleaners or solvents.
- If the display becomes dim or the alarm weakens, replace all 4 AA batteries with new ones.
- Remove batteries if the clock will not be used for an extended period to prevent leakage.
Troubleshooting
| Problem | Possible Cause / Solution |
|---|---|
| Display is blank or dim. |
|
| Alarm is not sounding or is too quiet. |
|
| Time is incorrect. |
|
Specifications
| Brand | Peakeep |
| Model Number | MHP6010 |
| Color | Green Digits |
| Display Type | Digital |
| Power Source | Battery Powered (4 AA batteries required, not included) |
| Product Dimensions | 7"W x 3.3"H |
| Material | Plastic |
| Special Features | Cordless, Large Big Numbers, 4 Dimmers, Optional Voice-activated, 12/24 Hour, DST, Easy to Set |
Warranty and Support
This Peakeep product comes with an Extended Warranty. For any questions, technical support, or warranty claims, please contact our customer service team.
Customer Service: sales@us-myhome.com

