
Introduction
This manual provides detailed instructions for the safe and efficient operation of your new WOLWES 7L Mini Automatic Portable Washing Machine. Please read this manual thoroughly before use and retain it for future reference. This appliance is designed for washing small loads of laundry, offering convenience and efficiency for various living spaces.
Safety Information
- Ensure the washing machine is placed on a stable, level surface to prevent movement during operation.
- Do not overload the machine beyond its 7L capacity to ensure proper washing and prevent damage.
- Keep the appliance away from direct sunlight, heat sources, and flammable materials.
- Always unplug the machine from the power outlet before cleaning or performing any maintenance.
- Do not immerse the main unit in water or other liquids.
- Supervise children to ensure they do not play with the appliance.
- Use only the provided power plug and ensure the voltage matches your local power supply.
Package Contents
Verify that all items listed below are included in your package:
- Mini Washer Machine (x1)
- 100-240V Power Plug (x1)
- Drain Pipe (x1)
- Inlet Pipe (x1)
- Inlet Water Connector (x1)
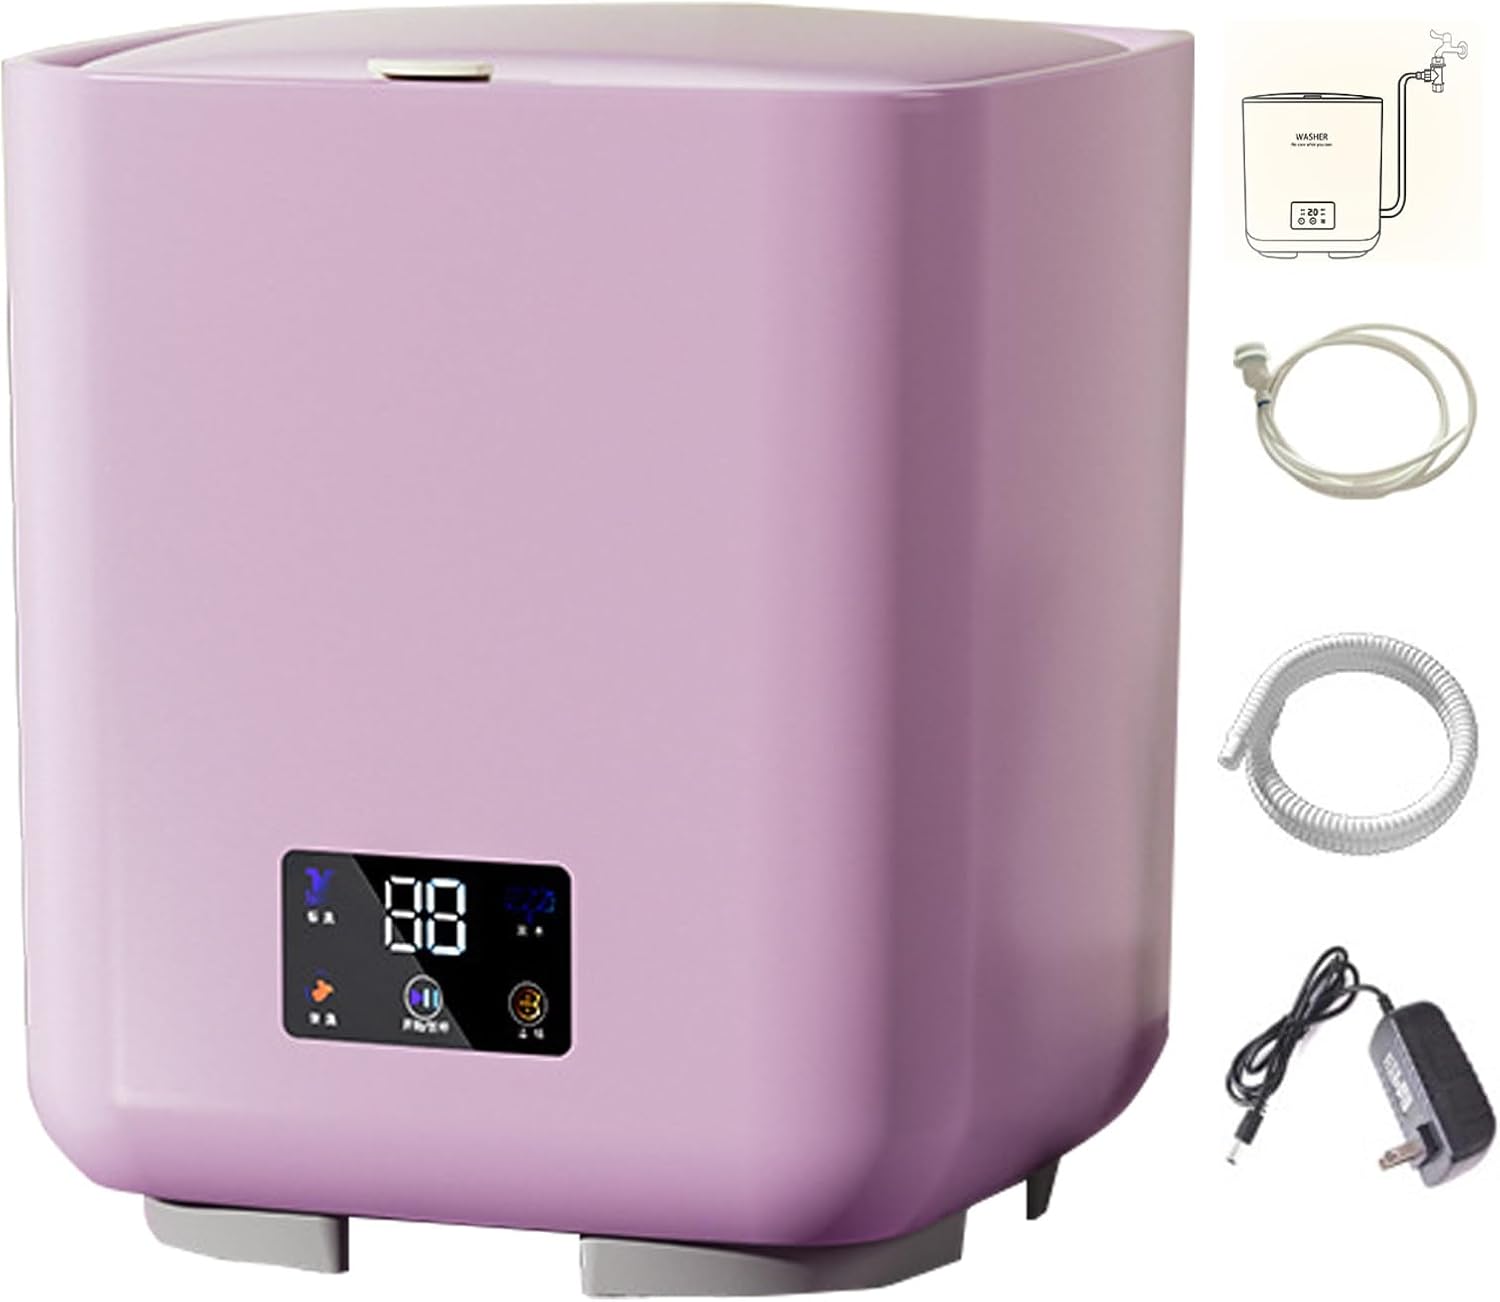
Specifications
| Feature | Specification |
|---|---|
| Voltage | 100V-240V |
| Capacity | 7 Liters |
| Dimensions (L x W x H) | 10.6 x 10.6 x 11.8 inches (27 x 27 x 30 cm) |
| Item Weight | 5.51 pounds (2.5 kg) |
| Material | ABS |
| Controls Type | Knob / Smart Touch |
| Special Features | Lightweight, Portable, Automatic Water Intake/Drainage, Spin Dry, Blue Ray + Silver Ion, Self-cleaning Function |
| Access Location | Top Load |
| Color | Purple |
Setup
1. Connecting Water Inlet and Drainage
- Connect the provided inlet pipe to the designated water inlet port on the washing machine. Ensure a secure connection to prevent leaks.
- Attach the inlet water connector to your water source (e.g., faucet).
- Connect the drain pipe to the drainage outlet on the machine. Position the other end of the drain pipe into a sink or drainage area, ensuring it is lower than the machine for proper gravity drainage.

2. Power Connection
- Plug the 100-240V power plug into a suitable electrical outlet.
- Ensure the power cord is not pinched or damaged.
Operating Instructions
1. General Operation
- Open the lid of the washing machine.
- Place your laundry inside the drum. Do not exceed the 7L capacity.
- Add a small amount of detergent suitable for delicate or small loads. Avoid excessive detergent to prevent oversudsing.
- Close the lid securely.
- Press the Power button to turn on the machine.
- Select your desired washing mode using the smart touch controls.
- The machine will automatically proceed with water intake, washing, drainage, rinsing, and spin drying according to the selected program.
- Once the program is complete, remove your clean laundry.


2. Washing Modes
The machine offers 4 intelligent timing washing modes:
- Standard Wash (30 minutes): For regular daily laundry.
- Quick Wash (20 minutes): For lightly soiled items or quick refreshes.
- Soaking and Washing (40 minutes): For tackling stubborn stains with an initial soak cycle.
- Self Cleaning (5 minutes): Dedicated mode for cleaning the inner tub of the washing machine.

Key Features
Fully Automatic Wash and Spin Dry
The machine integrates washing and spin drying functions. Once a mode is selected, it automatically handles water intake, washing, drainage, rinsing, and spin drying, providing a complete laundry cycle.

Blue Ray + Silver Ion Technology
Equipped with 360° blue ray and silver ion technology, this feature provides deep cleansing and purification for your clothes, contributing to better hygiene, especially for delicates and baby clothing.

7L Capacity
The compact 7-liter capacity is ideal for small loads. It can typically accommodate items such as 2 underwear, 4 panties, 8 pairs of socks, 1 baby clothing item, or 3 small towels.
Anti-shock Suction Cup
The base of the washing machine features anti-shock suction cups. These help to stabilize the unit and prevent it from moving or vibrating excessively during high-speed spinning cycles.
Maintenance
1. Cleaning the Exterior
- Wipe the exterior of the machine with a soft, damp cloth. Do not use abrasive cleaners or solvents.
2. Cleaning the Interior (Self-cleaning Mode)
- Regularly use the 5-minute Self Cleaning mode to maintain the hygiene of the inner tub.
- Ensure the drain pipe is properly positioned during the self-cleaning cycle.
3. Drain Pipe and Inlet Pipe
- Periodically check the drain and inlet pipes for any blockages or damage. Clean as necessary.
Troubleshooting
Machine Not Starting
- Check if the power plug is securely connected to a working outlet.
- Ensure the lid is properly closed. The machine will not operate if the lid is open.
Water Not Draining
- Verify that the drain pipe is not kinked or blocked.
- Ensure the drain pipe is positioned lower than the machine for gravity drainage.
Excessive Vibration/Noise
- Ensure the machine is placed on a firm, level surface.
- Check that the laundry load is balanced inside the drum. Redistribute items if necessary.
- Verify the anti-shock suction cups are properly engaged with the surface.
Water Leakage
- Check all hose connections (inlet and drain) for tightness.
- Ensure the machine is not overloaded, which can cause water to overflow.
- Confirm the machine is level; an unlevel machine can lead to leaks.
Warranty and Support
For warranty information and customer support, please refer to the documentation provided at the time of purchase or contact your retailer. Keep your purchase receipt as proof of purchase.