
ErGear EGSS15B-EU
ErGear Single Monitor Arm User Manual
Model: EGSS15B-EU
Introduction
Thank you for choosing the ErGear Single Monitor Arm. This manual provides detailed instructions for the installation, operation, and maintenance of your new monitor arm. Designed for screens from 13 to 34 inches and supporting up to 22 lbs, this gas spring monitor mount offers ergonomic flexibility and helps optimize your workspace. Please read this manual thoroughly before installation and keep it for future reference.
Product Specifications
| Specification | Detail |
|---|---|
| Brand | ErGear |
| Model Number | EGSS15B-EU |
| Compatible Screen Size | 13 - 34 inches |
| Weight Capacity | Up to 22 lbs (10 kg) |
| VESA Compatibility | 75x75mm, 100x100mm |
| Mounting Type | C-Clamp or Grommet Base |
| C-Clamp Desk Thickness | 0.39" - 2.76" (10-70mm) |
| Grommet Desk Thickness | 0.39" - 2.17" (10-55mm) |
| Material | Aviation-grade Aluminum Alloy |
| Tilt Range | -35° to +90° |
| Swivel Range | 180° |
| Rotation Range | 360° |
| Max Vertical Extension | 17.5 inches |
| Max Horizontal Extension | 15.3 inches |
| Color | Black |
Package Contents
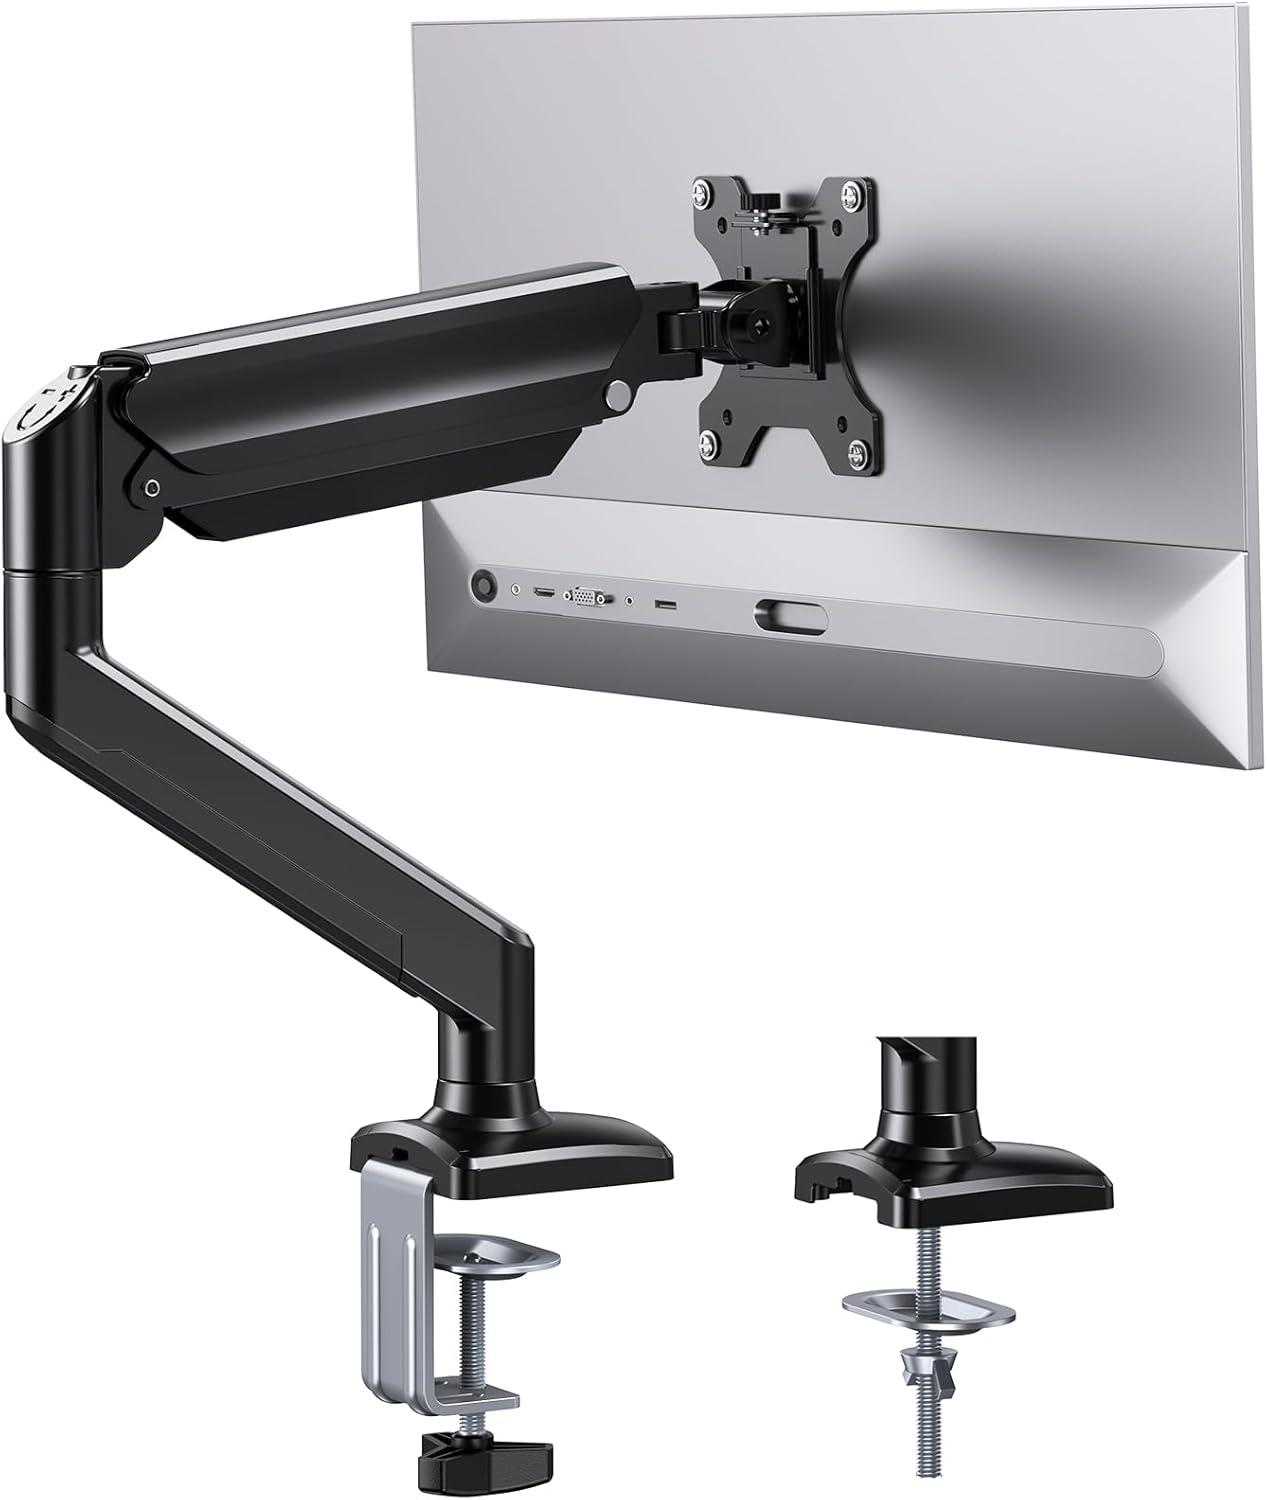
Before beginning installation, please ensure all parts are present and undamaged. Refer to the included hardware kit for specific component identification.
- Monitor Arm Assembly
- C-Clamp Mounting Hardware
- Grommet Base Mounting Hardware
- VESA Plate Screws (various sizes)
- Hex Keys / Adjustment Tools
- Instruction Manual (this document)
Setup and Installation
The ErGear monitor arm offers two primary installation methods: C-clamp and Grommet Base. Choose the method most suitable for your desk.
1. Choose Your Mounting Method

- C-Clamp Mounting: Ideal for desks with edges, supporting thicknesses from 0.39" to 2.76".
- Grommet Base Mounting: Requires an existing hole in your desk (or drilling one), supporting thicknesses from 0.39" to 2.17".
2. Easy 3-Step Installation Process
Follow these general steps for quick setup. Detailed instructions are provided in the included manual and can be found in the PDF document linked in the support section.
- Mount the Base: Securely attach the chosen base (C-clamp or grommet) to your desk. Ensure it is tightened firmly to prevent wobbling.
- Attaching the Arms: Slide the monitor arm assembly onto the mounted base. Ensure it clicks into place or is secured according to the specific mechanism.
- Hang Monitors: Attach the VESA plate to the back of your monitor using the appropriate screws. Then, slide the monitor with the attached VESA plate onto the arm's VESA head.

Compatibility Check: Before installation, verify your monitor's size, weight, and VESA pattern. This arm supports 13"-34" screens, up to 22 lbs, and VESA 75x75mm or 100x100mm.

Operating and Adjustments
The ErGear monitor arm is designed for maximum flexibility to achieve your ideal viewing angle and ergonomic setup.
Ergonomic Flexibility
Utilize the gas-spring mechanism for fluid, one-finger adjustments. This allows you to easily position your monitor to reduce neck strain and improve productivity.
- Tilt: Adjust your screen from -35° to +90° to eliminate glare and find the perfect vertical angle.
- Swivel: Rotate your monitor 180° horizontally to share your screen or change viewing perspectives.
- Rotation: Pivot your screen 360° for quick transitions between landscape and portrait modes.
- Extension: Extend your screen up to 17.5 inches vertically and 15.3 inches horizontally for optimal eye-level comfort.


Tension Adjustment
If your monitor sags or does not stay in position, you may need to adjust the gas spring tension. Use the included hex key to adjust the tension screw located on the arm.
- Turn "+" (clockwise) for heavier monitors to increase tension.
- Turn "-" (counter-clockwise) for lighter monitors to decrease tension.

Maintenance
Regular maintenance ensures the longevity and optimal performance of your ErGear monitor arm.
- Cleaning: Wipe down the arm with a soft, damp cloth. Avoid abrasive cleaners or solvents.
- Cable Management: Utilize the integrated cable clips to route and organize your monitor cables. This not only keeps your desk tidy but also prevents cables from snagging or interfering with arm movement.

- Periodic Check: Periodically check all screws and connections to ensure they remain tight. Re-tighten if necessary.
- Gas Spring Endurance: The gas spring is designed for over 20,000 cycles, ensuring long-term durability.

Troubleshooting
If you encounter any issues with your monitor arm, please refer to the following common solutions:
| Problem | Possible Cause / Solution |
|---|---|
| Monitor sags or won't stay in position |
|
| Arm is too stiff to move |
|
| Monitor wobbles after installation |
|
| Cannot achieve desired height/extension |
|
Warranty and Support
ErGear products are built with quality and durability in mind. While specific warranty details are not provided in this manual, please retain your proof of purchase for any warranty claims.
For further assistance, technical support, or to download the full installation manual in PDF format, please visit the official ErGear website or contact customer support through your retailer.
You can also refer to the official installation manual PDF: ErGear Monitor Arm Installation Manual (PDF)
Related documentsEGSS15B-EU


Ask a question about this manual
Ask about setup, troubleshooting, compatibility, parts, safety, or missing instructions. Manuals+ will review the question and use this page’s manual context to help answer it.