Introduction
Thank you for purchasing the Disney Mickey Mouse 2 Quart Electric Ice Cream Maker. This appliance is designed to help you easily create delicious homemade ice cream, frozen yogurt, sherbet, or sorbet. Please read this instruction manual thoroughly before first use to ensure safe and efficient operation.

Front view of the Disney Mickey Mouse Ice Cream Maker, featuring a Mickey Mouse embossed design and a power button.
Important Safety Information
When using electrical appliances, basic safety precautions should always be followed, including the following:
- Read all instructions before operating the appliance.
- Do not touch hot surfaces. Use handles or knobs.
- To protect against electrical shock, do not immerse cord, plugs, or the base unit in water or other liquid.
- Close supervision is necessary when any appliance is used by or near children.
- Unplug from outlet when not in use and before cleaning. Allow to cool before putting on or taking off parts.
- Do not operate any appliance with a damaged cord or plug, or after the appliance malfunctions or has been damaged in any manner. Return appliance to the nearest authorized service facility for examination, repair, or adjustment.
- The use of accessory attachments not recommended by the appliance manufacturer may cause injuries.
- Do not use outdoors.
- Do not let cord hang over edge of table or counter, or touch hot surfaces.
- Do not place on or near a hot gas or electric burner, or in a heated oven.
- Do not use appliance for other than intended use.
- Avoid contact with moving parts. Keep hands, hair, clothing, as well as spatulas and other utensils away from the freezer bowl during operation to reduce the risk of injury to persons and/or damage to the appliance.
- Do not use the freezer bowl on a stove top or other heat source.
- Do not freeze the freezer bowl at temperatures below 0°F (-18°C).
Parts and Components
Your Disney Mickey Mouse Ice Cream Maker includes the following parts:
- Base Unit (with motor and power button)
- 2-Piece Lid (clear lid with opening for ingredients)
- Freezer Bowl (double-insulated, requires pre-freezing)
- Plastic Paddle (churning arm)

An overhead view showing the inside of the ice cream maker base, where the freezer bowl and paddle are placed.

The double-insulated freezer bowl, which must be pre-frozen before use.
Setup and First Use
- Unpack: Carefully remove all components from the packaging. Retain packaging for future storage or transport if needed.
- Clean: Before first use, wash the freezer bowl, plastic paddle, and lid in warm, soapy water. Rinse thoroughly and dry all parts completely. The base unit should be wiped clean with a damp cloth. Do not immerse the base unit in water.
- Freeze the Bowl: This is a critical step. Place the empty, dry freezer bowl in the back of your freezer for at least 8 to 12 hours, or until it is completely frozen. For best results, store the bowl in the freezer at all times so it's ready for use. The colder the bowl, the better the ice cream will churn.
- Assemble: Once the freezer bowl is frozen, place it into the base unit. Insert the plastic paddle into the center of the freezer bowl, ensuring it sits correctly. Place the 2-piece lid on top of the base unit, aligning it properly.
Operating Instructions
Follow these steps to make delicious frozen desserts:
- Prepare Your Mixture: Prepare your desired ice cream, frozen yogurt, sherbet, or sorbet mixture. Ensure the mixture is chilled in the refrigerator for at least 2-3 hours before churning for best results.
- Assemble the Maker: Ensure the freezer bowl is completely frozen and placed securely in the base unit. Insert the plastic paddle and secure the lid.
- Start Churning: Plug the unit into a standard electrical outlet. Press the power button to turn on the ice cream maker. The paddle will begin to rotate.
- Add Ingredients: Immediately pour your chilled mixture through the opening in the lid while the machine is churning. Do not overfill; leave at least 1.5 inches from the top as the mixture will expand.
- Churn: Allow the mixture to churn for approximately 20 to 30 minutes, or until it reaches your desired consistency. The churning time may vary depending on the recipe and room temperature.
- Add Mix-ins: During the last 5 minutes of churning, you can add your favorite mix-ins such as chocolate chips, fruit, nuts, candy pieces, or sprinkles through the lid opening.
- Serve or Store: Once churning is complete, turn off the machine and unplug it. Remove the lid and paddle. Use a rubber spatula or plastic spoon to scoop the ice cream into a separate container. For a firmer consistency, transfer the ice cream to an airtight container and place it in the freezer for 2-4 hours.

A hand adding fresh raspberries into the ice cream maker through the lid opening while it churns.
Maintenance and Cleaning
Proper cleaning ensures the longevity and hygiene of your ice cream maker.
- Unplug: Always unplug the appliance from the electrical outlet before cleaning.
- Disassemble: Remove the lid, plastic paddle, and freezer bowl from the base unit.
- Hand Wash: The freezer bowl, plastic paddle, and lid are hand wash only. Wash them in warm, soapy water. Rinse thoroughly and dry completely with a soft cloth. Do not wash these parts in a dishwasher, as it may damage them.
- Base Unit: Wipe the base unit with a damp cloth. Do not immerse the base unit in water or any other liquid.
- Storage: Ensure all parts are completely dry before storing. You may store the freezer bowl in the freezer for immediate future use. Store the assembled unit in a clean, dry place.
Troubleshooting
| Problem | Possible Cause | Solution |
|---|---|---|
| Machine does not turn on. | Not plugged in; power outlet issue; unit malfunction. | Ensure unit is securely plugged into a working outlet. Check household circuit breaker. If problem persists, contact customer support. |
| Ice cream is not freezing or is too soft. | Freezer bowl not sufficiently frozen; mixture not chilled; too much mixture; warm room temperature. | Ensure freezer bowl is frozen for at least 8-12 hours. Chill mixture thoroughly before adding. Do not overfill the bowl. Operate in a cooler environment if possible. |
| Paddle stops churning. | Mixture is too thick; too much mixture; paddle not inserted correctly. | Ensure mixture is not too thick. Do not overfill. Check that the paddle is correctly seated. If the mixture is too thick, it may indicate the ice cream is done. |
| Loud noise during operation. | Paddle or lid not seated correctly; foreign object in bowl. | Turn off and unplug the unit. Check that the paddle and lid are correctly assembled. Ensure no foreign objects are in the bowl. |
Product Specifications
| Feature | Detail |
|---|---|
| Brand | Disney |
| Model Name | Ice Cream Maker |
| Model Number | DCM-800WH |
| Capacity | 2 Quarts |
| Color | White |
| Operation Mode | Automatic |
| Power | 120V, 50 watts |
| Item Weight | 10.7 Pounds (approx. 4.85 kg) |
| Product Dimensions | 8.66 x 8.66 x 13.35 inches (approx. 22 x 22 x 34 cm) |
| Product Care | Hand Wash (for removable parts) |
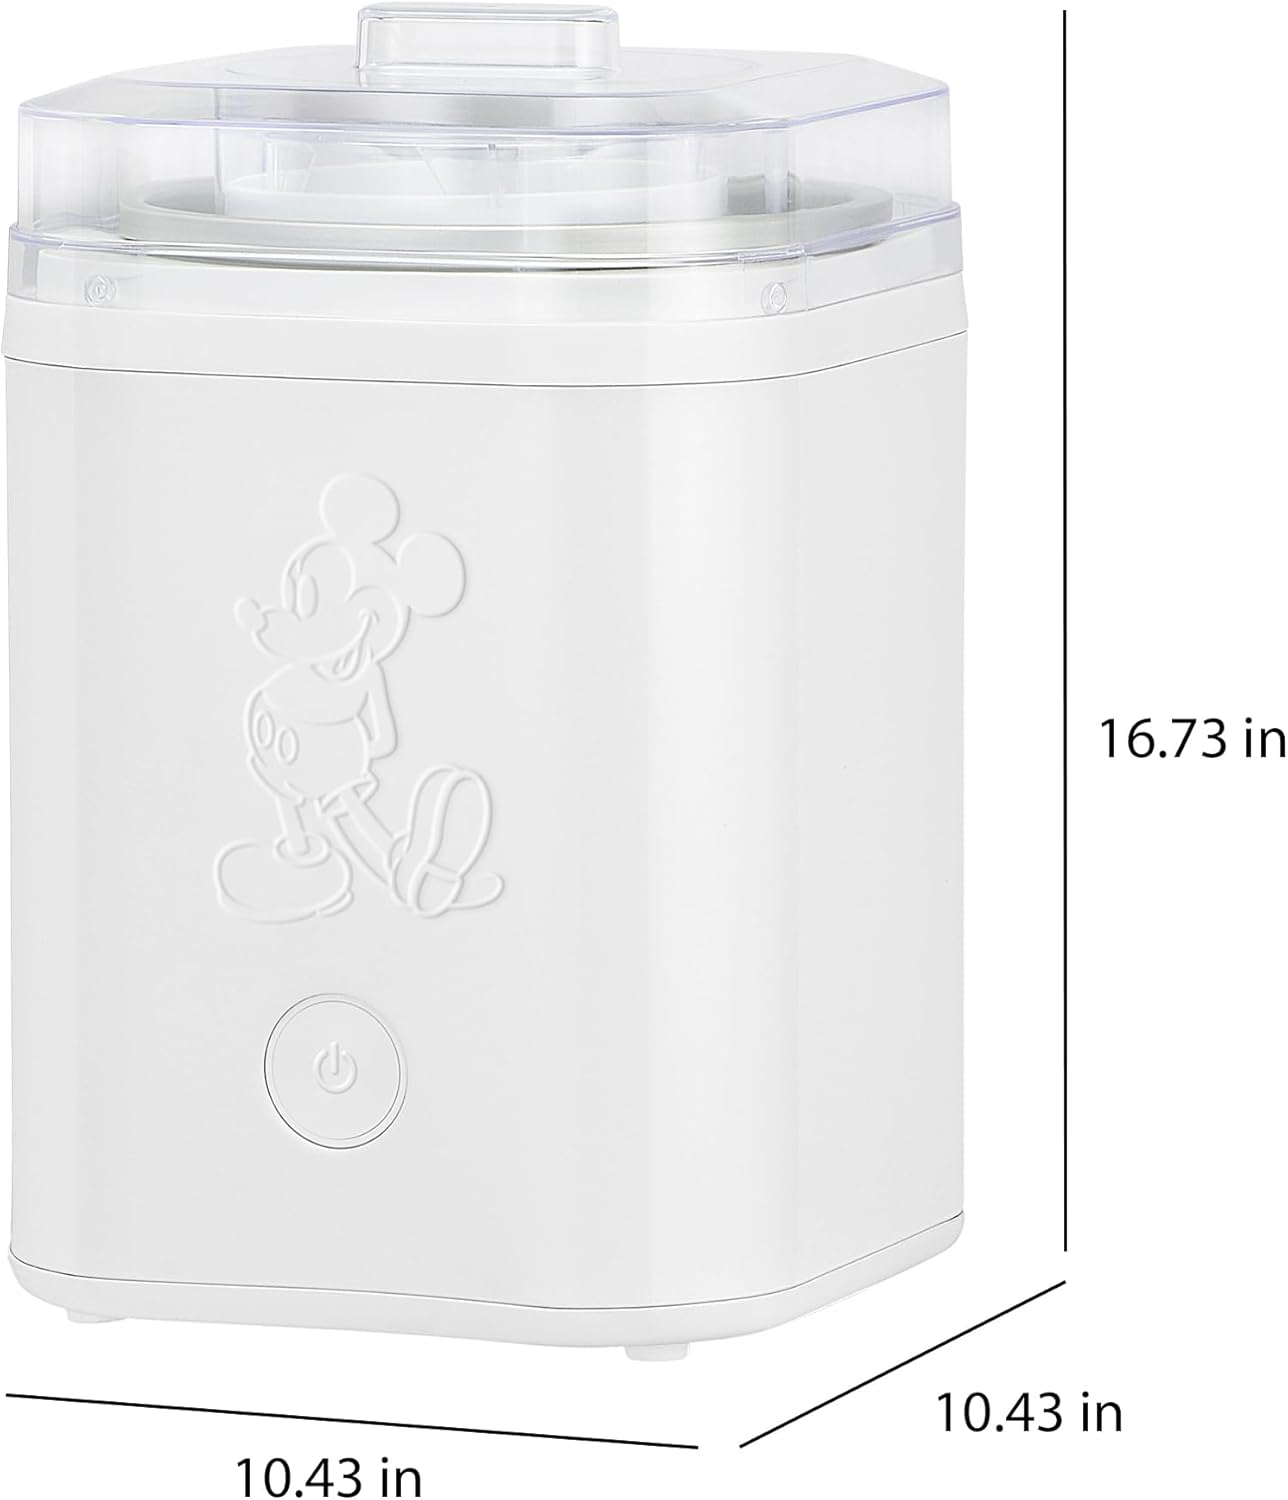
Diagram showing the approximate dimensions of the ice cream maker.
Warranty and Customer Support
This product comes with a limited manufacturer's warranty. Please refer to the warranty card included in your product packaging for specific terms and conditions, including the warranty period and coverage details.
For technical assistance, troubleshooting beyond this manual, or to inquire about warranty service, please contact Disney customer support. Contact information can typically be found on the product packaging, the official Disney website, or by searching for 'Disney customer service' online.
Please have your model number (DCM-800WH) and proof of purchase ready when contacting support.