Introduction
This manual provides comprehensive instructions for the setup, operation, maintenance, and troubleshooting of your Epson Expression 13000XL Archival Photo and Graphics Flatbed Scanner. Please read this manual thoroughly before using the scanner to ensure proper functionality and to maximize its performance.
1. Setup
1.1 Unpacking and Initial Inspection
Carefully remove the scanner and all accessories from the packaging. Verify that all components listed in the "In the Box" section are present and undamaged. Retain the packaging for future transport or storage.
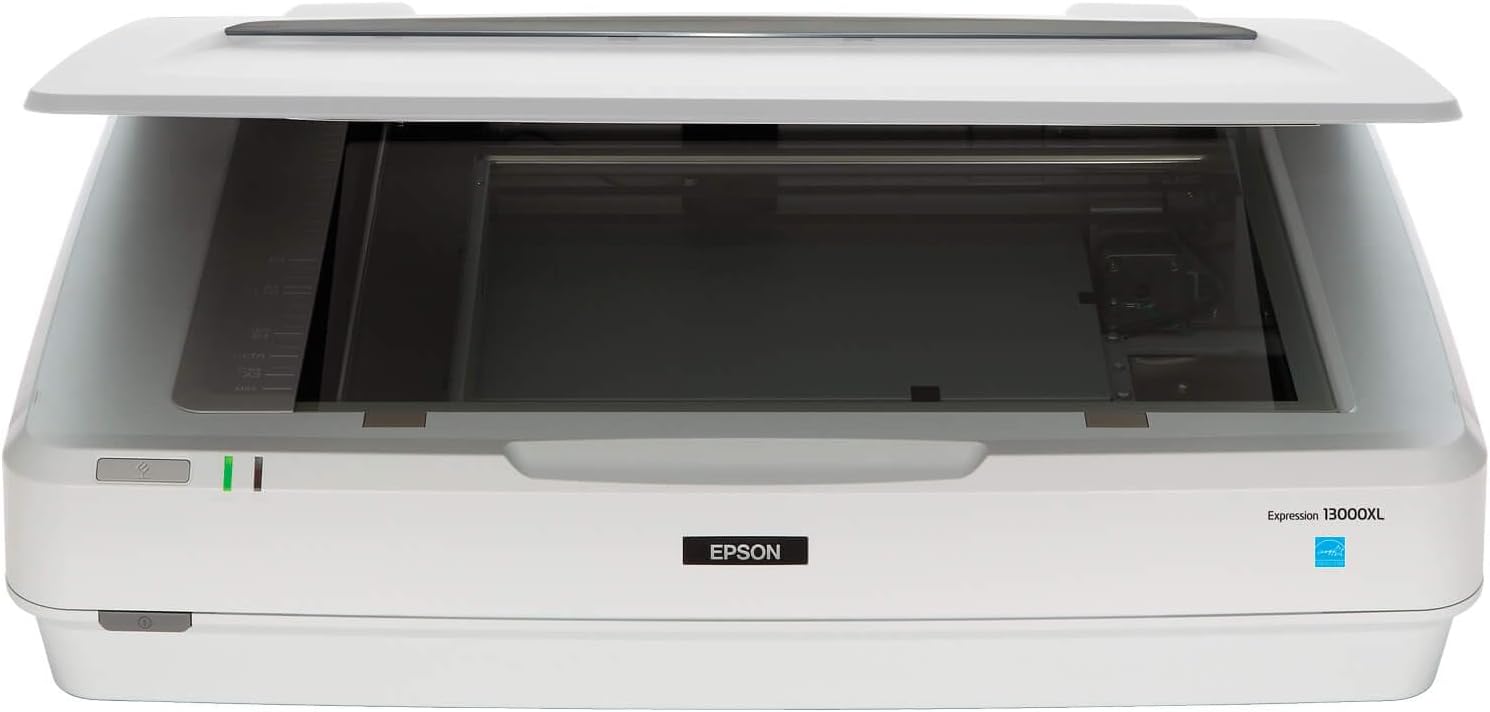
Image: The Epson Expression 13000XL flatbed scanner with its lid slightly ajar, showing the scanning bed. This image illustrates the scanner's overall design and size.
1.2 Connecting the Scanner
- Connect the power cable to the scanner and then to an electrical outlet.
- Connect the Hi-Speed USB 2.0 cable from the scanner to an available USB port on your computer.
1.3 Software Installation
Download the latest drivers and scanning software from the official Epson support website. Follow the on-screen instructions to complete the installation. The included software, such as LaserSoft Imaging SilverFast Ai, provides advanced scanning and image processing capabilities.

Image: A visual representation of the items included in the product box: the Epson Expression 13000XL scanner, a Start Here Guide, SilverFast software download card, power cable, and Hi-Speed USB 2.0 cable. This helps users verify package contents.
2. Operating the Scanner
2.1 Basic Scanning Procedure
- Ensure the scanner is powered on and connected to your computer.
- Place your document or photo face-down on the scanner glass, aligning it with the corner guide.
- Close the scanner lid gently.
- Open the scanning software on your computer (e.g., Epson Scan 2 or SilverFast Ai).
- Select your desired scanning settings (e.g., resolution, color mode, document type).
- Initiate the scan. The scanned image will appear in the software interface.
- Save the scanned image to your preferred location and format.
2.2 Large-Format Scanning
The Epson Expression 13000XL supports scanning of reflective media up to 12.2" x 17.2". Place your large-format originals directly onto the scanner glass, ensuring they are flat and properly aligned. The scanner's design accommodates these larger sizes for professional applications.

Image: The Epson Expression 13000XL scanner with its lid open, revealing a large architectural drawing placed on the scanning bed. This demonstrates the scanner's capacity for large-format documents up to 12.2" x 17.2".
2.3 Enhancing Image Quality
The scanner features a 2400 x 4800 dpi resolution and 3.8 Dmax optical density for capturing fine details and a wide dynamic range. Epson MatrixCCD and ReadyScan LED technologies contribute to accurate color reproduction and quick startup times without warm-up delays.

Image: The Epson Expression 13000XL scanner with its lid open, showing a vibrant, colorful abstract image on the scanning bed. This visually represents the scanner's capability for exceptional image quality and high resolution (2400 x 4800 dpi).

Image: A close-up of the Epson Expression 13000XL scanner with its lid open, displaying a color calibration chart on the scanning bed. A hand is visible near the chart. This image highlights the scanner's use of Epson MatrixCCD and ReadyScan LED technologies for accurate color and no warm-up time.
2.4 Easy Photo Fix Technology for Color Restoration
Utilize Epson's Easy Photo Fix technology to restore faded colors in old photographs and remove dust. This feature is accessible through the scanning software and can significantly improve the appearance of aged originals with a single touch.

Image: The Epson Expression 13000XL scanner positioned next to two photographs of a vintage car and house. One photo appears faded, while the other is vibrant and restored, illustrating the effectiveness of Easy Photo Fix technology for one-touch color restoration.
2.5 Batch Scanning
Increase productivity by scanning multiple printed images or documents simultaneously. Place several items on the scanner bed, and the software can automatically detect and save them as individual files, streamlining your workflow.

Image: The Epson Expression 13000XL scanner with its lid open, displaying several small landscape photographs arranged on the scanning bed. A computer monitor in the background shows the scanning software interface, indicating the batch scanning feature for increased productivity.
2.6 Optional Transparency Unit
For scanning film and other transparent materials, an optional Transparency Unit (sold separately) is required. This unit allows scanning of transparencies up to 12" x 16.5", expanding the scanner's versatility for archival and graphic arts purposes.
3. Maintenance
3.1 Cleaning the Scanner Glass
To ensure optimal scan quality, regularly clean the scanner glass. Use a soft, lint-free cloth lightly dampened with a mild glass cleaner. Avoid abrasive materials or excessive liquid, which can damage the glass or internal components. Ensure the glass is completely dry before use.
3.2 General Care
Keep the scanner in a clean, dust-free environment. Avoid placing heavy objects on the scanner lid. When not in use for extended periods, it is recommended to power off the scanner and disconnect it from the power source.
4. Troubleshooting
4.1 Scanner Not Detected
- Verify that the power cable is securely connected to both the scanner and the electrical outlet.
- Ensure the USB cable is firmly connected to both the scanner and your computer.
- Try connecting the USB cable to a different USB port on your computer.
- Restart your computer and the scanner.
- Check if the scanner drivers are correctly installed and up to date.
4.2 Poor Scan Quality
- Clean the scanner glass as described in the Maintenance section.
- Ensure the original document or photo is placed flat and correctly aligned on the scanner bed.
- Adjust scanning settings such as resolution, color depth, and image enhancements within the scanning software.
- Check for any dust or debris on the original document itself.
4.3 Software Issues
- Ensure you are using the latest version of the scanning software and drivers.
- If issues persist, try reinstalling the scanning software.
- Consult the software's help documentation or Epson's online support resources for specific error messages.
5. Specifications
| Feature | Detail |
|---|---|
| Model Name | Expression 13000XL |
| Item Model Number | B11B257201 |
| Scanner Type | Photo, Flatbed |
| Optical Resolution | 2400 x 4800 dpi |
| Optical Density | 3.8 Dmax |
| Color Depth | 48-bit |
| Max Scan Area (Reflective) | 12.2" x 17.2" |
| Max Scan Area (Transparency, with optional unit) | 12" x 16.5" |
| Connectivity Technology | USB |
| Optical Sensor Technology | CCD (Epson MatrixCCD) |
| Light Source | ReadyScan LED |
| Product Dimensions | 18"D x 25.8"W x 6.2"H |
| Item Weight | 31.5 pounds |
| Manufacturer | Epson |
| Date First Available | June 21, 2023 |
6. Warranty and Support
6.1 Product Warranty
For detailed information regarding the product warranty, including terms, conditions, and duration, please refer to the warranty documentation included with your scanner or visit the official Epson website. Protection plans may also be available for extended coverage.
6.2 Technical Support
If you encounter issues that cannot be resolved using this manual's troubleshooting section, please contact Epson technical support. Support resources, including FAQs, driver downloads, and contact information, are available on the official Epson support website.
You can visit the Epson Store on Amazon for additional product information and accessories.


