1. Introduction
Thank you for choosing the SCHNEIDER SCVCO2350DE Wet and Dry Vacuum Cleaner. This appliance is designed to efficiently clean both wet spills and dry debris from various hard floor surfaces. Featuring a powerful 18V motor, a dirt sensor for optimized cleaning, and a self-propelled brush, it offers up to 50 minutes of cordless operation. Please read this manual thoroughly before first use to ensure safe and optimal performance of your device.
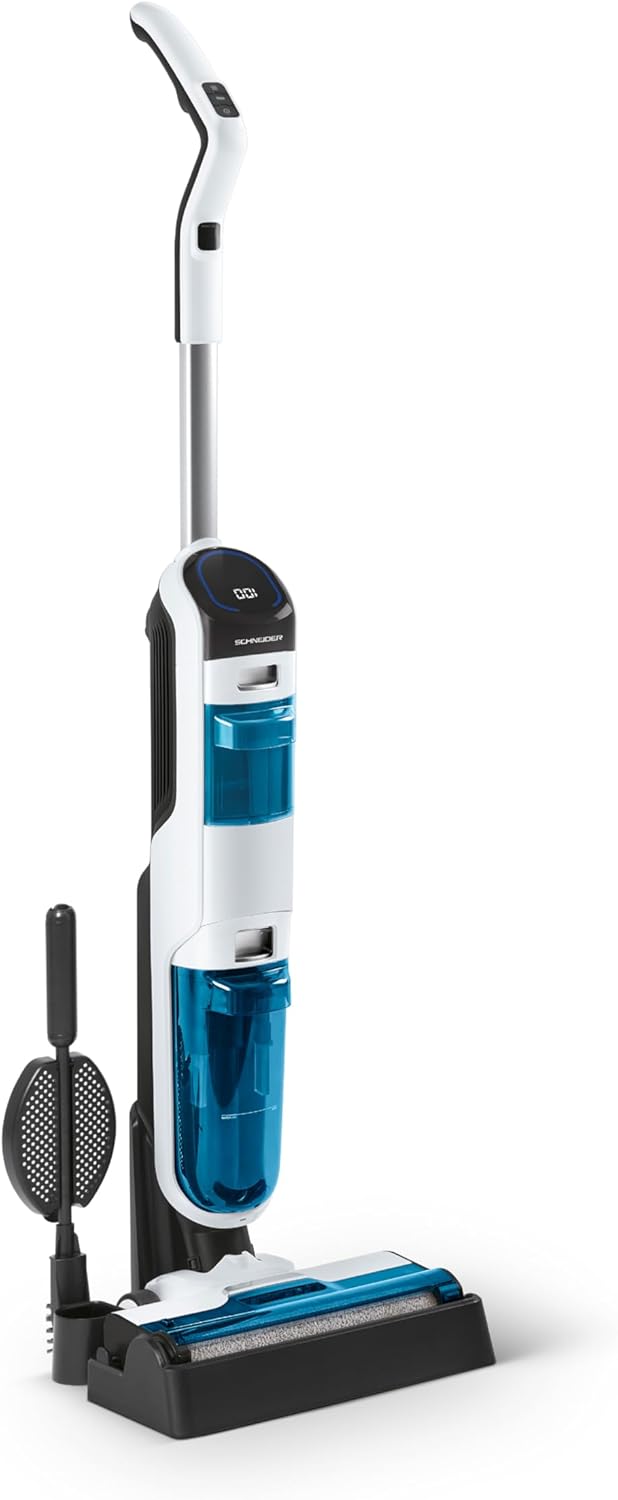
Figure 1: SCHNEIDER SCVCO2350DE Wet and Dry Vacuum Cleaner with charging base and cleaning tool.
2. Safety Instructions
Always observe basic safety precautions when using electrical appliances to reduce the risk of fire, electric shock, or injury.
- Read all instructions before using the appliance.
- Do not immerse the appliance in water or other liquids.
- Keep hair, loose clothing, fingers, and all parts of the body away from openings and moving parts.
- Use only as described in this manual. Use only manufacturer's recommended attachments.
- Do not use with a damaged cord or plug. If the appliance is not working as it should, has been dropped, damaged, left outdoors, or dropped into water, return it to a service center.
- Do not handle the charger or appliance with wet hands.
- Do not pick up flammable or combustible liquids, such as gasoline, or use in areas where they may be present.
- Do not pick up anything that is burning or smoking, such as cigarettes, matches, or hot ashes.
- Exercise extra care when cleaning on stairs.
- Unplug from outlet when not in use and before servicing.
- This appliance is for household use only.
3. Package Contents
Please check the contents of your package to ensure all items are present and undamaged.
- SCHNEIDER SCVCO2350DE Main Unit
- Handle Assembly
- Clean Water Tank (680ml capacity)
- Dirty Water Tank (440ml capacity)
- Charging Base
- Power Adapter
- Cleaning Brush Tool
- User Manual (this document)
4. Setup
4.1 Assembly
- Carefully remove all components from the packaging.
- Insert the handle assembly into the main unit until it clicks securely into place.
- Ensure both the clean water tank and dirty water tank are correctly installed.
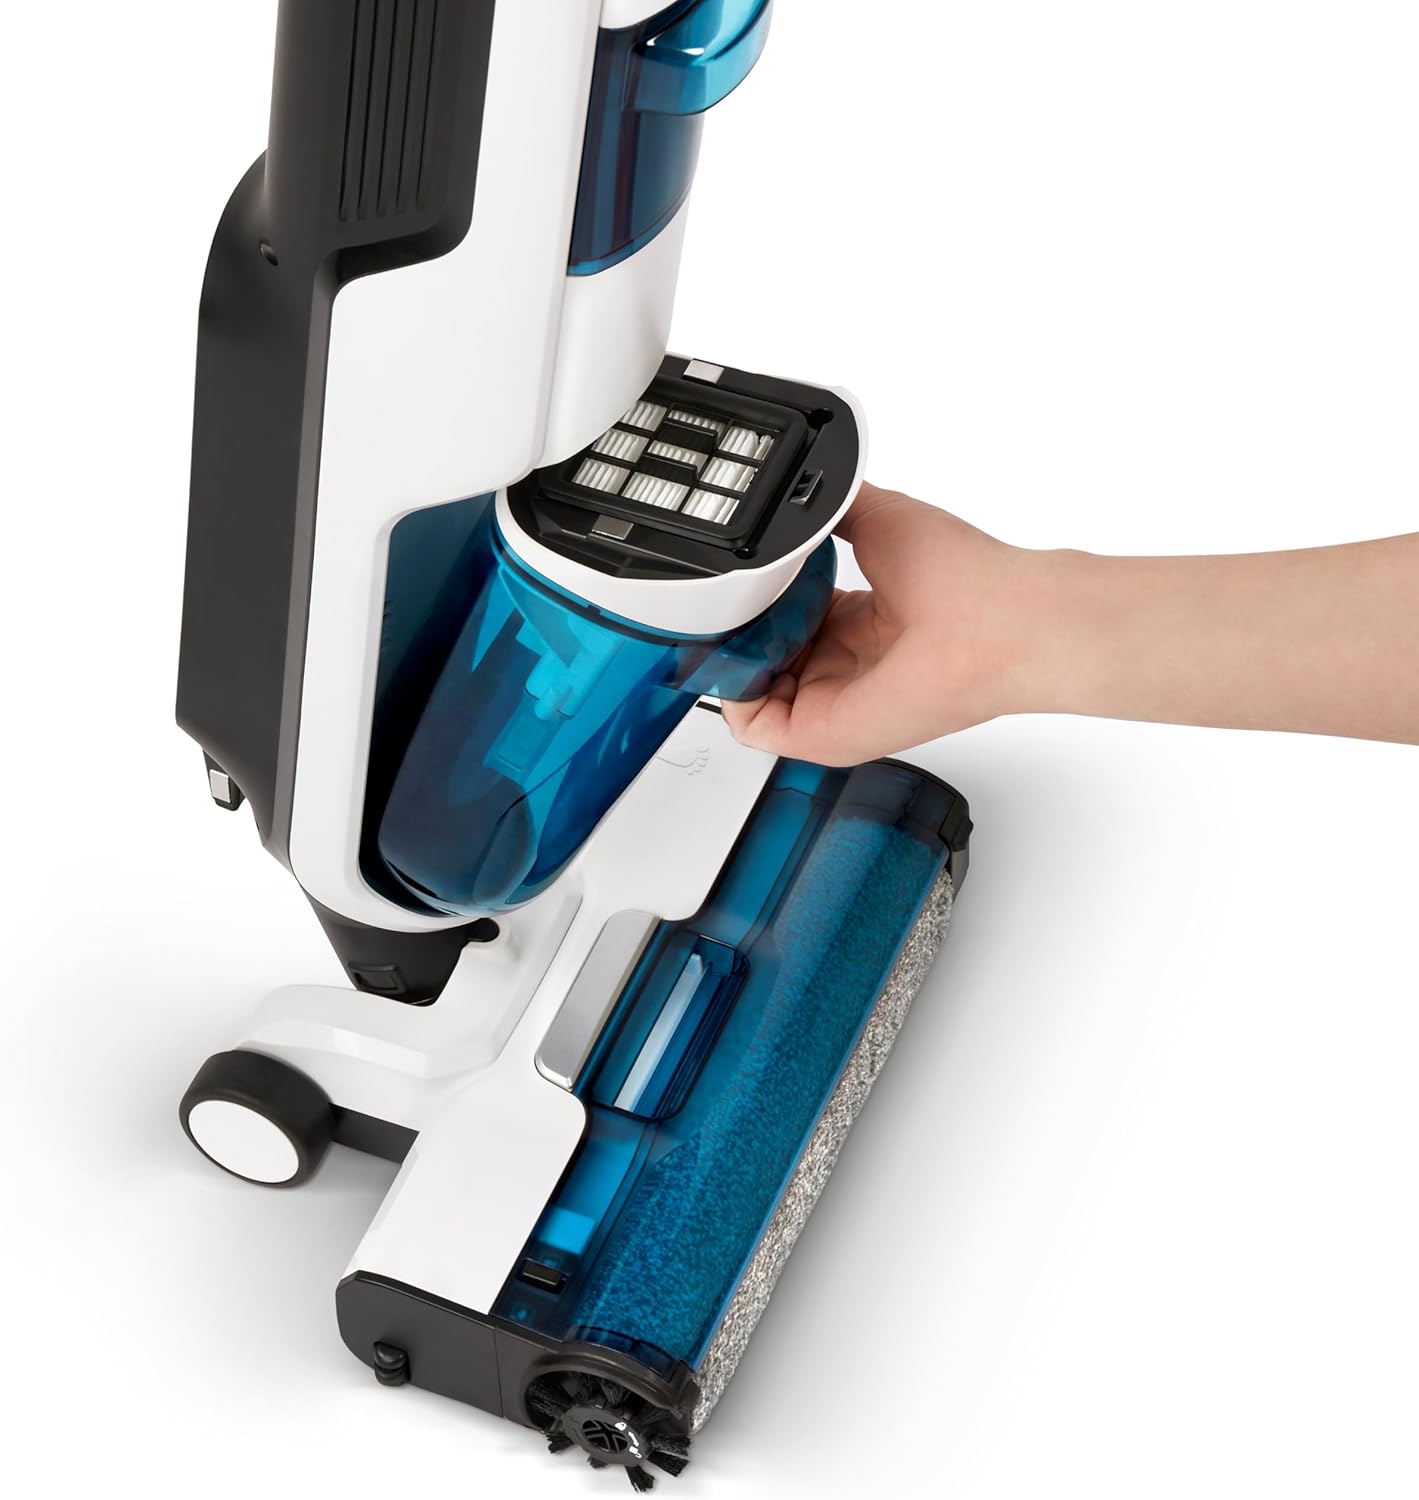
Figure 2: Illustration of removing a water tank for filling or emptying.
4.2 Initial Charging
Before first use, fully charge the vacuum cleaner.
- Place the main unit onto the charging base.
- Connect the power adapter to the charging base and then to a wall outlet.
- The display will indicate charging status. A full charge provides up to 50 minutes of runtime.

Figure 3: The vacuum cleaner docked on its charging base.
4.3 Filling the Clean Water Tank
- Remove the clean water tank from the main unit.
- Open the tank cap and fill with clean water. You may add a small amount of non-foaming floor cleaning solution suitable for wet vacuums. Do not exceed the MAX fill line.
- Close the cap securely and reinsert the tank into the main unit until it clicks.
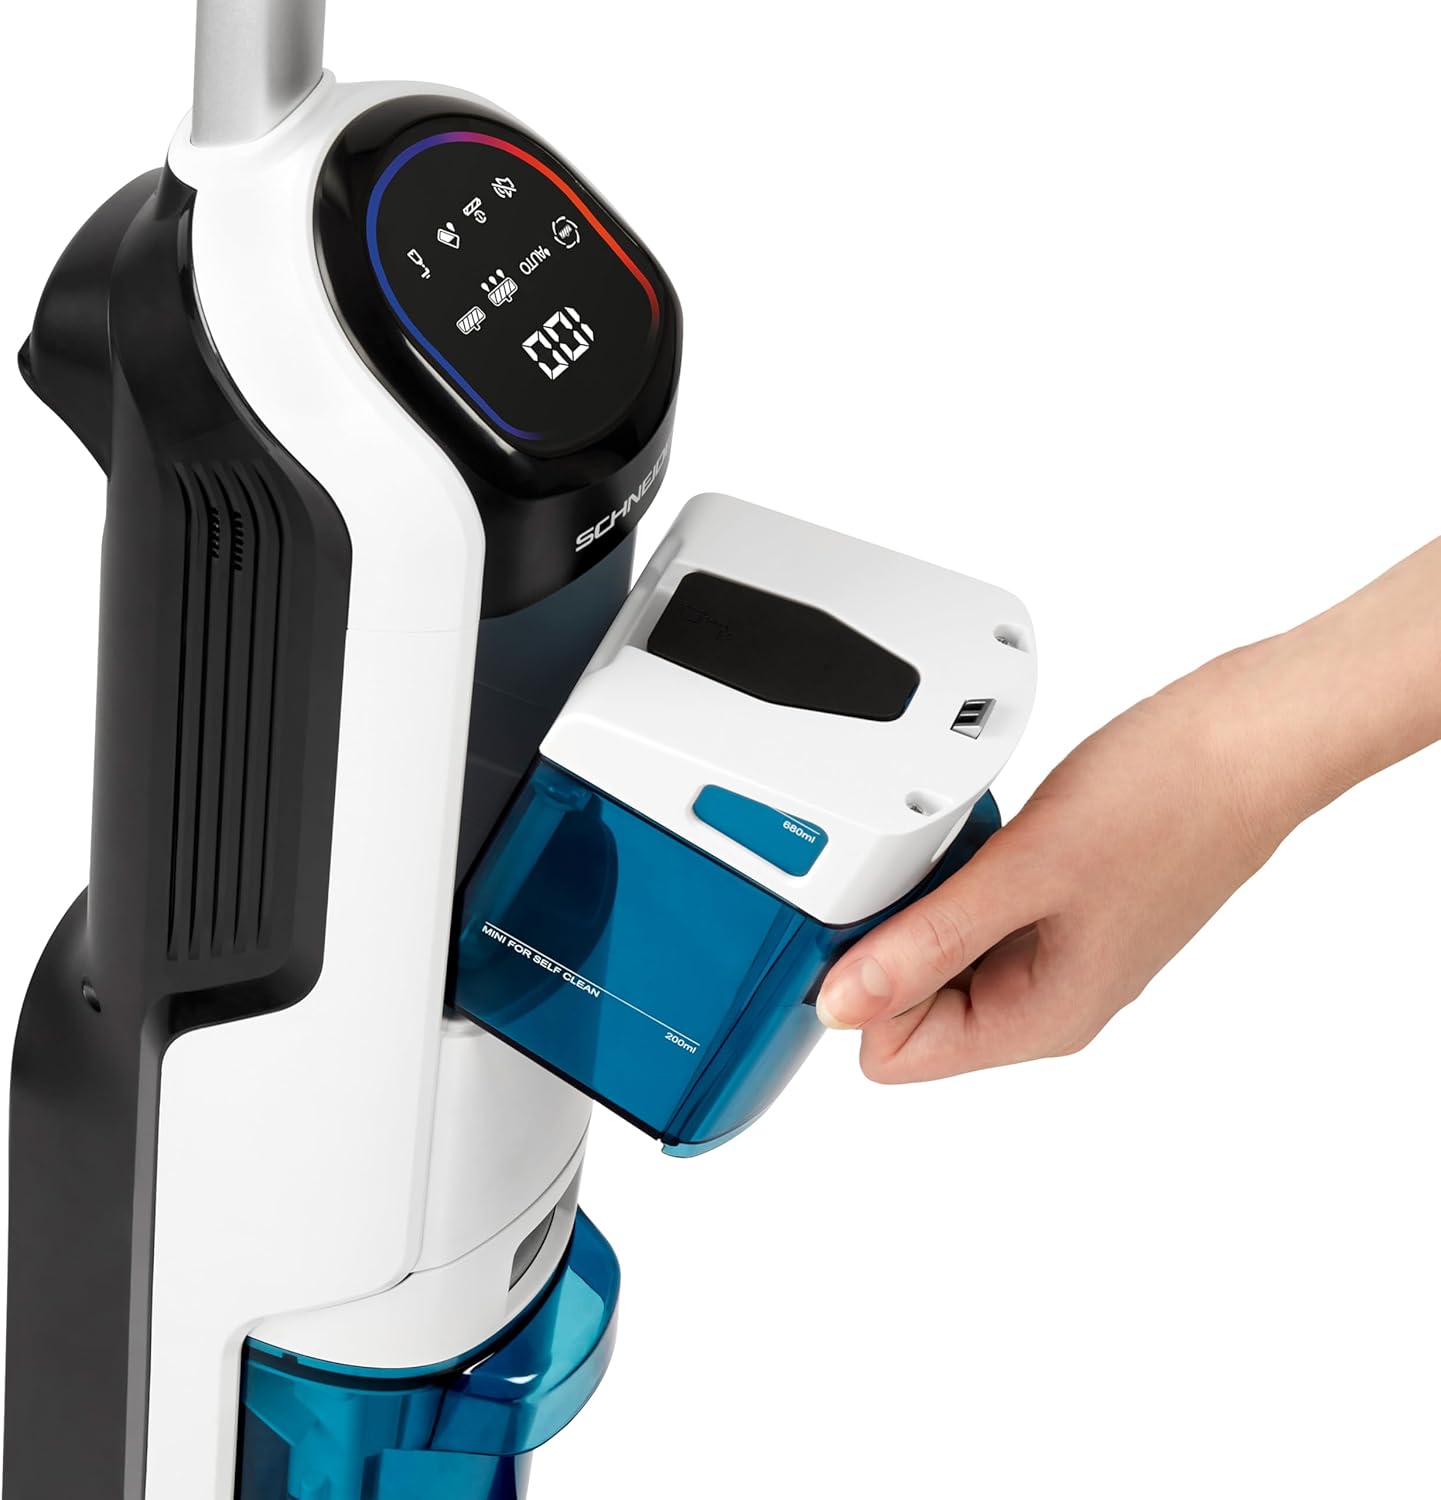
Figure 4: The clean water tank being held, ready for filling.
5. Operating Instructions
5.1 Power On/Off and Mode Selection
Press the power button on the handle to turn the appliance on or off. The vacuum cleaner features an intelligent dirt sensor that automatically adjusts suction power and water flow based on the detected dirt level.

Figure 5: The LED display indicating current mode (AUTO) and battery level.
5.2 Cleaning Operation
Hold the handle firmly and gently push or pull the vacuum cleaner across the floor. The self-propelled brush assists in movement.
- Dirt Sensor: The LED indicator on the display will show red for dirty areas and turn blue when the floor is clean, optimizing cleaning efficiency.
- Edge Cleaning: The exclusive brush design allows for cleaning within 5mm of baseboards, corners, and obstacles.
- Wet and Dry Cleaning: The appliance simultaneously vacuums dry debris and washes the floor with clean water, collecting dirty water into a separate tank.
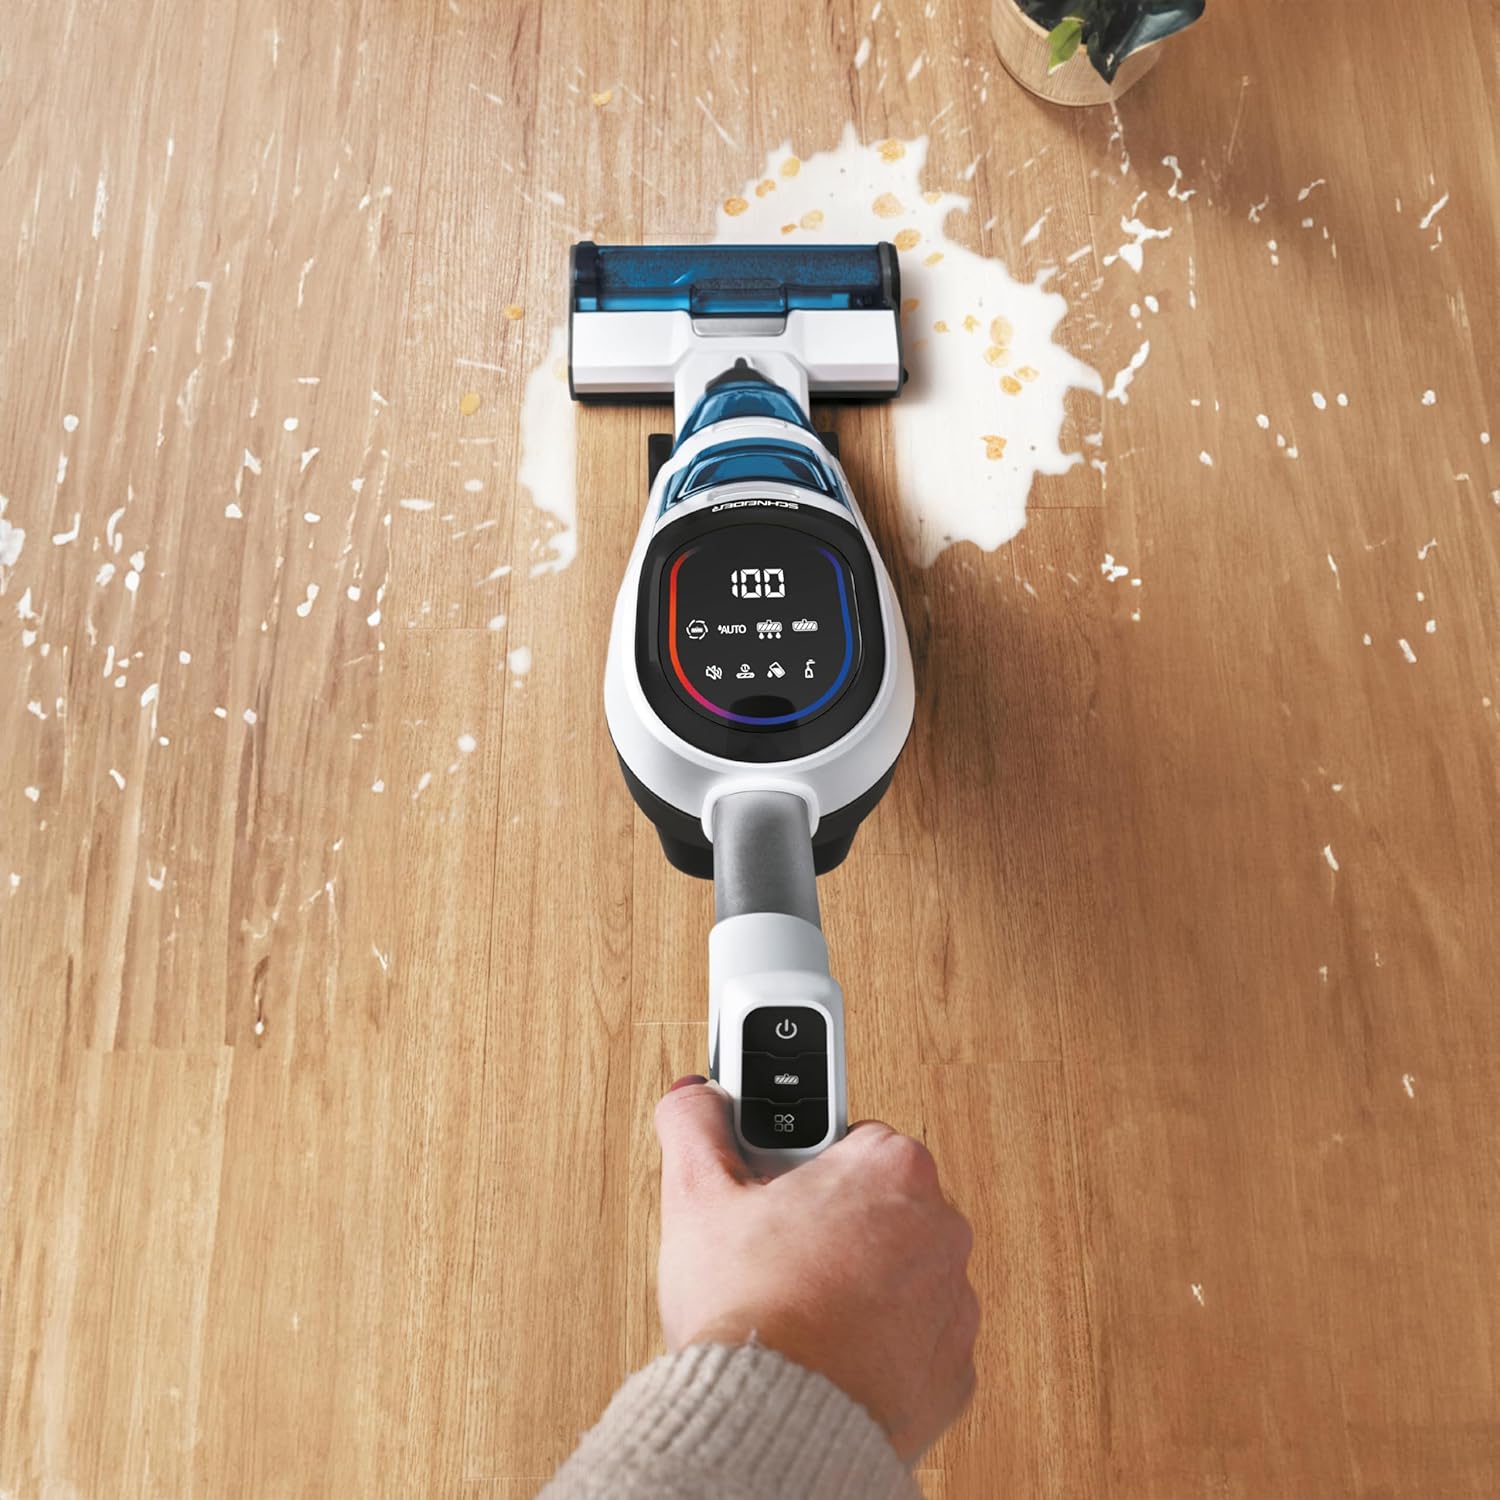
Figure 6: The vacuum cleaner effectively cleaning a wet spill on a hard floor.

Figure 7: The specialized brush design allows for thorough cleaning along edges and baseboards.
6. Maintenance
Regular maintenance ensures the longevity and optimal performance of your SCHNEIDER SCVCO2350DE.
6.1 Emptying and Cleaning the Dirty Water Tank
- After each use, or when the dirty water tank is full, remove it from the main unit.
- Carefully open the tank and dispose of the dirty water and collected debris.
- Rinse the tank thoroughly with clean water. Ensure no residue remains.
- Allow the tank to air dry completely before reinserting it.
6.2 Cleaning the Brush Roll
- Turn off the appliance and remove it from the charging base.
- Access the brush roll compartment (refer to diagrams in the full manual if needed).
- Remove the brush roll and use the provided cleaning tool to remove any hair, fibers, or debris.
- Rinse the brush roll under running water if necessary and allow it to air dry completely before reinstallation.

Figure 8: The vacuum cleaner can perform a self-cleaning cycle while on its charging base.
6.3 Filter Maintenance
Periodically check and clean the filter located within the dirty water tank assembly. Rinse it with water and ensure it is completely dry before reassembling.
7. Troubleshooting
If you encounter issues with your SCHNEIDER SCVCO2350DE, please refer to the following common problems and solutions.
| Problem | Possible Cause | Solution |
|---|---|---|
| Appliance does not turn on or charge. | Battery depleted; improper connection to charging base; faulty power adapter. | Ensure the appliance is correctly placed on the charging base and the power adapter is securely plugged into a working outlet. Allow sufficient time for charging. |
| Poor suction or cleaning performance. | Dirty water tank full; clean water tank empty; clogged brush roll or filter; hose blockage. | Empty and clean the dirty water tank. Refill the clean water tank. Clean the brush roll and filter. Check for any blockages in the suction path. |
| Water leakage. | Water tanks not properly installed; tank caps not securely closed; damaged tank or seals. | Ensure both clean and dirty water tanks are correctly seated and their caps are tightly closed. Inspect tanks and seals for any damage. |
| LED indicator remains red after cleaning. | Area still dirty; sensor malfunction. | Pass over the area again. If the issue persists, ensure the sensor area is clean and free of debris. |
| Difficulty obtaining spare parts. | Limited availability of specific components. | Contact SCHNEIDER customer support or your retailer for assistance with spare parts. Note that availability may vary. |
8. Specifications
| Feature | Detail |
|---|---|
| Brand | SCHNEIDER |
| Model Number | SCVCO2350DE |
| Color | Blue and White |
| Clean Water Tank Capacity | 680 Millilitres |
| Power | 150 Watts |
| Voltage | 18 Volts |
| Noise Level | 78 dB |
| Features | Portable, Dirt Sensor, Self-propelled brush |
| Item Weight | 4.5 Kilograms |
| Battery Autonomy | Up to 50 minutes |
| Dirty Water Tank Capacity | 440 Millilitres |
9. Warranty and Support
Your SCHNEIDER SCVCO2350DE Wet and Dry Vacuum Cleaner is covered by a manufacturer's warranty. For specific warranty terms and conditions, please refer to the warranty card included with your product or visit the official SCHNEIDER website.
For technical support, troubleshooting assistance beyond this manual, or inquiries regarding spare parts, please contact SCHNEIDER customer service or your authorized retailer. Keep your proof of purchase for warranty claims.


