
1. Introduction
This manual provides detailed instructions for the safe and effective operation of your Godox SK300IIV Photo Studio Strobe Flash. Please read this manual thoroughly before use to ensure proper functionality and to prevent damage to the unit or injury to yourself.
The Godox SK300IIV is a professional studio monolight designed for various photography applications, offering stable output, fast recycling, and integrated wireless control capabilities.
2. Product Overview
The Godox SK300IIV features a robust design with advanced functionalities for studio photography.

Image 2.1: Godox SK300IIV Strobe Flash with included accessories.
Key Features:
- Powerful Flash Output: 300Ws with a Guide Number (GN) of 58.
- Fast Recycling: Achieves full power recycling in 0.1-1.5 seconds.
- Stable Color Temperature: Consistent 5700K output.
- Integrated Wireless System: Built-in Godox 2.4G Wireless X System for remote control.
- Adjustable Modeling Lamp: 10W LED modeling light, adjustable from 5% to 100% power.
- Bowens Mount: Compatible with a wide range of studio light modifiers.
- User-Friendly Interface: LCD panel displays precise output, with intelligent memory function for settings.
- Safety Features: Built-in heat elimination fan and overheat protection.
Components:
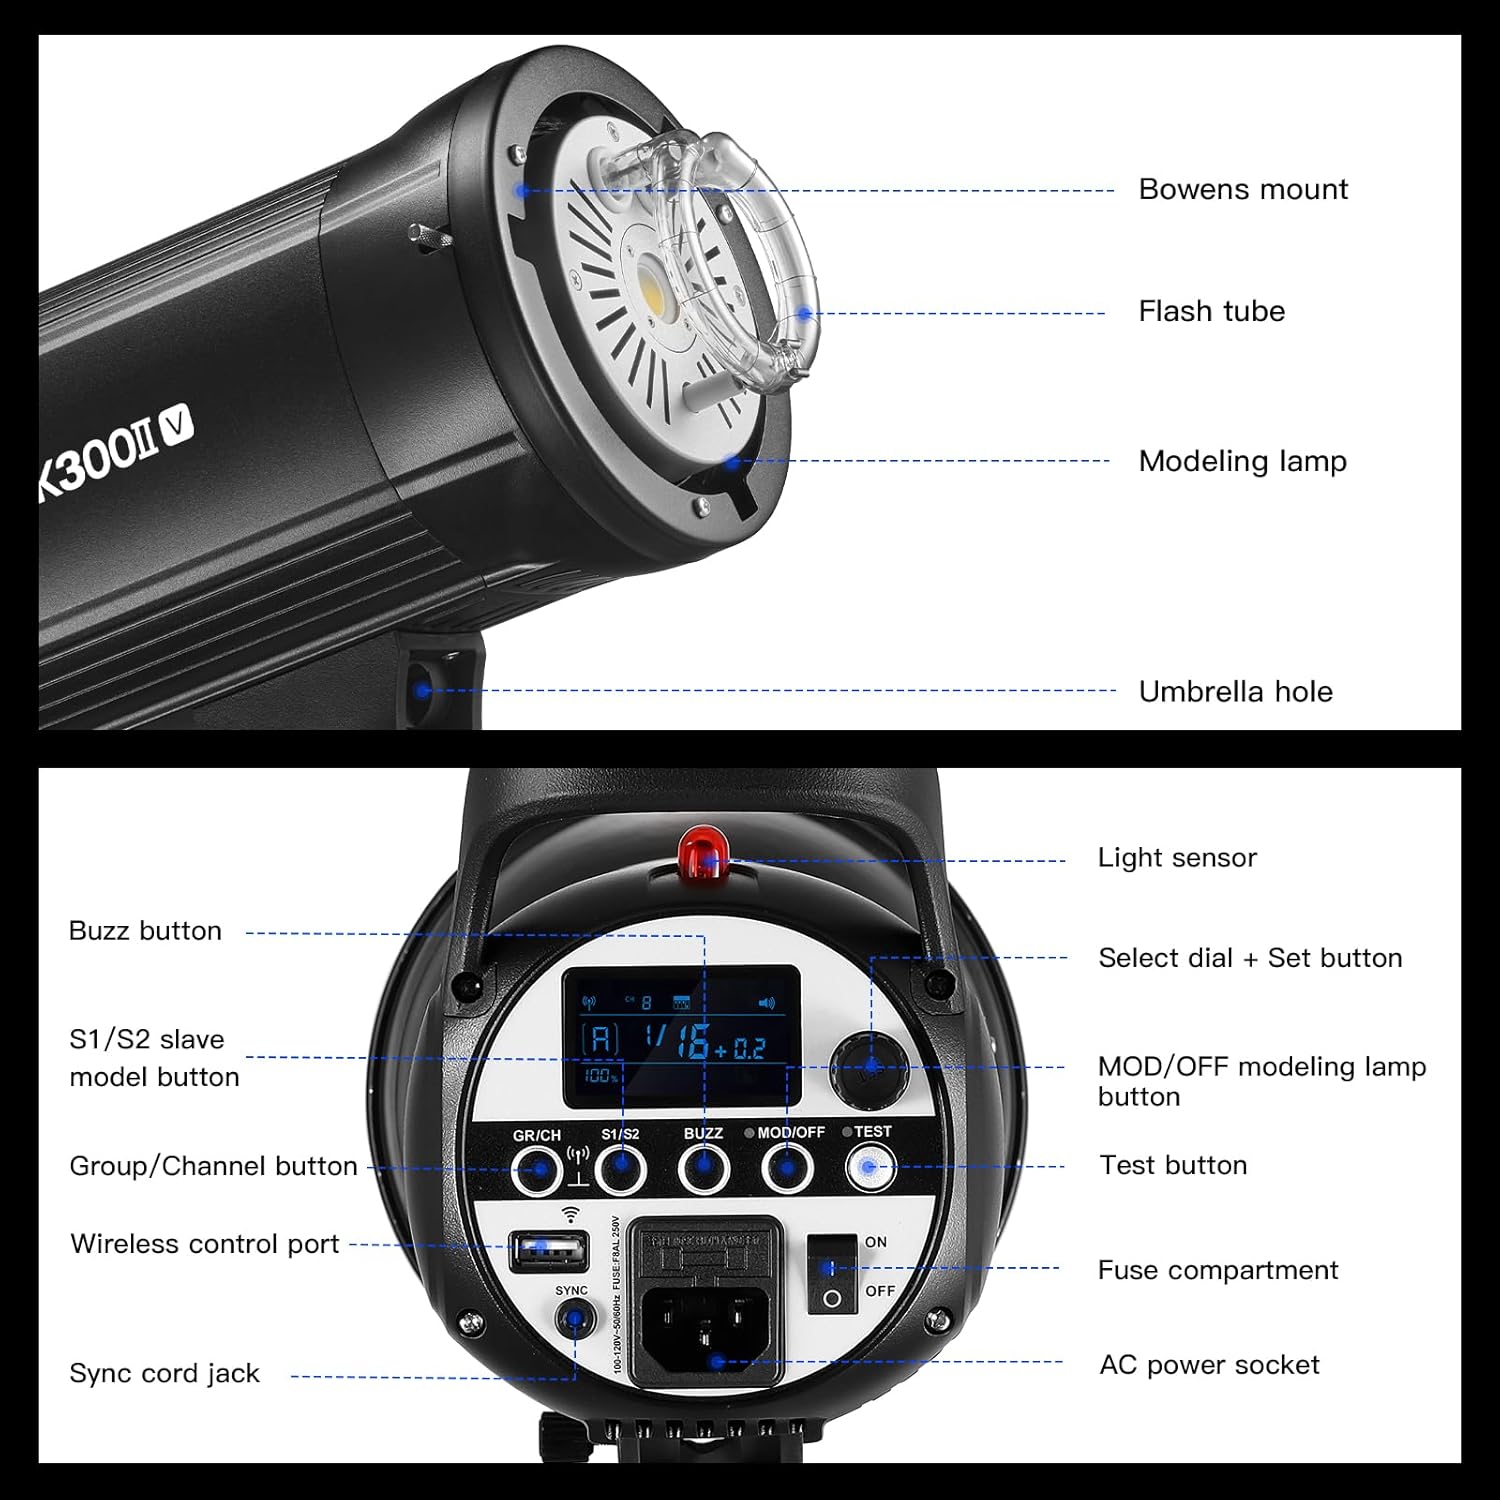
Image 2.2: Labeled components of the Godox SK300IIV.
- Bowens Mount
- Flash Tube
- Modeling Lamp
- Umbrella Hole
- Light Sensor
- Select Dial + Set Button
- MOD/OFF Modeling Lamp Button
- Test Button
- Buzz Button
- S1/S2 Slave Mode Button
- Group/Channel Button
- Wireless Control Port
- Sync Cord Jack
- Fuse Compartment
- AC Power Socket
3. Setup
- Mounting the Flash: Securely attach the SK300IIV to a light stand using the integrated mounting bracket. Adjust the angle as needed and tighten the locking knob.
- Connecting Power: Insert the power cord into the AC Power Socket (15) on the back of the unit, then plug the other end into a suitable power outlet.
- Attaching Light Modifiers: The SK300IIV features a Bowens mount (1). Align your desired light modifier (e.g., softbox, reflector) with the mount and rotate until it locks into place. Ensure it is securely fastened before operation.
- Lamp Protection Cover: Remove the lamp protection cover before operating the flash. Refer to the Safety Information section for important warnings regarding the lamp cover.
4. Operating Instructions
4.1 Power On/Off
Press the power switch located near the AC Power Socket (15) to turn the unit on or off. The LCD panel will illuminate upon power-on.
4.2 Adjusting Flash Output
The flash output can be adjusted from 1/1 (full power) to 1/16 in 40 precise steps. Use the Select Dial (6) to increase or decrease the flash power. The current setting is displayed on the LCD panel.
4.3 Modeling Lamp Operation
The SK300IIV is equipped with a 10W LED modeling lamp (3). Press the MOD/OFF Modeling Lamp Button (7) to cycle through modeling lamp modes (e.g., On, Off, Proportional). When on, the modeling lamp's brightness can be adjusted from 5% to 100% using the Select Dial (6).

Image 4.1: Modeling lamp power adjustment from 5% to 100%.
4.4 Test Flash
Press the Test Button (8) to fire a test flash. This is useful for checking light output and trigger functionality.
4.5 Buzz Function
The Buzz Button (9) activates or deactivates an audible beep that indicates when the flash has recycled and is ready to fire again.
5. Wireless Control
The SK300IIV features a built-in Godox 2.4G Wireless X System, allowing for remote triggering and power adjustment. This system is compatible with various Godox X System triggers.

Image 5.1: Wireless control setup with Godox X System triggers and smartphone app.
5.1 Compatible Triggers
Use Godox XPro, XProII, X1, X2, XT32, XT16, or FT-16 flash triggers (sold separately) to achieve wireless synchronous triggering and control.
5.2 Group and Channel Settings
Use the Group/Channel Button (11) to set the flash to a specific group and channel, matching the settings on your wireless trigger. This allows for individual or group control of multiple flashes.
5.3 Smartphone App Control
When using X2 or XProII triggers, you can adjust flash settings directly from the Godox Flash APP on your smartphone.
6. Synchronization Modes
The SK300IIV supports multiple synchronization methods to integrate with various camera systems.
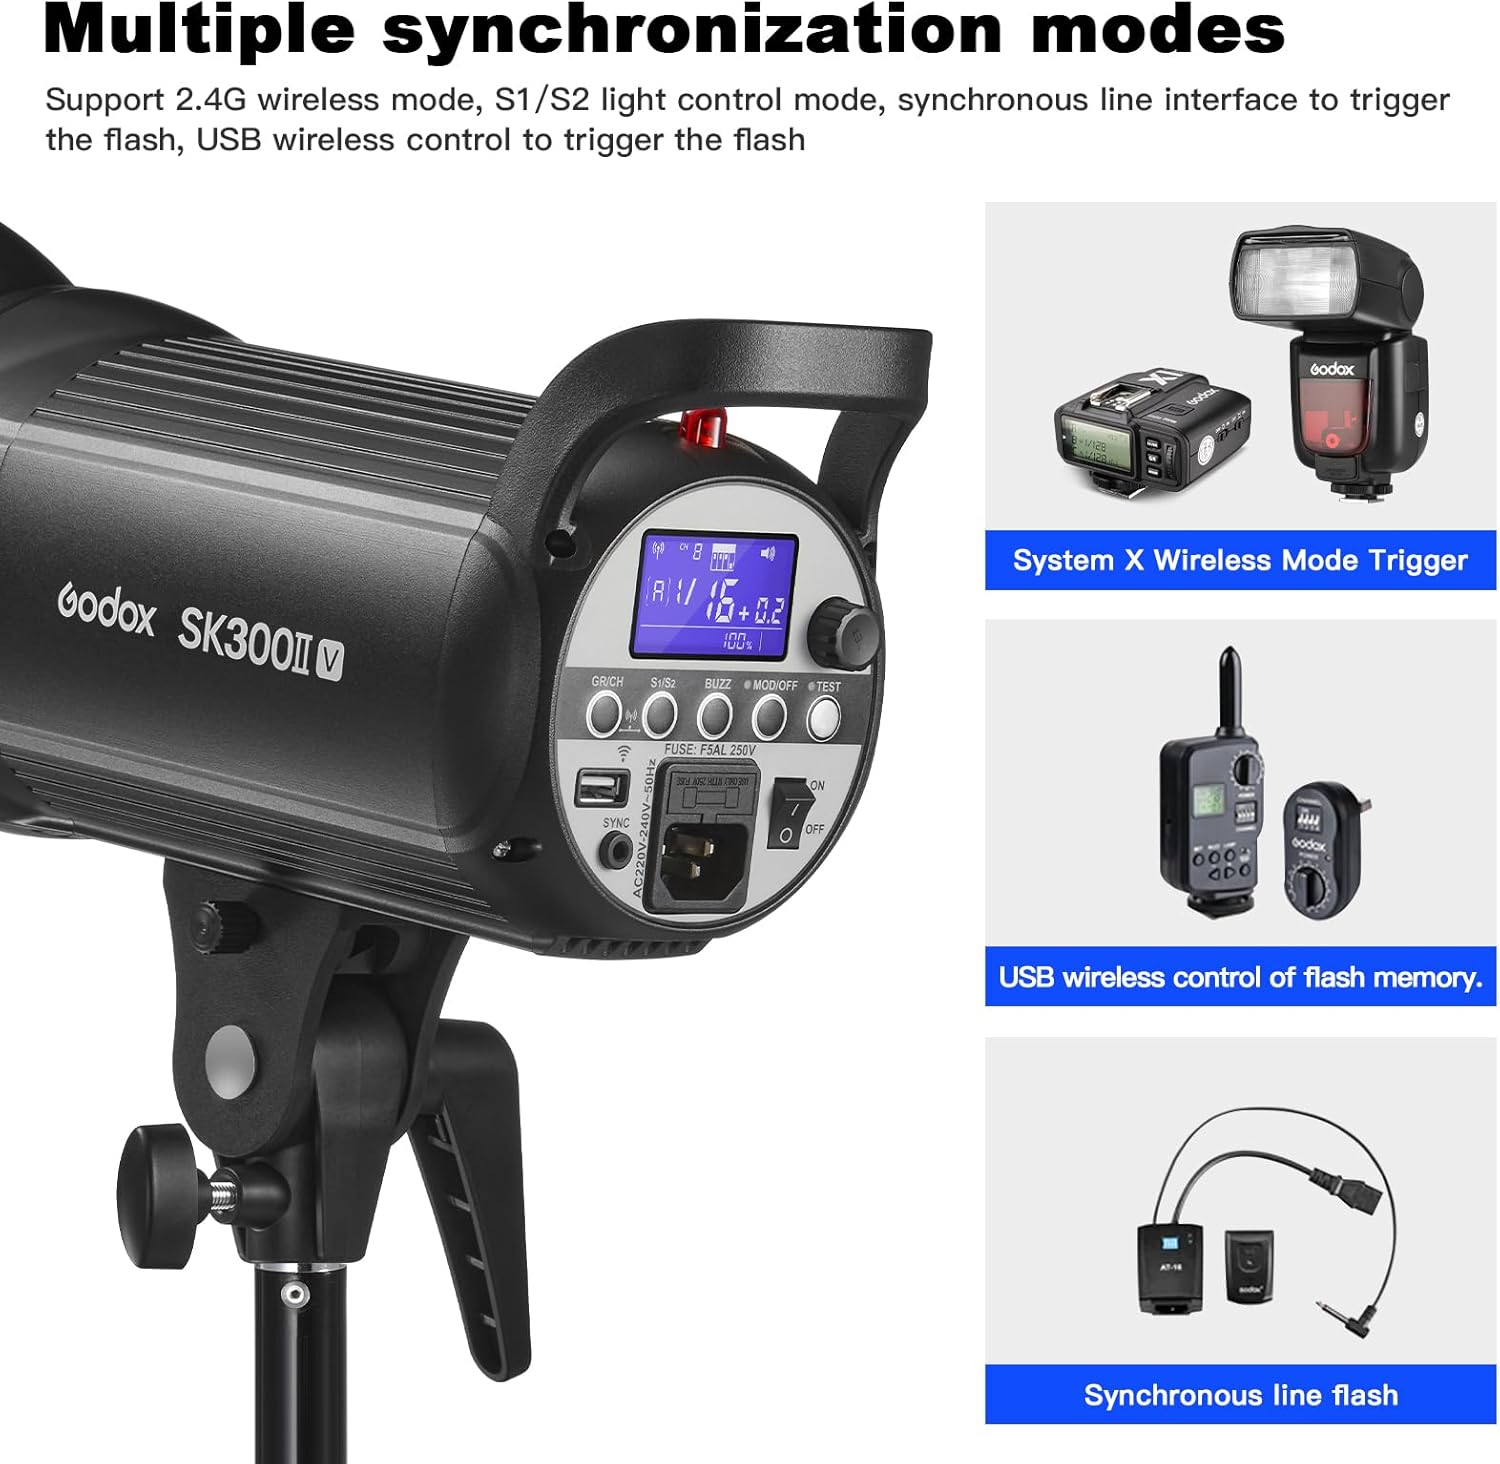
Image 6.1: Overview of synchronization options.
- 2.4G Wireless Mode: Utilizes the built-in Godox X System for wireless triggering.
- S1/S2 Light Control Mode: The flash can be triggered by another flash. S1 mode fires upon detecting the first flash. S2 mode ignores the pre-flash of a TTL system and fires on the main flash. Activate using the S1/S2 Slave Mode Button (10).
- Synchronous Line Interface: Connect a sync cord to the Sync Cord Jack (13) for direct wired synchronization with your camera.
- USB Wireless Control: The Wireless Control Port (12) can be used with a compatible USB wireless trigger (e.g., Godox FT-16) for remote control.
- Anti-Preflash Function: This function allows synchronization with cameras that employ a single pre-flash firing system.
7. Bowens Mount Compatibility
The integrated Bowens mount (1) provides broad compatibility with a variety of studio lighting accessories, allowing for diverse lighting effects.
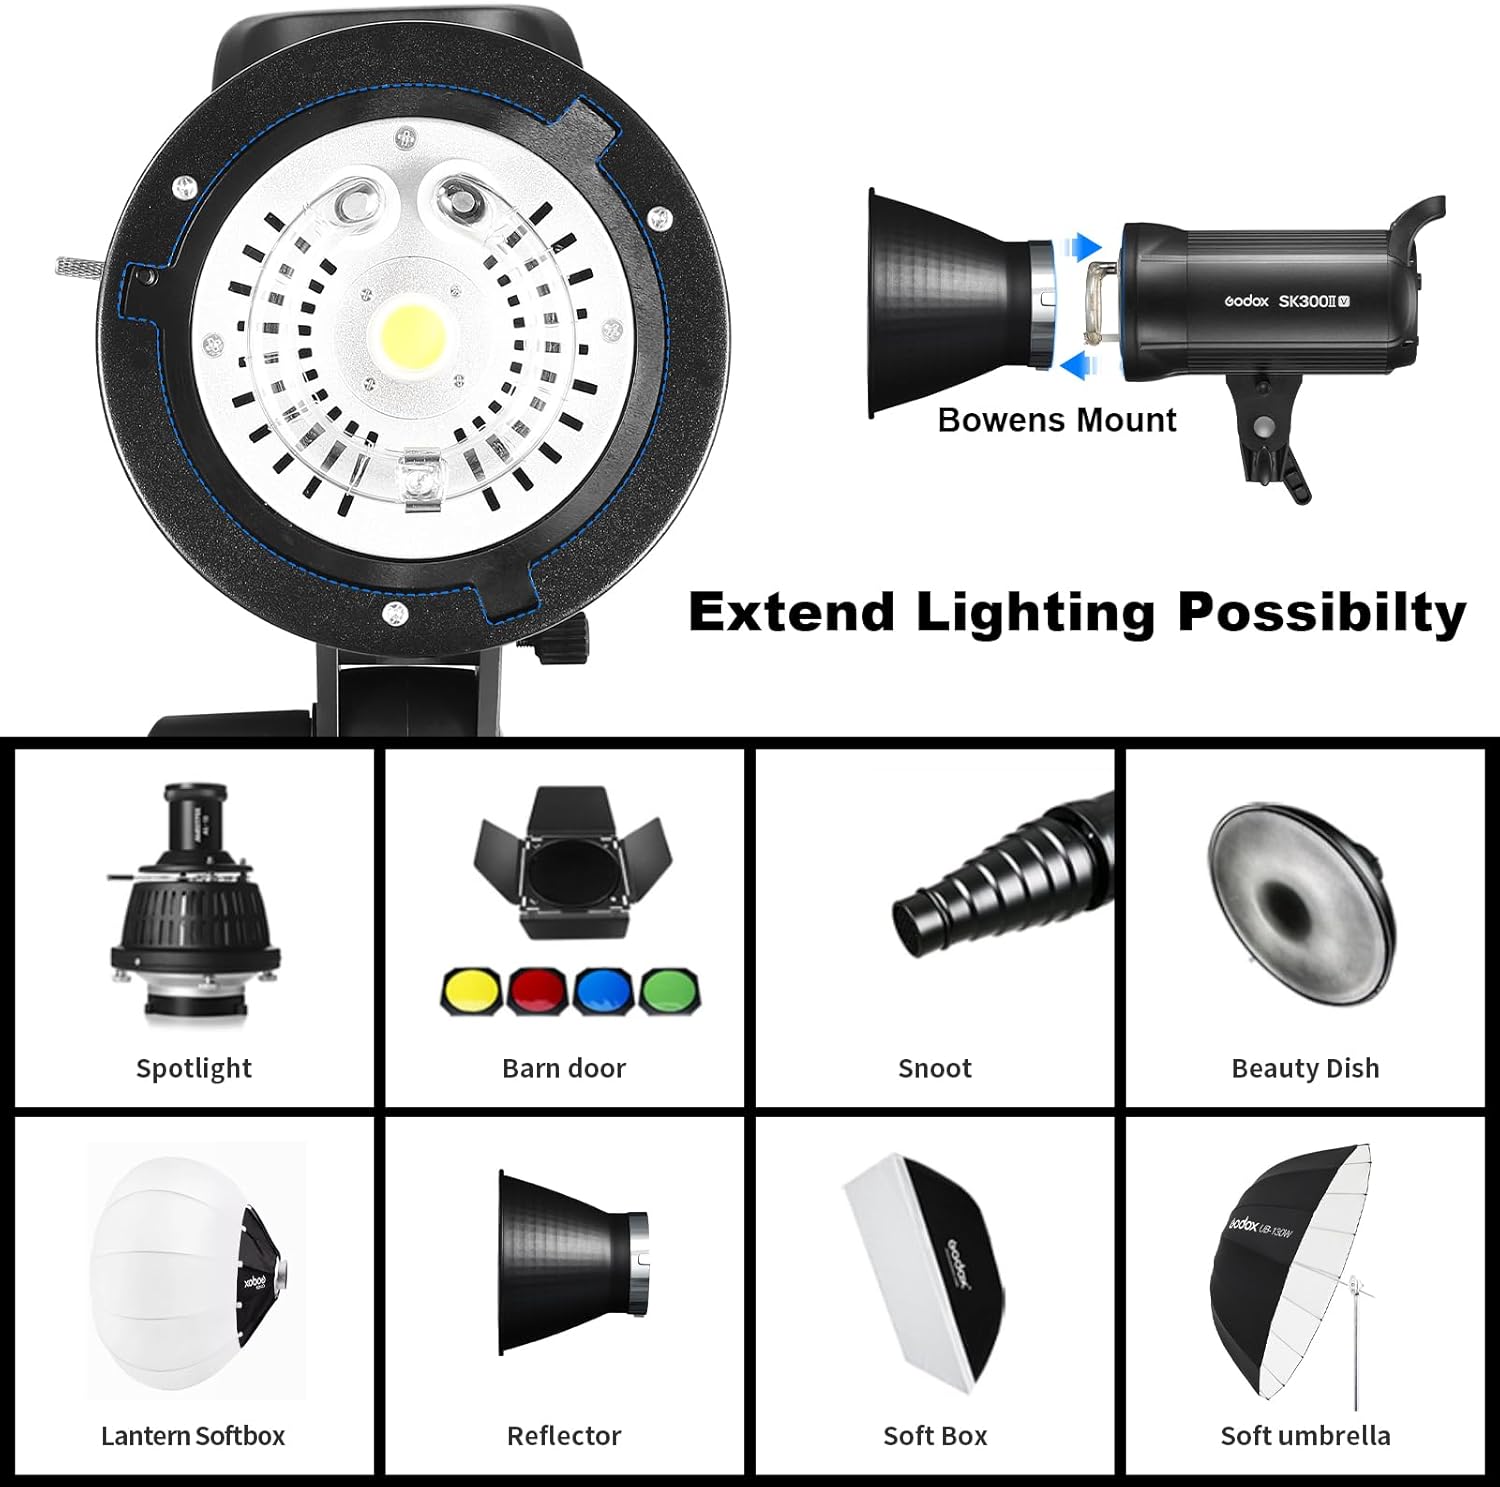
Image 7.1: Examples of Bowens mount compatible accessories.
Compatible accessories include, but are not limited to:
- Softboxes
- Barn Doors
- Snoots
- Beauty Dishes
- Reflectors
- Lantern Softboxes
8. Maintenance
- Cleaning: Use a soft, dry cloth to clean the exterior of the flash. Avoid using solvents or abrasive cleaners.
- Heat Dissipation: The built-in heat elimination fan helps prevent overheating. Ensure the fan vents are not obstructed during operation.
- Storage: When not in use, store the flash in a dry, dust-free environment.
- Fuse Replacement: If the flash fails to power on, check the fuse located in the Fuse Compartment (14). Replace with a fuse of the same type and rating if necessary.
9. Troubleshooting
- Flash Not Firing:
- Check power connection.
- Ensure the flash is powered on.
- Verify trigger settings (channel, group) match the flash.
- Check the sync cord connection if using wired sync.
- Press the Test Button (8) to confirm internal flash operation.
- Inconsistent Output:
- Allow sufficient recycling time between flashes.
- Ensure stable power supply.
- Overheating Warning:
- Discontinue use and allow the unit to cool down.
- Ensure proper ventilation around the unit.
10. Specifications
| Feature | Specification |
|---|---|
| Model | SK300IIV |
| Flash Output | 300Ws |
| Guide Number (GN) | 58 |
| Color Temperature | 5700K |
| Recycling Time | 0.1-1.5 seconds |
| Modeling Lamp | 10W LED, 5%-100% adjustable |
| Flash Output Adjustment | 40 steps (1/1 to 1/16) |
| Wireless System | Godox 2.4G Wireless X System |
| Sync Speed | Up to 1/250s |
| Mount Type | Bowens Mount |
| Item Weight | 7.1 pounds |
| Package Dimensions | 16.5 x 11 x 7.4 inches |
11. Package Contents
The following items are typically included with your Godox SK300IIV Photo Studio Strobe Flash:

Image 11.1: Package contents.
- SK300IIV Flash Head (x1)
- Power Cord (x1)
- Lamp Head Protection Cover (x1)
Note: Standard reflector and sync cable are typically sold separately.
12. Safety Information
- High Voltage: Do not attempt to disassemble or repair the unit yourself. High voltage components are present.
- Heat Warning: The flash tube and modeling lamp can become very hot during operation. Avoid direct contact.
- Lamp Cover: Do not operate the flash with the lamp protection cover on. The lamp cover is not resistant to high temperatures and can melt or cause a fire hazard. Always remove it before turning on the light.
- Ventilation: Ensure adequate ventilation around the flash unit to prevent overheating.
- Water and Moisture: Keep the unit away from water and high humidity.
13. Warranty and Support
For warranty information and technical support, please refer to the documentation provided with your purchase or visit the official Godox website. Keep your proof of purchase for warranty claims.