1. Introduction
Thank you for choosing the AVATTO WT400-16A-B Smart WiFi Thermostat. This device is designed to provide intelligent temperature control for your water heater and gas boiler systems, offering convenience through programmable schedules, app control, and voice commands. Please read this manual carefully before installation and operation to ensure proper use and optimal performance.
2. Safety Information
- Always disconnect power to the heating system before installing or servicing the thermostat.
- Installation should be performed by a qualified electrician or heating technician.
- Do not expose the thermostat to water or excessive humidity.
- Ensure all wiring connections are secure and comply with local electrical codes.
- Keep batteries out of reach of children. Dispose of used batteries responsibly.
3. Package Contents
Verify that all items are present in your package:
- AVATTO WT400-16A-B Thermostat Unit
- User Manual
- Mounting Screws (2 pcs)
- NTC Sensor Cable (3 meters)
4. Product Overview
4.1 Key Features
- Smart WiFi Control: Connects directly to 2.4 GHz Wi-Fi for remote control via smartphone app.
- Voice Control: Compatible with Amazon Alexa and Google Assistant for hands-free operation.
- Programmable Schedules: Offers 6 distinct heating programs for weekdays and 2 for weekends, optimizing energy use.
- Heating and Cooling Functionality: Supports both heating and cooling modes for year-round comfort.
- Large LCD Display: A 4.6-inch screen clearly shows room temperature, set temperature, operating status, battery level, day, and time.
- Easy Installation: Designed for surface mounting with potential-free output (NO, NC, COM).
- Dual Power Options: Operates on AAA batteries with an optional Type-C power input.
4.2 Display and Controls
The thermostat features a clear LCD screen and an intuitive rotary knob for adjustments.
4.3 Compatibility
This thermostat is designed for use with water heaters and gas boilers that have dry contact connections. It is not compatible with electric underfloor heating systems or instantaneous electric water heaters.

Image: This diagram illustrates the thermostat's compatibility. It is compatible with gas boilers featuring dry contact connections (indicated by a checkmark) and is not compatible with electric heating systems or actuator valves (indicated by cross marks).
5. Setup
5.1 Installation
The thermostat is designed for surface mounting. Choose a suitable location on an interior wall, away from direct sunlight, drafts, or heat sources that could affect temperature readings.
- Disconnect Power: Turn off the main power supply to your heating system at the circuit breaker.
- Mount the Backplate: Detach the front panel of the thermostat from its backplate. Secure the backplate to the wall using the provided screws.
- Wiring: Connect the heating system wires to the NO (Normally Open), NC (Normally Closed), and COM (Common) terminals on the backplate. Refer to your heating system's manual for specific wiring diagrams. The thermostat provides a potential-free output.
- Attach Front Panel: Once wiring is complete and secure, reattach the front panel to the backplate.
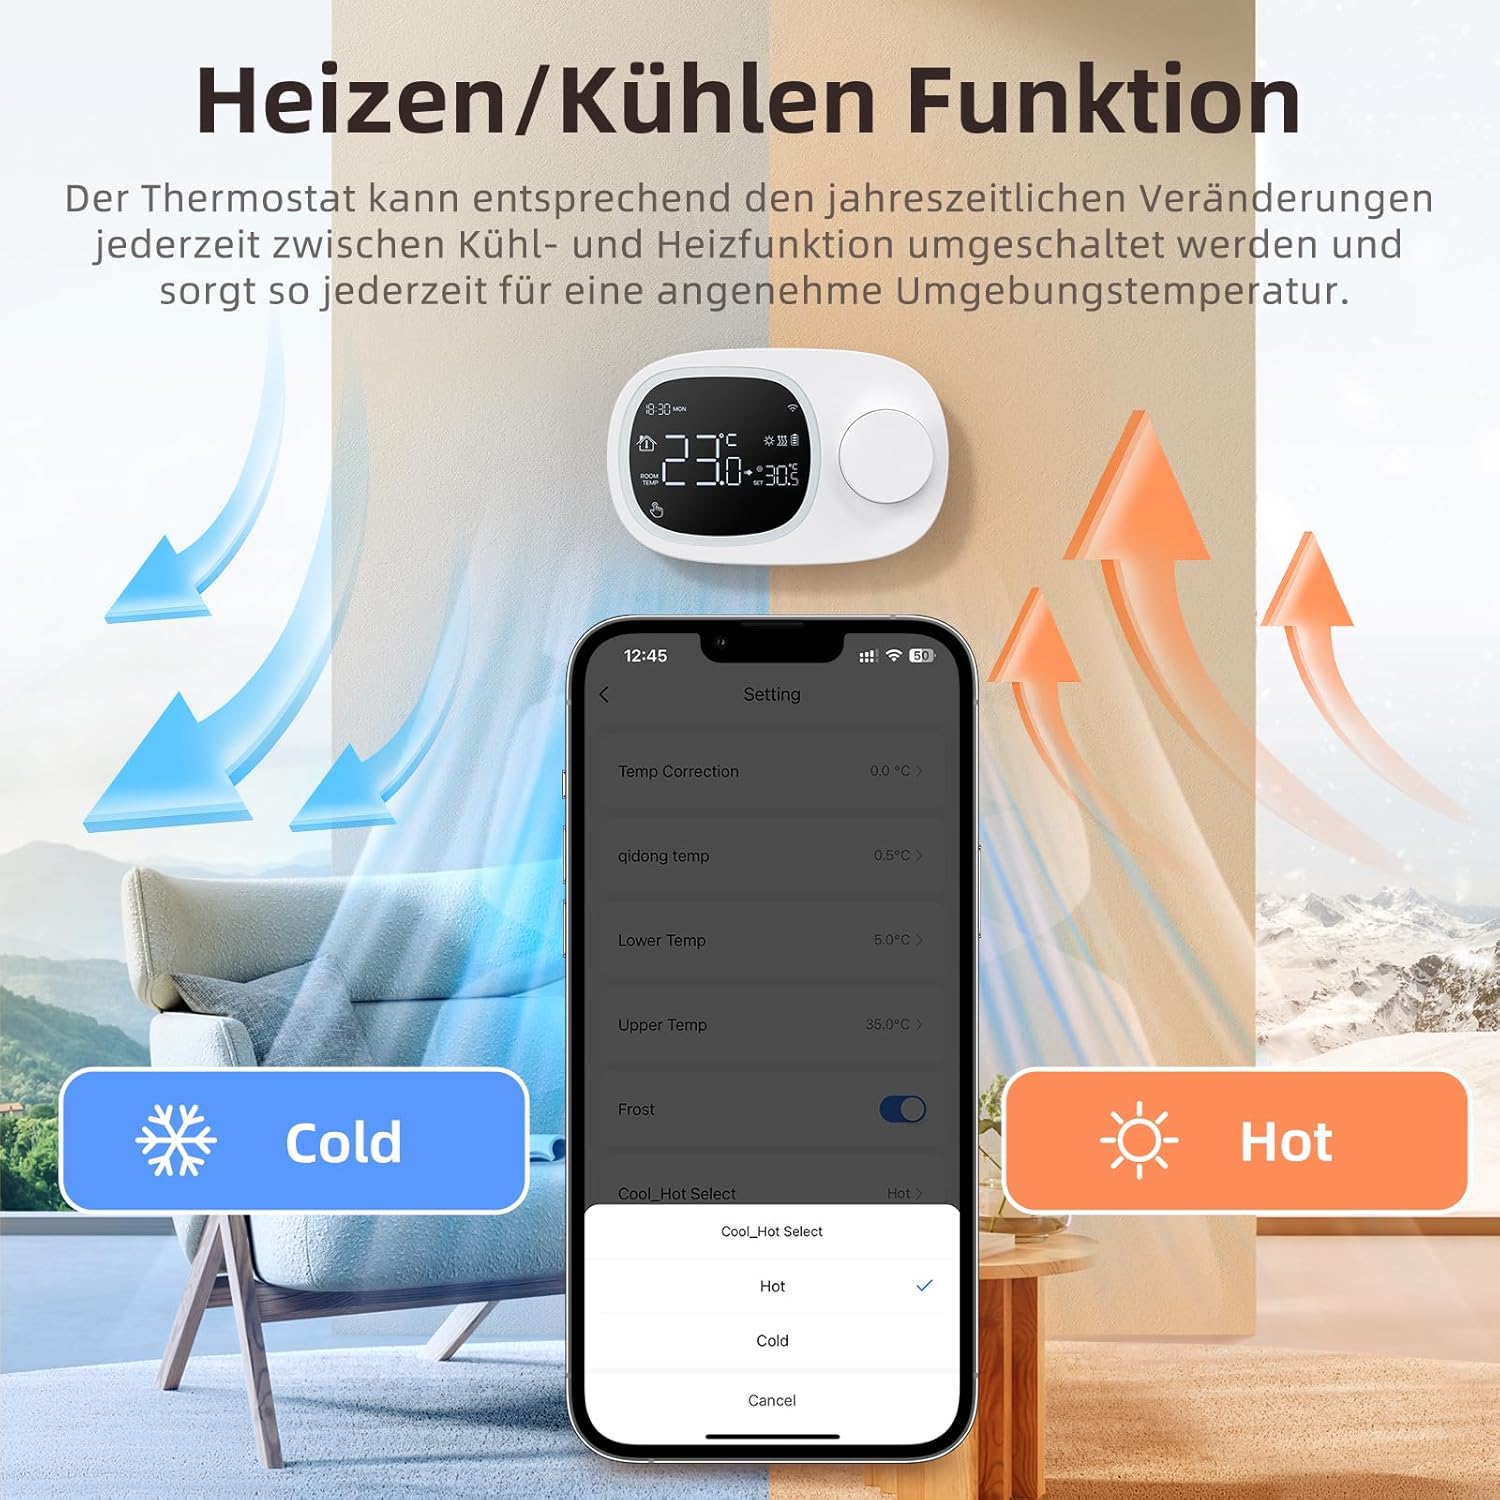
Image: This image shows the thermostat's backplate with wiring terminals and its physical dimensions (13.3 cm width, 8.6 cm height, 2.5 cm depth).
5.2 Power Supply
The thermostat can be powered by three AAA batteries or via a Type-C USB connection.
- Battery Installation: Open the battery compartment on the back of the thermostat and insert three AAA batteries, observing the correct polarity. The screen will display the battery level. Under normal operation, batteries typically last about 6 months.
- Type-C Power (Optional): For continuous power, you can connect a Type-C USB cable to the designated port.

Image: This image illustrates the battery compartment for AAA batteries and the Type-C port for alternative power input.
5.3 WiFi Connection
To enable smart features, connect your thermostat to your home's 2.4 GHz Wi-Fi network.
- Download App: Download and install the 'Smart Life' or 'AVATTO' app from your smartphone's app store.
- Register/Login: Create an account or log in to the app.
- Add Device: In the app, select 'Add Device' or the '+' icon. Choose 'Thermostat' or 'Heating Control'.
- Pairing Mode: Follow the in-app instructions to put the thermostat into pairing mode (usually involves pressing and holding a button on the thermostat until a Wi-Fi icon flashes).
- Connect to Wi-Fi: Ensure your mobile phone is connected to your home's 2.4 GHz Wi-Fi network. Enter your Wi-Fi password in the app.
- Complete Setup: The app will guide you through the final steps to connect the thermostat.
6. Operating Instructions
6.1 Basic Operation
- Power On/Off: Press the power button to turn the thermostat on or off.
- Adjust Temperature: Rotate the knob to set your desired room temperature. The display will show both the current room temperature and the set temperature.
6.2 Programmable Modes
The thermostat allows you to set a weekly schedule to automatically adjust the temperature.
- Weekday Programs: Set up to 6 different heating periods for Monday to Friday.
- Weekend Programs: Set up to 2 heating periods per day for Saturday and Sunday.
- Setting Schedule: Access the programming menu via the thermostat's interface or the Smart Life/AVATTO app to configure your desired times and temperatures for each period.

Image: This image displays the app interface for setting a weekly programmable schedule, showing different time slots and temperatures for each day.
6.3 App Control
Control your thermostat remotely using the Smart Life or AVATTO app.
- Remote Temperature Adjustment: Change the set temperature from anywhere.
- Schedule Management: Easily create, modify, or disable heating schedules.
- Mode Switching: Switch between heating and cooling modes.
- Device Sharing: Share control of the thermostat with family members.
6.4 Voice Control
Integrate your thermostat with Amazon Alexa or Google Assistant for convenient voice commands.
- Linking Accounts: Follow the instructions in the Smart Life/AVATTO app to link your account with Alexa or Google Assistant.
- Voice Commands: Use commands such as:
- "Alexa, set [Thermostat Name] to 22 degrees."
- "Hey Google, what is the temperature in [Room Name]?"

Image: This image demonstrates remote control via the Smart Life app and voice control using an Alexa device, showing a command to set the room temperature.
6.5 Heating and Cooling Function
The thermostat supports both heating and cooling modes. You can switch between these functions as needed to maintain a comfortable ambient temperature throughout the year.
- Mode Selection: The mode can typically be changed through the thermostat's menu settings or directly within the Smart Life/AVATTO app.
- Temperature Hysteresis: The thermostat features precise temperature control with adjustable hysteresis (0.5-10°C) to prevent rapid cycling of your heating/cooling system.
- Temperature Limits: Set minimum and maximum temperature limits (e.g., 5-35°C) to ensure safe and efficient operation.

Image: This image illustrates the heating and cooling functions, showing temperature arrows and the app interface for selecting 'Hot' or 'Cold' modes.
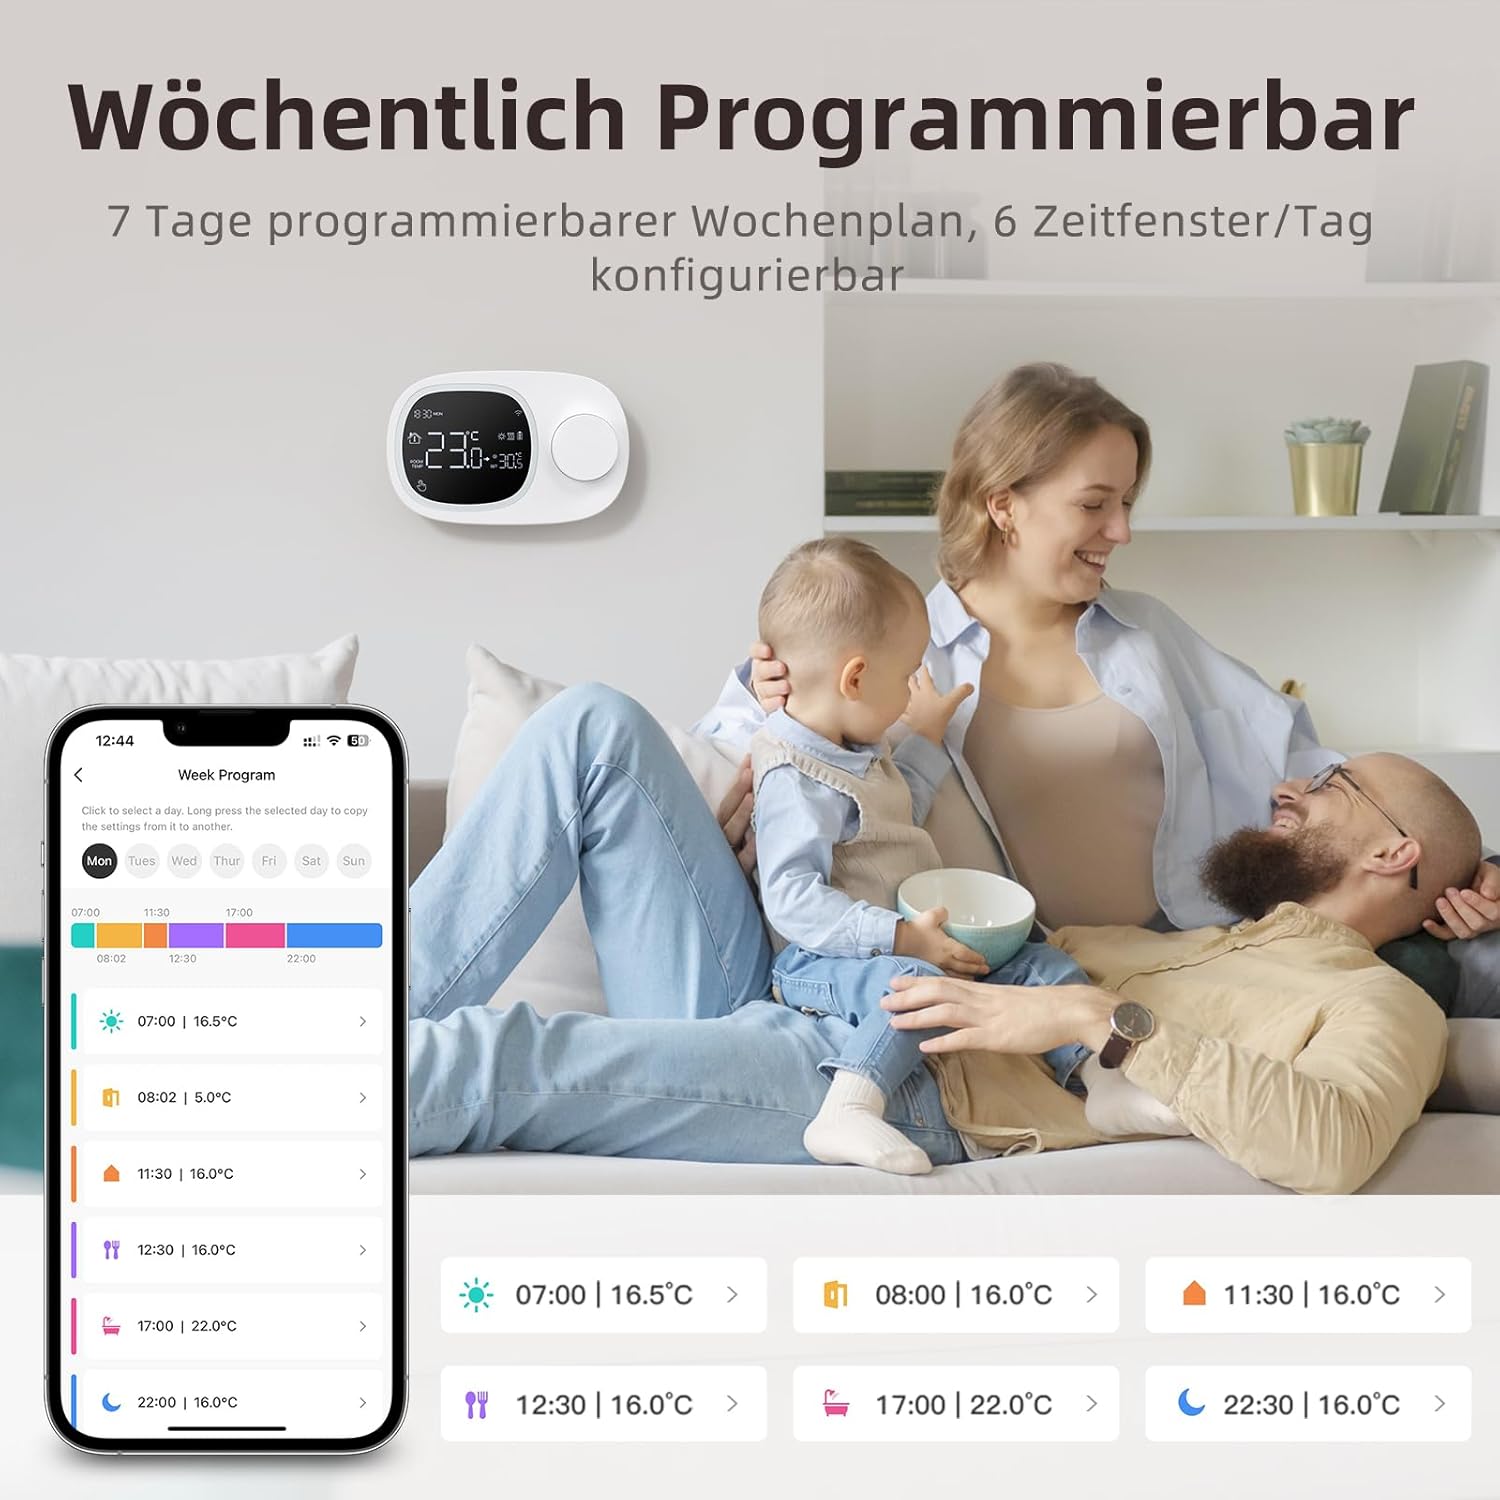
Image: This image highlights the precise temperature control features, including temperature hysteresis (0.5-10°C), minimum temperature setting (0.5°C), and upper/lower temperature limits (5-35°C).
7. Maintenance
7.1 Battery Replacement
When the battery level indicator on the screen shows low power, replace the three AAA batteries promptly to ensure continuous operation. Refer to section 5.2 for battery installation instructions.
8. Troubleshooting
If you encounter issues with your thermostat, refer to the following common problems and solutions:
| Problem | Possible Cause / Solution |
|---|---|
| Thermostat does not power on. | Check if the AAA batteries are correctly inserted and charged. Ensure the power button is functioning. If using Type-C power, verify the cable connection. |
| Confused characters appear on the screen. | This may indicate an installation issue. Reinstall the device, ensuring all connections are secure. |
| Displayed temperature is inaccurate. | Access the advanced menu mode on the thermostat or the calibration menu in the Smart Life/Tuya app to adjust temperature settings. |
| Device starts normally, but screen does not show output temperature. | Check the connection between the main control board and the power board. Verify that all wiring is correct according to the markings on the device connector. |
| Cannot connect to Wi-Fi. | Ensure your router is broadcasting a 2.4 GHz Wi-Fi signal. Confirm your mobile phone is connected to the 2.4 GHz network during pairing. Check Wi-Fi password. |
9. Specifications
- Brand: AVATTO
- Model Number: WT400-16A-B (also referred to as WT580)
- Color: Black
- Dimensions (Thermostat): Approximately 13.3 x 8.6 x 2.5 cm
- Item Weight: 270 grams
- Power Output (Heating System): Up to 3800 Watts
- Voltage: 240 Volts (AC)
- Material: Plastic
- Power Source (Thermostat): 3 x AAA Batteries (sold separately), optional Type-C USB
- Connectivity: Wi-Fi (2.4 GHz), Bluetooth
- Controller Type: Amazon Alexa, Google Assistant
- Special Features: Voice control, LCD display (temperature, weather, time, date, room temp, heating icon), 0.5°C temperature increments, Silent operation, Smart Life/Tuya Smart remote control.
- Specific Product Uses: Water heaters and gas boilers with dry contact.
10. Warranty and Support
Information regarding specific warranty details is not available in this document. For technical assistance, troubleshooting, or any questions not covered in this manual, please contact AVATTO customer support. You may also find additional support resources through the Smart Life or AVATTO application.


