Introduction
Welcome to your new Nexgrill 22-inch Charcoal Grill with Table Cart and Side Table. This manual provides essential information for the safe assembly, operation, and maintenance of your grill. Please read all instructions thoroughly before first use to ensure optimal performance and longevity of your product.
Important Safety Information
Failure to follow these safety instructions could result in serious injury or property damage.
- For outdoor use only. Do not operate this grill indoors or in any enclosed area.
- Keep children and pets away from the grill at all times, especially during operation.
- Use the grill on a level, stable, non-combustible surface, away from flammable materials.
- Never leave a lit grill unattended.
- Keep a fire extinguisher or a bucket of sand readily available in case of fire.
- Allow the grill to cool completely before moving or cleaning.
- Always use heat-resistant gloves when handling hot components or charcoal.
- Do not use gasoline, kerosene, or alcohol for lighting charcoal. Use only approved charcoal starters.
Package Contents
Before beginning assembly, ensure all parts listed below are present and undamaged. If any parts are missing or damaged, do not proceed with assembly and contact customer support.
- Grill Lid with Handle and Integrated Thermometer
- Grill Bowl (Porcelain-enameled)
- Porcelain-Coated Cast Iron Cooking Grid
- Charcoal Grate
- Removable Ash Catcher
- Grill Cart Frame (Steel)
- Foldable Side Shelf
- Condiment Shelf
- Storage Rack
- Wheels (4)
- Tool Holder
- Grate Hook
- Assembly Hardware (bolts, washers, nuts)
- User Manual

This diagram illustrates the main components of the grill and cart assembly, including the lid-mounted thermometer, foldable side shelf, condiment shelf, steel frame, storage rack, and 4-wheel storage.
Assembly Instructions
The Nexgrill 22-inch Charcoal Grill is designed for straightforward assembly. Follow these steps carefully, referring to the provided diagrams for visual guidance.
- Unpack and Organize: Carefully remove all components from the packaging. Lay them out and verify against the package contents list.
- Attach Wheels: Securely attach the four wheels to the bottom of the grill cart frame using the provided hardware. Ensure locking nuts are tightened for stability.
- Assemble Cart Frame: Connect the various sections of the steel cart frame as per the diagrams, ensuring all bolts are finger-tight initially.
- Install Grill Bowl: Place the porcelain-enameled grill bowl into the designated opening on the cart structure.
- Attach Shelves and Rack: Install the foldable side shelf, condiment shelf, and storage rack to the cart frame.
- Insert Internal Components: Place the charcoal grate at the bottom of the grill bowl, followed by the porcelain-coated cast iron cooking grid.
- Attach Lid and Accessories: Secure the lid handle to the grill lid. Attach the tool holder to the side of the cart.
- Final Tightening: Once all components are in place, systematically tighten all bolts and screws to ensure a sturdy and secure assembly.
Operating Your Charcoal Grill
Initial Burn-In
Before cooking food for the first time, perform an initial burn-in. Load charcoal, light it, and allow it to burn for 30-60 minutes with the lid closed and air vents fully open. This process helps to burn off any manufacturing residues. Allow the grill to cool completely afterward.
Charcoal Loading
Place charcoal briquettes or lump charcoal directly onto the charcoal grate at the bottom of the grill bowl. Arrange charcoal for direct or indirect cooking as desired for your recipe.

Image showing charcoal being loaded into the grill bowl.
Lighting the Charcoal
For best results, use a charcoal chimney starter. Place crumpled newspaper or fire starters at the bottom of the chimney, fill the top with charcoal, and light the paper. Once the coals are ash-covered (approximately 15-20 minutes), carefully pour them onto the charcoal grate in the grill bowl. Do not use lighter fluid or other flammable liquids.
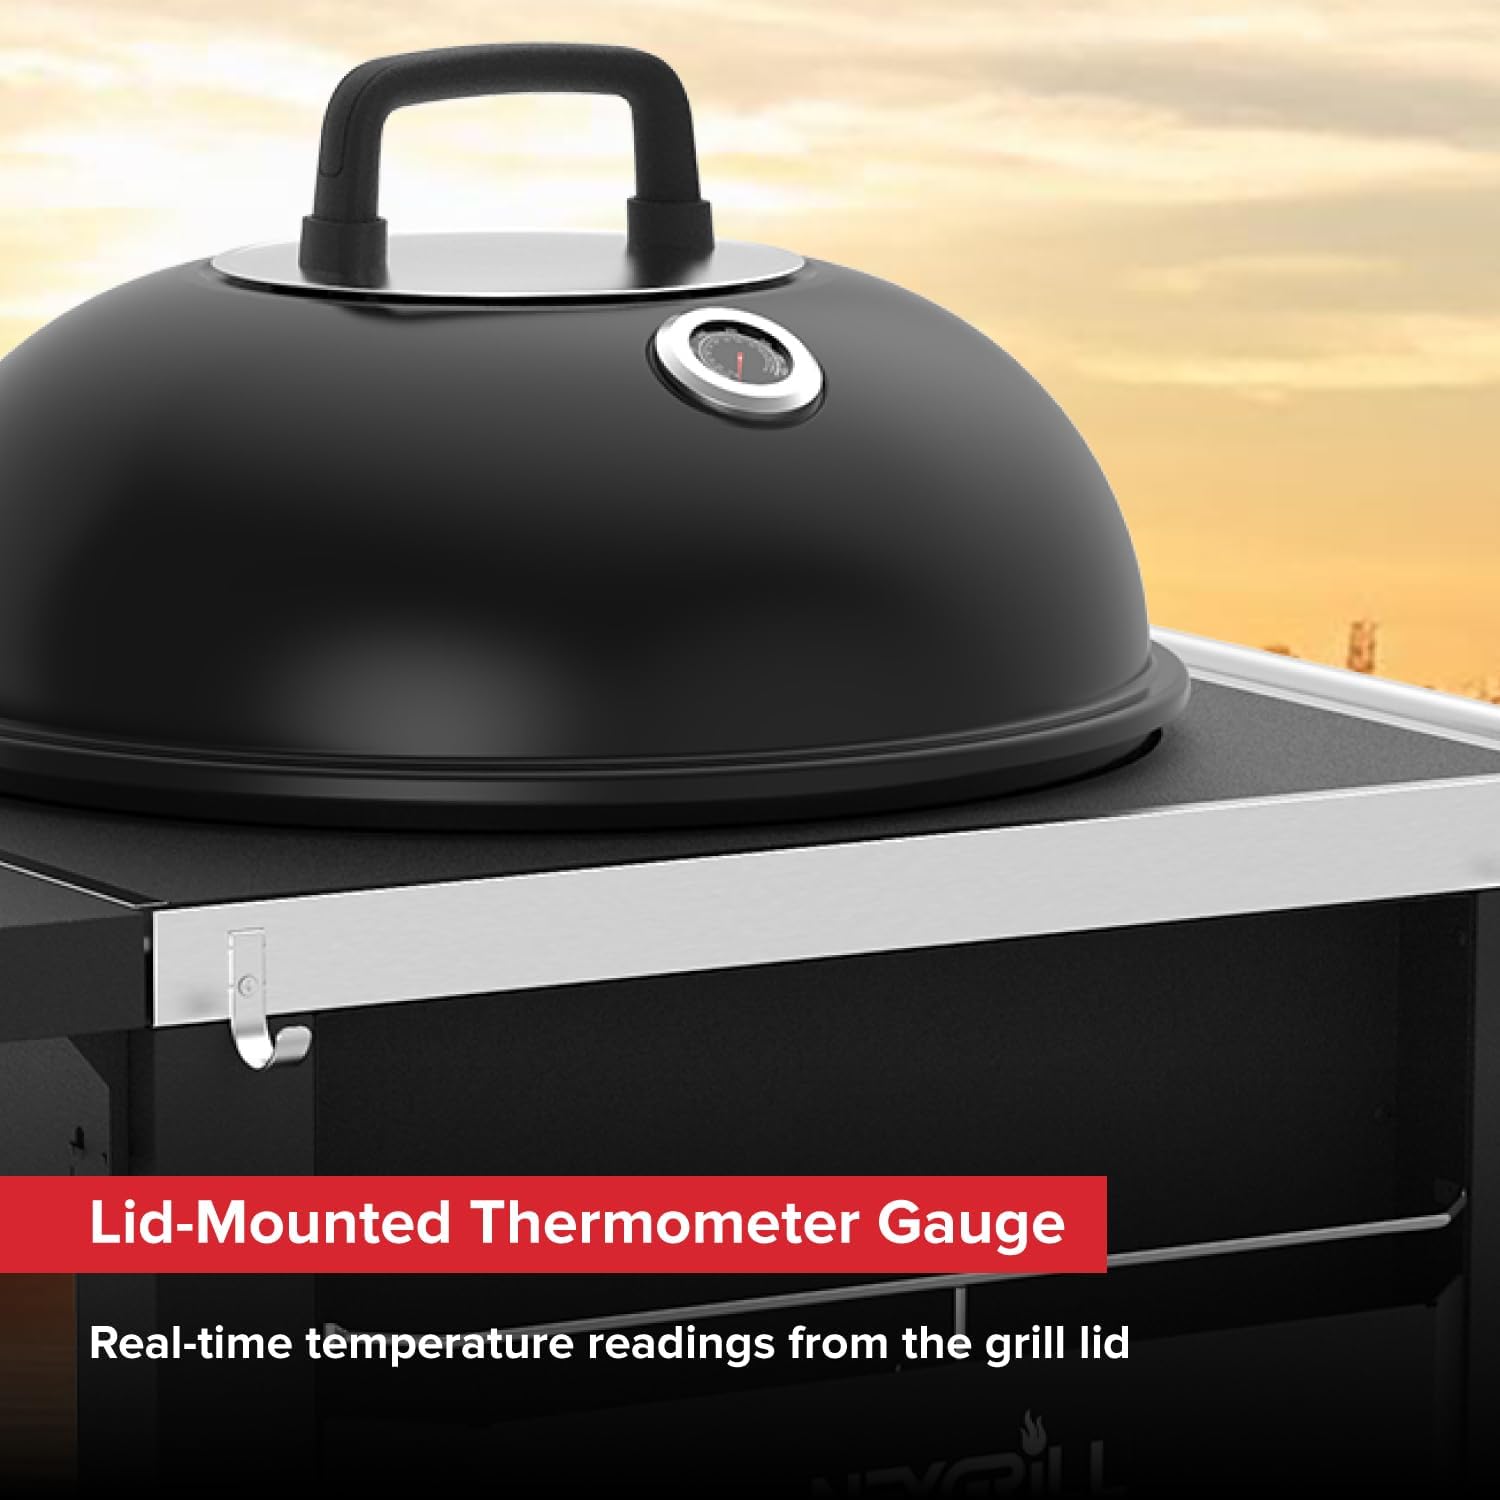
Temperature Control
The grill features adjustable air vents and a lid-mounted thermometer for precise temperature management.
- Adjustable Air Vents: Control airflow to regulate heat. Opening the vents wider increases oxygen flow, raising the temperature. Closing them restricts oxygen, lowering the temperature.
- Integrated Temperature Gauge: The thermometer on the lid provides real-time internal temperature readings, allowing you to monitor cooking progress without lifting the lid.
The adjustable air vent on the lid allows for precise temperature control by managing airflow.

The integrated thermometer gauge provides real-time temperature readings inside the grill.
Cooking Surface
The grill offers a generous 358 square inches of porcelain-enameled cast iron cooking surface, providing ample space for various foods.

The porcelain-coated cast iron cooking grid offers 358.4 square inches of cooking area.
Maintenance and Cleaning
Regular cleaning and maintenance will ensure your grill remains in excellent condition and performs reliably for years.
- After Each Use: Allow the grill to cool completely. Use a stiff-bristled grill brush to scrape off any food residue from the cooking grid.
- Ash Removal: The removable ash catcher simplifies cleanup. Once the grill is cool and all ashes are extinguished, slide out the ash catcher and dispose of the ashes properly.

The removable ash catcher facilitates easy disposal of ashes after grilling.
- Exterior Cleaning: Wipe down exterior surfaces with a damp cloth and mild detergent. The porcelain-enameled lid and bowl are designed for durability and easy cleaning. Avoid abrasive cleaners that can damage the finish.
- Storage: When not in use, store the grill in a dry, covered area to protect it from weather elements. A grill cover is recommended.
Troubleshooting
Refer to this section for solutions to common issues you might encounter.
- Low Temperature:
Solution: Ensure air vents are sufficiently open to allow proper airflow. Add more charcoal if needed. Verify the lid is properly sealed to retain heat. - Excessive Smoke:
Solution: Adjust air vents to reduce airflow. Ensure you are using the correct type and quantity of charcoal. Avoid using too much wood for smoking, if applicable. - Food Sticking to Grate:
Solution: Ensure the cooking grid is clean before use. Lightly oil the cooking grid with high-heat cooking oil before placing food. - Difficulty Lighting Charcoal:
Solution: Use a charcoal chimney starter for efficient and consistent lighting. Ensure charcoal is dry and not exposed to moisture.
Product Specifications
| Brand | Nexgrill |
| Model Name | Nexgrill 22" Charcoal Grill with Table Cart and Side Table |
| Model Number | 810-0026HC |
| Product Dimensions (D x W x H) | 49.9" x 27.5" x 44.02" |
| Item Weight | 74.8 pounds (34.02 Kilograms) |
| Cooking Surface Area | 358.4 Square Inches |
| Fuel Type | Charcoal |
| Material | Alloy Steel (Frame), Cast Iron (Cooking System/Frame), Porcelain-enameled (Lid and Bowl) |
| Special Features | Adjustable Air Vent, Built-In Thermometer, Portable, Removable Ash Tray, Tool Holder, Cart and Side Table |
Warranty and Customer Support
For specific warranty information regarding your Nexgrill 22-inch Charcoal Grill, please refer to the warranty card included with your product or visit the official Nexgrill website. Keep your purchase receipt for warranty claims.
For technical assistance, replacement parts, or any questions not covered in this manual, please contact Nexgrill customer support:
- Online Support: Visit the official Nexgrill website for FAQs and support resources.
- Contact Information: (Please refer to your product packaging or the official Nexgrill website for the most current contact details.)
Product Overview

Overview of the Nexgrill 22-inch Charcoal Grill with Table Cart and Side Table.


