
Introduction
This manual provides comprehensive instructions for the safe and effective operation, maintenance, and troubleshooting of your GOCHIFIX LG0116-PRO Laser Level. Please read this manual thoroughly before using the device to ensure optimal performance and safety. Keep this manual for future reference.

Image: The GOCHIFIX LG0116-PRO Laser Level, showcasing its ability to project multiple 360-degree green laser lines for comprehensive leveling tasks.
Package Contents
Verify that all items listed below are included in your package:
- 16 Lines Laser Level (Main Unit)
- 5200 mAh Rechargeable Lithium Ion Battery
- Battery Charger
- Fine-tuning Multifunctional Bracket
- Remote Control
- Lifting Base
- Metal Plate
- Portable Storage Bag
- USB Power Cord
- 360° Rotating Base
- Mounting Clip
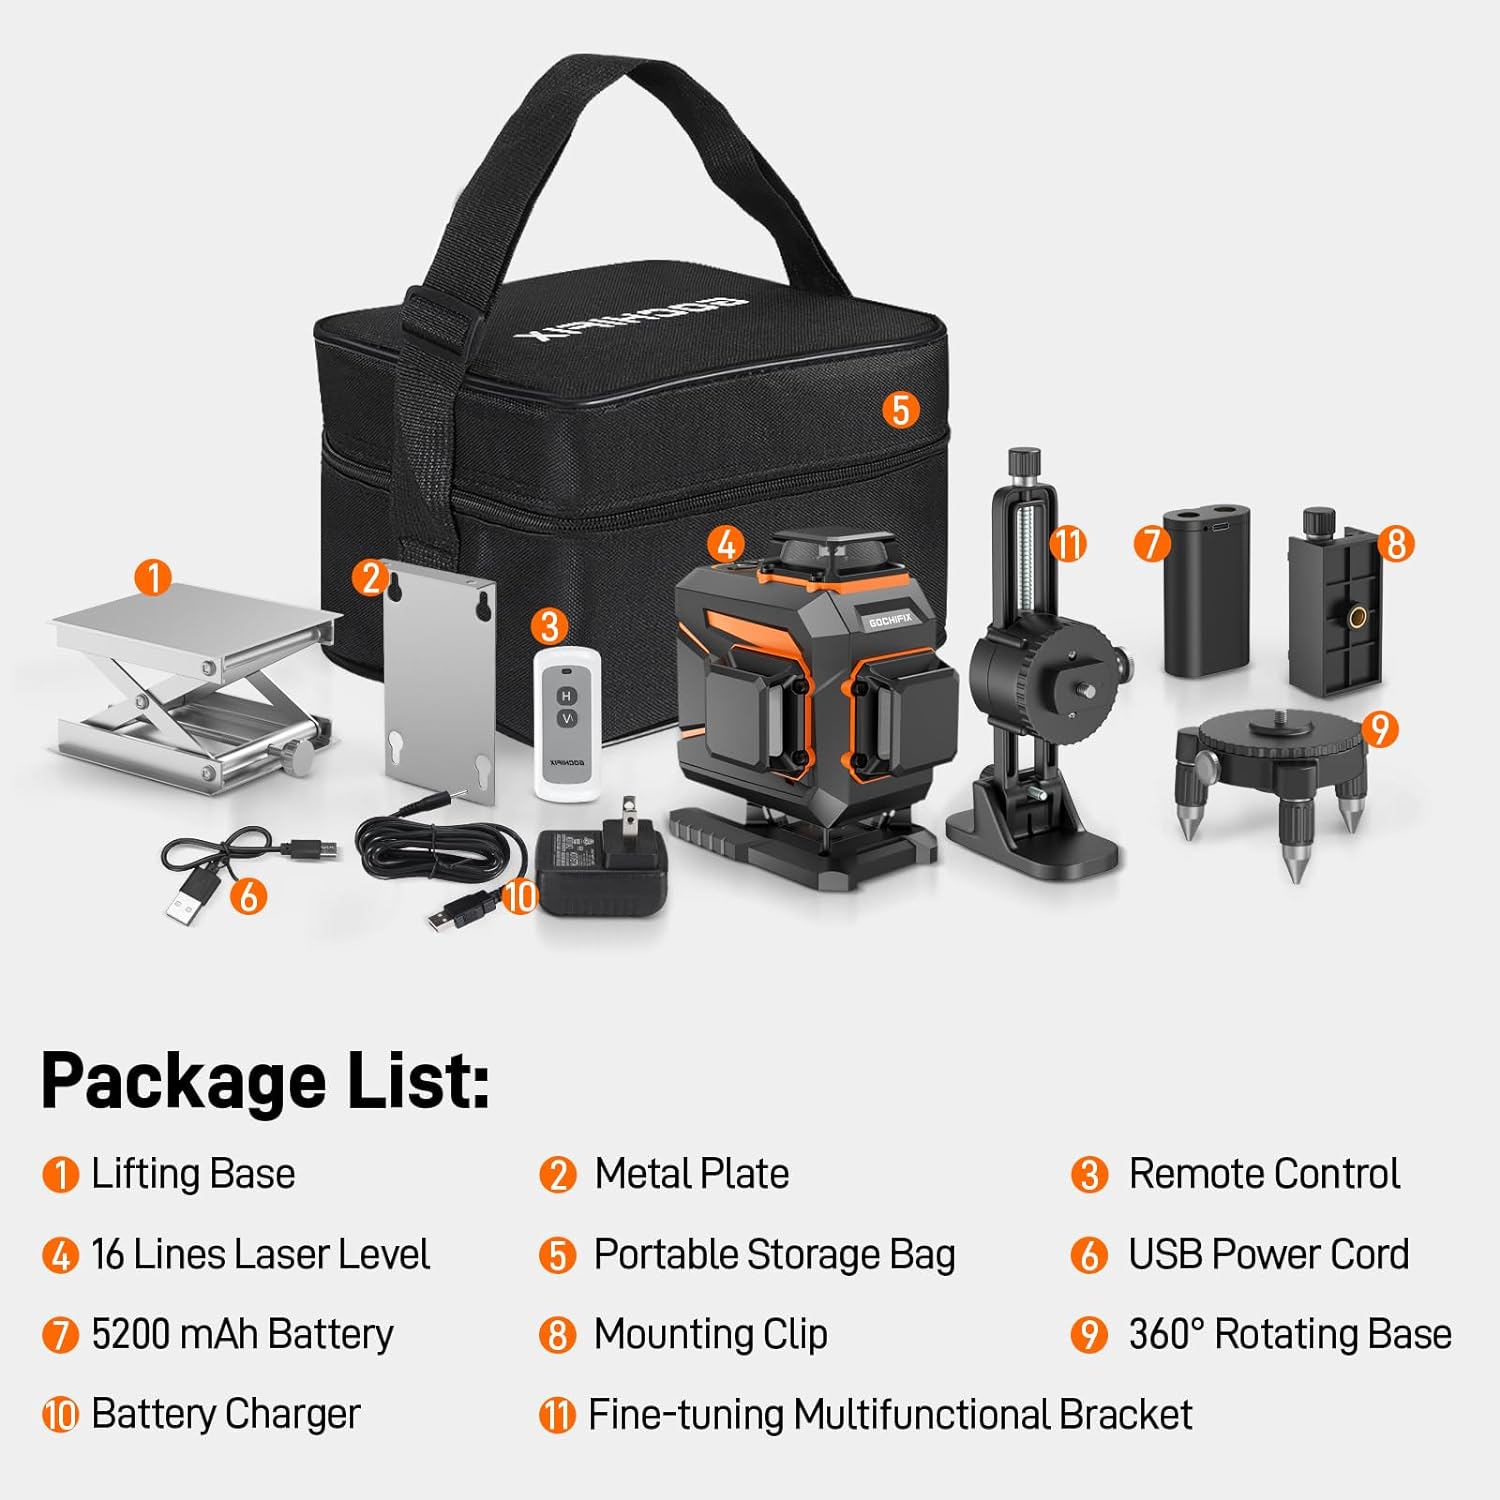
Image: A visual representation of all components included in the GOCHIFIX LG0116-PRO Laser Level package, clearly labeled for identification.
Product Features
The GOCHIFIX LG0116-PRO Laser Level is designed for precision and durability, offering advanced features for various leveling applications:
- 4Dx360° Green Laser: Equipped with a Sharp 520 laser from Japan, providing four 360-degree laser planes (two horizontal, two vertical) for comprehensive coverage.
- High Accuracy: Delivers an accuracy of ±1/9 inch at 32.8 feet, with a wavelength of 520nm, ensuring precise measurements.
- Adjustable Brightness: Features two levels of brightness adjustment for optimal visibility in different lighting conditions.
- Self-Leveling Mode: Automatically levels within 5 seconds if the tilt angle is within ±4°. An alarm sounds if the angle exceeds 4°.
- Manual Mode: Allows the laser lines to be locked at any angle for non-level applications.
- Pulse Mode: Extends the working range up to 200 feet when used with a compatible laser receiver (not included).
- Remote Control: Enables convenient operation from up to 10 meters (32.8 feet) away, allowing activation of horizontal and vertical lines independently.
- Versatile Power Options: Powered by a 5200 mAh rechargeable Lithium Ion battery, offering 5-21 hours of continuous use depending on the number of laser units active. The device can also be charged while working via its Type-C charging port. The battery is removable for separate charging.
- Multiple Installation Options:
- Lifting Base: Provides fine-tuning of height for precise adjustments.
- 360° Rotating Base: Allows for full 360-degree rotation without dead angles for flexible positioning.
- Fine-tuning Multifunctional Bracket: Offers both wall mounting and micro-adjustment capabilities.
- 1/4" Thread Mount: Compatible with most standard tripods for stable setup.
- Robust Construction: Made from durable ABS+TPU material, with 80% of the body covered in vinyl for enhanced protection.
- Safety Protection: IP54 rated for water and dust resistance, and designed to be drop-proof, ensuring reliability in demanding work environments.
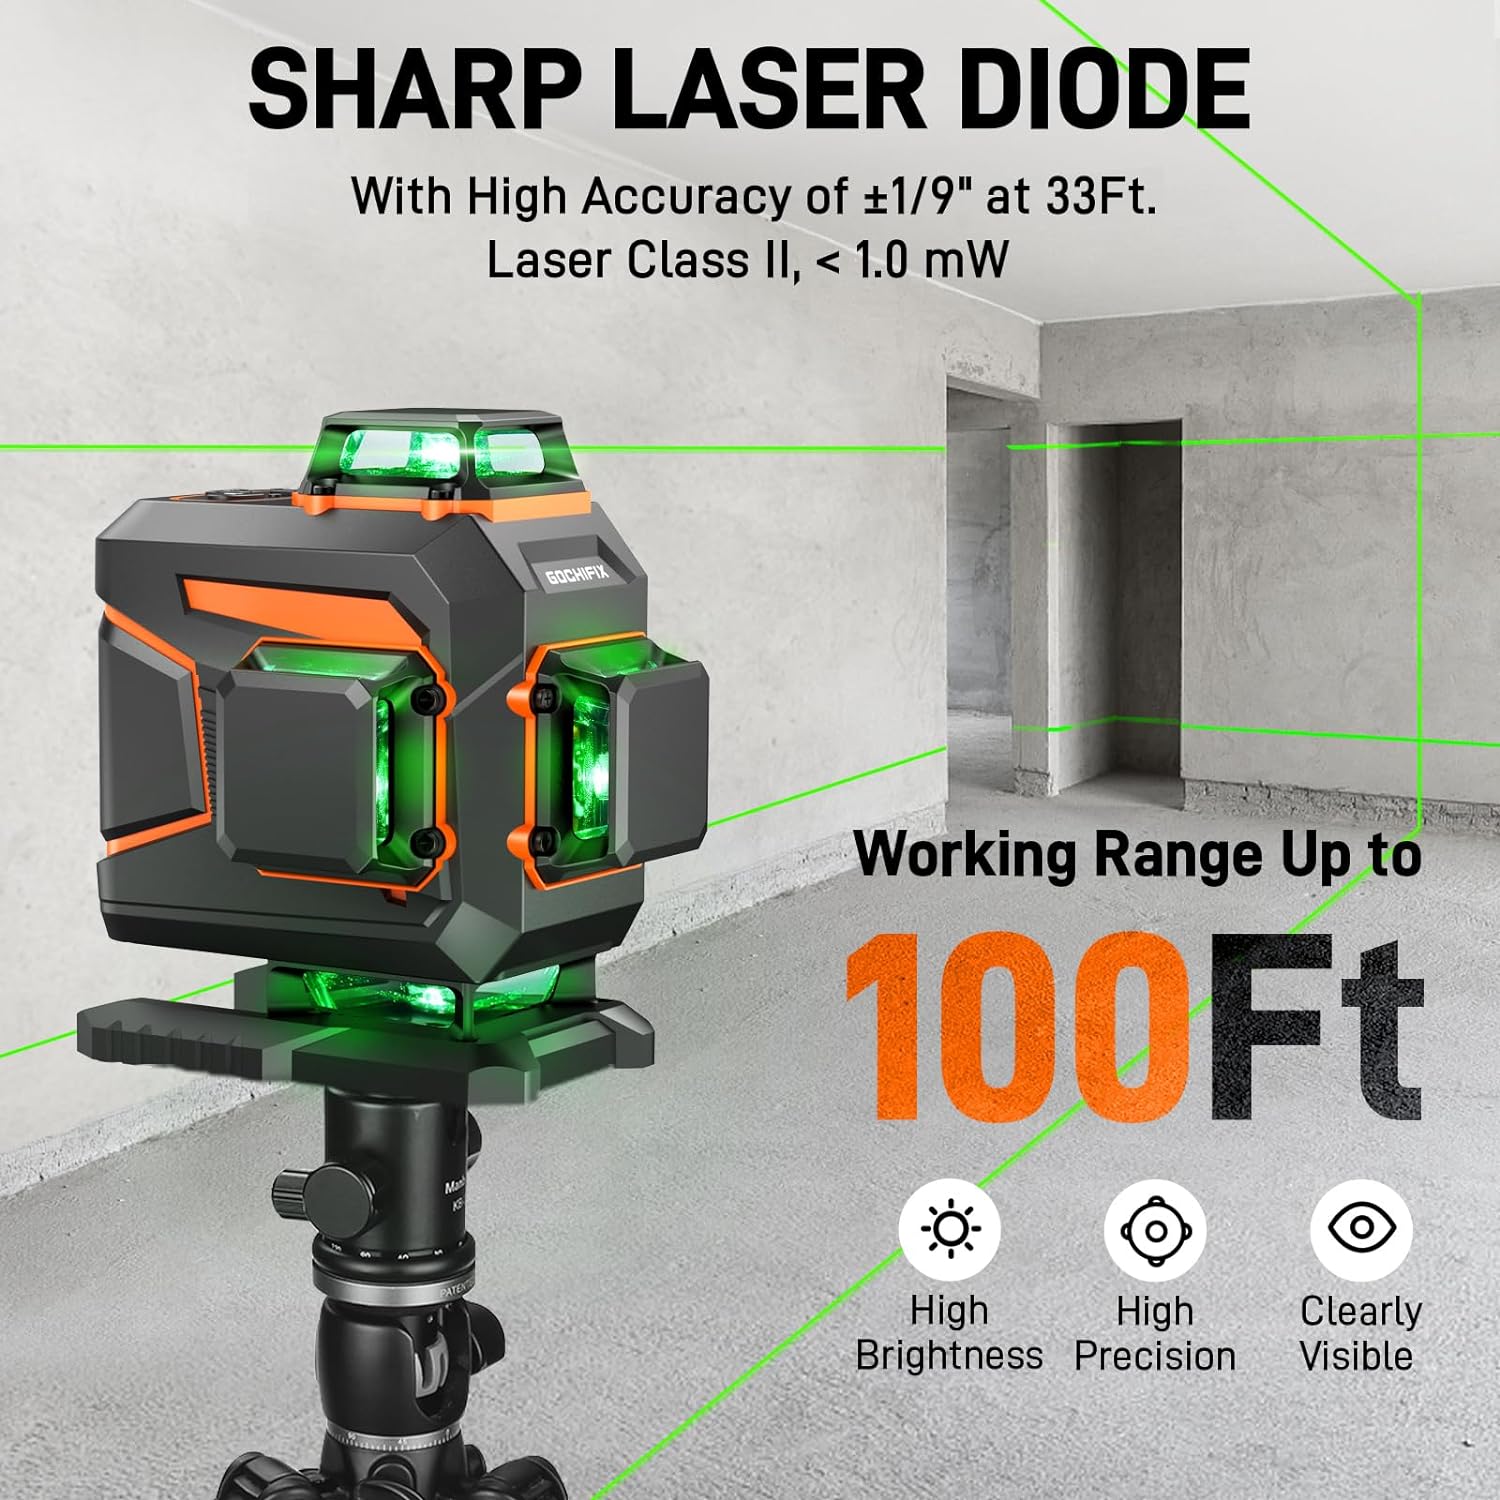
Image: Detail of the Sharp Laser Diode, highlighting its high accuracy and extended working range of up to 100 feet.
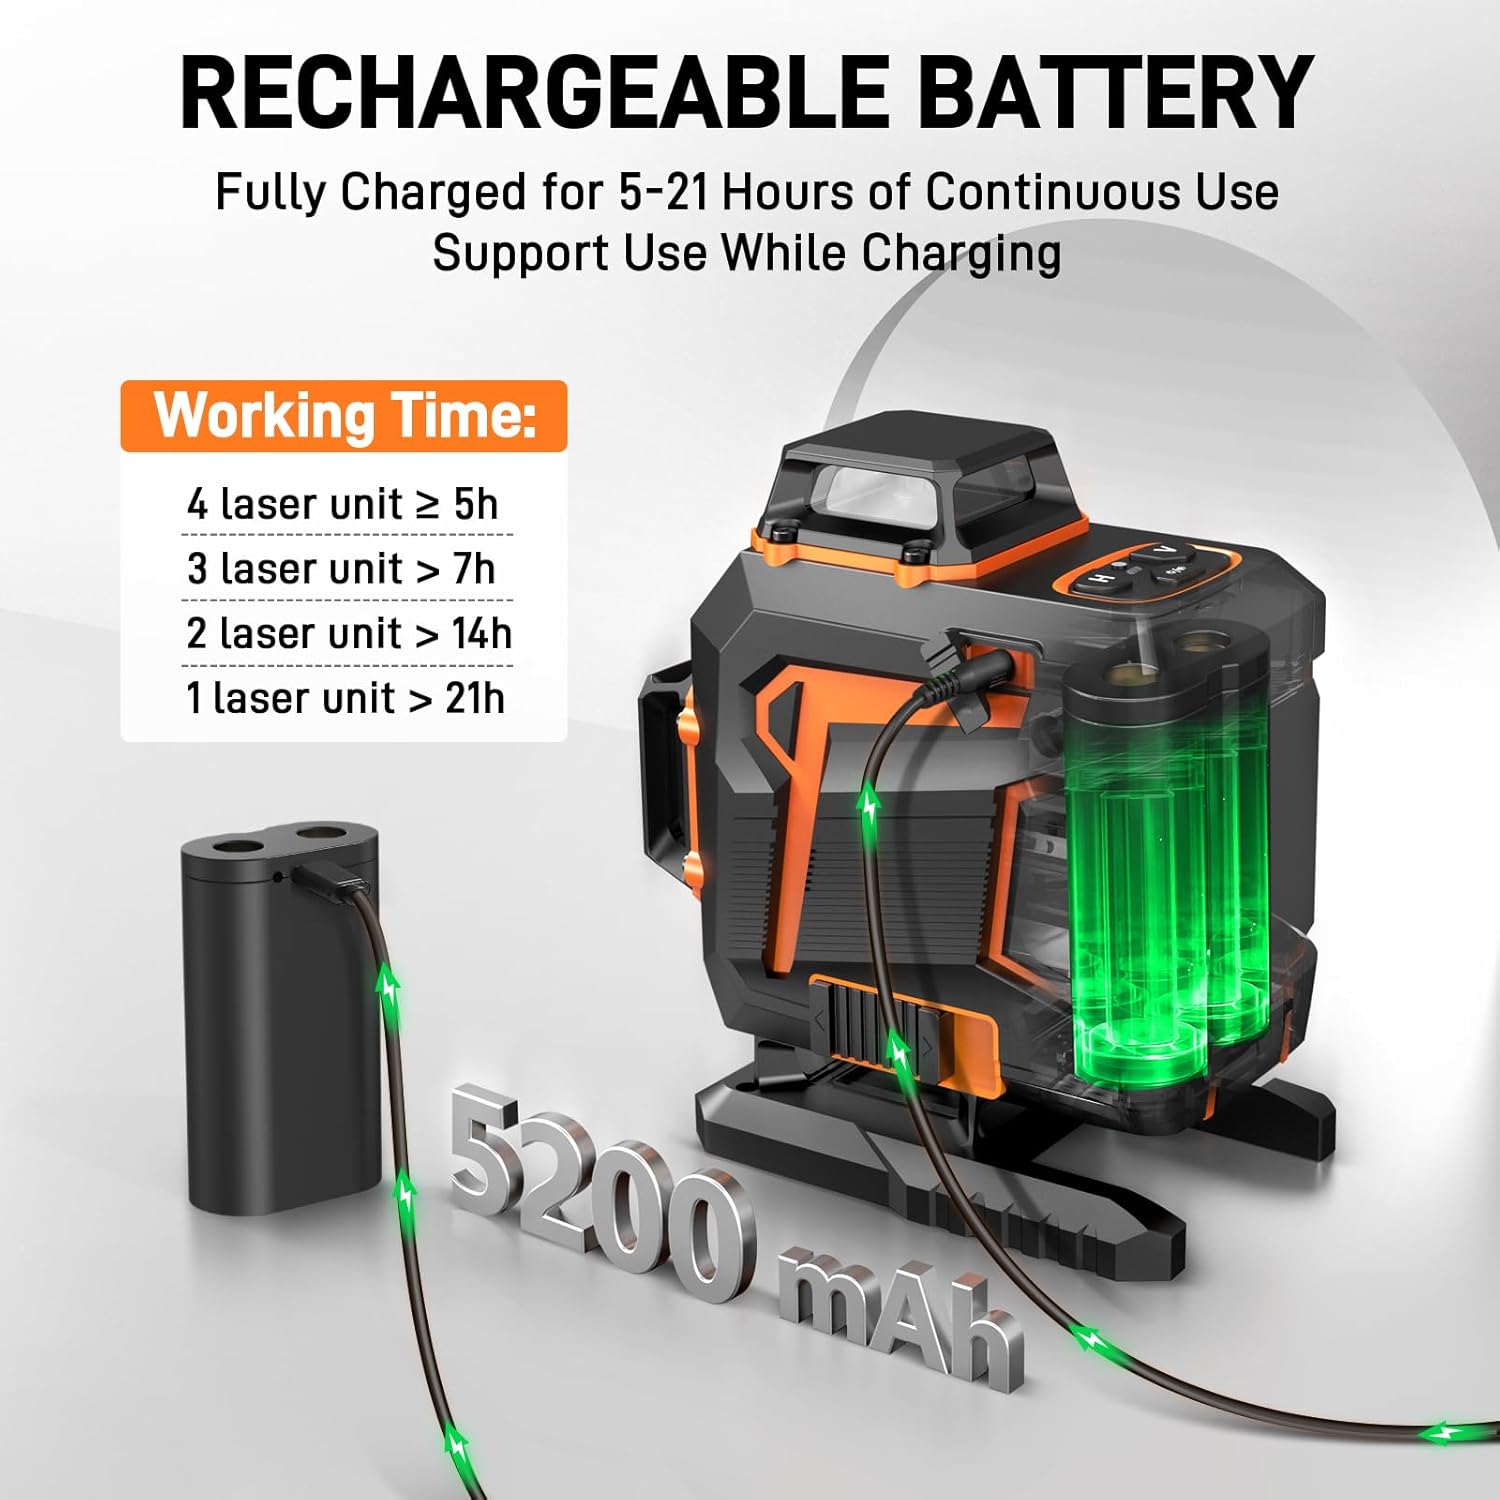
Image: Information on the 5200 mAh rechargeable battery, detailing its capacity and estimated working times based on laser usage.
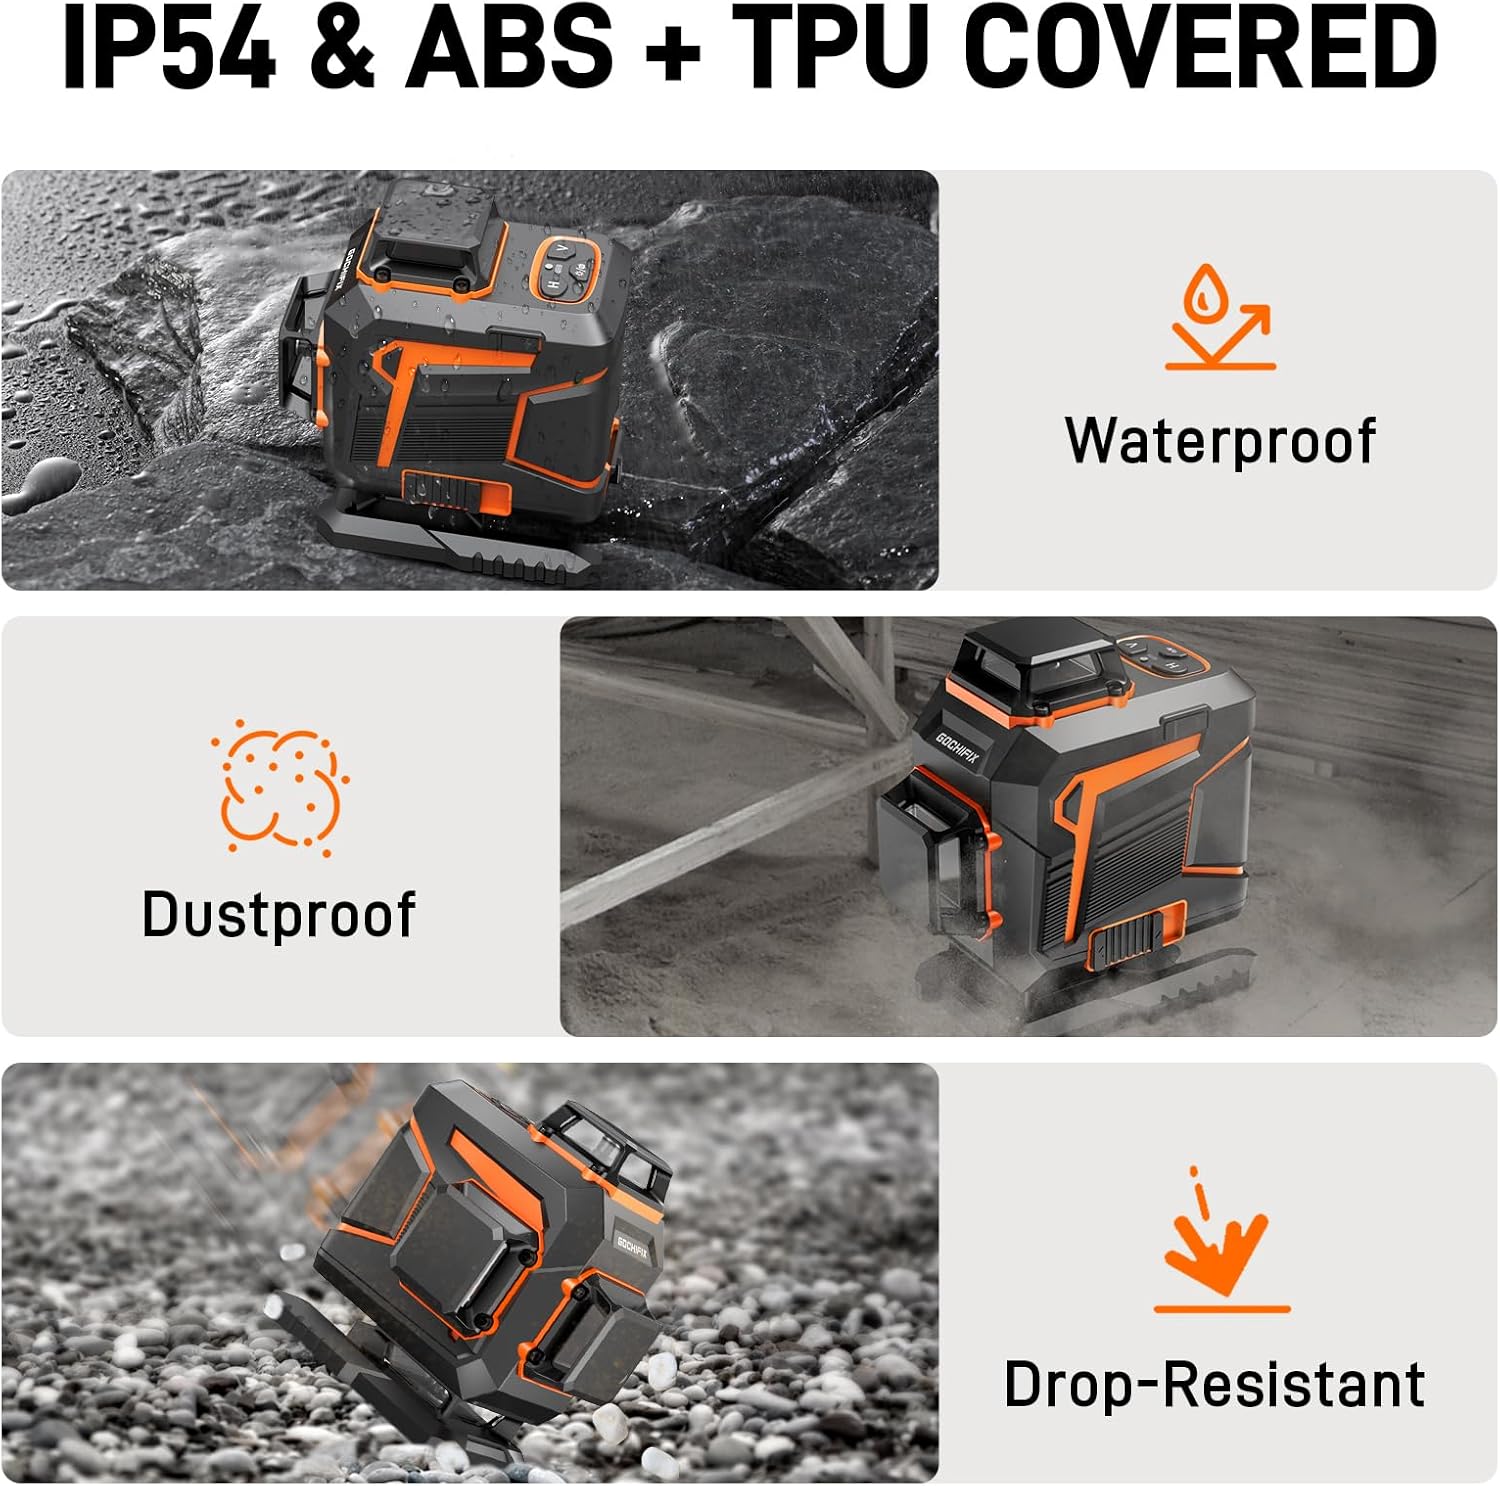
Image: Visuals illustrating the robust IP54 waterproof, dustproof, and drop-resistant design of the laser level, ensuring durability.
Setup
- Battery Installation:
Locate the battery compartment on the side of the laser level. Insert the 5200 mAh Lithium Ion battery, ensuring it clicks securely into place. The battery can be charged separately or while installed in the device using the provided charger and USB Type-C cable.
- Power On/Off:
Slide the ON/OFF switch to the "ON" position to power on the device. Slide it to "OFF" to power off. When powered on, the device will automatically enter Self-Leveling Mode.
- Positioning the Laser Level:
Place the laser level on a stable, flat surface. For optimal performance in Self-Leveling Mode, ensure the surface is within ±4° of level. Use the included Lifting Base or 360° Rotating Base for fine adjustments and precise positioning. The 1/4" thread mount allows for attachment to a standard tripod (not included).
- Attaching Accessories:
Attach the Fine-tuning Multifunctional Bracket or Mounting Clip as needed for wall mounting or specific height adjustments. Ensure all attachments are secure before operation.
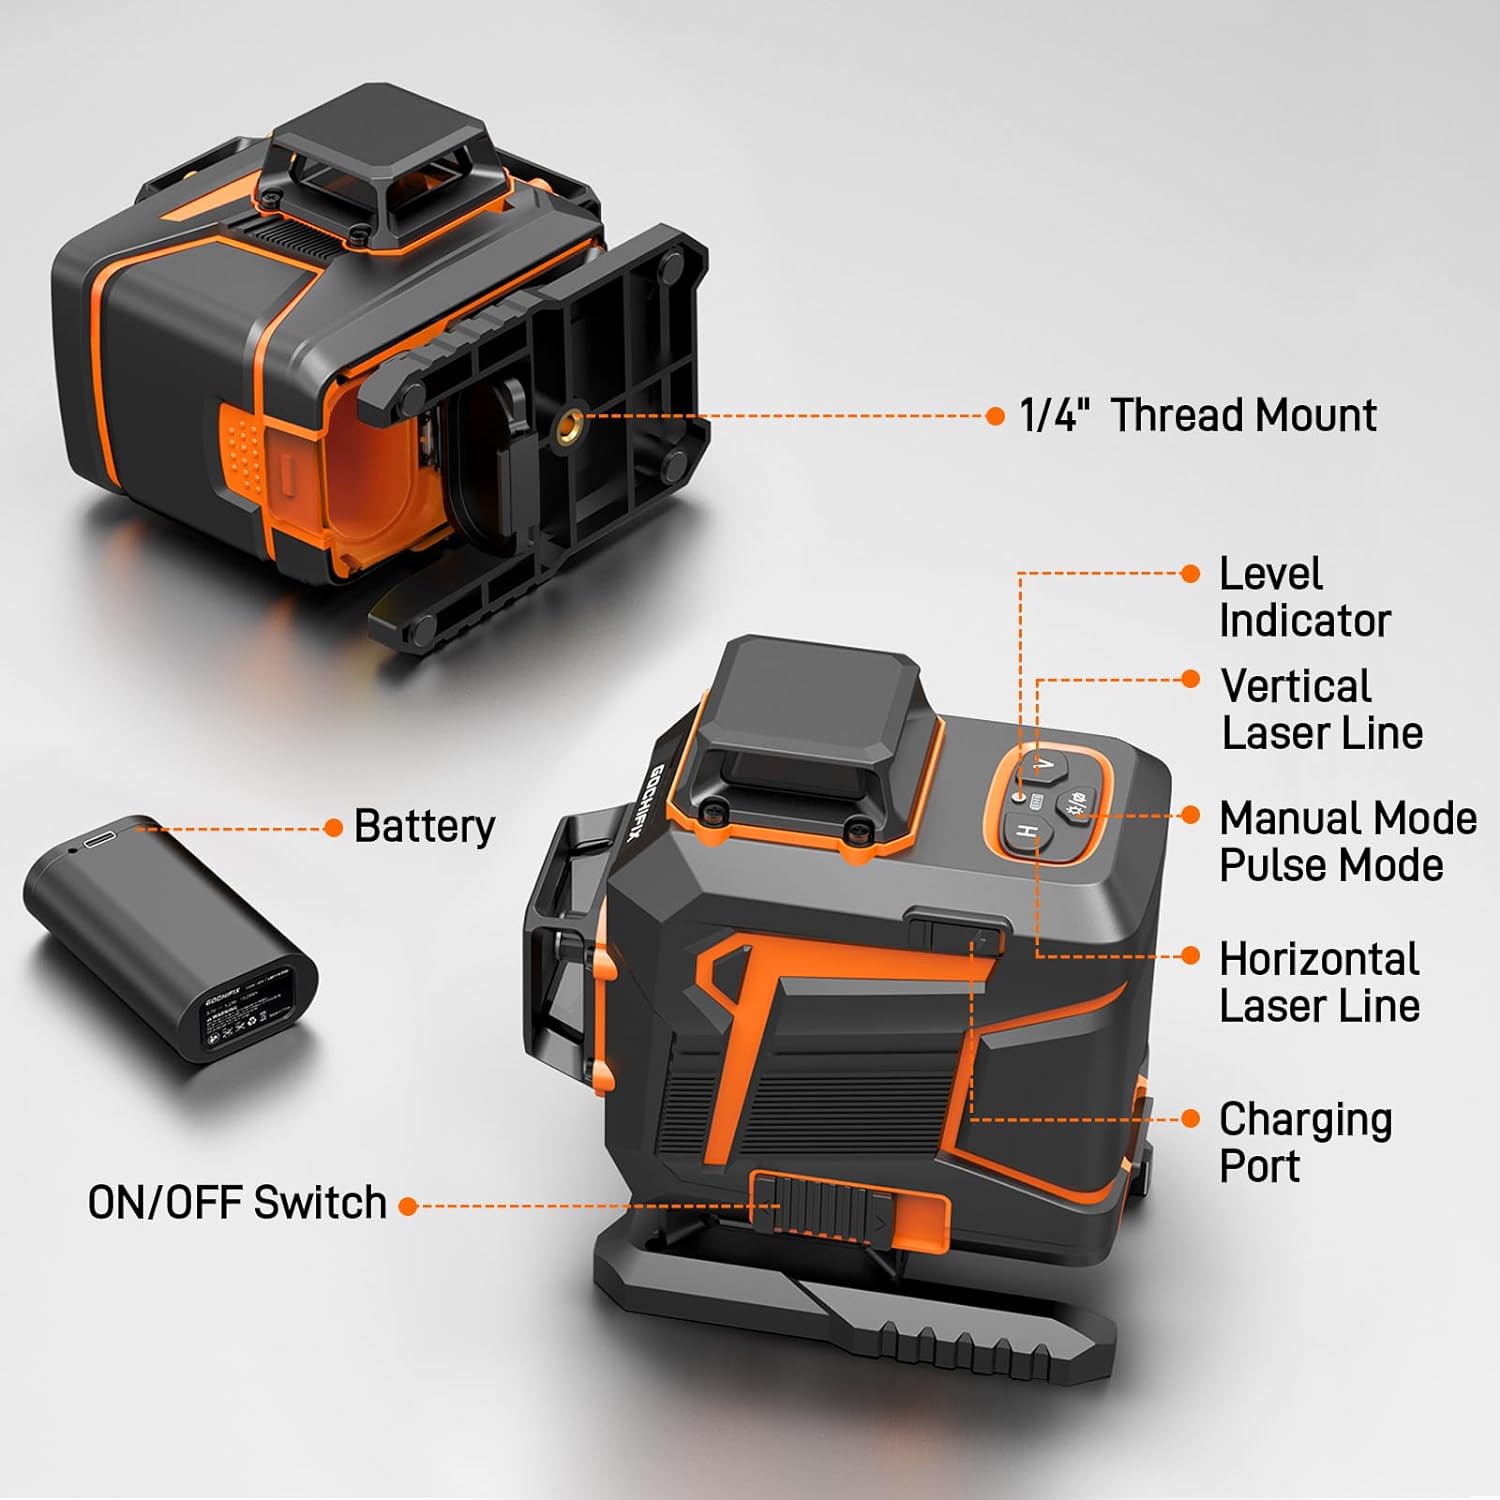
Image: An annotated diagram highlighting key components of the laser level, such as the ON/OFF switch, battery, charging port, and laser line controls.
Video: A hands-on demonstration of the GOCHIFIX Laser Level, including unboxing, battery installation, attaching the adjustable feet, and initial power-on to show self-leveling functionality.
Operating Instructions
- Self-Leveling Mode:
When the device is powered on and the switch is in the "ON" position, it automatically enters Self-Leveling Mode. The laser will self-level within 5 seconds if placed on a surface within ±4° of true level. If the tilt exceeds 4°, an audible alarm will sound, and the laser lines will flash, indicating that the device is out of its leveling range. Adjust the device's position until the alarm stops and the laser lines become stable.
- Manual Mode (Tilt Mode):
To activate Manual Mode, slide the ON/OFF switch to the "OFF" position, then press and hold the O/S button for 3 seconds. In Manual Mode, the self-leveling function is disabled, allowing you to project laser lines at any desired angle. The laser lines will not flash or alarm in this mode, providing flexibility for sloped applications like staircase installations.
- Pulse Mode:
For extended working range (up to 200 feet) or outdoor use, activate Pulse Mode. Short press the O/S button while in Self-Leveling Mode to toggle Pulse Mode. This mode is designed to work with a compatible laser receiver (not included) to detect the laser lines over longer distances or in bright conditions.
- Laser Line Selection:
Use the H (Horizontal) and V (Vertical) buttons on the top panel or the remote control to select which laser lines are projected. You can activate horizontal lines, vertical lines, or a combination of both. The 4D design allows for two horizontal and two vertical 360-degree lines.
- Brightness Adjustment:
Short press the brightness adjustment button (often integrated with the O/S button or a dedicated sun icon) to cycle through the two available brightness levels.
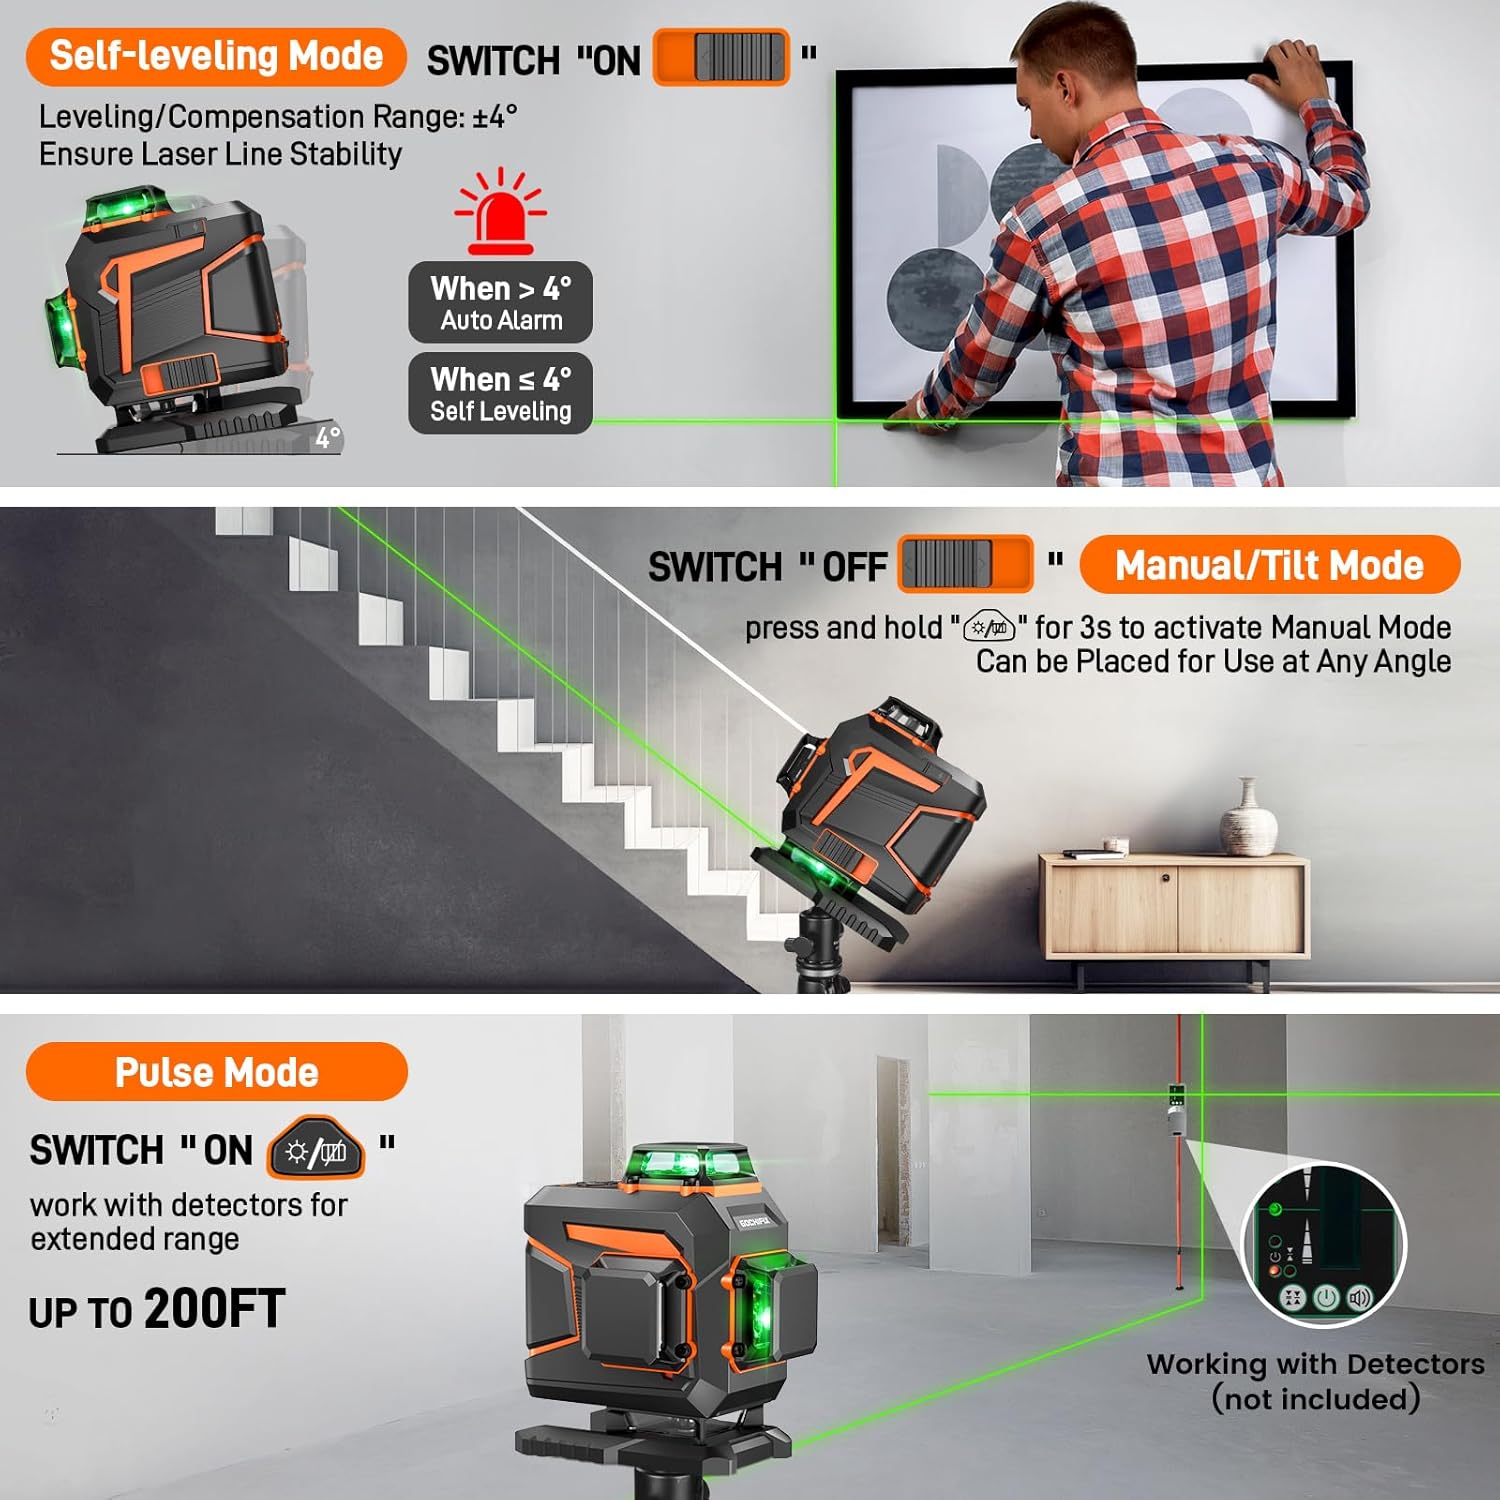
Image: Visual guide to the three main operating modes: Self-leveling, Manual/Tilt, and Pulse Mode, showing how to activate and their functions.
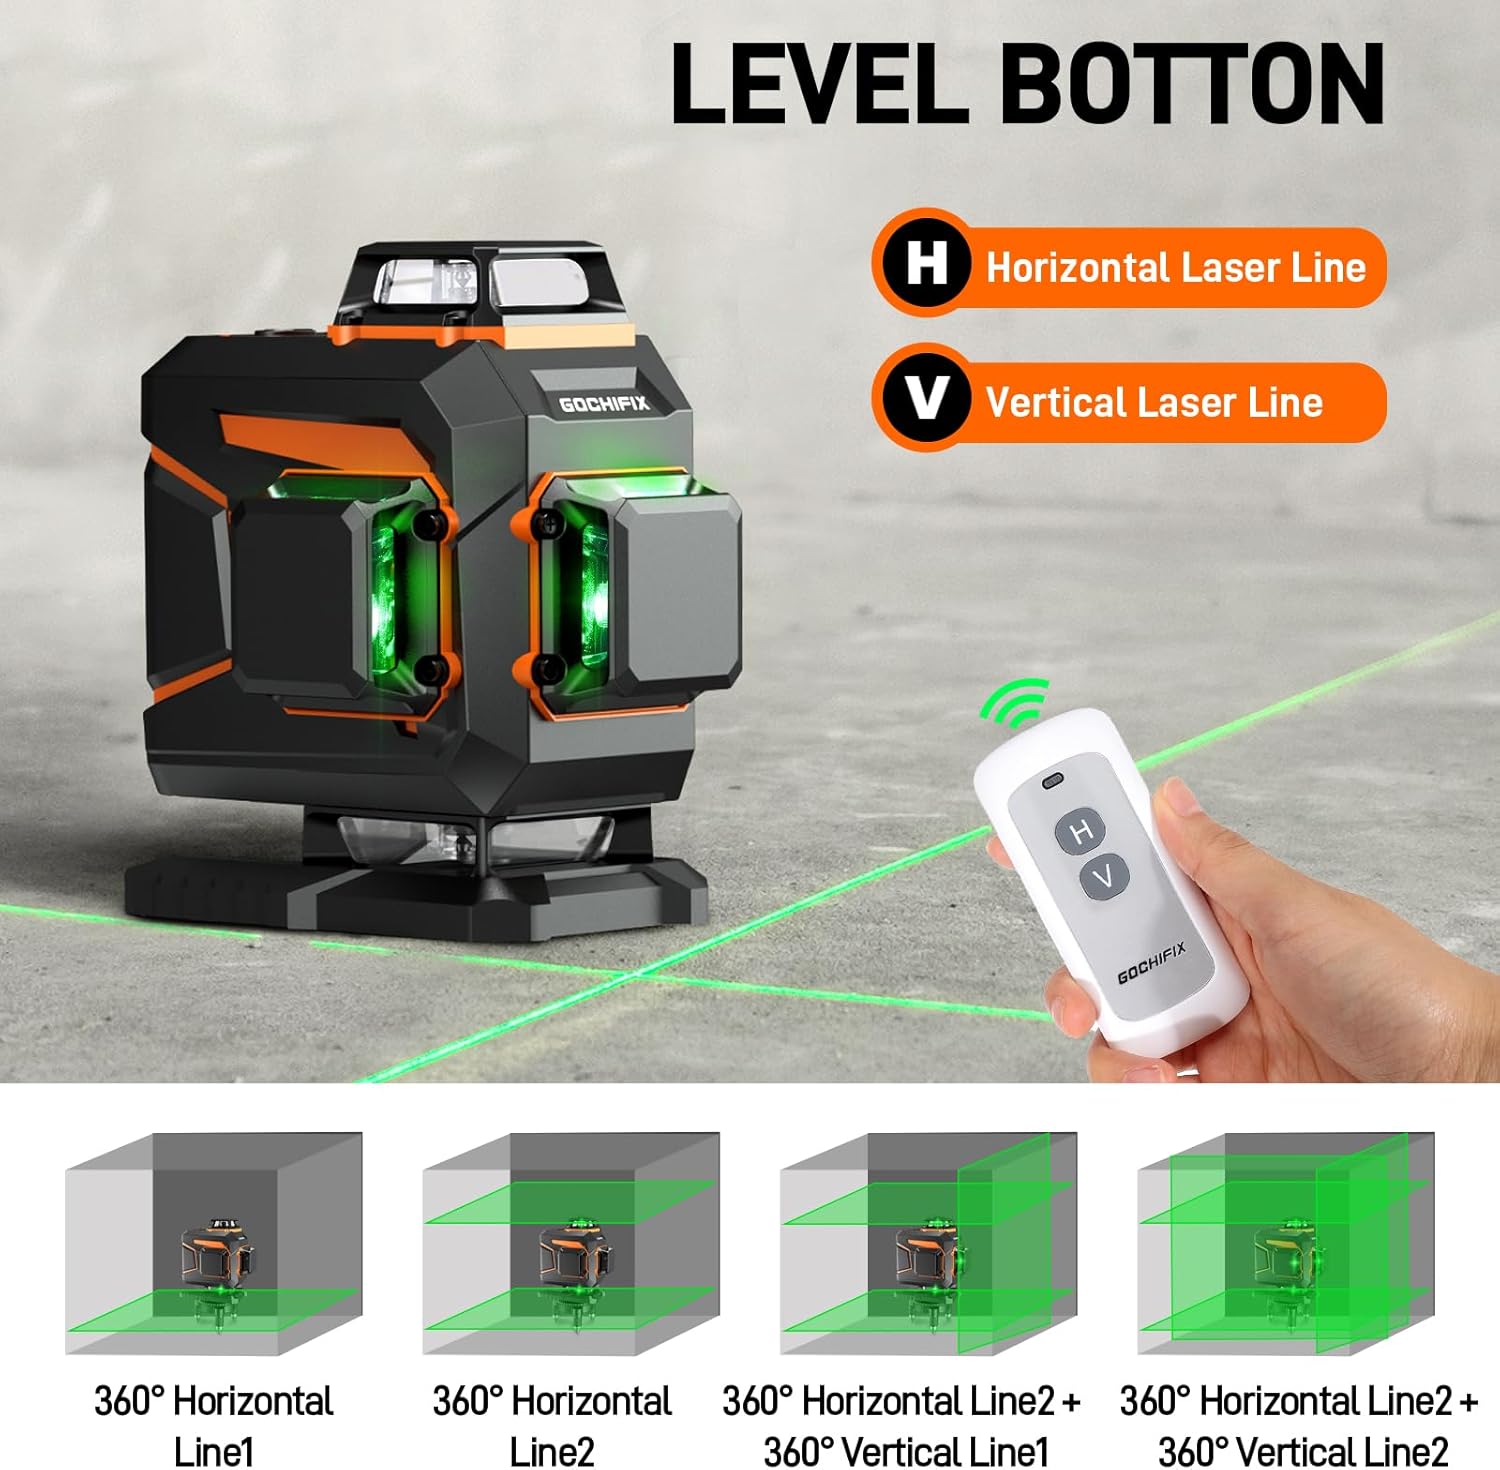
Image: The laser level and its remote control, illustrating how to select horizontal and vertical laser lines for different projection needs.
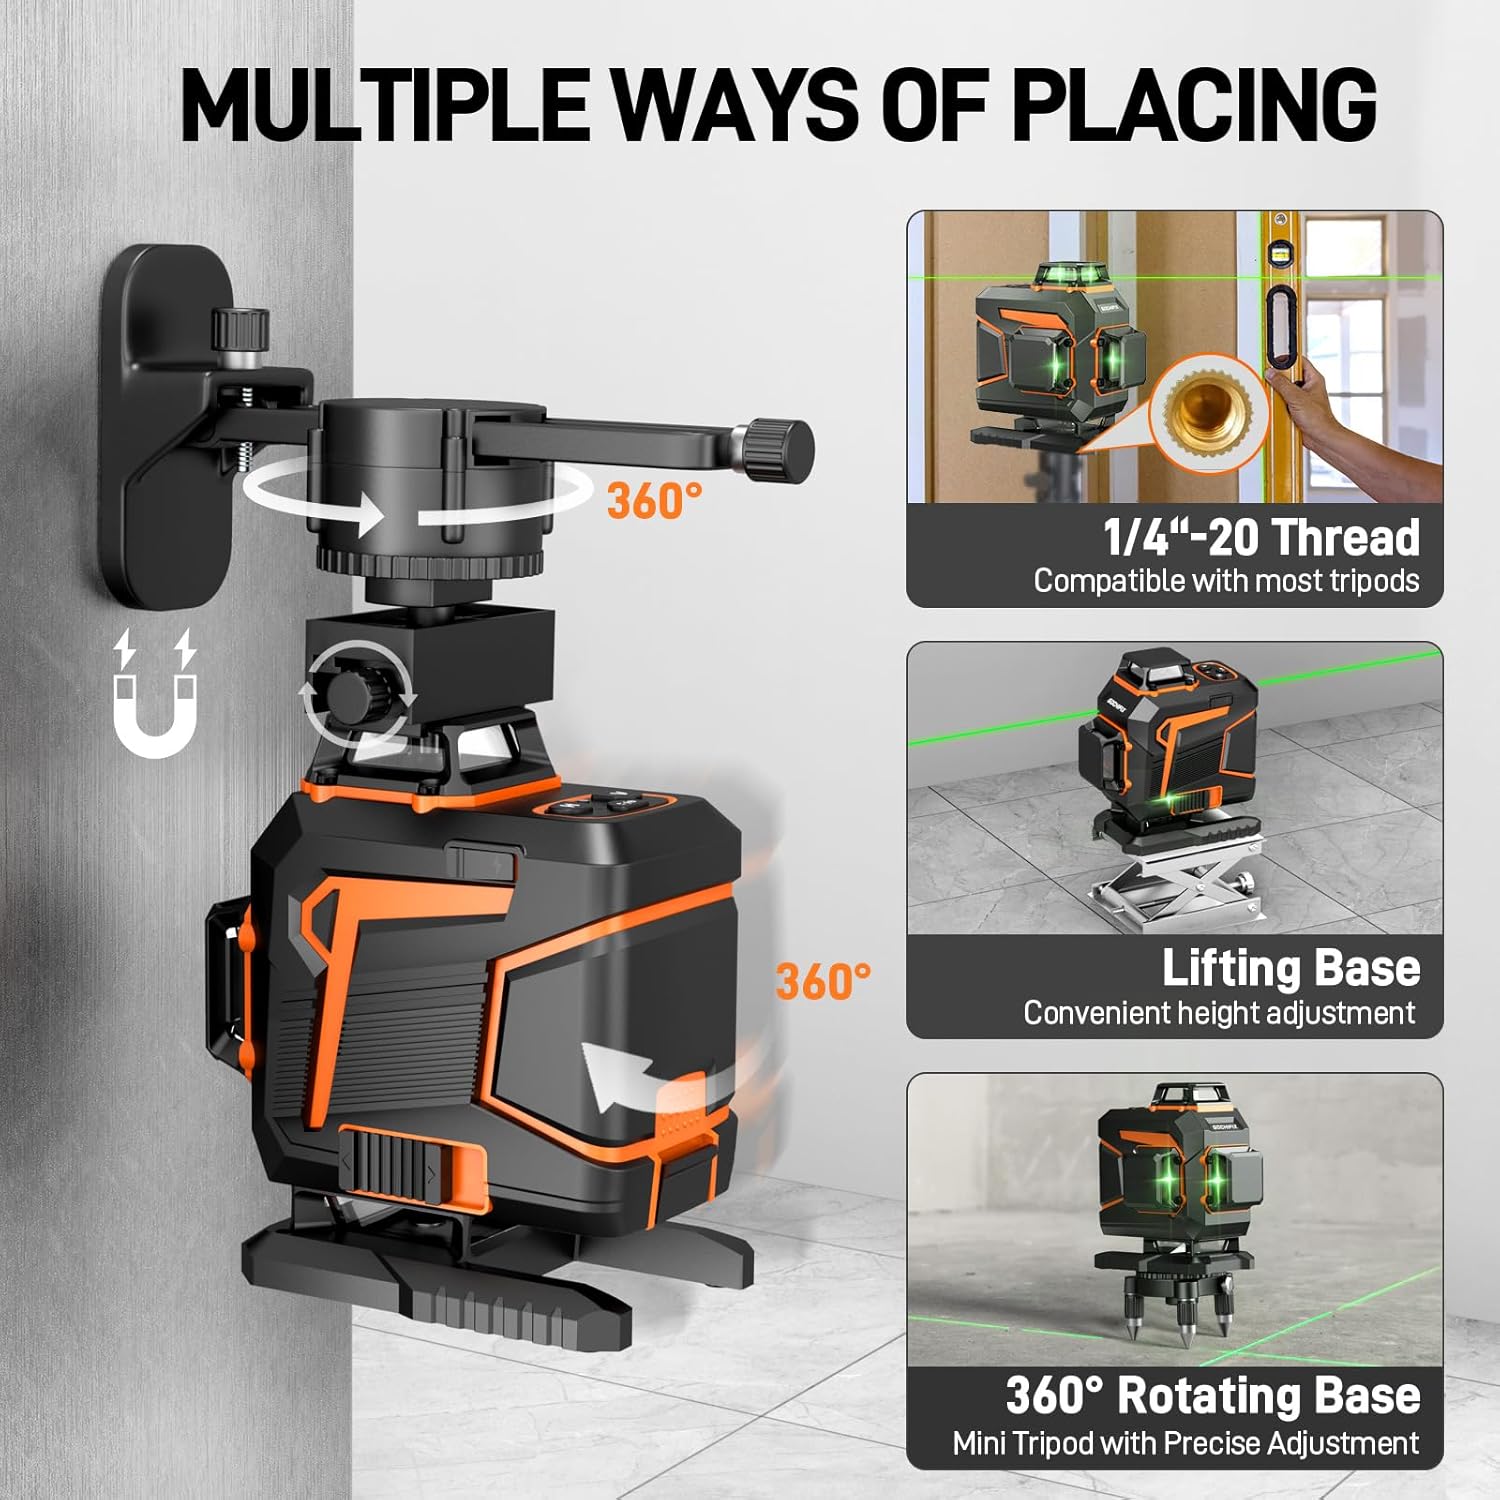
Image: Demonstrations of various placement options for the laser level, such as using a tripod, the lifting base, and the 360° rotating base for versatile applications.
Maintenance
- Cleaning: Regularly clean the laser level with a soft, damp cloth. Do not use abrasive cleaners or solvents. Keep the laser apertures clean to ensure clear and accurate projections.
- Storage: When not in use, store the laser level in its portable storage bag with the foam layer to protect it from dust, moisture, and impact. Ensure the pendulum lock is engaged (if applicable) before storing to prevent damage during transport.
- Battery Care: For long-term storage, charge the battery to approximately 50% and store it in a cool, dry place. Recharge the battery every 3-6 months to maintain its lifespan.
- Environmental Protection: Although the device is IP54 rated for water and dust resistance, avoid prolonged exposure to extreme temperatures, direct sunlight, or excessive moisture.
Troubleshooting
| Problem | Possible Cause | Solution |
|---|---|---|
| Laser lines are flashing and/or alarm is sounding. | Device is out of self-leveling range (tilt > ±4°). | Place the device on a more level surface or adjust the feet/base until the alarm stops and lines stabilize. |
| Laser lines are dim or not visible. | Low battery, bright ambient light, or incorrect brightness setting. | Charge the battery. Use Pulse Mode with a receiver in bright conditions. Adjust brightness settings. |
| Device does not power on. | Battery is depleted or not properly installed. | Ensure battery is fully charged and correctly inserted. |
| Remote control is not working. | Remote battery is depleted or out of range. | Replace remote battery. Ensure remote is within 10m range and pointed towards the device. |
Specifications
| Feature | Detail |
|---|---|
| Brand | GOCHIFIX |
| Model Number | LG0116-PRO |
| Material | ABS+TPU |
| Color | Black + Orange |
| Laser Type | Sharp 520 Green Laser Tube |
| Laser Lines | 4x360° (2 Horizontal, 2 Vertical) |
| Accuracy | ±1/9 inch at 32.8 feet |
| Wavelength | 520nm |
| Self-Leveling Range | ±4° |
| Pulse Mode Range | Up to 200 feet (with receiver) |
| Remote Control Range | 10 meters (32.8 feet) |
| Battery Type | 5200 mAh Lithium Ion (rechargeable) |
| Operating Time | 5-21 hours (depending on laser units active) |
| Power Source | Battery Powered |
| IP Rating | IP54 (Waterproof & Dustproof) |
| Item Weight | 4.27 pounds |
| Product Dimensions | 4.92 x 4.72 x 3.15 inches |
Warranty and Support
GOCHIFIX stands behind the quality of its products. This laser level comes with a standard manufacturer's warranty covering defects in materials and workmanship. For specific warranty terms, registration, or technical support, please refer to the warranty card included in your package or visit the official GOCHIFIX website. You may also contact customer service through the retailer where the product was purchased.
For further assistance, please contact GOCHIFIX customer support.
