1. Introduction
This manual provides essential information for the safe and efficient operation of your OMTech Pronto 35 90W CO2 Laser Engraver Cutter. Please read all instructions carefully before use to ensure proper setup, operation, and maintenance. This machine is designed for precision engraving and cutting of various non-metallic materials.
2. Safety Information
Your OMTech Pronto 35 is a Laser Class 2 device with 0.827 mW output power. Adhere to all safety guidelines to prevent injury or damage. The product contains materials known to the State of California to cause cancer and birth defects or other reproductive harm (Proposition 65 warning).
- Eye Protection: Always wear appropriate laser safety glasses when operating the machine.
- Ventilation: Ensure adequate ventilation to remove fumes and debris generated during operation. The powerful air pump and 318 cfm turbo exhaust fan assist in maintaining a clean workspace.
- Material Compatibility: Only engrave or cut materials specified as safe for CO2 lasers. Avoid materials that produce toxic fumes or are highly flammable.
- Emergency Stop: Familiarize yourself with the emergency stop button location and function.
- Built-in Sensors: The machine features built-in sensors that continuously monitor temperature and air pressure, stopping operation if necessary to prevent overheating or low-pressure conditions.
- Flame-Retardant PC Board: The integrated flame-retardant PC board significantly reduces the risk of fire during operation.
- Safe Observation: Utilize the flame-resistant window to track your process safely.
3. Product Features
- Separate Shipments: The laser engraver and water chiller are shipped in two separate packages.
- Versatile Material Processing: Capable of cutting, engraving, and shaping wood (up to 0.4"), acrylic (up to 0.8"), leather, fabric, cardboard, glass, and other non-metallic materials.
- Fast & Accurate Autofocus: Advanced autofocus feature instantly calibrates the laser's focal point with a push of a button, ensuring precision.
- Large Workspace & High Speed: Features a 28"x20" workspace and a maximum engraving speed of 1,000 mm/s for efficient project completion.
- Effortless Accuracy: X and Y-axis stepping motors with V-wheel guide rails minimize wobbling and misalignment.
- Enhanced Airflow: Includes a powerful air pump and 318 cfm turbo exhaust fan for a clean workspace.
- Seamless Software Compatibility: Fully compatible with RDWorks, CorelLaser, and LightBurn.
- 2-Way Pass-Through: Allows for working with larger materials than the workbed.
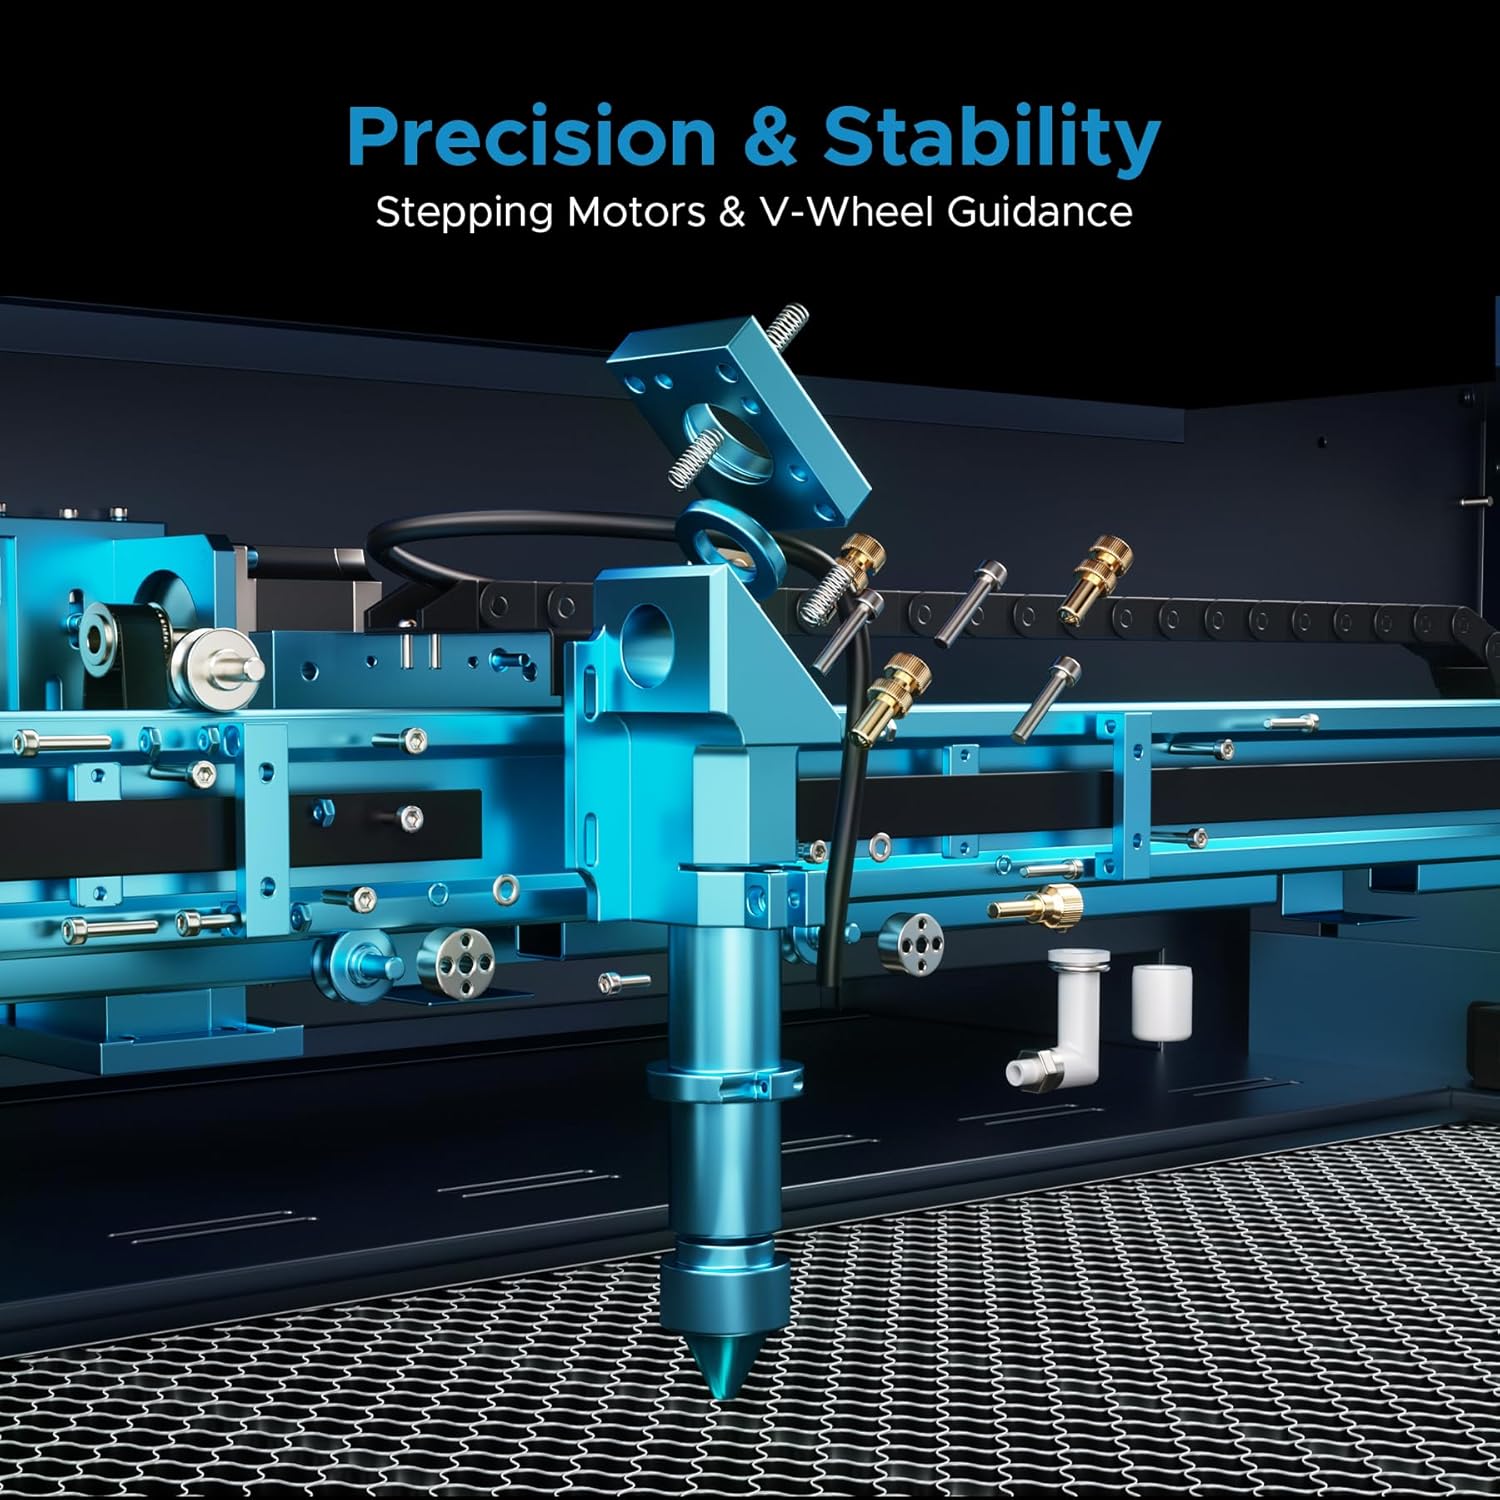
Figure 3.1: Key features of the OMTech Pronto 35, including power, speed, autofocus, work area, and software compatibility.

Figure 3.2: The 2-Way Pass-Through design allows for processing materials larger than the internal workbed.
4. Setup
Upon receiving your OMTech Pronto 35, ensure both packages (laser engraver and water chiller) have arrived. Carefully unpack all components and verify against the packing list. Place the machine on a stable, level surface.
- Chiller Connection: Connect the provided water chiller to the laser engraver according to the chiller's specific instructions. Ensure the chiller is filled with distilled water or a recommended coolant.
- Air Assist & Exhaust: Connect the air assist hose to the laser head and the exhaust fan to the machine's exhaust port, directing fumes safely outdoors or to a filtration system.
- Power Connection: Connect the machine to a grounded power outlet.
- Software Installation: Install the necessary software (RDWorks, CorelLaser, or LightBurn) on your computer and connect it to the laser engraver via USB or Ethernet.
Video 4.1: Overview of the CO2 Laser Engraver, including initial setup considerations.
5. Operating Instructions
Before starting any operation, ensure all safety precautions are in place and the material is correctly positioned on the workbed.
- Power On: Turn on the main power switch and the laser power switch.
- Material Placement: Place your material on the honeycomb workbed. For optimal results, ensure the material is flat and secure.
- Autofocus: Utilize the advanced autofocus feature by pressing the dedicated button on the control panel. This will automatically set the correct focal distance for your material.
- Software Operation: Open your design file in LightBurn, RDWorks, or CorelLaser. Adjust settings such as power, speed, and resolution based on your material and desired outcome.
- Job Preview: Use the software's preview function to verify the engraving/cutting path.
- Start Job: Initiate the laser job from the software or the machine's control panel. Monitor the process through the flame-resistant observation window.

Figure 5.1: The Intelligent Auto-Focus system simplifies setup by automatically adjusting the laser head.
Video 5.1: Detailed guide on how to laser engrave a photo using a CO2 Laser Engraver.
Video 5.2: Demonstration of laser engraving and cutting on acrylic mirror for a DIY project.
6. Maintenance
Regular maintenance ensures the longevity and optimal performance of your laser engraver.
- Lens Cleaning: Periodically clean the laser lens and mirrors with appropriate cleaning solutions and wipes to maintain laser beam quality.
- Workbed Cleaning: Regularly clean the honeycomb workbed to remove debris and residue, which can affect cutting quality and fire safety.
- Water Chiller Maintenance: Follow the water chiller's instructions for regular water changes and cleaning to prevent algae buildup and ensure efficient cooling of the laser tube.
- Air Assist & Exhaust System: Inspect and clean the air assist nozzle and exhaust fan/ducts to ensure proper airflow and smoke extraction.
- Lubrication: Lubricate the guide rails and moving parts as recommended in the detailed product manual to ensure smooth operation.

Figure 6.1: Illustration of the efficient smoke and dust removal system for cleaner engraving.
7. Troubleshooting
- Overheating Alert: If the machine displays an overheating alert (e.g., >131°F), it will automatically stop. Check the water chiller for proper function, water level, and circulation. Allow the machine to cool down before resuming operation.
- Low-Pressure Alarm: A built-in pressure sensor triggers an alarm if pressure drops, indicating a potential issue with the air assist or exhaust system. Inspect hoses and connections for blockages or leaks.
- Poor Engraving/Cutting Quality: Verify focal distance using the autofocus function. Check laser power and speed settings in your software. Ensure the material is flat and the lens/mirrors are clean.
- Software Connection Issues: Ensure USB/Ethernet cables are securely connected. Restart both the machine and computer. Check software settings for correct port selection.

Figure 7.1: The overheating alert system monitors temperature and automatically stops the machine if it exceeds safe limits.

Figure 7.2: The low-pressure alarm system uses built-in sensors to detect pressure drops and prevent potential risks.
8. Specifications
| Feature | Detail |
|---|---|
| Product Dimensions | 49.6 x 34.3 x 36.6 inches |
| Item Model Number | RYGEL-USB0906US |
| Item Weight | 441 pounds |
| Manufacturer | OMTech |
| Date First Available | June 2, 2023 |
9. Warranty and Support
OMTech provides 2 years of comprehensive service for this product. Our 24/7 global support team offers expert assistance, including technical guidance and local demonstrations by appointment. For any inquiries or support needs, please contact OMTech customer service.
- Customer Support: Access 24/7 online customer service for immediate assistance.
- Technical Guidance: Receive expert technical guidance from our global support team.
- Local Demos: Schedule local demonstrations by appointment to enhance your understanding and skills.