
maXpeedingrods BI94OA
maXpeedingrods Suspension Leveling Kit User Manual
Model: BI94OA
Brand: maXpeedingrods
1. Introduction
This user manual provides essential information for the installation, operation, and maintenance of your maXpeedingrods 3.5" Front 2.5" Rear Leveling Kit. This kit is engineered to enhance your vehicle's appearance and capability by providing additional ground clearance and allowing for larger tire fitment, all while preserving the original ride quality.
Please read this manual thoroughly before beginning installation to ensure proper procedure and safety.
2. Vehicle Compatibility
This leveling kit is compatible with the following vehicle models:
- GMC Envoy 2WD 4WD (2002-2009)
- Chevy Trailblazer 2WD 4WD (2002-2009)
Note: Trailblazer 4WD models can only achieve a 2-inch front lift with this kit.
3. Kit Components
Your maXpeedingrods leveling kit includes all necessary hardware for installation. Please verify all components are present before beginning.
- Front Leveling Spacers (2)
- Rear Leveling Spacers (2)
- Mounting Hardware (Bolts, Nuts, Washers)

Figure 3.1: Overview of the maXpeedingrods 3.5" Front 2.5" Rear Leveling Kit components.
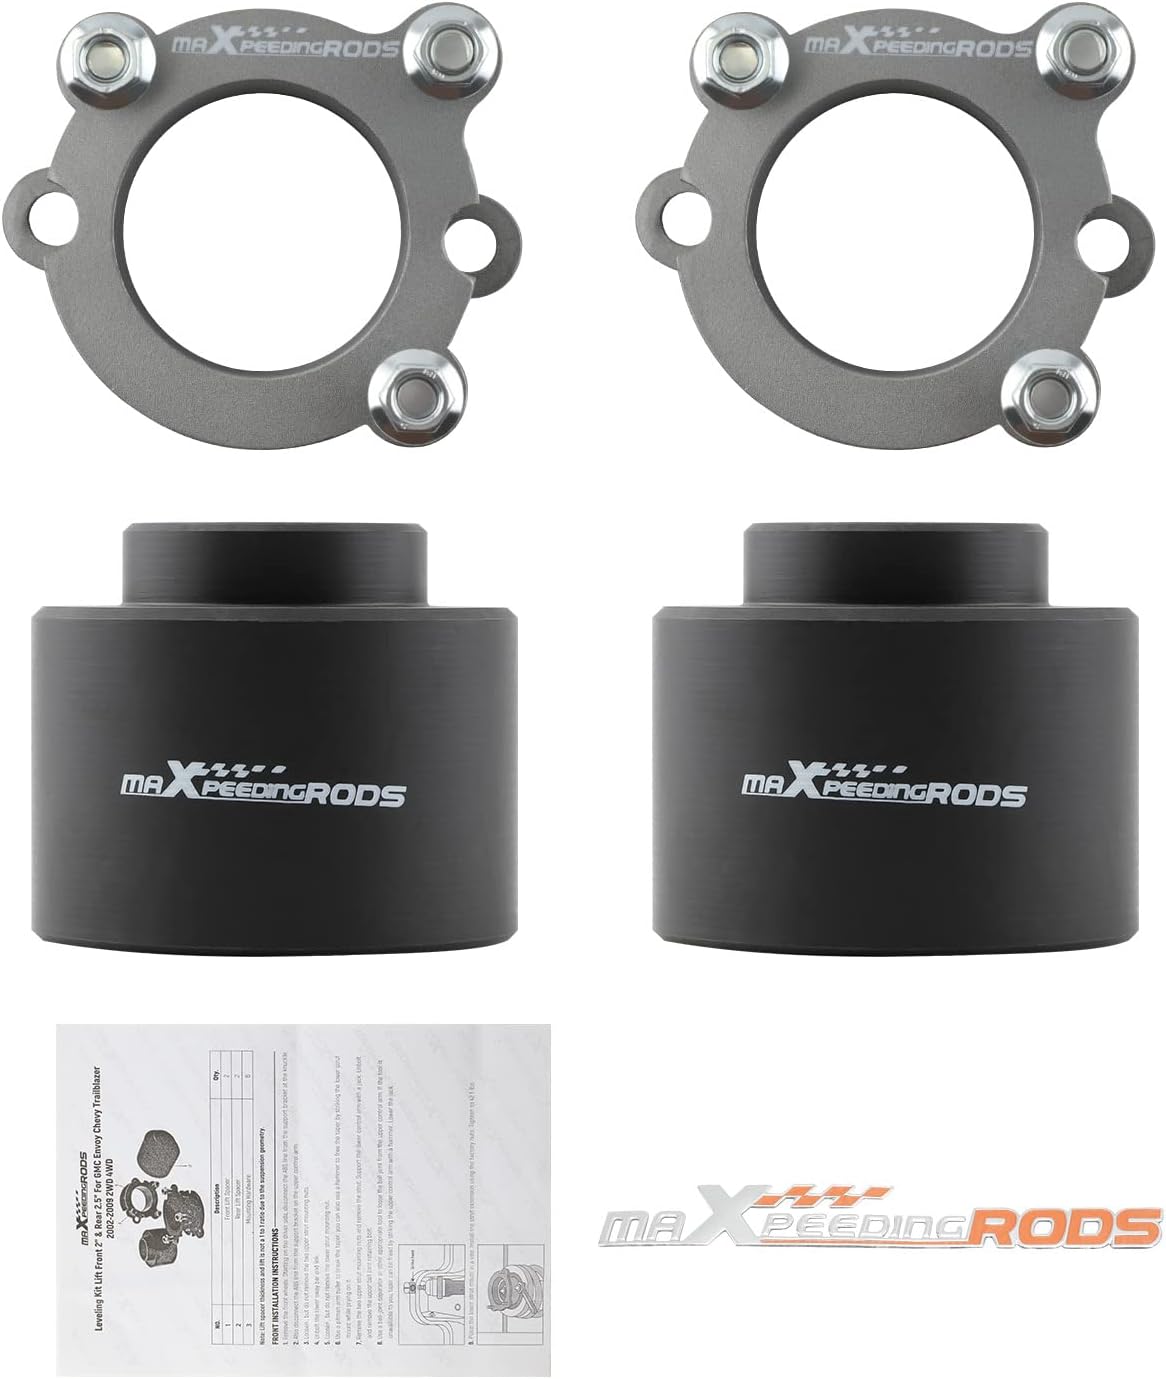
Figure 3.2: Kit contents including spacers and a basic instruction guide.
Material and Construction
The lift spacers are manufactured from high-grade carbon steel, ensuring resistance to abrasion, corrosion, and impact. They are designed for high strength and durability under demanding driving conditions.

Figure 3.3: Detail of the front strut spacer, showing zinc-plated hardware and anti-corrosion coating for enhanced durability.

Figure 3.4: Detail of a rear coil spacer, made from durable carbon steel.
4. Installation Guide
This leveling kit is designed for bolt-on installation and is compatible with stock shocks. The spacers can be directly bolted onto the top of the struts without requiring disassembly of the strut assembly.
While the installation is designed to be straightforward, professional installation is highly recommended to ensure proper alignment and safety. Incorrect installation can lead to vehicle instability or damage.
Important Installation Notes:
- Always use appropriate safety equipment, including jack stands and wheel chocks.
- Ensure the vehicle is on a level surface before beginning work.
- Follow all torque specifications for fasteners as per your vehicle's service manual.
- After installation, a professional wheel alignment is mandatory to correct suspension geometry and prevent premature tire wear.
Understanding Lift Height vs. Spacer Thickness:
Due to suspension geometry, the actual lift height achieved will not be a 1:1 ratio with the spacer thickness. The design of the strut spacer alters the angle of the lower control arm, providing an additional lift beyond the physical thickness of the spacer itself.

Figure 4.1: Explanation of lift height versus spacer thickness.
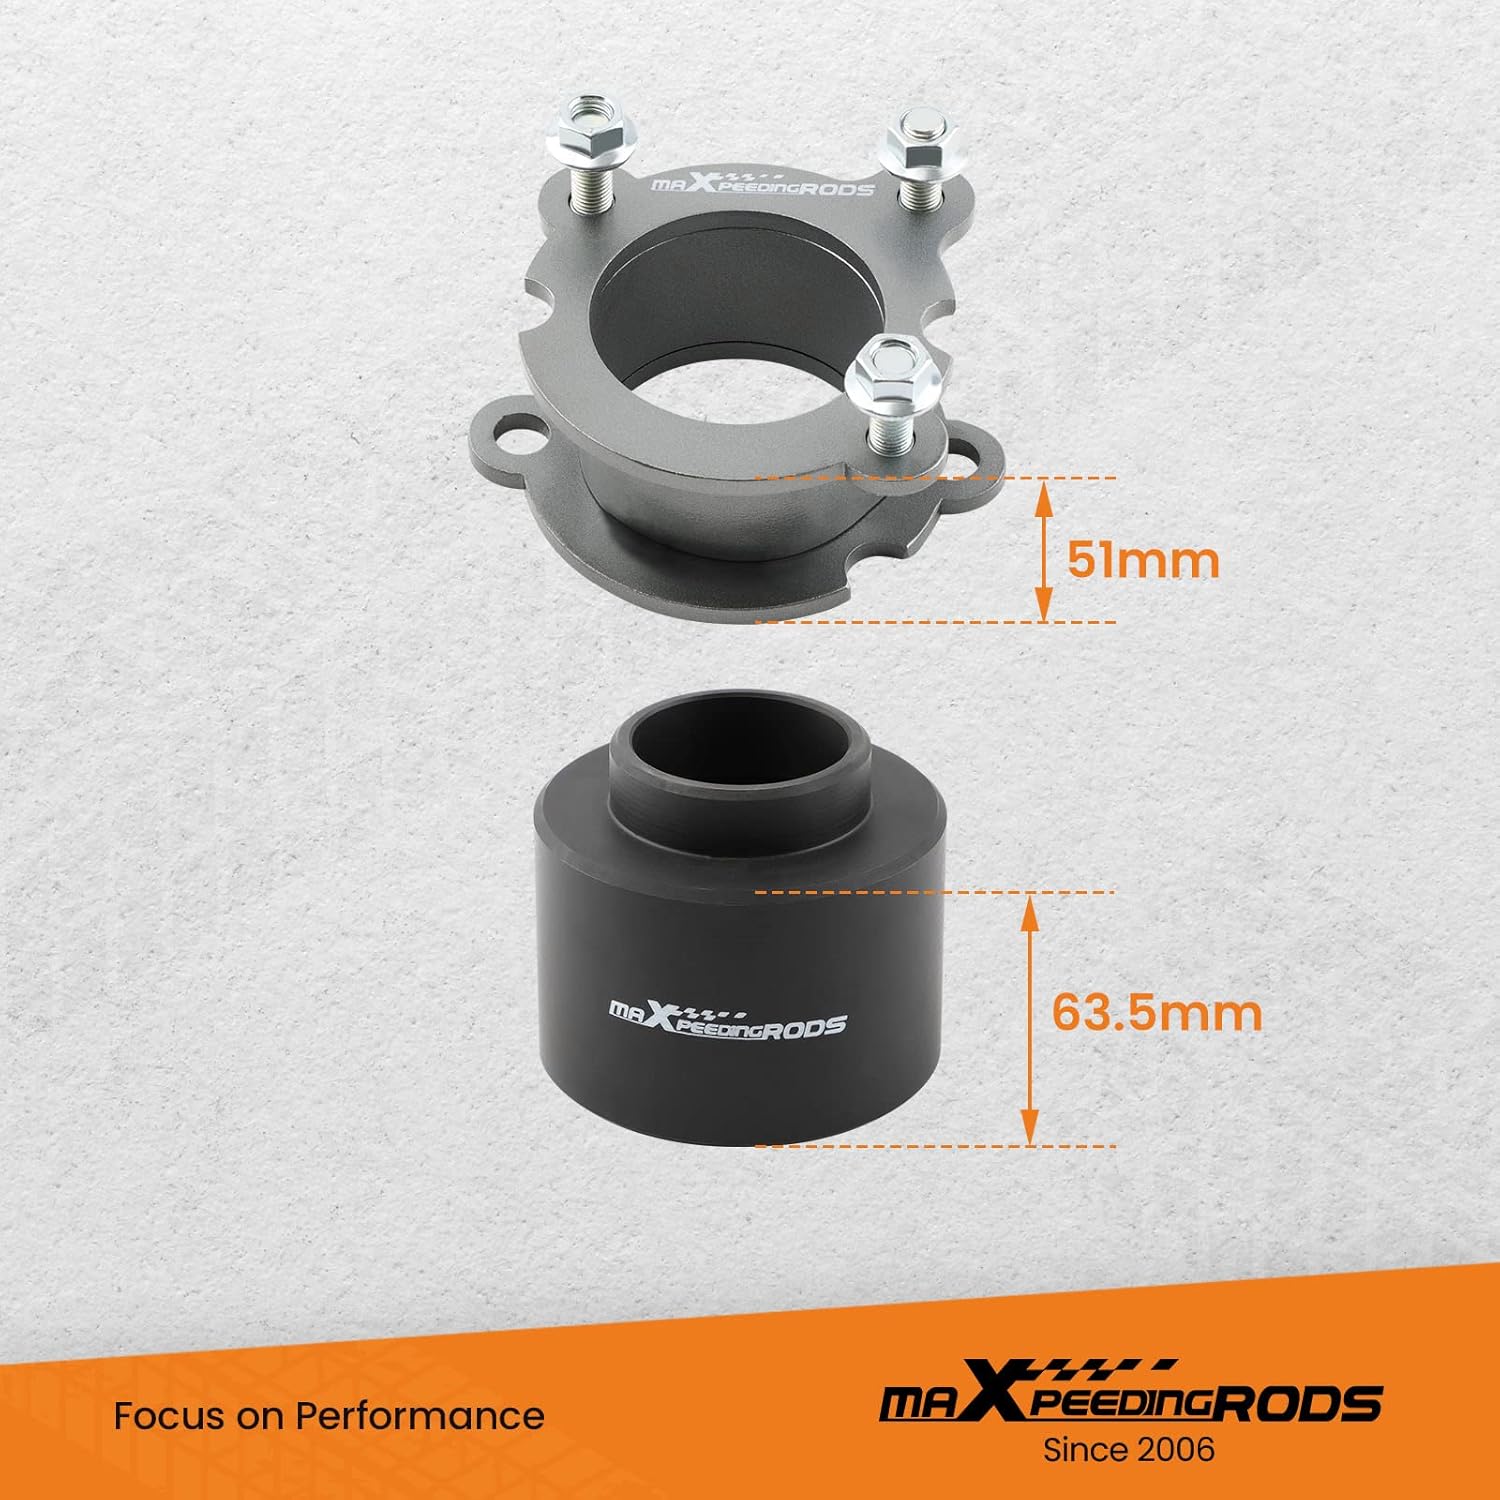
Figure 4.2: Approximate dimensions of the front and rear spacers.
5. Operating Benefits
Once installed, your maXpeedingrods leveling kit provides several operational benefits:
- Increased Ground Clearance: Adds extra ground clearance, which can be beneficial for off-road driving or navigating uneven terrain.
- Accommodates Larger Tires: Allows for the fitment of larger tires, up to 32 inches, enhancing both aesthetics and off-road capability.
- Eliminates Factory Rake: Levels the vehicle by raising the front to match the rear, providing a more aggressive and balanced stance.
- Maintains Ride Quality: Designed to maintain the smooth factory ride quality, ensuring comfort during daily driving.

Figure 5.1: Visual comparison of vehicle stance before and after leveling kit installation.
6. Maintenance
To ensure the longevity and optimal performance of your leveling kit and vehicle's suspension, consider the following maintenance practices:
- Regular Inspection: Periodically inspect all components of the leveling kit and surrounding suspension parts for any signs of wear, damage, or loose fasteners.
- Cleaning: Keep the components clean from excessive dirt, mud, and road salt, especially if driving in harsh conditions.
- Torque Checks: Re-check the torque of all installation fasteners after the first 500 miles and then periodically as part of your routine vehicle maintenance.
7. Troubleshooting
If you experience any issues after installing your leveling kit, consider the following common troubleshooting steps:
- Uneven Stance: Ensure all components are installed correctly and on the appropriate side of the vehicle. Verify the correct kit was purchased for your specific vehicle model and drivetrain (2WD/4WD).
- Unusual Noises: Check for loose bolts or components making contact with other parts of the suspension or chassis. Re-torque all fasteners.
- Poor Ride Quality: Confirm that the kit is compatible with your stock shocks. If issues persist, consult with a professional mechanic.
- Tire Wear Issues: This is often a sign of incorrect alignment. Ensure a professional wheel alignment was performed after installation.
For persistent issues or concerns, please contact maXpeedingrods customer support.
8. Specifications
| Feature | Specification |
|---|---|
| Brand | maXpeedingrods |
| Model Number | BI94OA |
| Auto Part Position | Front |
| Material | Carbon Steel |
| Included Components | Rear leveling kit, shocks (spacers for shocks) |
| Maximum Front Lifting Height | 3.5 Inches |
| Maximum Rear Lifting Height | 2.5 Inches |
| Item Weight | 5.78 pounds |
| Product Dimensions | 10.63 x 7.48 x 5.91 inches |
9. Customer Support and Warranty
maXpeedingrods is committed to providing excellent customer service. If you have any questions regarding your leveling kit, installation, or require technical assistance, please do not hesitate to contact us.
Customer Service: 24/7 customer service is available. Please refer to the contact information provided with your purchase or on the official maXpeedingrods website.
Warranty Information: This product is covered by a return policy allowing for refund or replacement within 30 days of purchase. For detailed warranty terms and conditions, please refer to the documentation included with your product or visit the maXpeedingrods official website.
Ask a question about this manual
Ask about setup, troubleshooting, compatibility, parts, safety, or missing instructions. Manuals+ will review the question and use this page’s manual context to help answer it.