
1. Introduction
This manual provides detailed instructions for the safe installation, operation, and maintenance of your POCHFAN 1185X 52-inch brushed nickel low profile ceiling fan. Please read all instructions carefully before beginning installation and retain this manual for future reference.
This modern flush mount ceiling fan features a quiet DC motor, dimmable 3CCT LED lighting, and a convenient remote control. Its reversible function allows for year-round comfort.
2. Product Features
- Sleek Design: Modern brushed nickel finish with a low-profile, flush mount design.
- Quiet DC Motor: Constructed with thickened silicon steel sheet, thickened copper wire, and precision double bearings for quiet operation (below 30 decibels) and long life.
- Dimmable LED Light: Integrated 24W LED light with adjustable brightness (0%-100%) and three color temperatures (Warm Light 3000K, Day Light 4000K, Cool Light 6500K).
- Reversible Function: Easily switch between downdraft mode for cooling in summer and updraft mode for circulating warm air in winter via remote control.
- 6 Fan Speeds: Offers six speed settings for optimal airflow, with a maximum airflow of over 4500 CFM.
- Timer Function: Includes 1-hour, 3-hour, and 6-hour timer settings for convenience.
- Double-Sided Blades: Blades feature a silver side and a white side, allowing for customization to match room decor.
3. Package Contents
Please ensure all components are present before beginning installation. Refer to your product packaging for a complete list of included items. Key components typically include:
- Ceiling Fan Motor Assembly
- Fan Blades (52-inch, double-sided)
- Mounting Bracket
- LED Light Kit
- Light Diffuser
- Remote Control (2 AAA batteries included)
- Hardware Pack (screws, washers, wire nuts)
- User Manual
4. Specifications
| Feature | Specification |
|---|---|
| Brand | POCHFAN |
| Model Name | 1185X |
| Color | Brushed Nickel |
| Product Dimensions | 52"D x 52"W x 10.8"H |
| Blade Length | 52 Inches |
| Power Source | AC |
| Motor Type | DC Inverter Motor |
| Noise Level | 30 Decibels |
| Air Flow Capacity | 4500 Cubic Feet Per Minute |
| Light Type | 24W Dimmable LED (3CCT) |
| Control Method | Remote |
| Number of Power Levels | 6 |
| Item Weight | 16.12 pounds |
5. Installation Guide
Before installation, ensure the power is turned off at the circuit breaker to prevent electrical shock. If you are unsure about electrical wiring, consult a qualified electrician.
5.1 Mounting the Bracket
Remove the existing mounting bracket from your junction box and install the new mounting bracket provided with the fan. Secure it firmly to the ceiling junction box.

Image Description: A close-up view of a ceiling junction box with a black mounting bracket attached. Wires (green, white, black) are visible, indicating electrical connections. This image illustrates the initial step of securing the fan's mounting bracket to the ceiling.
5.2 Wiring Connections
Connect the fan's wiring to your household wiring according to the electrical code and the fan's instructions. Typically, this involves connecting ground, neutral, and live wires. Once connected, carefully tuck the wires into the junction box and secure the fan's housing to the mounting bracket using the provided screws.
Video Description: A video demonstrating the wiring process for the ceiling fan. Hands are shown connecting various colored wires (white, black, green) with wire nuts, then carefully tucking them into the ceiling's junction box. The fan's main body is then lifted and secured to the mounting bracket with screws, completing the main fan assembly installation.
5.3 Attaching Fan Blades
Attach the fan blades to the motor assembly using the included screws and washers. Ensure each blade is securely fastened. The blades are double-sided, allowing you to choose between a silver or white finish to match your decor.

Image Description: A modern 52-inch brushed nickel ceiling fan with five silver blades installed in a contemporary living room. The fan is flush-mounted to the ceiling, providing both illumination and air circulation. This image showcases the fan's aesthetic in a typical home setting.
5.4 Installing the LED Light Kit and Diffuser
Connect the LED light kit's wiring to the fan's internal wiring. Secure the light kit to the fan assembly with the designated screws. Finally, twist the light diffuser back onto the fan to cover the LED light unit.

Image Description: A diagram illustrating the dimensions of the 52-inch ceiling fan (52 inches wide, 10.8 inches high) and close-ups of its key components: an acrylic shade, a quiet motor, and an LED integrated light kit. This provides a visual breakdown of the fan's physical attributes and internal parts.
6. Operating Instructions
Your POCHFAN ceiling fan is operated using the included remote control. Ensure the remote has 2 AAA batteries installed (included).
6.1 Remote Control Functions

Image Description: A close-up of the POCHFAN remote control, clearly labeling its various buttons: Fan Speed (1-6), Fan OFF, Light ON/OFF, Forward/Reverse, Light Brightness +/-, and Fan Timer (1H/3H/6H Setting). This visual guide helps users understand each button's function.
- Power Button (Center): Turns the fan ON/OFF.
- Fan Speed (1-6): Select desired fan speed from 1 (lowest) to 6 (highest).
- Light ON/OFF: Toggles the LED light on or off.
- Light Brightness (+/-): Adjusts the brightness of the LED light from 0% to 100%.
- Color Temperature (Light button press): Each press of the light button cycles through Warm Light (3000K), Day Light (4000K), and Cool Light (6500K).
- Forward/Reverse: Changes the direction of the fan blade rotation for seasonal use.
- Timer (1H/3H/6H): Sets the fan to automatically turn off after 1, 3, or 6 hours.
Video Description: A video demonstrating the remote control functions of the ceiling fan. A hand is shown pressing buttons on the remote to change fan speeds, turn the light on and off, and adjust the light's color temperature and brightness. The fan and light respond to each command, illustrating the ease of use.

Image Description: A visual representation of the fan's lighting capabilities, showing the 3-color temperature selection (Warm Light 3000K, Natural Light 4000K, Cold White Light 6500K) and a smooth dimmable range from 20% to 100%. A remote control is also pictured, highlighting its role in these adjustments.
6.2 Reversible Function
The fan's reversible function allows you to optimize airflow for different seasons:
- Summer Mode (Downdraft): Blades rotate counter-clockwise, pushing cool air downwards to create a refreshing breeze.
- Winter Mode (Updraft): Blades rotate clockwise, drawing cool air up towards the ceiling and circulating warm air throughout the room.
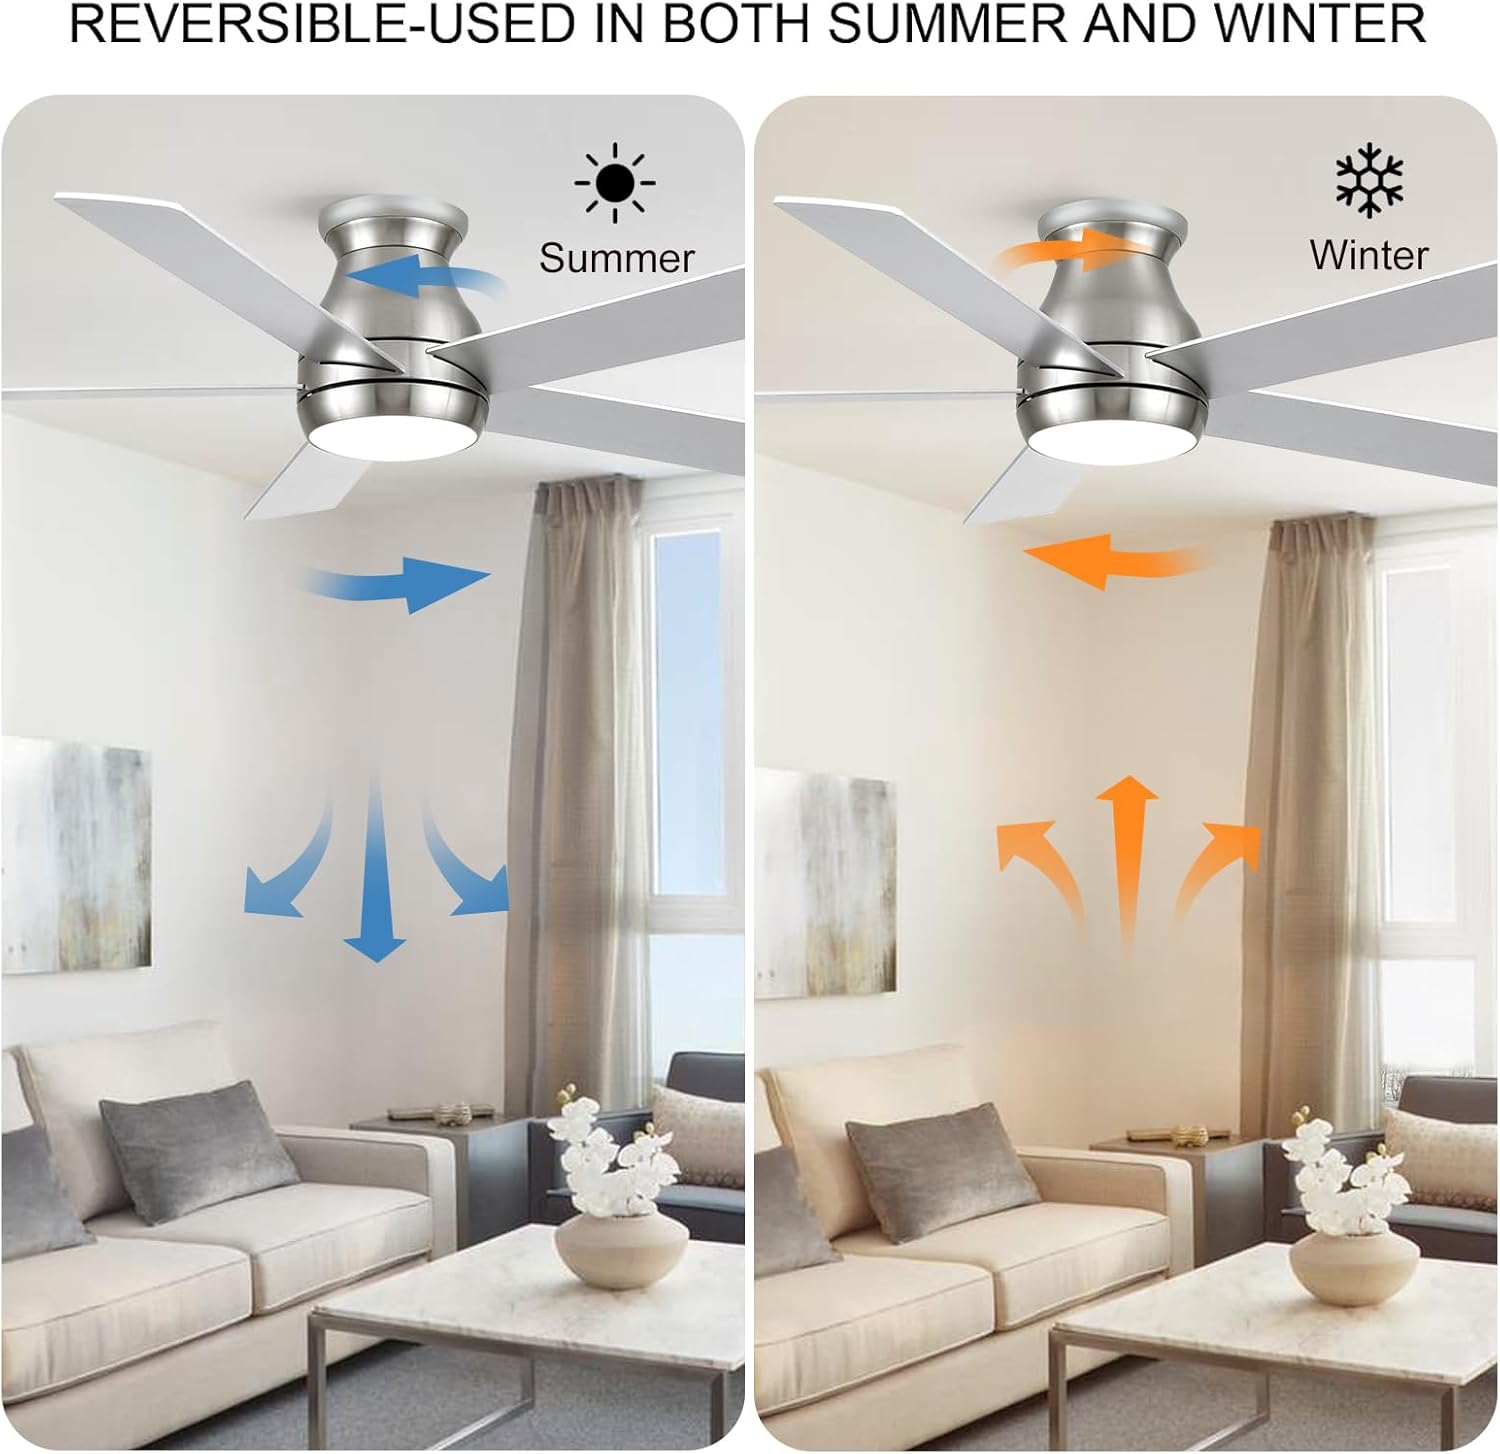
Image Description: A split image demonstrating the reversible function of the ceiling fan. The left side shows blue arrows indicating downdraft for summer cooling, while the right side shows orange arrows indicating updraft for winter heat circulation. The fan's appearance remains consistent in both scenarios.
7. Maintenance
Regular maintenance ensures optimal performance and longevity of your ceiling fan.
- Cleaning: Use a soft, damp cloth to clean the fan blades and motor housing. Do not use abrasive cleaners or solvents.
- Blade Inspection: Periodically check that all blade screws are tight. Loose blades can cause wobbling and noise.
- Light Diffuser: The light diffuser can be removed by twisting for cleaning. Ensure it is securely reattached.
- No Lubrication Needed: The DC motor is permanently lubricated and does not require additional oiling.
8. Troubleshooting
If you experience issues with your fan, refer to the following common problems and solutions:
| Problem | Possible Cause | Solution |
|---|---|---|
| Fan does not start | No power to the fan; Loose wire connections; Remote control battery low. | Check circuit breaker; Verify all wire connections are secure; Replace remote control batteries. |
| Fan wobbles | Loose blade screws; Improperly balanced blades; Loose mounting bracket. | Tighten all blade screws; Use a balancing kit (not included) to balance blades; Ensure mounting bracket is securely fastened. |
| Light does not work | Loose wire connection to light kit; Faulty LED light kit. | Check light kit wiring connections; Contact customer service for replacement if LED is faulty. |
| Remote control not responding | Low or dead batteries; Remote not paired with fan. | Replace batteries; Refer to remote pairing instructions in the full manual (if applicable). |
9. Warranty and Support
POCHFAN provides replacement service for any non-working, missing, or damaged parts within 2 years of purchase. For any needs or questions, please contact customer service. You can typically find a "Get help with order" button on your order page or click on "Help" at the bottom of the Amazon page.