
1. Introduction
Thank you for choosing the SWAREY 6.5L Professional Ultrasonic Cleaner. This device utilizes ultrasonic waves to provide thorough and efficient cleaning for a wide range of items. Please read this manual carefully before operation to ensure safe and optimal use of the product. Keep this manual for future reference.

Image 1.1: The SWAREY 6.5L Professional Ultrasonic Cleaner, showcasing its stainless steel construction and digital control panel.
2. Safety Instructions
To prevent personal injury or damage to the unit, always observe the following safety precautions:
- Do not operate the unit without liquid in the tank.
- Ensure the unit is placed on a stable, level surface.
- Do not immerse the main unit in water or other liquids.
- Keep out of reach of children.
- Use only appropriate cleaning solutions. Avoid flammable, corrosive, or abrasive liquids.
- Unplug the unit from the power outlet before filling, emptying, or cleaning.
- Do not touch the tank or cleaning solution during operation, especially when the heating function is active.
- If the unit is damaged, do not operate it. Contact customer support.
- Ensure proper ventilation during operation.
3. Product Overview
3.1 Key Features
- Capacity: 6.5 liters, with a tank size of 30 x 15 x 15 cm.
- Material: Constructed from high-quality 304 stainless steel for durability and resistance to weak acids and alkalis.
- Advanced Transducer Technology: Features 3 industrial-grade transducers (3 x 60W = 180W ultrasonic power) with a piezoelectric sandwich structure for enhanced cleaning efficiency.
- Powerful Cleaning: Operates at an ultrasonic frequency of 40 kHz with 180W ultrasonic power and 300W heating power.
- Digital Control: Equipped with a digital display for precise time (0-99 min) and temperature (0-80°C) control.
- Degas Function: Intermittently removes gas from the liquid to reduce bubble resistance and improve cleaning effectiveness.
- Wide Application: Suitable for cleaning jewelry, glasses, waterproof watches, carburetors, hardware, 3D print models, screws, circuit boards, industrial tools, and more.
3.2 Components
The SWAREY Ultrasonic Cleaner includes the main unit, a stainless steel lid, a cleaning basket, and a power cord.

Image 3.1: The ultrasonic cleaner unit shown with its accessories, including the cleaning basket and power cable.
3.3 Digital Control Panel
The control panel features a digital display for temperature and time settings, along with buttons for various functions.
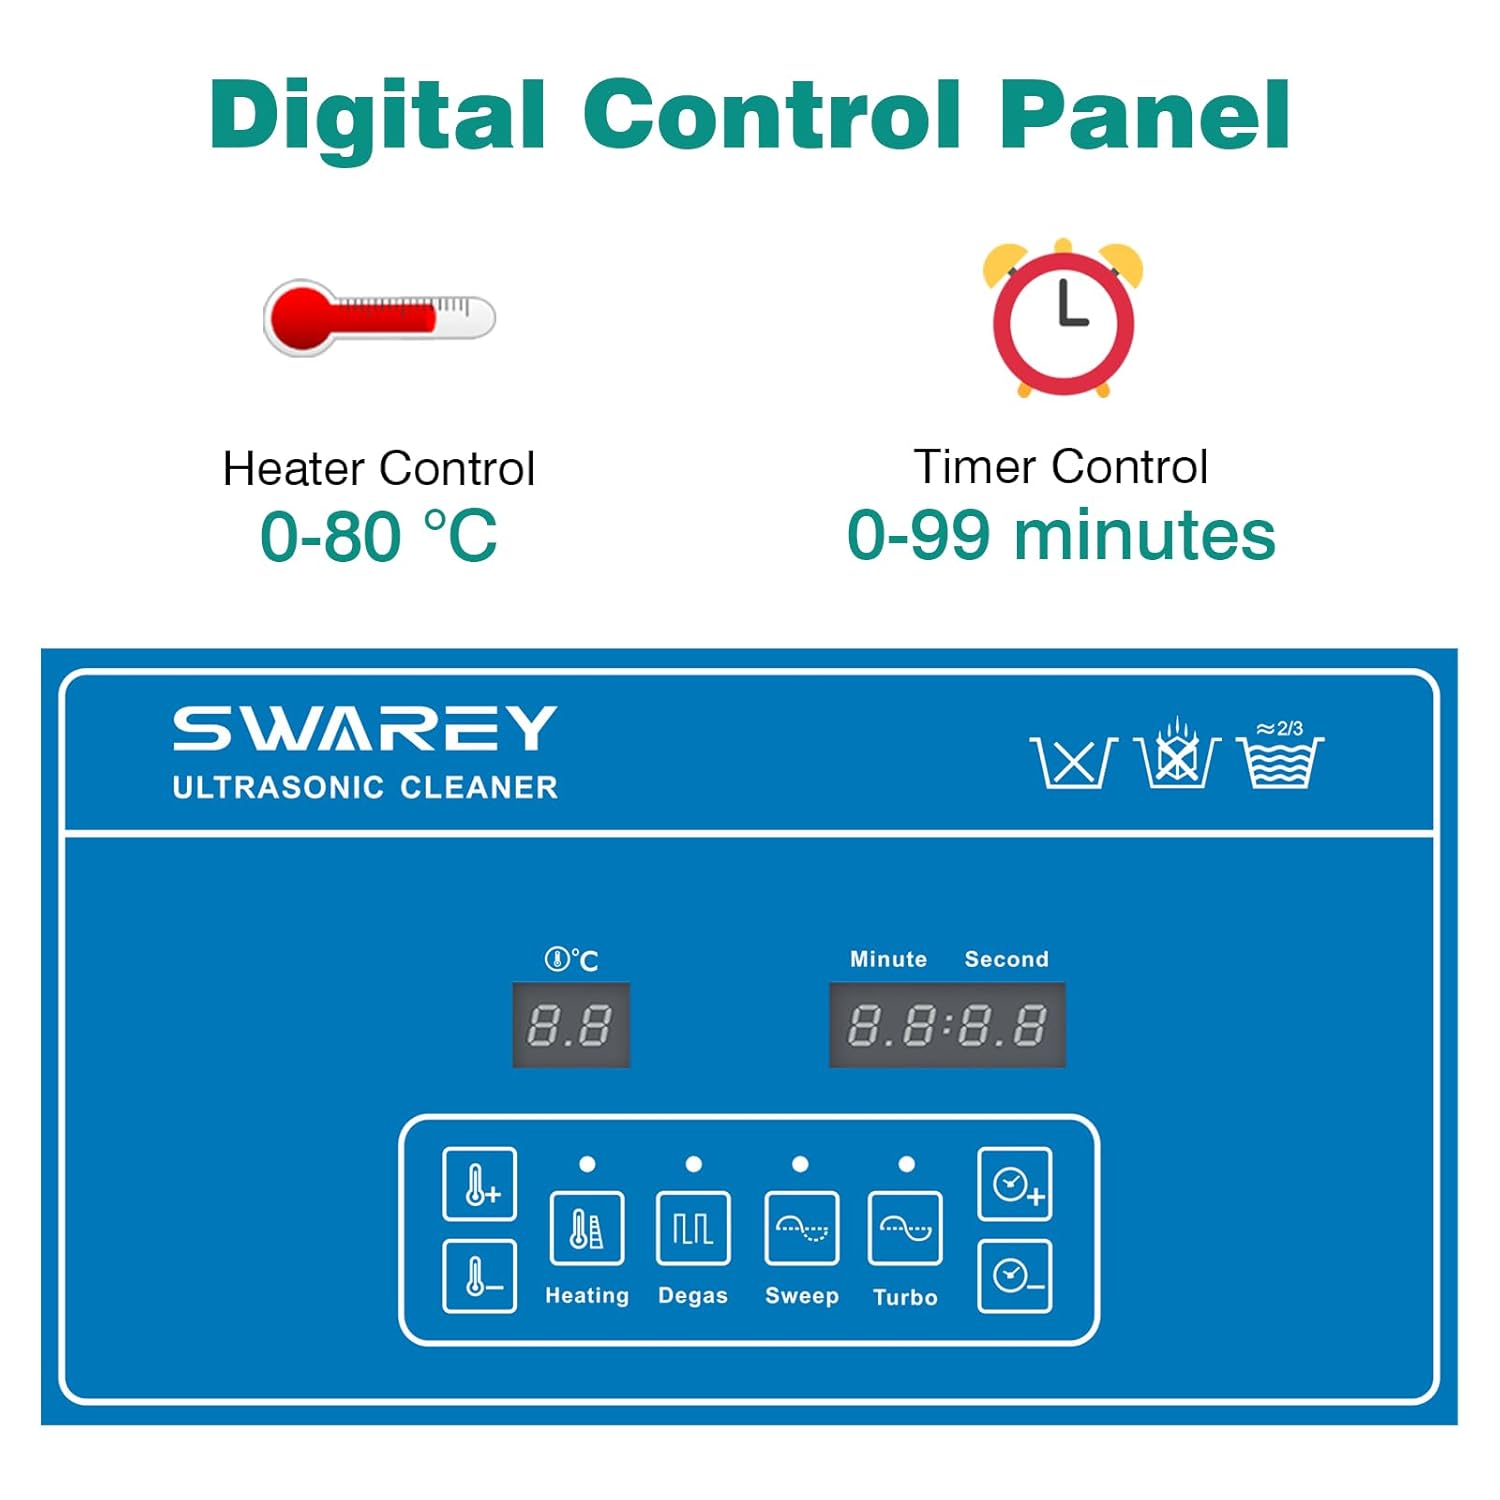
Image 3.2: Detailed view of the digital control panel, showing temperature and timer displays, and function buttons for heating, degas, sweep, and turbo modes.
3.4 Product Dimensions

Image 3.3: A diagram illustrating the external and internal dimensions of the ultrasonic cleaner, including the tank size of 30cm x 15cm x 15cm (11.81in x 5.9in x 5.9in).
4. Setup
- Placement: Place the ultrasonic cleaner on a firm, level, and dry surface. Ensure there is adequate ventilation around the unit.
- Fill the Tank: Open the lid and fill the stainless steel tank with an appropriate cleaning solution. Do not exceed the maximum fill line (approximately 2/3 full). Ensure the items to be cleaned will be fully submerged.
- Connect Power: Plug the power cord into the unit's power inlet, then connect it to a grounded electrical outlet.
- Prepare Items: Place the items to be cleaned into the cleaning basket. Lower the basket into the tank, ensuring items are submerged but not touching the bottom of the tank directly.
5. Operating Instructions
5.1 Basic Operation
- Power On: Press the main power switch (usually located on the back or side of the unit) to turn on the cleaner. The digital display will illuminate.
- Set Temperature: Use the 'Heating' buttons (up/down arrows) to set the desired cleaning temperature (0-80°C). Heating can significantly improve cleaning results, especially for oil and wax removal.
- Set Time: Use the 'Timer' buttons (up/down arrows) to set the desired cleaning duration (0-99 minutes).
- Start Cleaning: Press the 'Start/Stop' button to begin the ultrasonic cleaning cycle. The unit will start generating ultrasonic waves and heating (if set).
- Stop Cleaning: The unit will automatically stop when the timer expires. You can also press the 'Start/Stop' button at any time to pause or end the cycle.
5.2 Advanced Functions
- Degas Function: Press the 'Degas' button to activate the degas function. This function operates intermittently (6 seconds on, 2 seconds off) to remove dissolved gases from the cleaning solution, which can improve ultrasonic cavitation and cleaning efficiency. It is recommended to use this function for a few minutes when using fresh cleaning solution.
- Sweep Function: (If available on your model) The 'Sweep' function varies the ultrasonic frequency slightly to ensure more uniform cleaning throughout the tank and prevent standing waves.
- Turbo Function: (If available on your model) The 'Turbo' function may provide a higher power output or a more intense cleaning cycle for stubborn dirt.

Image 5.1: Illustrates the interaction with the control panel for setting parameters.

Image 5.2: Depicts the heating process, which is effective for removing oil and wax from items.
5.3 After Cleaning
- Once the cleaning cycle is complete, turn off the unit and unplug it from the power outlet.
- Carefully lift the cleaning basket out of the tank.
- Rinse the cleaned items with clean water to remove any residual cleaning solution.
- Dry the items thoroughly before storage or use.
- To empty the tank, use the drain valve located on the side of the unit. Collect the used solution in a suitable container and dispose of it according to local regulations.
6. Maintenance
- Cleaning the Tank: After each use, especially with dirty solutions, clean the stainless steel tank. Wipe the interior with a soft cloth. Do not use abrasive cleaners or steel wool.
- Exterior Cleaning: Wipe the exterior of the unit with a damp cloth. Do not spray water directly onto the control panel or electrical components.
- Storage: Store the unit in a cool, dry place when not in use. Ensure the tank is empty and dry.
- Regular Inspection: Periodically check the power cord for any signs of damage.
7. Troubleshooting
| Problem | Possible Cause | Solution |
|---|---|---|
| Unit does not power on | No power supply; Power switch off; Fuse blown | Check power connection; Turn on power switch; Check and replace fuse (if applicable and safe to do so) |
| No ultrasonic sound/action | Tank empty; Insufficient liquid; Transducer issue | Ensure tank is filled above MIN line; Add more liquid; Contact customer support |
| Poor cleaning results | Incorrect cleaning solution; Insufficient cleaning time/temperature; Overloaded tank; Items touching tank bottom | Use appropriate solution; Increase time/temperature; Reduce load; Use cleaning basket to suspend items |
| Heating not working | Heating function not activated; Heater malfunction | Ensure heating is set and activated; Contact customer support |
8. Specifications
| Specification | Value |
|---|---|
| Model | SS6 |
| Tank Capacity | 6.5 Liters |
| Ultrasonic Frequency | 40 kHz |
| Ultrasonic Power | 180 W (3 x 60W transducers) |
| Heating Power | 300 W |
| Timer Setting | 0-99 minutes (Digital) |
| Temperature Setting | 0-80°C (Digital) |
| Tank Material | Stainless Steel 304 |
| Overall Dimensions (approx.) | 41.5 x 36.5 x 26.5 cm |
| Weight (approx.) | 5.86 kg |
9. Warranty and Support
For warranty information, technical support, or service inquiries, please refer to the warranty card included with your product or visit the official SWAREY website. Please have your model number (SS6) and purchase date available when contacting support.