1. Introduction
This manual provides comprehensive instructions for the installation, operation, and maintenance of your Weiser Powerbolt 2 Satin Chrome Keyless Entry Door Lock and the accompanying SmartKey Re-Key Kit. The Powerbolt 2 offers convenient keyless entry with a personalized access code and motorized one-touch locking. The SmartKey Re-Key Kit allows for quick and easy re-keying of your Weiser locks without professional assistance.
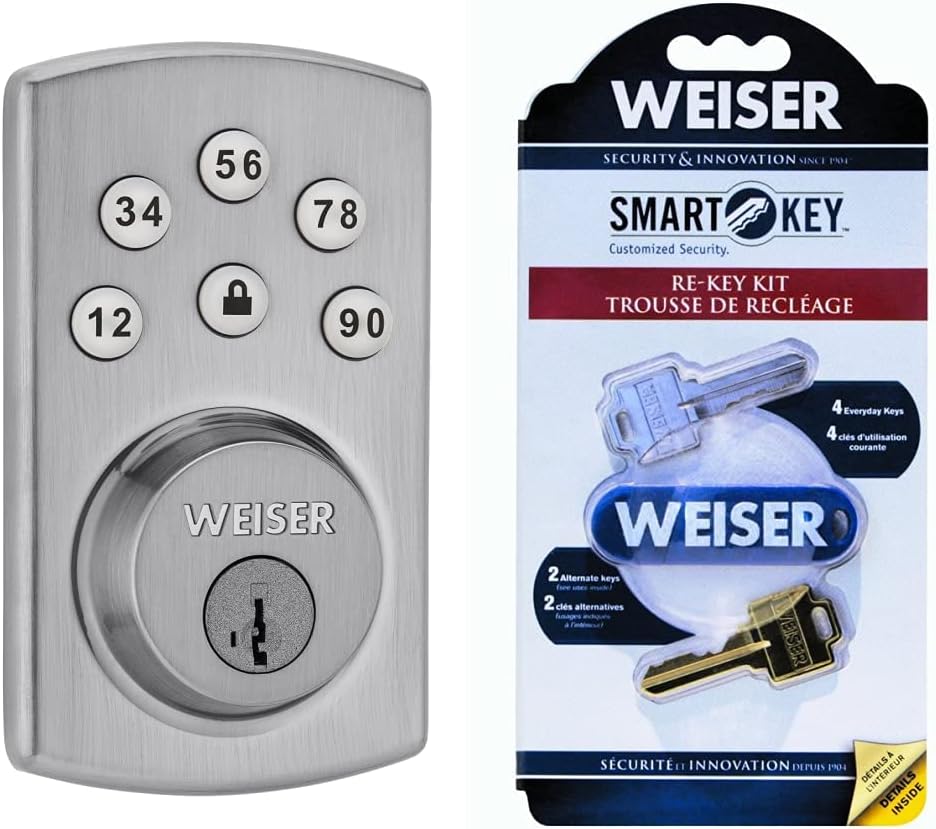
Figure 1: Weiser Powerbolt 2 Keyless Entry Door Lock and SmartKey Re-Key Kit Bundle. This image displays both the Powerbolt 2 deadbolt with its keypad and the SmartKey Re-Key Kit packaging, highlighting the complete security solution.
The Powerbolt 2 features a backlit keypad for enhanced visibility in low light conditions and an automatic locking function after 30 seconds for added security. It supports up to 6 user codes and operates on 4 AA batteries. The SmartKey technology provides advanced protection against common break-in techniques like picking and bumping, and allows you to re-key your lock in seconds.
2. Important Safety Information
Please read and understand all instructions before installing and using this product. Keep this manual for future reference.
- Do not attempt to disassemble or modify the lock. This may void the warranty and compromise security.
- Use only the specified battery type (4 AA alkaline batteries). Do not mix old and new batteries or different types of batteries.
- Ensure all components are securely fastened during installation to prevent malfunction.
- Protect the keypad from excessive moisture or direct water exposure.
- Regularly check battery levels and replace batteries as needed to ensure continuous operation.
- Keep your access codes confidential and change them periodically for enhanced security.
3. Package Contents
Verify that all items listed below are included in your package:
- Weiser Powerbolt 2 Keyless Entry Deadbolt (Exterior Keypad Assembly, Interior Assembly, Latch, Strike Plate)
- Weiser SmartKey Re-Key Kit (Includes 2 sets of keys: 4 Everyday Keys, 2 Alternate Keys, and SmartKey tool)
- Mounting Screws
- Installation Guide / User Manual (this document)
- 4 AA Batteries (typically not included, but required for operation)
4. Setup and Installation
4.1 Powerbolt 2 Deadbolt Installation
The Powerbolt 2 is designed for easy installation with just a screwdriver. Ensure your door has a standard bore hole of 2 1/8 inches and a door thickness between 1 3/8 inches and 1 3/4 inches.
- Prepare the Door: Check the door's bore hole and backset. Adjust the latch if necessary to fit the backset.
- Install the Latch: Insert the latch into the door edge and secure it with screws. Ensure the latch bolt is facing the correct direction.
- Install Exterior Assembly: Feed the cable and spindle through the bore hole. Position the exterior keypad assembly flush against the door.
- Install Interior Mounting Plate: Secure the interior mounting plate to the exterior assembly using the provided screws. Ensure the cable is routed correctly.
- Connect Interior Assembly: Connect the cable from the exterior assembly to the interior assembly. Align the spindle with the slot on the interior assembly.
- Secure Interior Assembly: Attach the interior assembly to the mounting plate with screws.
- Install Batteries: Insert 4 new AA alkaline batteries into the battery pack, observing polarity.
- Perform Door Handing Process: This step is crucial for the lock to learn the orientation of your door. Follow the specific instructions in the included quick start guide for your Powerbolt 2 model. Typically, this involves pressing a button on the interior assembly while the door is open and the latch is extended.

Figure 2: Weiser Powerbolt 2 installed on a door. This image shows the sleek appearance of the Powerbolt 2 deadbolt on a residential door, demonstrating its integration into a home security setup.
4.2 SmartKey Re-Key Kit Usage
The SmartKey Re-Key Kit allows you to re-key your Weiser lock in three easy steps without removing it from the door. This is useful for changing keys after moving or for consolidating multiple locks to a single key.

Figure 3: Weiser SmartKey Re-Key Kit packaging back. This image displays the rear of the SmartKey Re-Key Kit packaging, which typically includes visual instructions for the re-keying process.
- Insert Current Key: Insert your currently working key fully into the cylinder.
- Insert SmartKey Tool: While the current key is still in the cylinder, insert the SmartKey tool firmly and fully into the SmartKey hole. You will feel a slight click.
- Remove Current Key & Insert New Key: Remove the current key. Immediately insert the new key (from the SmartKey kit) fully into the cylinder. Turn the new key 90 degrees clockwise, then 90 degrees counter-clockwise. Remove the new key. Your lock is now re-keyed to the new key.
Note: Ensure the door is unlocked before starting the re-keying process. Test the new key multiple times before closing the door.
5. Operating Instructions
5.1 Powerbolt 2 Keyless Entry

Figure 4: Close-up of Powerbolt 2 keypad. This image provides a detailed view of the Powerbolt 2's backlit keypad, showing the numbered buttons and the lock/unlock button.
- Unlocking the Door: Enter your 4-8 digit user code on the keypad. The deadbolt will retract, and the door will unlock.
- Locking the Door:
- One-Touch Locking: Press the "Lock" button (padlock icon) on the keypad. The deadbolt will extend.
- Automatic Locking: The lock will automatically extend the deadbolt 30 seconds after being unlocked if no further action is taken. This feature can typically be enabled/disabled via programming.
- Using the Key: The lock can also be operated with a traditional key from the outside. From the inside, use the turn-button.
5.2 Programming User Codes
The Powerbolt 2 allows for up to 6 unique user codes. Refer to your specific model's quick start guide for detailed programming steps, as these can vary slightly. Generally, the process involves:
- Enter Programming Mode: Press the "Program" button on the interior assembly (usually located near the battery pack).
- Enter Master Code: Input your existing Master Code (if set) or the default programming code.
- Add New User Code: Follow the prompts to enter a new 4-8 digit user code.
- Confirm: The lock will typically beep or flash to confirm successful programming.
Important: It is highly recommended to change the default Master Code immediately after installation for security purposes.

Figure 5: Powerbolt 2 features graphic. This graphic illustrates key features of the Powerbolt 2, including One-Touch Locking, Master Code, Bump-Proof, User Codes, Pick-Proof, and Kick-In Resistant capabilities, highlighting its robust security.
6. Maintenance
- Battery Replacement: The Powerbolt 2 operates on 4 AA alkaline batteries. When the batteries are low, the lock will typically emit a series of beeps or a red light will flash after a successful code entry. Replace all four batteries simultaneously.
- Cleaning: Clean the keypad and lock exterior with a soft, damp cloth. Avoid abrasive cleaners or solvents that could damage the finish or electronic components.
- Lubrication: Periodically lubricate the latch bolt and deadbolt mechanism with a silicone-based lubricant to ensure smooth operation. Do not lubricate the cylinder itself.
7. Troubleshooting
| Problem | Possible Cause | Solution |
|---|---|---|
| Lock does not respond to keypad entry. | Dead batteries; incorrect code entered; lock in programming mode. | Replace all 4 AA batteries. Ensure correct code is entered. Exit programming mode. |
| Deadbolt does not extend/retract fully. | Misalignment with strike plate; low batteries; door handing process not completed. | Check strike plate alignment. Replace batteries. Perform door handing process. |
| Keypad lights up but lock doesn't operate. | Internal cable disconnected; mechanical binding. | Recheck internal cable connection during installation. Ensure no obstructions. |
| Cannot re-key lock with SmartKey Kit. | Incorrect current key; SmartKey tool not fully inserted; lock not unlocked. | Ensure you are using a working key. Insert SmartKey tool firmly until it clicks. Ensure lock is in the unlocked position. |
8. Specifications
- Product Type: Keyless Entry Door Lock / Deadbolt Lock + Re-Key Kit
- Brand: Weiser
- Model: Powerbolt 2
- Finish: Satin Chrome (Polished)
- Material: Metal
- Number of Pieces: 2 (Lock and Re-Key Kit)
- Special Features: Keyless Entry, Backlit Keypad, Motorized Auto Lock, SmartKey Re-Key Technology
- User Codes: Up to 6 programmable user codes
- Power Source: 4 AA Alkaline Batteries (not included)
- Door Thickness Compatibility: 1 3/8" - 1 3/4"
- Bore Hole Diameter: 2 1/8"
- Recommended Use: Security
9. Warranty and Support
Weiser products are manufactured to the highest standards of quality and technology. For specific warranty information regarding your Powerbolt 2 lock and SmartKey Re-Key Kit, please refer to the warranty card included with your product or visit the official Weiser website.
For technical support, troubleshooting assistance, or to inquire about replacement parts, please contact Weiser Customer Service. Contact information can typically be found on the product packaging or on the official Weiser website:


