Introduction
The TIDRADIO TD-H8 is a high-power 10-watt dual-band ham radio designed for reliable communication. It features wireless programming capabilities via a smartphone application, a large 1.77-inch color screen, and a 2500mAh Type-C rechargeable battery. This manual provides detailed instructions for the proper setup, operation, and maintenance of your TD-H8 radio.
Key Product Features
- 10 Watt Output Power: Provides extended communication range compared to lower-wattage radios. Features Low (2-3W), Mid (5-7W), and High (9-12W) power modes.
- Wireless Programming: Program the radio directly from your smartphone using the Odmaster app, eliminating the need for a PC or programming cable.
- 2500mAh Type-C Battery: High-capacity rechargeable Li-ion battery offering up to 12 hours of continuous use and 60 hours of standby time. Supports USB-C direct charging.
- 1.77-inch Color Screen: Large display for clear visibility of frequencies, channel numbers, and other radio information.
- Dual Band Operation: Supports 144-174mHz and 420-470MHZ frequencies.
- Version Switching & Updatable Firmware: Supports switching between different firmware versions and allows for future software updates.
- Multiple Features: Includes NOAA Scan, Frequency Hopping, Dual Watch, VOX, CTCSS/DCS Codes, Scanning, Monitor, Remote/Site Alarm, and DTMF.
Package Contents
Upon opening the package, please verify that all the following items are included:
- 2 × TIDRADIO TD-H8 10W Ham Radio units
- 2 × Desktop charging cradles
- 2 × USB-C chargers with cables
- 1 × Original Antenna
- 1 × User Manual (this document)
Setup Guide
1. Battery Installation and Initial Charge
Before first use, ensure the battery is fully charged. Attach the 2500mAh Li-ion battery pack to the back of the radio, ensuring it clicks securely into place. Use the provided USB-C cable and charger, or the desktop charging cradle, to charge the radio. The charging indicator will show the charging status.
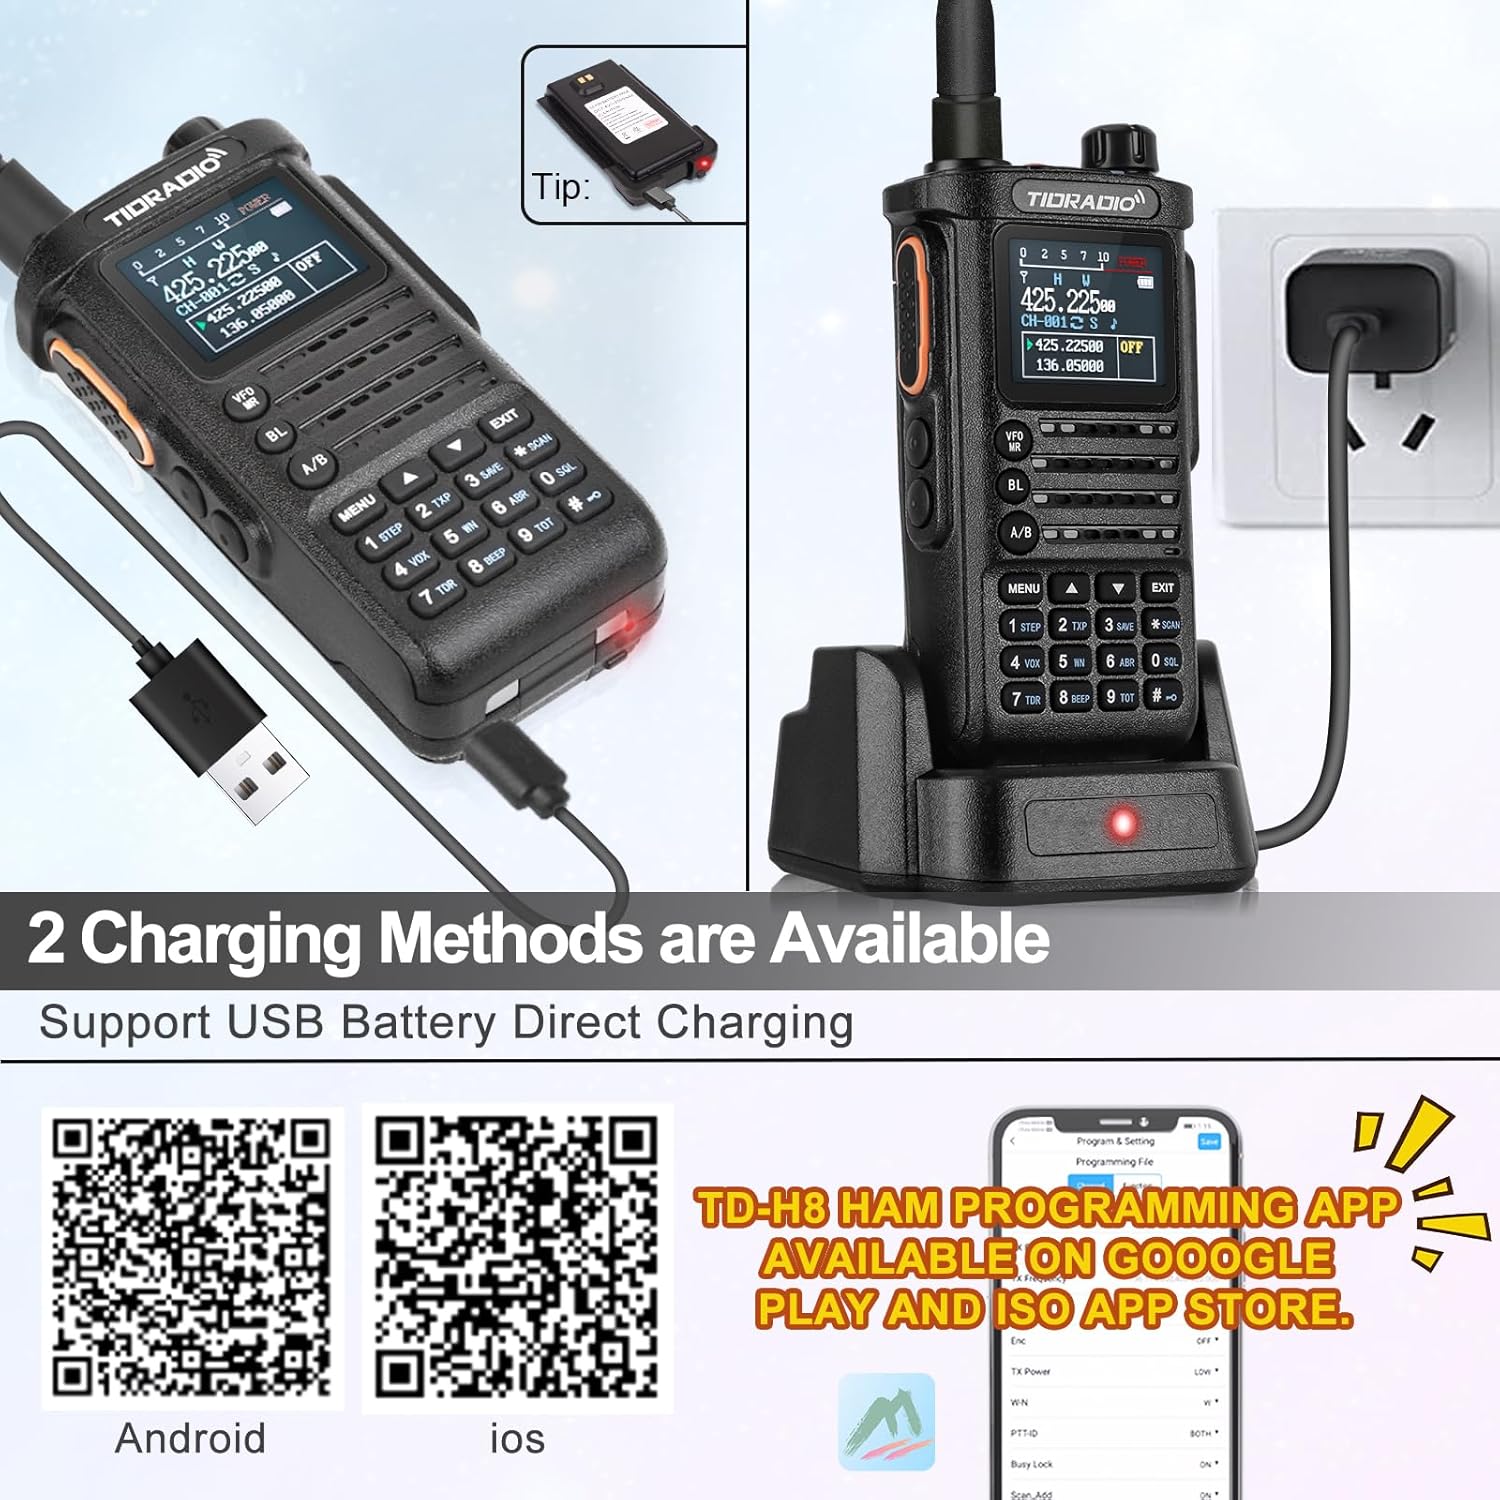
Image: TIDRADIO TD-H8 radio showing the 2500mAh battery and USB-C charging port. The radio is connected to a USB-C cable for direct charging.

Image: Comparison showing the 2500mAh battery pack for the TD-H8, highlighting its larger capacity compared to standard 1800mAh batteries.
2. Antenna Attachment
Carefully screw the provided antenna onto the antenna connector at the top of the radio until it is finger-tight. Do not overtighten.
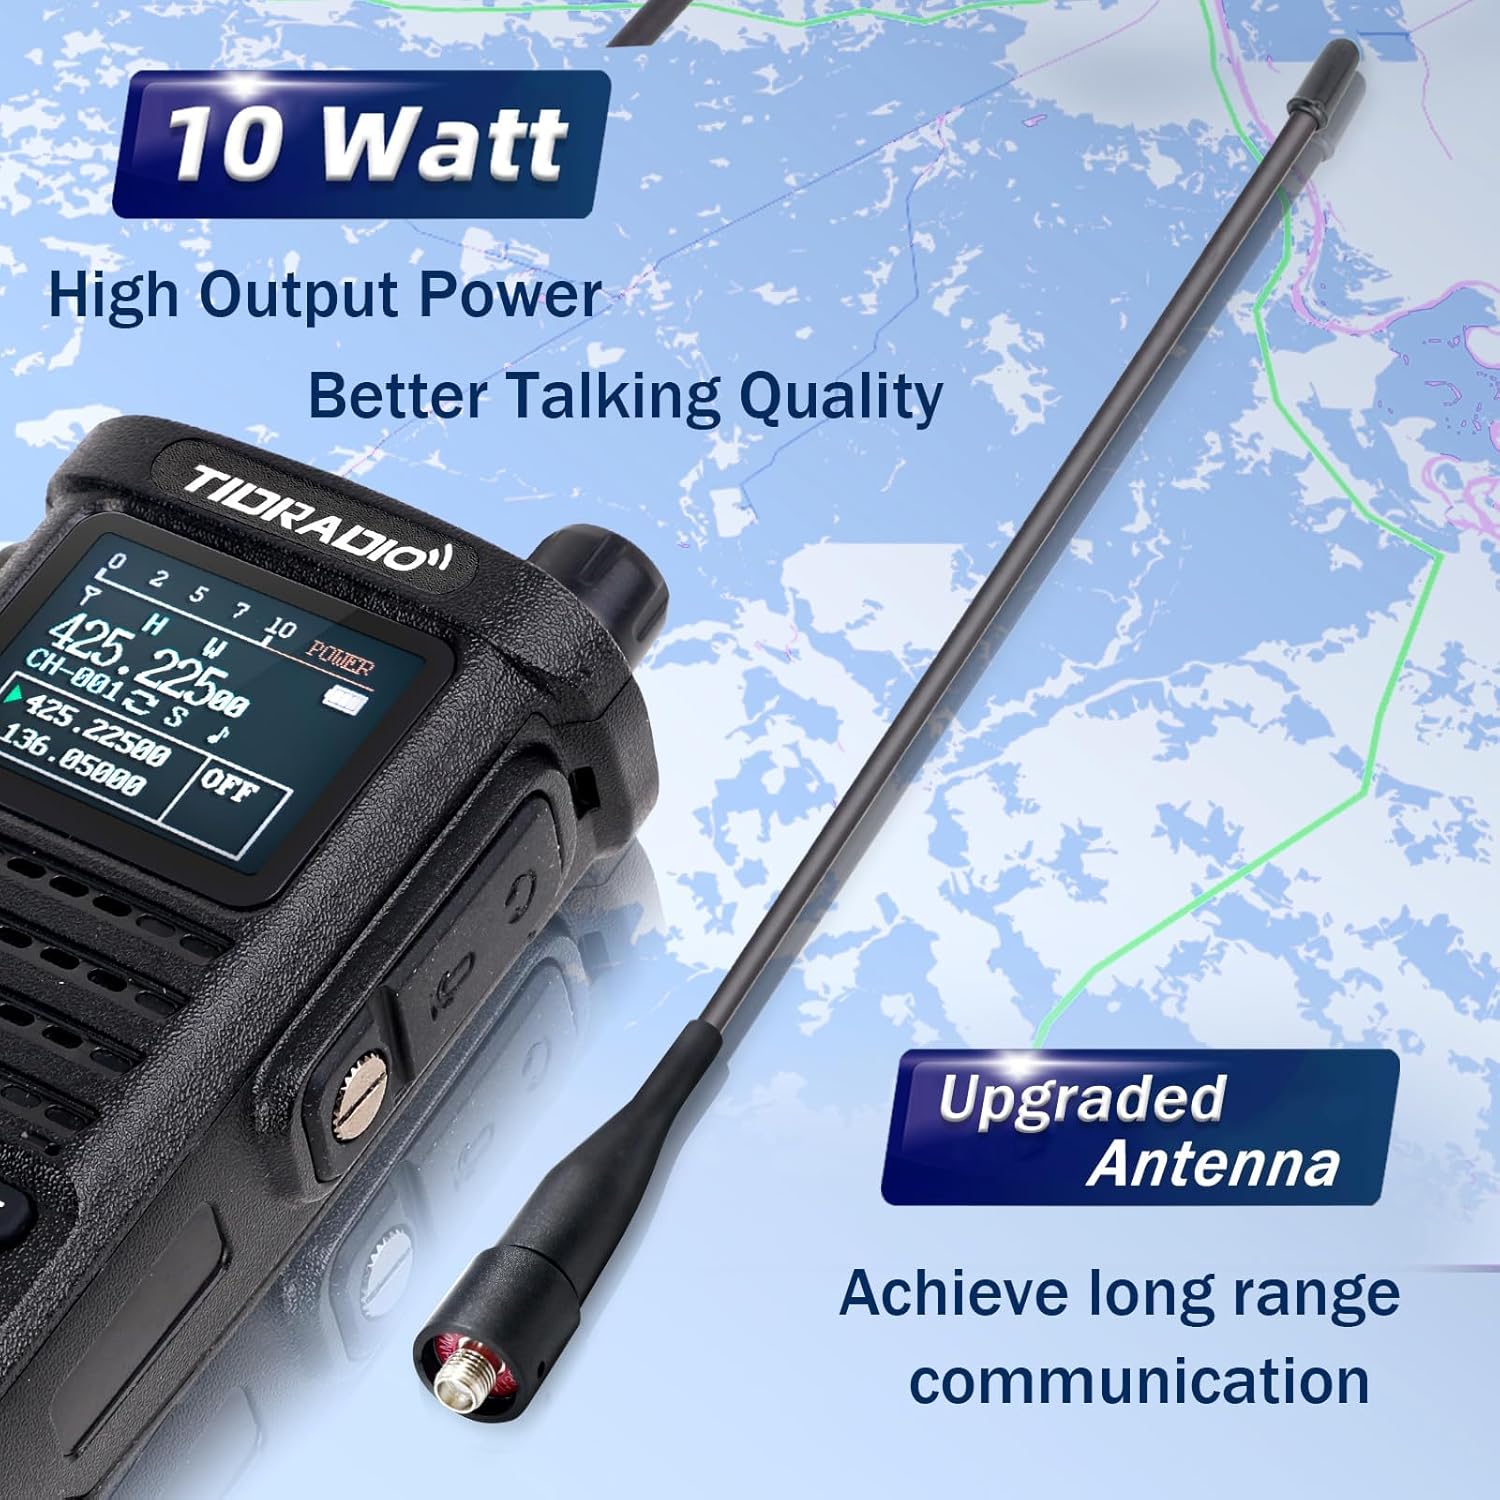
Image: Close-up of the TIDRADIO TD-H8 radio with its upgraded antenna, emphasizing its high output power and long-range communication capability.
3. Powering On/Off
To power on the radio, rotate the top knob (on/off/volume) clockwise. To power off, rotate it counter-clockwise until it clicks.
Operating Instructions
Basic Operation
- Volume Control: Adjust the top knob clockwise to increase volume and counter-clockwise to decrease.
- Push-to-Talk (PTT) Button: Press and hold the PTT button on the side of the radio to transmit. Release to receive.
- Channel/Frequency Selection: Use the up/down arrow keys or the numeric keypad to select channels or input frequencies. The VFO/MR button switches between Frequency Mode (VFO) and Channel Mode (MR).
- A/B Key: Switches between the upper (A) and lower (B) display frequencies for dual watch operation.
- Menu Button: Accesses the radio's menu for various settings.
- Exit Button: Exits menu settings or current operation.
Advanced Features
- NOAA Weather Radio: The TD-H8 supports NOAA weather scans to keep you informed of weather alerts.
- Dual Watch: Monitor two different frequencies simultaneously.
- VOX (Voice Operated Exchange): Allows hands-free transmission when voice is detected.
- Scanning: Scan through channels or frequencies to find active transmissions.
- CTCSS/DCS Codes: Use these codes for selective signaling and to filter out unwanted communications.

Image: Detailed view of the TD-H8's color LCD screen, highlighting the display of frequency, channel number, channel name, and the Dual Watch function.

Image: The TD-H8 radio screen showing the NOAA Weather Radio feature, indicating its capability to receive weather alerts.
Programming the TD-H8
Wireless Programming via Odmaster App
The TD-H8 supports wireless programming directly from your smartphone using the Odmaster app. This eliminates the need for a PC or programming cable.
- Download the Odmaster app from your smartphone's app store:
- Enable Bluetooth on your smartphone and the TD-H8 radio (press the BL key).
- Open the Odmaster app, connect to your TD-H8 radio via Bluetooth, and follow the in-app instructions to program channels, frequencies, and other settings.
- The app allows for channel editing, nearby repeater search and import, and saving/sharing radio configurations.
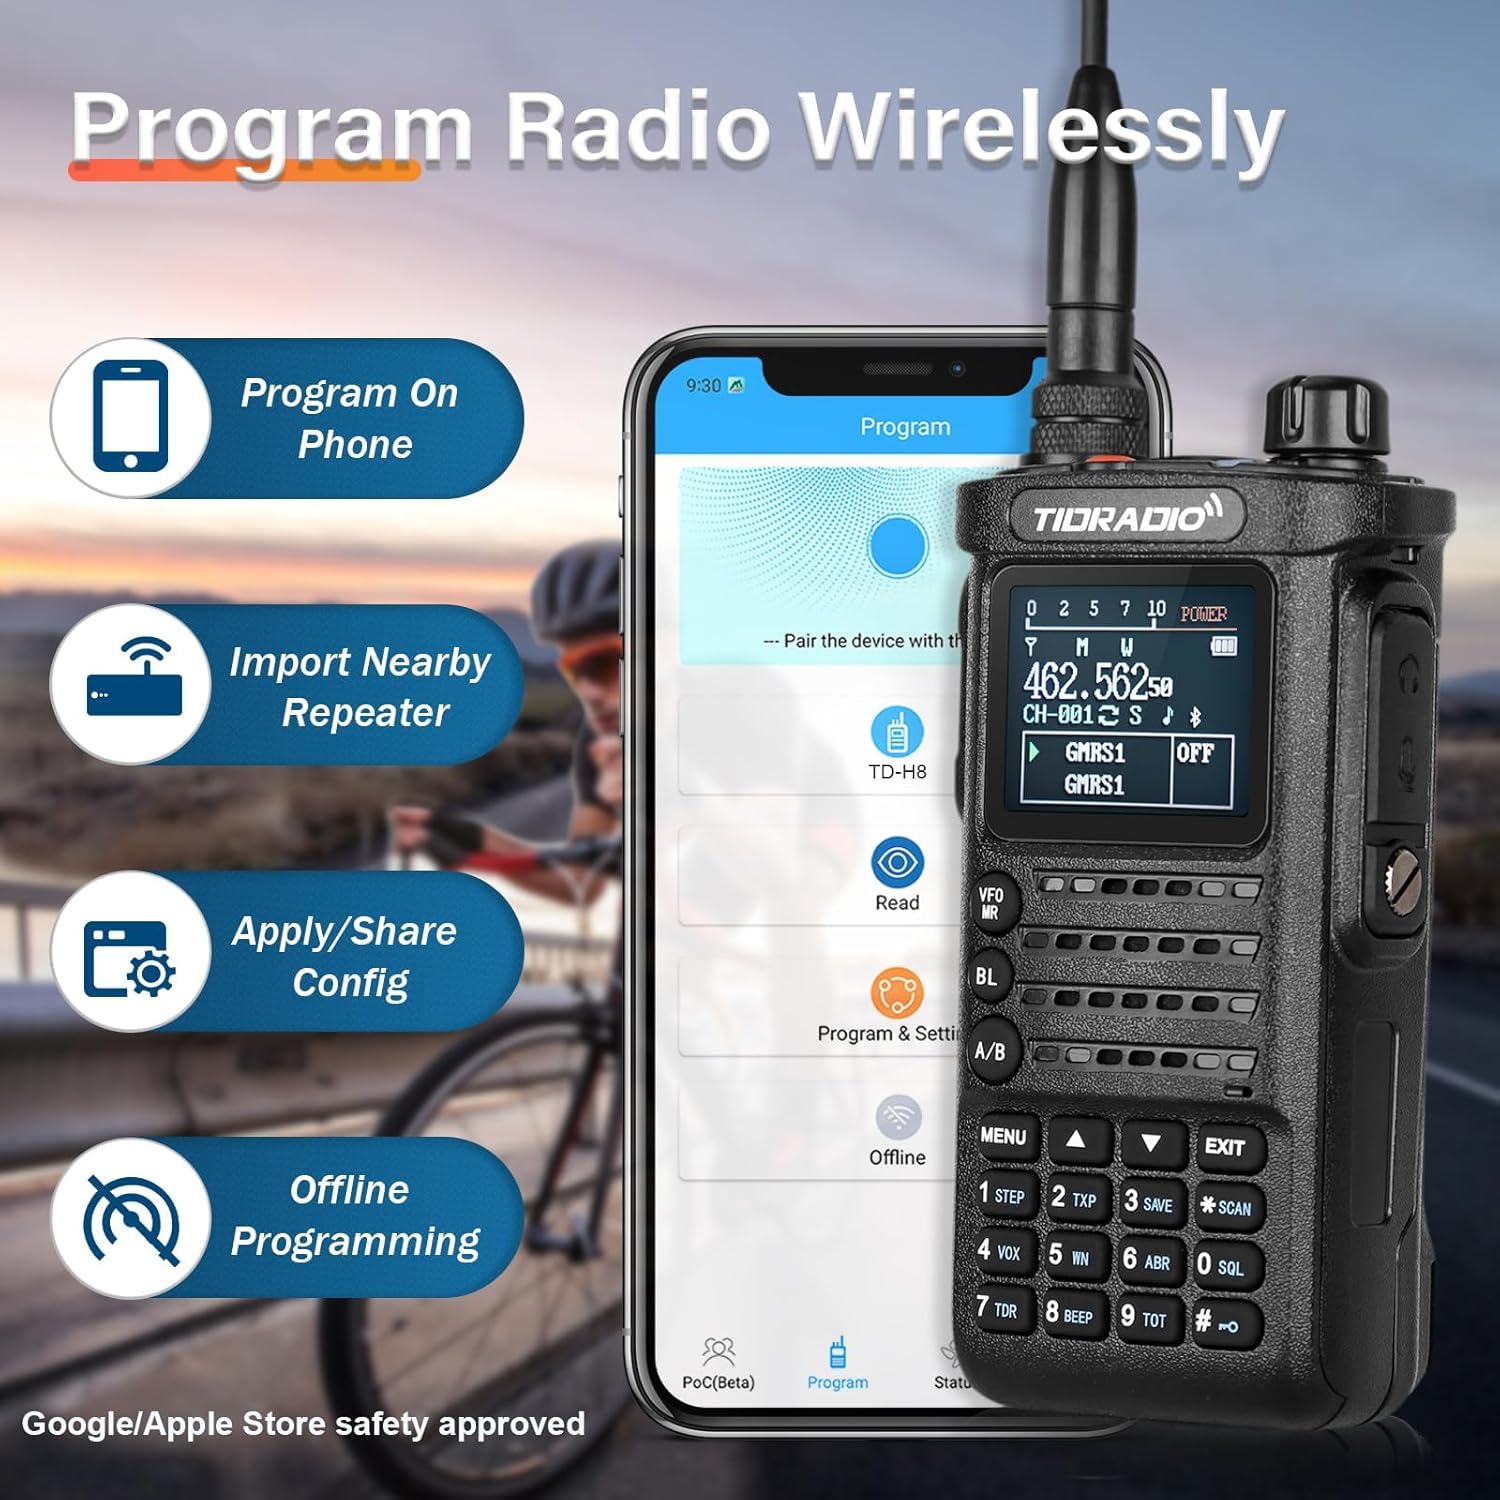
Image: The TIDRADIO TD-H8 radio shown alongside a smartphone displaying the Odmaster app interface, illustrating the wireless programming feature.

Image: Screenshot of the Odmaster app demonstrating the "Repeater List" feature, which allows users to search for and import nearby repeater information.
PC Programming
The TD-H8 can also be programmed using PC software such as Chirp and CPS (Customer Programming Software).
Firmware Version Switching
If you encounter issues connecting to the TD-H8 during the programming process, especially with different model versions (e.g., 2nd vs. 3rd generation), you may need to switch the radio's firmware version.
To switch versions: Press the PTT button + "*" button + power on the device simultaneously. Then, select the required version from the options displayed on the screen.
The TD-H8 also supports updatable firmware, allowing for future software enhancements.
Maintenance
- Cleaning: Use a soft, damp cloth to clean the radio's exterior. Do not use harsh chemicals or solvents.
- Battery Care: To prolong battery life, avoid fully discharging the battery frequently. Store the radio and battery in a cool, dry place when not in use for extended periods.
- Antenna Care: Ensure the antenna is securely attached but not overtightened. Avoid bending or stressing the antenna.
- Water Resistance: The TD-H8 is water-resistant, but it is not waterproof. Avoid submerging the radio in water.
Troubleshooting
| Problem | Possible Cause | Solution |
|---|---|---|
| Radio does not power on. | Battery is not charged or not properly installed. | Ensure the battery is fully charged and correctly attached. |
| Cannot connect to radio for wireless programming. | Bluetooth is off; incorrect firmware version selected; app issue. | Ensure Bluetooth is enabled on both devices. Try switching the radio's firmware version (PTT + "*" + Power On). Restart the app. |
| Poor transmission or reception range. | Antenna not properly attached; low power setting; environmental interference. | Check antenna connection. Ensure radio is set to High Power mode. Move to an area with fewer obstructions. |
| Display is dim or unreadable. | Backlight setting; low battery. | Adjust backlight settings in the menu. Charge the battery. |
If problems persist, please contact TIDRADIO customer support for assistance.
Specifications
| Feature | Detail |
|---|---|
| Model Number | TD-H8 |
| FCC ID | 2AWL3-TDH8 |
| Frequency Range | 144-174mHz, 420-470MHZ |
| Output Power | 10 Watt (High), 5-7 Watt (Mid), 2-3 Watt (Low) |
| Battery Capacity | 2500mAh Li-ion (7.4 Volts) |
| Display Type | 1.77" Color LCD |
| Number of Channels | 199 |
| Talking Range Maximum | 10000 Meters (approx. 6.2 miles, dependent on conditions) |
| Water Resistance Level | Water Resistant |
| Item Weight | 2.27 pounds (approx. 1.03 kg) |
| Package Dimensions | 10 x 8.7 x 2.44 inches |
Product Overview Video
Video: An official overview of the TIDRADIO TD-H8 10W Ham Radio, showcasing its wireless programming module, 10-watt power output, 2500mAh battery, and large color screen display. This video provides a visual guide to the radio's main features and benefits.
Warranty and Support
For any issues related to programming, operation, or general inquiries, please contact TIDRADIO customer support. Refer to the contact information provided with your purchase or visit the official TIDRADIO website for support resources.
The manufacturer provides ongoing support, including free app updates and feature upgrades for the Odmaster application.


