Introduction
This user manual provides detailed instructions for the operation and maintenance of your Hayve 4K Digital Microscope. Please read this manual thoroughly before using the device to ensure proper functionality and safety.
The Hayve HY070 PRO digital microscope features a 4K image resolution and 2K video capability, offering 2-1500X continuous magnification. It is equipped with a 7-inch IPS screen, multiple lighting options including a bottom LED light, and connectivity via HDMI and USB for larger displays. It is designed for various applications including coin inspection, soldering, and general microscopic observation.
Safety Information
- Ensure the microscope is placed on a stable, level surface to prevent accidental falls.
- Do not expose the device to extreme temperatures, humidity, or direct sunlight.
- Use only the specified 5V/1A or 5V/2A USB adapter for power.
- Avoid direct eye exposure to the LED lights.
- Keep the device away from water or other liquids.
- Do not attempt to disassemble or repair the microscope yourself. Contact qualified personnel for service.
- Keep out of reach of small children to prevent accidental ingestion of small parts.
Package Contents
Please verify that all items listed below are included in your package:
- Hayve 4K Digital Microscope Unit (with 7-inch IPS Screen)
- Adjustable Stand/Bracket
- Base Plate
- Gooseneck Side Lights (2x)
- Bottom LED Light Module
- Remote Control
- USB-C Cable
- HDMI Cable
- 32GB MicroSD Card
- Calibration Ruler
- Prepared Slides (10x)
- User Manual

Figure 1: Complete package contents of the Hayve 4K Digital Microscope.
Setup
Follow these steps to assemble your Hayve 4K Digital Microscope:
- Step 1: Place the bracket on the base.
Insert the vertical support bracket into the designated slot on the base plate. Ensure it is seated firmly.

Figure 2: Main components of the microscope.
- Step 2: Fix the bracket with the knob.
Tighten the knob at the base of the bracket to secure it to the base plate, preventing any wobble.
- Step 3: Place the screen unit on the bracket.
Carefully slide the main microscope unit (with the integrated screen) into the adjustable clamp at the top of the vertical bracket.
- Step 4: Tighten the two knobs.
Secure the microscope unit in place by tightening the two knobs on the bracket's clamp. This will hold the unit firmly at the desired height.
Video 1: Step-by-step assembly guide for the Hayve 4K Digital Microscope.
Operating Instructions
Powering On/Off and Charging
The microscope has a built-in 3600mAh rechargeable battery, providing up to 5 hours of working time. To charge, connect the microscope to a 5V/1A or 5V/2A USB adapter using the provided USB-C cable.

Figure 3: The microscope features a long-lasting battery for extended use.
Magnification and Focus
The microscope offers a continuous magnification range from 2X to 1500X. Adjust the height of the microscope unit on the stand and rotate the focus wheel on the lens barrel to achieve a clear image of your specimen.
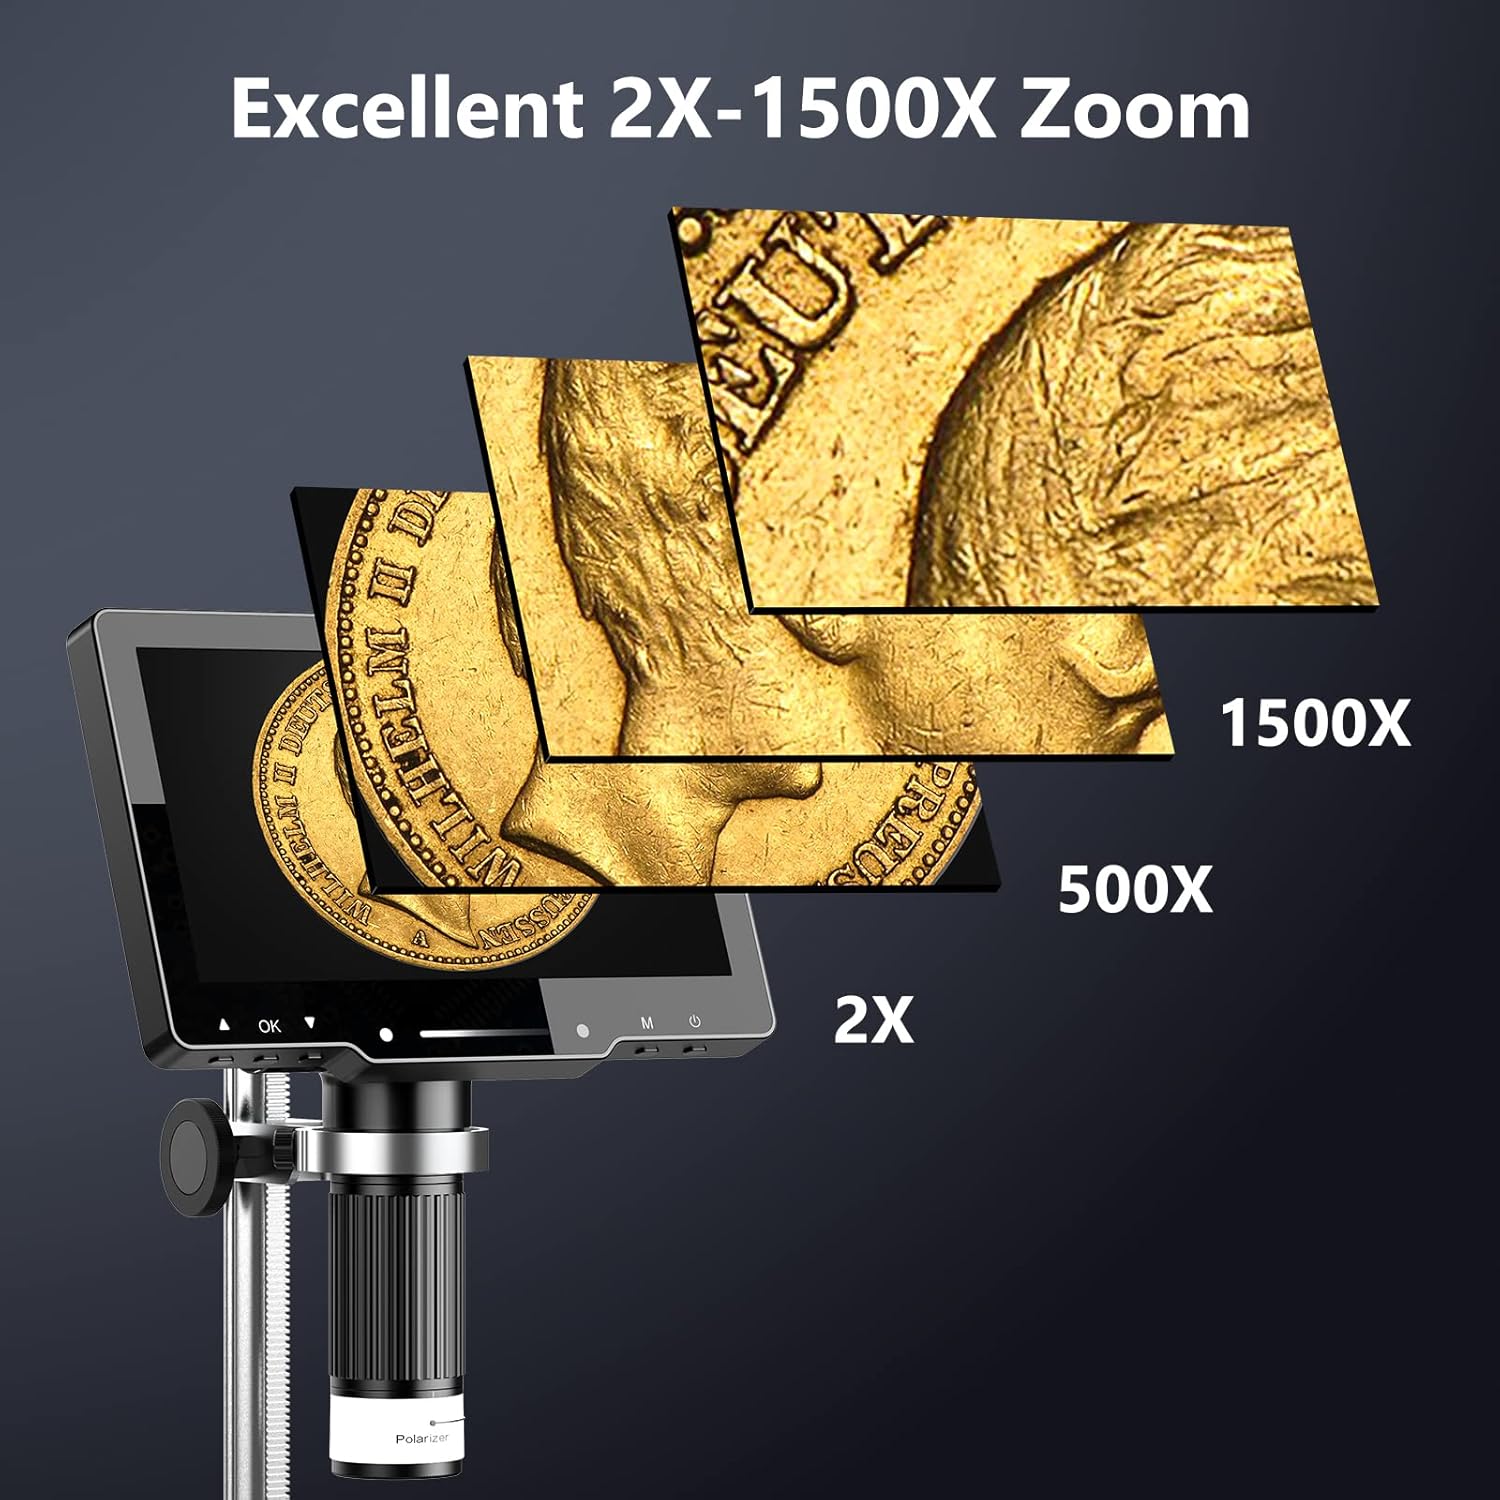
Figure 4: The microscope provides excellent zoom capabilities from 2X to 1500X.
Lighting Control
The microscope is equipped with multiple lighting options for optimal viewing:
- 8 LED Lights: Integrated around the lens for direct illumination.
- 2 Side Lights: Adjustable gooseneck lights for flexible illumination angles.
- Bottom LED Light: For viewing transparent specimens or slides. (10 prepared slides are included).
Adjust the brightness of the lights using the controls on the unit or the remote control.

Figure 5: Intelligent touch light control for adjustable illumination.

Figure 6: The amazing bottom light stage for viewing transparent objects.
Polarizer Lens
The unique polarizer lens design helps to reduce reflection and glare, especially when observing reflective surfaces like coins, diamonds, or PCB metals. Rotate the polarizer ring on the lens to achieve optimal observation conditions.
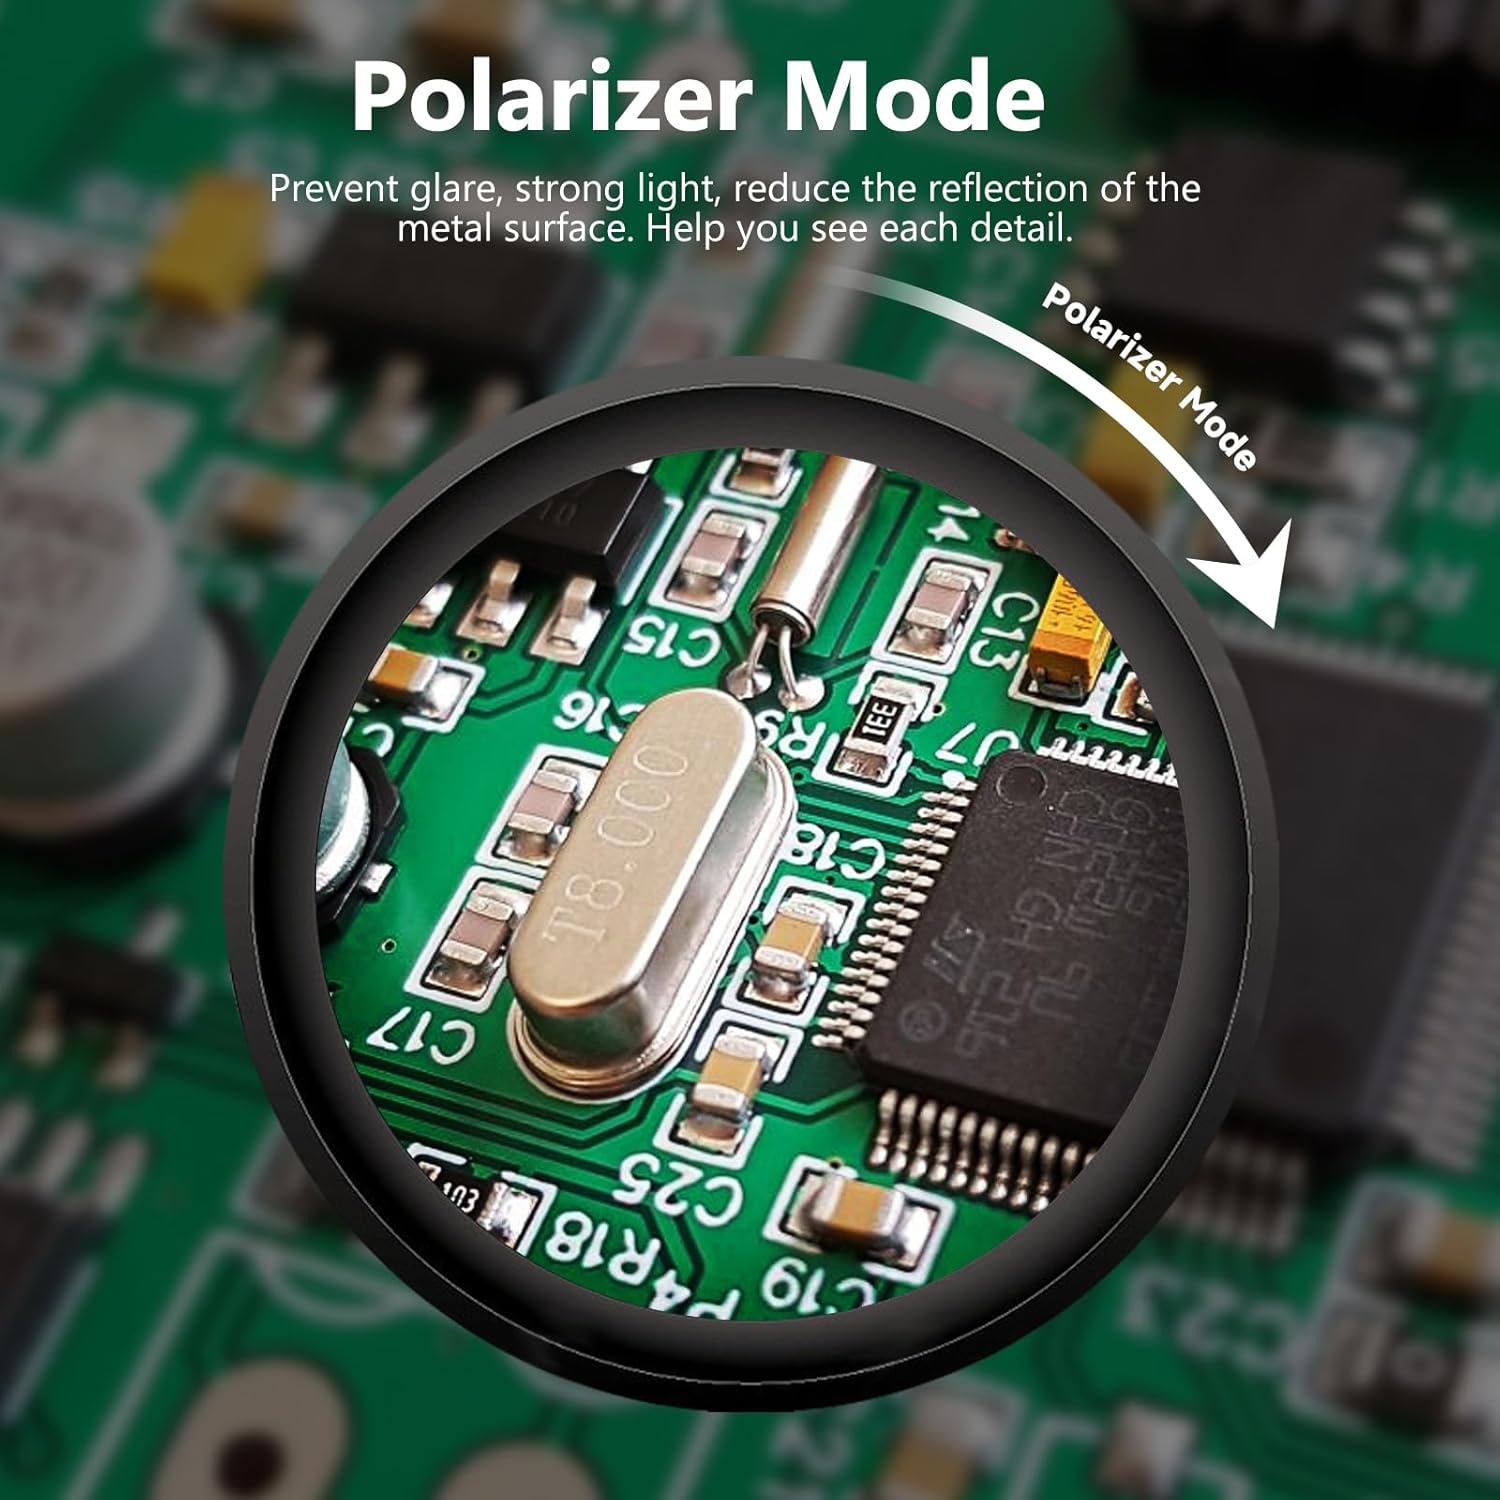
Figure 7: Polarizer mode for reducing glare on reflective surfaces.
External Display Connectivity (HDMI & USB)
The Hayve HY070 PRO supports connection to external displays for a larger view and easier sharing:
- HDMI Output: Connect the microscope to a TV or projector using the provided HDMI cable for real-time, high-definition display without delay.
- USB Output: Connect to a PC or Mac via the USB-C port. This allows for real-time transmission and compatibility with various camera operation software (e.g., HiView, Amcap).
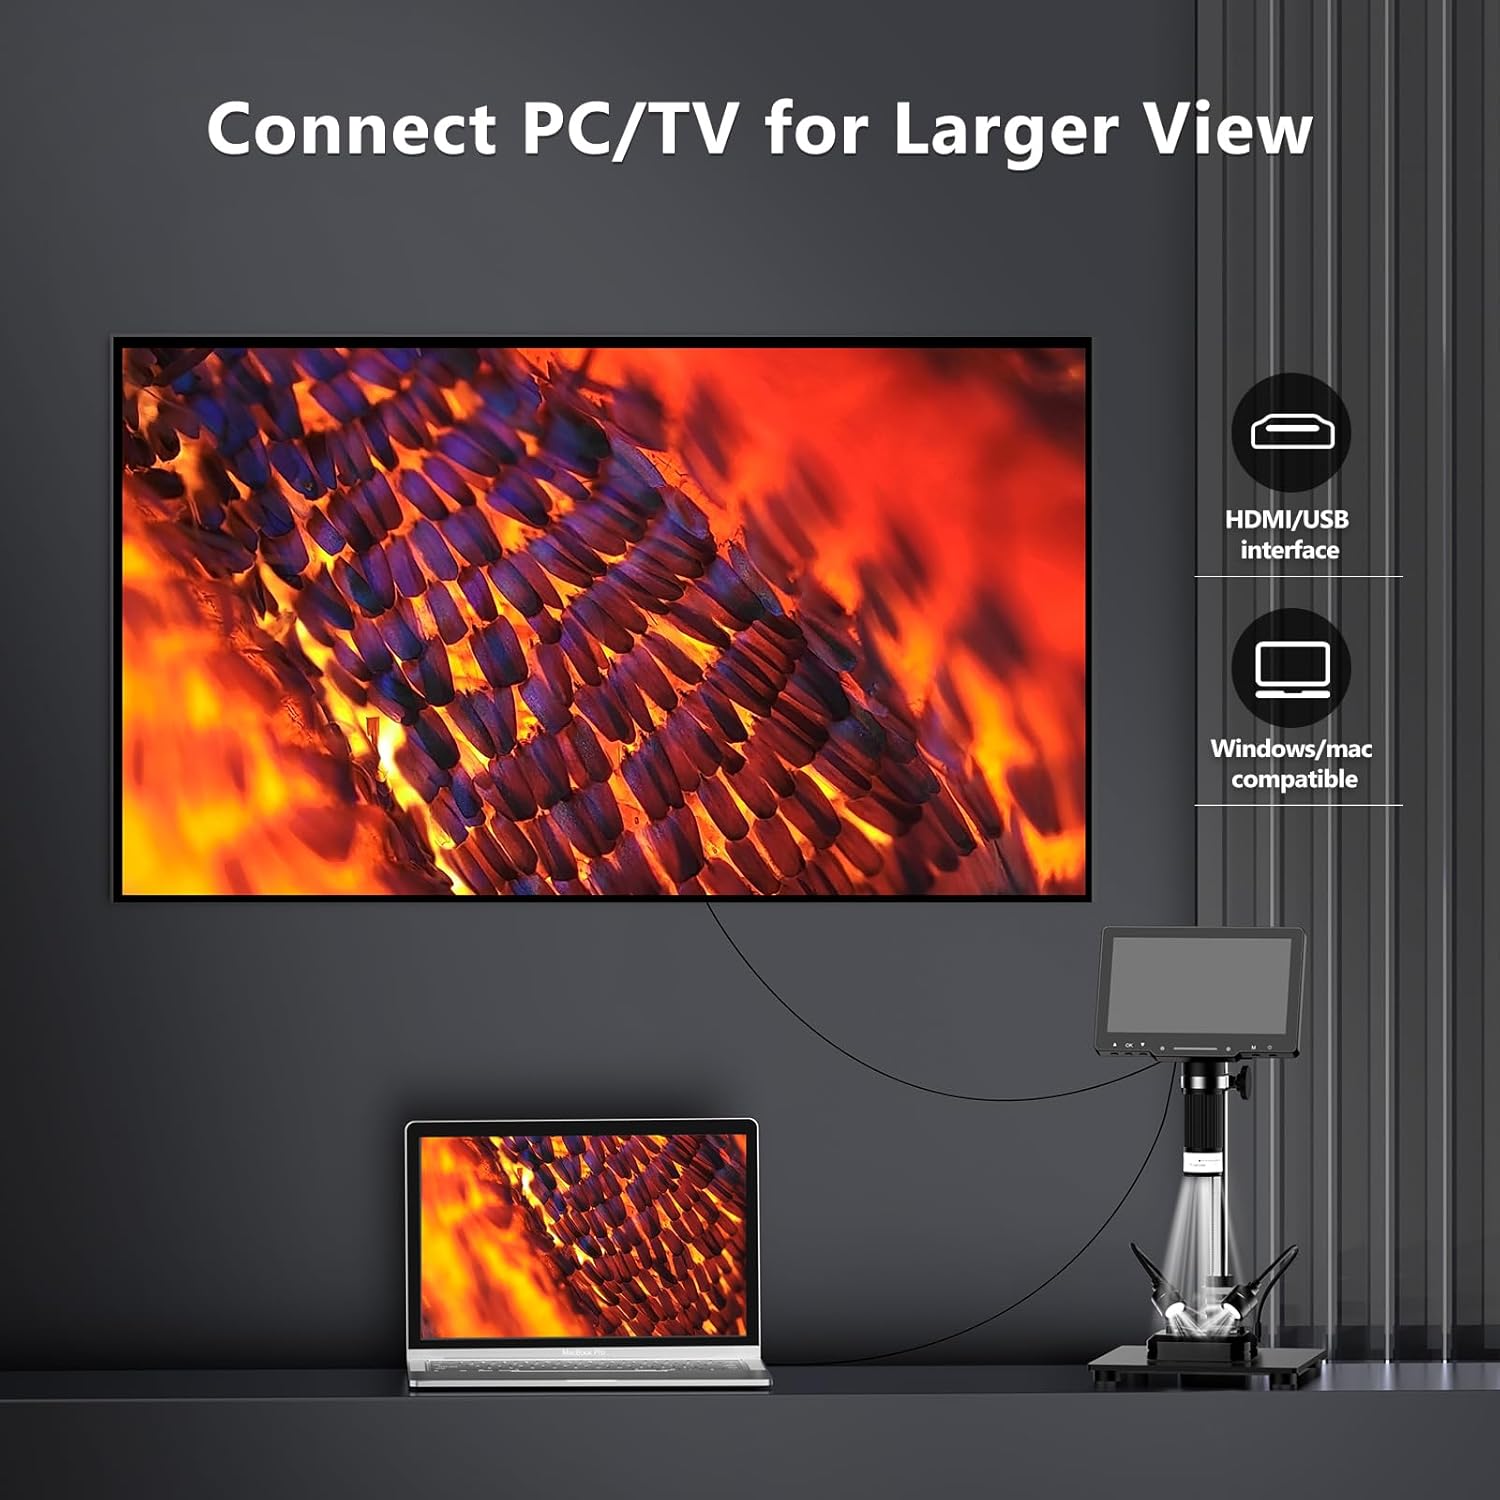
Figure 8: Connect to PC/TV for a larger viewing experience.
Photo and Video Capture
The microscope captures 4K photos and 2K ultra-clear videos. A 32GB MicroSD card is included for storage, capable of storing over 10,000 pictures. Use the buttons on the unit or the remote control to capture images and videos.
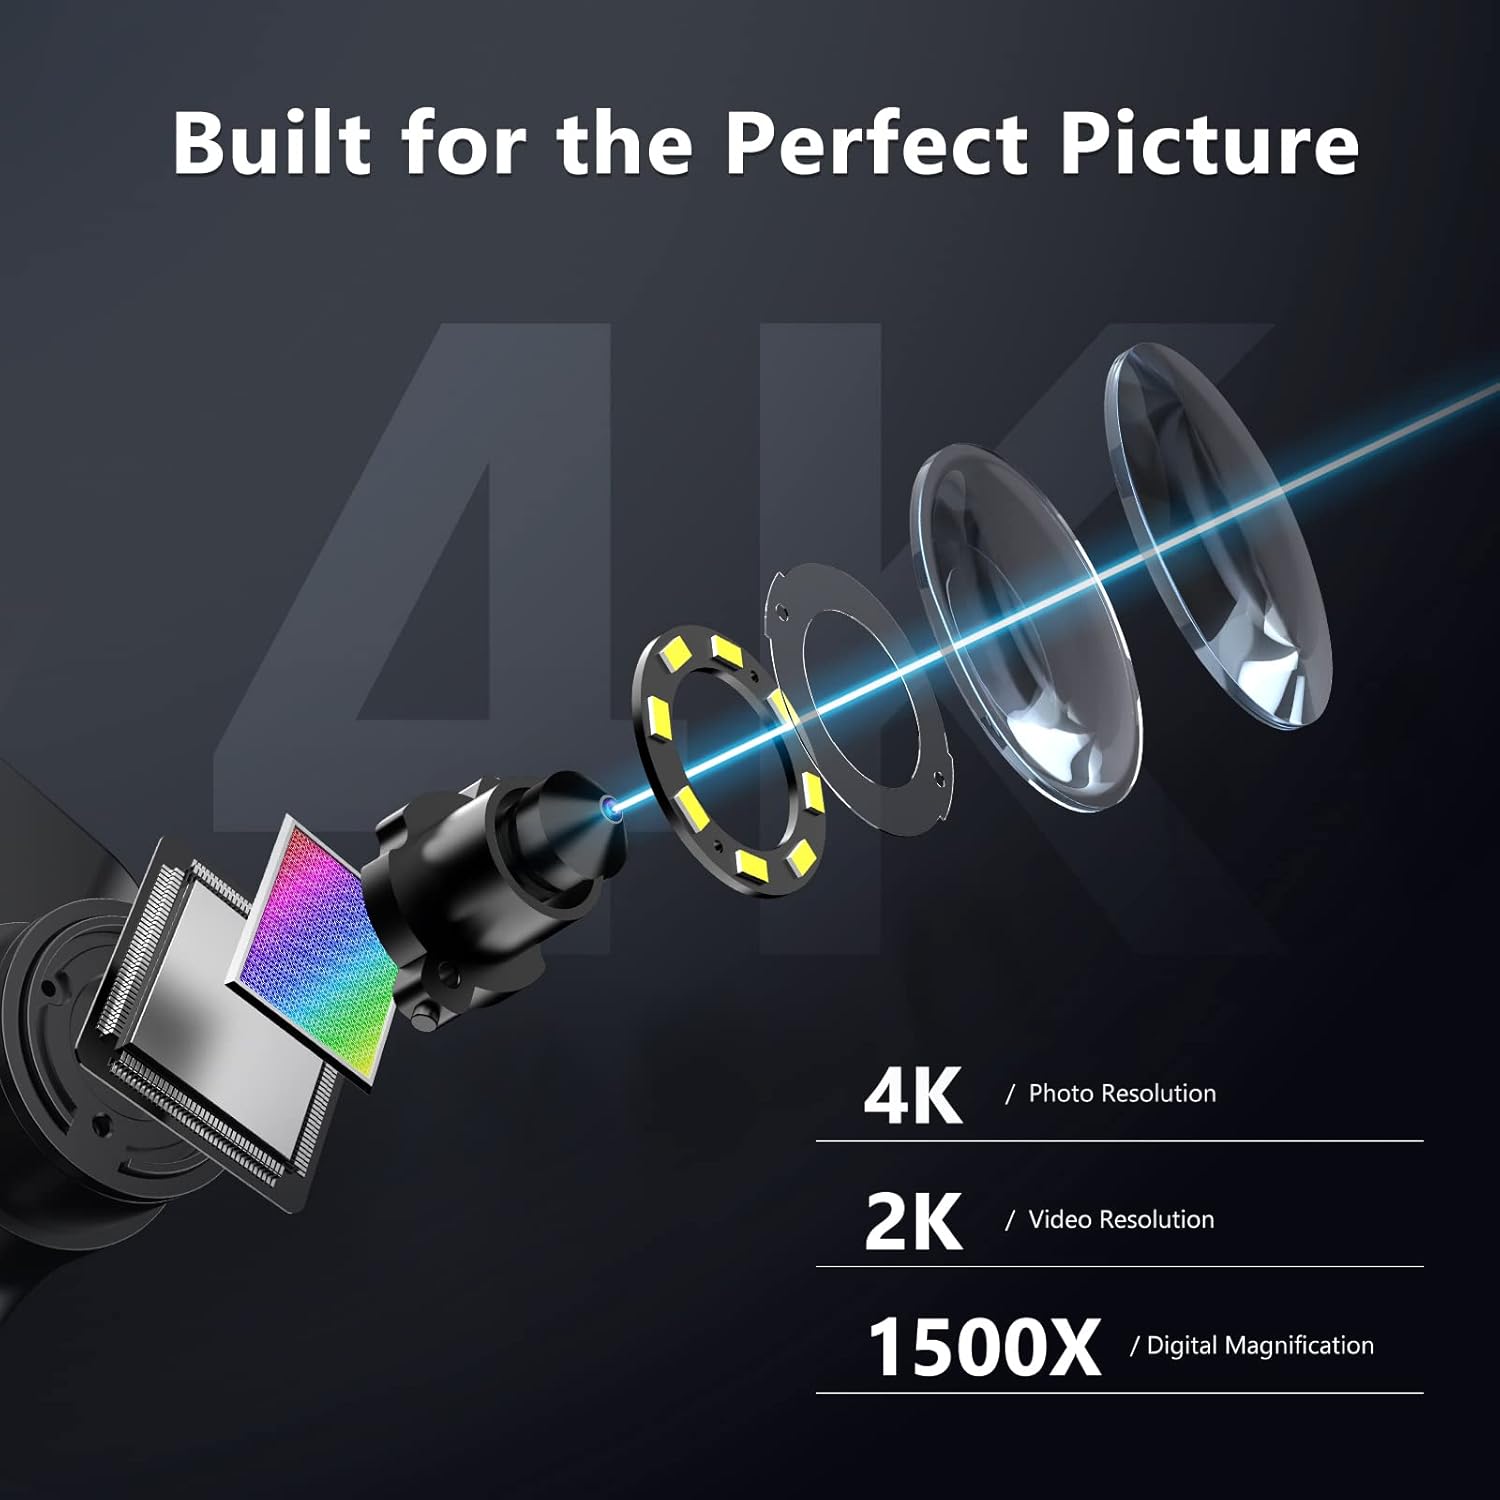
Figure 9: Built for perfect picture quality with 4K photo and 2K video resolution.

Figure 10: The upgraded 7-inch IPS screen provides vivid and saturated colors with a 178-degree wide viewing angle.
Remote Control Operation
The included remote control provides convenient access to various functions, such as capturing photos, recording videos, and adjusting lighting, without disturbing the microscope's position.
Figure 11: Convenient remote control for easy operation.
Maintenance
- Cleaning: Use a soft, dry cloth to clean the exterior of the microscope. For the screen and lens, use a microfiber cloth specifically designed for optics. Do not use abrasive cleaners or solvents.
- Storage: When not in use, store the microscope in a clean, dry place, away from dust and direct sunlight. The original packaging can be used for safe storage and transport.
- Battery Care: To prolong battery life, avoid fully discharging the battery frequently. Charge the device regularly, even if not in active use.
Troubleshooting
| Problem | Possible Cause | Solution |
|---|---|---|
| No image on screen / Screen is black. | Device is off, battery is low, or screen brightness is too low. | Ensure the device is powered on. Charge the battery. Adjust screen brightness. |
| Image is blurry. | Incorrect focus, incorrect working distance, or dirty lens. | Adjust the focus wheel. Adjust the height of the microscope unit. Clean the lens. |
| Image has glare/reflection. | Strong light source reflecting off the specimen. | Activate and adjust the polarizer lens. Adjust the angle or intensity of the LED lights. |
| Cannot connect to PC/TV. | Incorrect cable, port, or driver issues. | Ensure correct HDMI/USB-C cable is used. Try a different port. Install necessary drivers for PC connection. |
| Remote control not working. | Low battery in remote, or obstruction. | Replace remote control batteries. Ensure no obstructions between remote and microscope. |
Specifications
- Model Name: HY070 PRO
- Magnification: 2X - 1500X
- Photo Resolution: 4K (48MP)
- Video Resolution: 2K
- Screen: 7-inch IPS Display
- Screen Viewing Angle: 178 Degrees
- Lighting: 8 LED Lights (around lens), 2 Side Lights (gooseneck), Bottom LED Light
- Connectivity: HDMI, USB-C
- Storage: Supports MicroSD card (32GB included)
- Battery: Built-in 3600mAh rechargeable Lithium Polymer
- Power Input: 5V/1A or 5V/2A USB
- Material: Metal, Plastic
- Color: Black
- Item Weight: Approximately 3.74 pounds (1.7 kg)
- Package Dimensions: 11.42 x 8.7 x 3.9 inches
Warranty Information
Specific warranty details for the Hayve 4K Digital Microscope are not provided in this manual. Please refer to the product packaging, the official Hayve website, or contact Hayve customer support for comprehensive warranty terms and conditions.
Support
For further assistance, technical support, or inquiries, please contact Hayve customer service. You may find contact information on the official Hayve website or through the retailer where you purchased the product.
Hayve Customer Service: Refer to the official Hayve website or product packaging for contact details.
We are committed to providing reliable products and support to meet your needs.


