Introduction
The Y&H MPPT Solar Charge Controller is an advanced device designed to efficiently manage power flow from solar panels to various battery types. Utilizing Maximum Power Point Tracking (MPPT) technology, it ensures optimal energy harvesting from your solar array. This controller is suitable for a wide range of applications, including communication base stations, home power systems, traffic lights, solar street lights, and courtyard lamp systems.
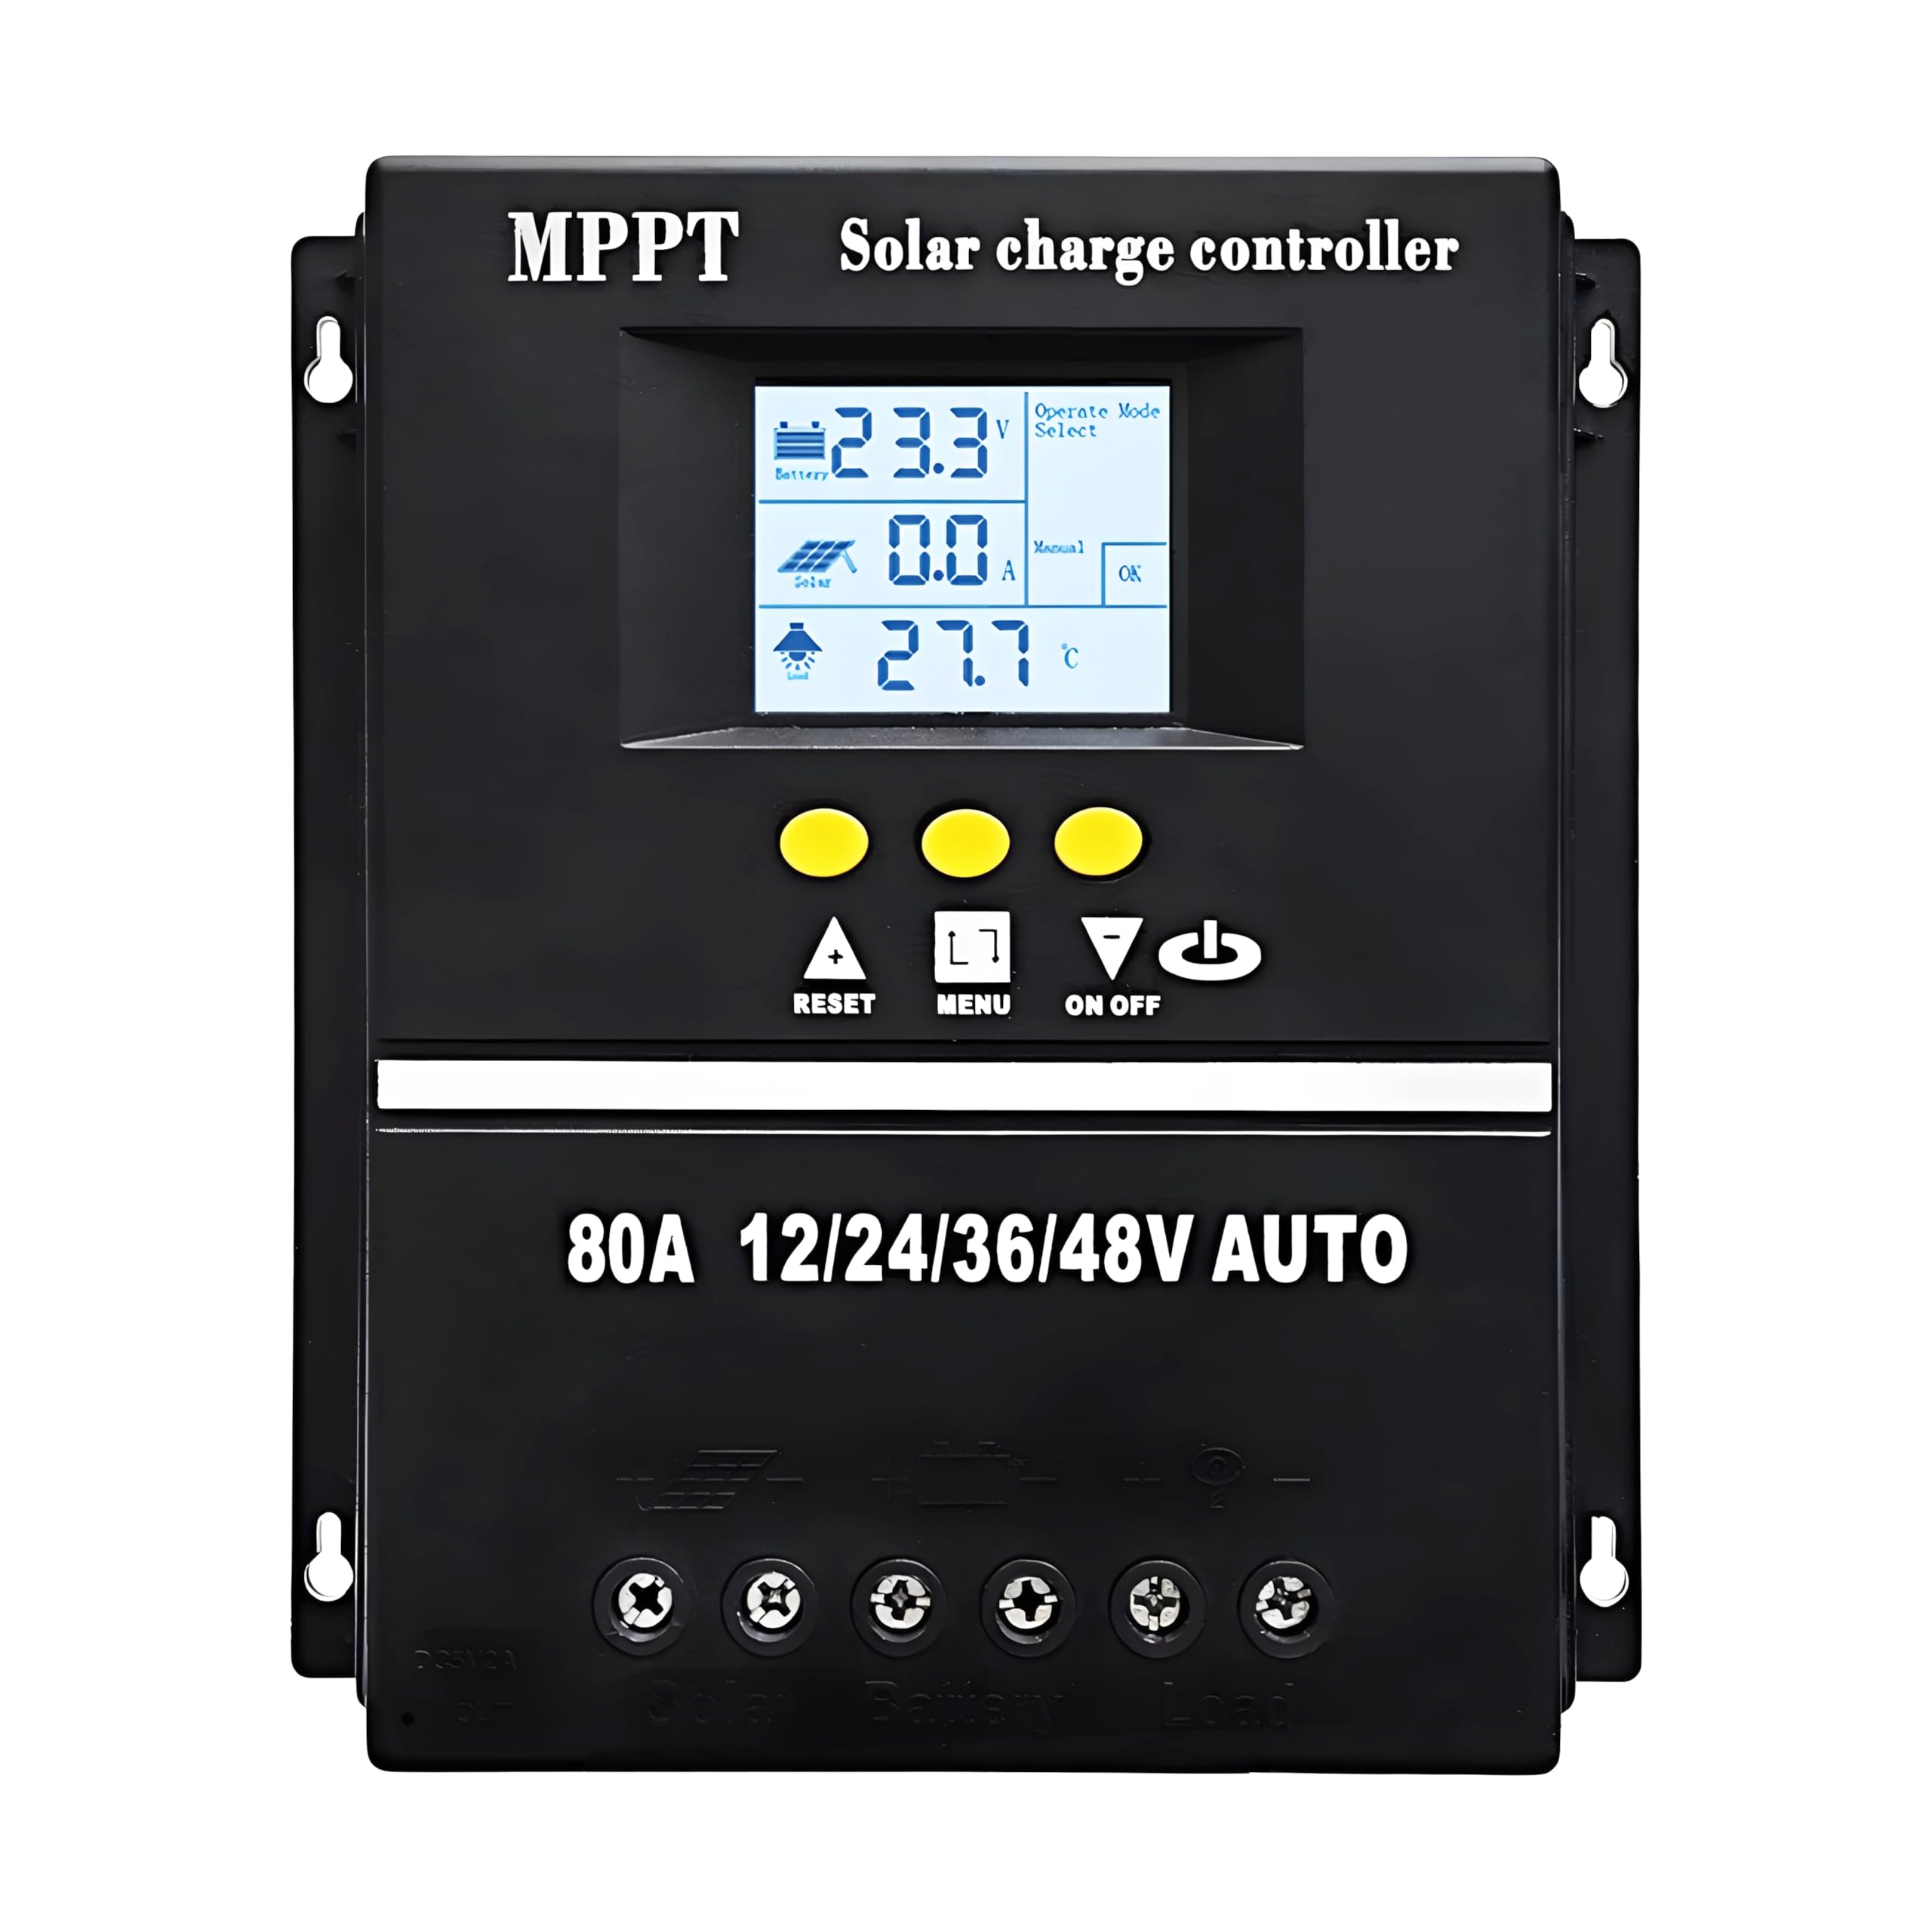
Figure 1: Y&H MPPT Solar Charge Controller 80A.
Key Features
- Advanced MPPT tracking technology with an efficiency of not less than 99.5%.
- Multifunction LCD screen with backlight for dynamic display of operating data and status.
- Compatibility with Sealed, GEL, Flooded, and LifePO4 battery types.
- Dual 5V USB charging ports for external devices.
- Automatic system voltage detection for 12V, 24V, 36V, and 48V systems.
- Integrated protection features: overvoltage, overcurrent, and overheating protection.
- Seven selectable working modes for diverse application requirements.
- User-adjustable and savable control parameters.
Setup and Installation
Proper installation is crucial for the safe and efficient operation of your solar charge controller. Please follow these guidelines carefully:
- Preparation: Ensure all components (solar panels, batteries, load) are disconnected and powered off before beginning installation.
- Mounting: Mount the controller in a well-ventilated area, away from direct sunlight, high temperatures, and moisture. Ensure there is sufficient space around the unit for heat dissipation.
- Battery Connection: Connect the battery to the controller first. Ensure correct polarity (positive to positive, negative to negative). The controller will automatically detect the battery voltage.
- Solar Panel Connection: Connect the solar panel array to the controller. Again, observe correct polarity.
- Load Connection: Connect your DC load to the controller's load terminals. Ensure the load's voltage and current requirements are within the controller's specifications.
- Power On: Once all connections are secure, power on your solar panel array and then your battery. The controller's LCD display should illuminate.
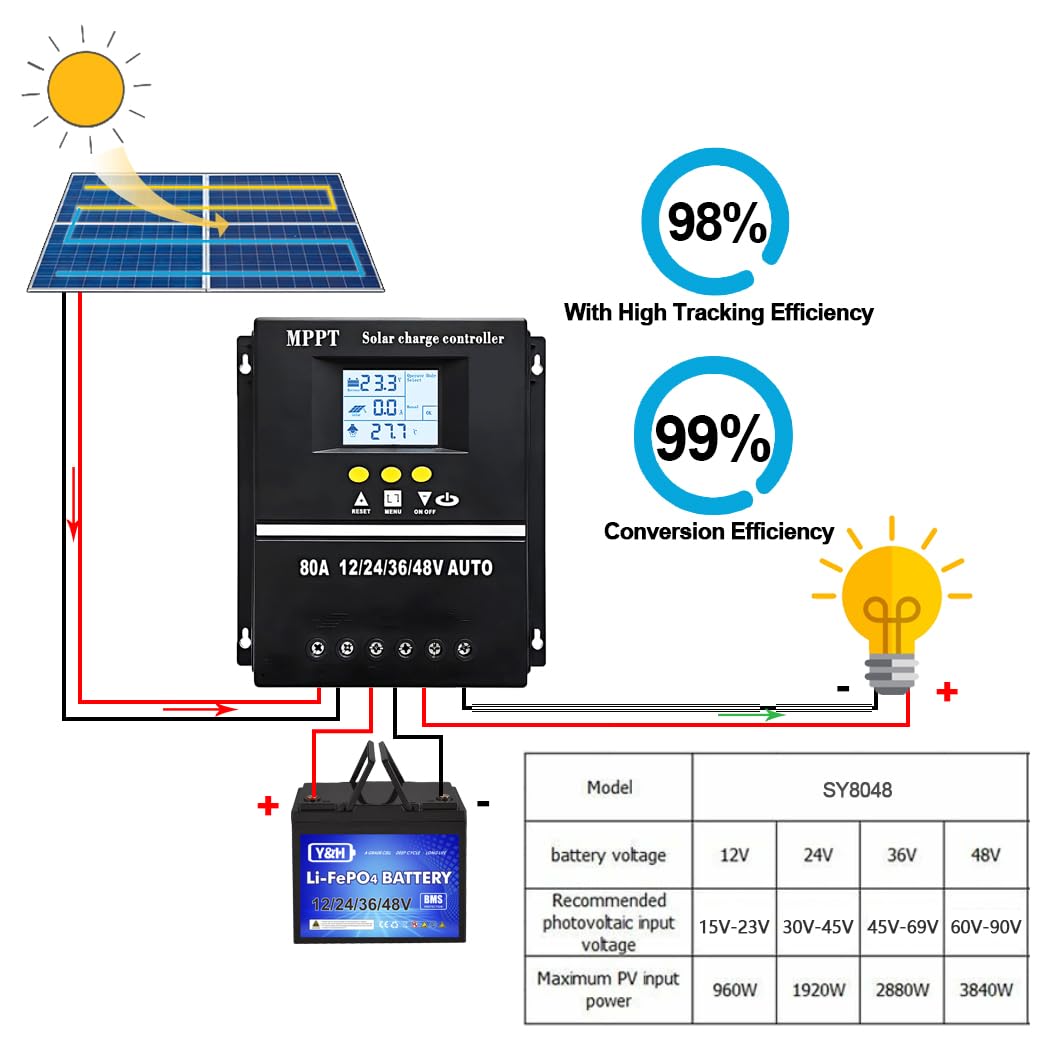
Figure 2: Wiring diagram illustrating the correct connection sequence for the solar charge controller, battery, solar panel, and load. Ensure positive and negative terminals are connected correctly.
Operating the Controller
The controller features an intuitive LCD display and control buttons for easy operation and monitoring.
LCD Display Interface
The LCD screen provides real-time operational data and status indicators:
- Battery Work Status: Displays current battery voltage and charge/discharge status.
- Solar Panel Operating Status: Shows PV input voltage and charging current.
- Load Output Status: Indicates load current and status.
- Mode Control Display: Shows the currently selected operating mode.
- Normal/Fault Status: Displays system health and any error codes.
- Product Operating Temperature: Shows the internal temperature of the controller.

Figure 3: Detailed view of the LCD display interface, showing areas for battery work status, solar panel operating status, load output status, mode control, and normal/fault status indicators.
Operating Modes
The controller offers seven distinct working modes to suit various application needs. These modes can be selected and adjusted via the menu buttons on the LCD interface:
- Charge Mode: Standard battery charging.
- Light Control Mode: Load turns on at sunset and off at sunrise.
- Light Control + Delay Mode: Load turns on at sunset and stays on for a set duration.
- Universal Control Mode: Load is continuously on.
- Manual Control Mode: Load can be manually switched on/off.
- Time Control Mode: Load operates according to a programmed schedule.

Figure 4: Illustration of various load working modes available on the controller, including Manual Mode (24H), Solar Light Control Mode (Sunset-Sunrise), and Solar Light Time Control.
Battery Compatibility and Charging Stages
The controller is designed to work with a variety of battery chemistries and employs a sophisticated four-stage charging algorithm to optimize battery health and longevity.

Figure 5: This image highlights the controller's compatibility with various battery types, including Sealed, GEL, Flooded, and Lithium (LiFePO4) batteries.
The four charging stages are:
- Bulk Charge: Rapid charging phase where the maximum current is delivered to the battery.
- Boost Charge: After bulk charge, the voltage is held constant to ensure full charge.
- Float Charge: Once fully charged, the voltage is reduced to a lower level to maintain the battery without overcharging.
- Equalization Charge: Periodically applies a higher voltage to flooded batteries to balance cell voltages and prevent sulfation.

Figure 6: This image illustrates the four charging stages: Bulk Charge, Boost Charge, Float Charge, and Equalization Charge, which ensure rapid, efficient, and safe battery charging.
Maintenance
To ensure the longevity and optimal performance of your Y&H MPPT Solar Charge Controller, regular maintenance is recommended:
- Inspect Connections: Periodically check all wiring connections for tightness, corrosion, or damage. Loose connections can lead to power loss or overheating.
- Clean the Unit: Keep the controller clean and free from dust and debris. Use a dry, soft cloth for cleaning. Do not use liquid cleaners.
- Ensure Ventilation: Verify that the installation area provides adequate airflow around the controller to prevent overheating, especially during peak operation.
- Battery Check: Regularly inspect battery terminals for any signs of wear, corrosion, or damage. Ensure batteries are properly maintained according to their manufacturer's guidelines.
Troubleshooting
If you encounter issues with your solar charge controller, consider the following troubleshooting steps:
- No Display/No Power: Check battery connections and ensure the battery has sufficient charge. Verify solar panel connections.
- No Charging: Confirm solar panel output voltage and current. Check for shading on solar panels. Ensure correct polarity of solar panel connections.
- Load Not Working: Check load connections and ensure the load is within the controller's specifications. Verify the selected operating mode.
- Error Codes: Refer to the controller's LCD display for any specific error codes. Consult the full product manual (if available) for detailed explanations of error codes.
- Overheating: Ensure the controller is installed in a well-ventilated area. Reduce load if necessary.
If issues persist after performing these checks, please contact Y&H customer support for further assistance.
Specifications
| Feature | Specification |
|---|---|
| Model | SY8048 |
| Battery Voltage | 12V/24V/36V/48V Auto |
| Charge Current | 80A |
| Max Solar Input (Voc) | 15-25V (12V battery); 30-50V (24V battery); 45-75V (36V battery); 60-100V (48V battery) |
| Max PV Input Power | 960W (12V battery); 1920W (24V battery); 2880W (36V battery); 3840W (48V battery) |
| Product Dimensions (L x W x H) | 19.5 x 18.4 x 6.6 cm |
| Product Weight | 660 grams |
| Display Type | LCD |
| Operating Temperature | Up to 60 Degrees Celsius |
| USB Output | Dual 5V ports |
| Color | Black |
Applications
The Y&H MPPT Solar Charge Controller is versatile and can be integrated into various solar power systems:
- Home power systems
- Communication base stations
- Traffic lights and solar street lights
- Courtyard lamp systems
- Camping setups and RVs
- Marine applications (boats)
- Other outdoor and travel power needs

Figure 7: This image illustrates various applications for the solar charge controller, such as camping, RVs, boats, outdoor activities, home use, and travel.
Warranty and Support
Y&H products are backed by a warranty. For technical assistance, troubleshooting, or any product-related inquiries, please contact the Y&H support team. Our dedicated engineers are available to provide guidance and solutions to any issues you may encounter.
Please refer to your purchase documentation or the official Y&H website for specific warranty terms and contact information.