
1. Introduction
Thank you for choosing the OMTech 60W CO2 Laser Engraver. This machine is designed for precision engraving and cutting across various materials such as wood, glass, and acrylic. This manual will guide you through the setup, operation, and maintenance of your laser engraver to ensure safe and optimal performance. Your laser engraver comes equipped with essential accessories including a water chiller for consistent laser performance and LightBurn software for intuitive control.
2. Safety Information
Operating a laser engraver requires adherence to strict safety protocols. Failure to follow these guidelines may result in serious injury or damage to the equipment.
- Laser Class: This device is a Class 2 laser product with 0.827mW output power. Avoid direct exposure to the laser beam.
- Eye Protection: Always wear appropriate laser safety glasses when operating the machine. The widened viewing window is made from flame-retardant material for enhanced safety during observation.
- Ventilation: Ensure the built-in air assist and external exhaust system are properly connected and functioning to efficiently remove smoke and dust, protecting laser lenses and reflective mirrors, and maintaining a safe working environment.
- Material Safety: Only engrave or cut materials approved for CO2 lasers. Certain materials can produce toxic fumes or catch fire.
- Emergency Stop: Familiarize yourself with the location and operation of the emergency stop button.
3. Product Features
The OMTech 60W CO2 Laser Engraver is equipped with advanced features designed for precision and ease of use:
- Commercial Laser Cutter Bundle: Includes a 60W CO2 laser engraver, water chiller, and LightBurn software for consistent performance and intuitive navigation.
- Autofocus Function: Eliminates manual adjustments. The workbeds adjust automatically, and the preinstalled autofocus finds the correct focal distance with the touch of a button.
- Large Work Area: Features honeycomb and aluminum blade beds with a 20"x28" (500x700 mm) work area.
- Four-Way Pass-Through Doors: Accommodates larger and longer items for extended project capabilities.
- Efficient Air Assist & Exhaust System: Built-in air assist removes smoke and dust, protecting laser lenses and reflective mirrors.
- Safe Observation Window: Widened viewing window made from flame-retardant material for safe process monitoring.
- High-Performance Laser Tube: Equipped with a Yongli H2 tube, offering a high-efficiency laser beam with a lifespan of up to 12,000 hours.

Image: The autofocus system automatically adjusts the laser head for precise focusing.

Image: The machine features convenient 4-way pass-through doors for handling oversized materials.

Image: The efficient exhaust system ensures a clean working area by removing smoke and debris.
4. What's in the Box
Upon receiving your OMTech 60W CO2 Laser Engraver, please verify that all components listed below are included:
- 1x 60W CO2 Laser Engraver
- 1x Water Chiller (CW-5200)
- 1x LightBurn Software
- 1x User Manual
- 1x Power Cord
- 1x USB Flash Drive
- 1x USB Cable
- 1x Ethernet Cable
- 1x Double-Sided Tape
- 1x Wrench Set
- 1x Tube of Silicone Insulation
- 1x Ceramic Resistor
- 1x Exhaust Pipe
- 1x Pipe Clamp
- 1x Water Pump
- 1x Water Pipe
- 1x Wire Set
- 6x Keys

Image: The OMTech 60W CO2 Laser Engraver and its primary bundled accessories.
5. Setup
5.1 Unpacking and Placement
Carefully unpack the laser engraver. Due to its weight (249 pounds) and dimensions (47.2 x 34.3 x 36.6 inches), it is recommended to have multiple people assist with placement. Position the machine on a stable, level surface in a well-ventilated area, away from flammable materials.
5.2 Connecting the Water Chiller
The water chiller is crucial for cooling the laser tube and ensuring consistent performance. Connect the water pipes from the chiller to the laser engraver's inlet and outlet ports as per the user manual. Fill the chiller with distilled water to the recommended level.
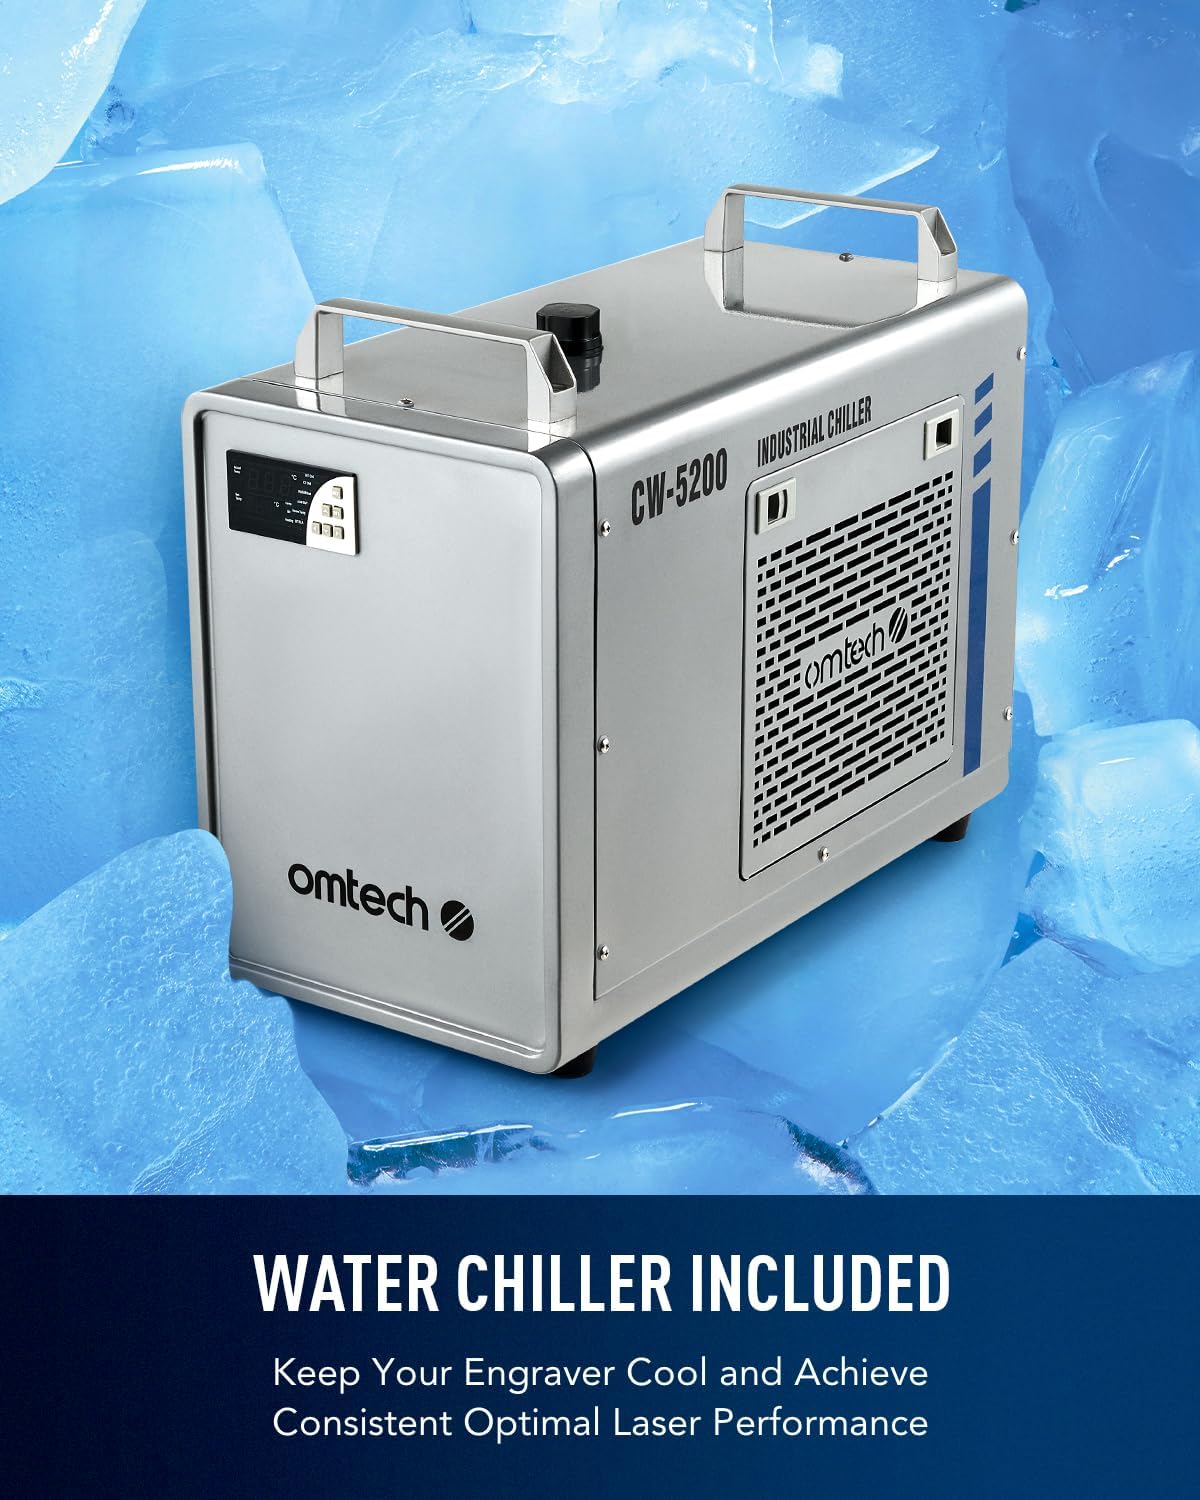
Image: The included CW-5200 industrial water chiller for laser tube cooling.
5.3 Air Assist and Exhaust System
Connect the air assist hose to the laser head and the exhaust pipe to the machine's exhaust port. Ensure the exhaust system vents outside or to a suitable filtration unit to remove smoke and fumes.
5.4 Electrical and Data Connections
Connect the power cord to a grounded outlet. Connect the laser engraver to your computer using the provided USB cable or Ethernet cable. The USB flash drive contains necessary drivers and software.
5.5 Software Installation (LightBurn)
Install the LightBurn software from the provided USB flash drive or download the latest version from the official LightBurn website. Follow the on-screen instructions for installation and initial setup.

Image: The LightBurn software interface, compatible with Windows, Linux, and macOS.
6. Operation
6.1 Loading Material
Open the laser engraver's lid. Place your material (e.g., wood, acrylic, glass) onto the honeycomb or aluminum blade bed. Ensure the material lies flat and is secured if necessary. Utilize the four-way pass-through doors for larger materials.
6.2 Using Autofocus
The autofocus feature simplifies setting the correct focal distance. Position the laser head over your material and activate the autofocus function via the control panel or software. The bed will adjust automatically to achieve optimal focus.
6.3 Digital Control Panel
The digital control panel allows for direct control over basic functions, job initiation, and monitoring. It is compatible with LightBurn, CorelDRAW, and AutoCAD.

Image: The digital control panel for easy and convenient operation.
6.4 Engraving and Cutting Process
Prepare your design in LightBurn. Set appropriate power and speed settings for your material. Initiate the job from the software or control panel. Monitor the process through the flame-retardant viewing window.
Video: Demonstration of laser engraving and cutting on acrylic mirror. This video illustrates the process of preparing acrylic mirror for engraving, setting up the design in LightBurn, and cleaning the finished product.
Video: Guide on how to laser engrave a photo using a CO2 laser engraver. This video details the steps for preparing an image for engraving on wood, adjusting settings in LightBurn, and achieving optimal photo-realistic results.
7. Maintenance
Regular maintenance ensures the longevity and optimal performance of your laser engraver.
- Cleaning Optics: Periodically clean the laser lenses and reflective mirrors to prevent residue buildup, which can degrade laser performance. Use appropriate cleaning solutions and lint-free wipes.
- Water Chiller Maintenance: Regularly check and maintain the water level in the chiller. Replace the water periodically to prevent algae growth and ensure efficient cooling of the laser tube.
- Exhaust System: Clean the exhaust pipe and fan to ensure proper airflow and efficient removal of smoke and debris.
- Workbed Cleaning: Keep the honeycomb and blade beds clean from debris and small cut pieces to maintain a level working surface and prevent fire hazards.
8. Troubleshooting
If you encounter issues with your laser engraver, consider the following common troubleshooting steps:
- No Laser Output: Check power connections, ensure the laser tube is properly cooled by the water chiller, and verify software settings for laser power.
- Poor Engraving/Cutting Quality: Ensure the material is flat and properly focused using the autofocus function. Clean the laser lenses and mirrors. Adjust power and speed settings in LightBurn for the specific material.
- Banding or Uneven Engraving: This can occur with certain materials or settings. Experiment with different DPI settings and ensure the material is securely held to prevent movement.
- Software Connection Issues: Verify USB/Ethernet cable connections and ensure LightBurn drivers are correctly installed. Restart both the machine and computer if necessary.
- Excessive Smoke/Fumes: Check the exhaust system for blockages and ensure it is properly venting. Verify air assist is active.
9. Specifications
| Feature | Detail |
|---|---|
| Model Number | RYGELAMZ-USB0705U1&LCW5200&USBLIGH |
| Laser Power | 60W CO2 |
| Work Area | 20" x 28" (500x700 mm) |
| Max. Engraving Speed | 600 mm/s |
| Product Dimensions | 47.2 x 34.3 x 36.6 inches |
| Item Weight | 249 pounds |
| Data Transmission | USB Cable, Ethernet Cable, USB Flash Drive, Offline |
| Pass-Through | 4-Way (Front/Back: 32.8x3.7 in., Side/Side: 20.4x0.7 in.) |
| Laser Class | Class 2, 0.827mW output power |
| Manufacturer | OMTech |
| Date First Available | May 25, 2023 |
10. Warranty & Support
OMTech is committed to providing excellent customer service and support for your laser engraver.
- Two-Year Support: Your product is covered by a two-year support period.
- US-Based Technical Support: Access quick response technical assistance from our US-based team to resolve any issues you encounter.
- 24/7 Online Customer Service: Our customer service team is available around the clock to assist you.
For further assistance, please visit the official OMTech website or contact customer support directly.

