1. Introduction
The PLASMARGON MIG200 is a versatile 3-in-1 multi-process welding machine designed for various applications including home DIY, auto repair, small-scale industrial manufacturing, and metal processing. This welder supports Flux Core MIG, Lift TIG, and Stick (MMA/ARC) welding, offering a powerful 135-amp output suitable for welding up to 5.0mm thick mild steel plates. It features an IGBT inverter for stable current regulation, an LED digital display for precise control, and robust safety features including overcurrent and overheat protection.
2. Safety Information
WARNING: Always read and understand all safety precautions before operating this welding machine. Failure to do so may result in serious injury or death.
- Wear appropriate personal protective equipment (PPE), including a welding helmet with proper shade, flame-resistant clothing, welding gloves, and safety shoes.
- Ensure adequate ventilation to avoid inhaling welding fumes.
- Protect bystanders from arc rays and sparks.
- Ensure the work area is free from flammable materials.
- Always connect the ground clamp securely to the workpiece.
- Do not operate the welder in wet conditions.
- Disconnect power before performing any maintenance or changing accessories.
3. Package Contents
Verify that all items listed below are included in your package:
- MIG200A Machine
- MIG Torch (MB-14AK)
- Electrode Holder (for Stick welding)
- Ground Clamp
- 0.030"/1lb Flux Cored Wire (E71T-GS)
- MIG torch Consumables (9pcs)
- Welding Cap
- Tapping Hammer
Note: A TIG welding gun needs to be purchased separately for Lift TIG welding.

Image: The PLASMARGON MIG200 machine displayed with all its included accessories, including the MIG torch, electrode holder, ground clamp, flux-cored wire, welding cap, and tapping hammer.
4. Setup
4.1 Power Connection
Connect the power cord to a suitable AC 110V power outlet. Ensure the welder's power switch, located on the rear panel, is in the 'OFF' position before connecting to power.
4.2 Wire Installation (Flux Core MIG)
- Open the side panel of the welder.
- Mount the flux-cored wire spool onto the spindle.
- Feed the wire through the wire feeder mechanism, ensuring it passes through the correct groove for the wire diameter (0.8mm or 1.0mm).
- Close the wire feeder tension arm and adjust the tension as needed.
- Thread the wire through the MIG torch liner until it emerges from the contact tip.
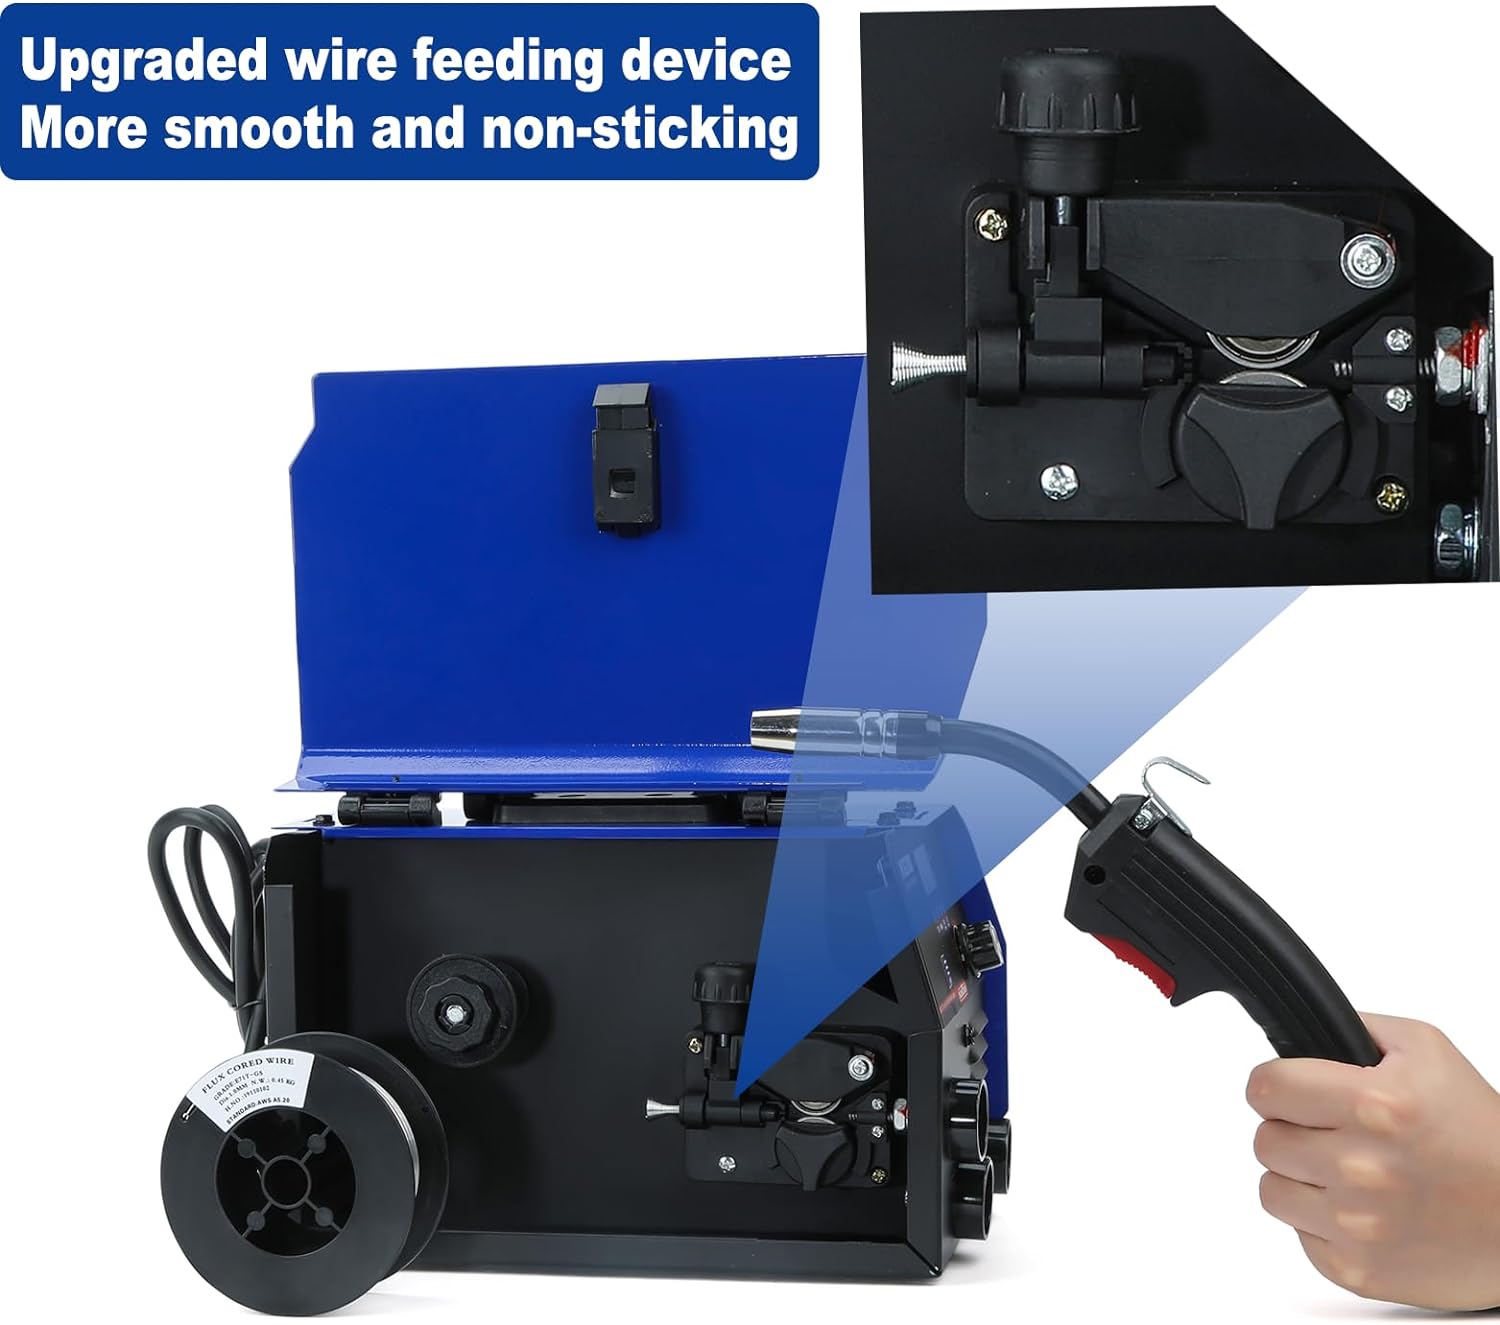
Image: A detailed view of the upgraded wire feeding device, designed for smooth and non-sticking wire delivery.

Image: Demonstrates the easy installation process of the flux-cored wire spool inside the welder, highlighting the gasless operation.
Video: A demonstration of how to install the flux-cored wire into the JZU MIG Welder Machine, showing the steps for loading the spool and threading the wire through the feeder mechanism.
4.3 Torch and Clamp Connections
- MIG Welding: Connect the MIG torch to the designated MIG torch interface on the front panel. Connect the ground clamp to the workpiece.
- Stick (MMA/ARC) Welding: Connect the electrode holder to the positive (+) terminal and the ground clamp to the negative (-) terminal on the front panel.
- Lift TIG Welding: Connect the TIG torch (not included) to the negative (-) terminal and the ground clamp to the positive (+) terminal.
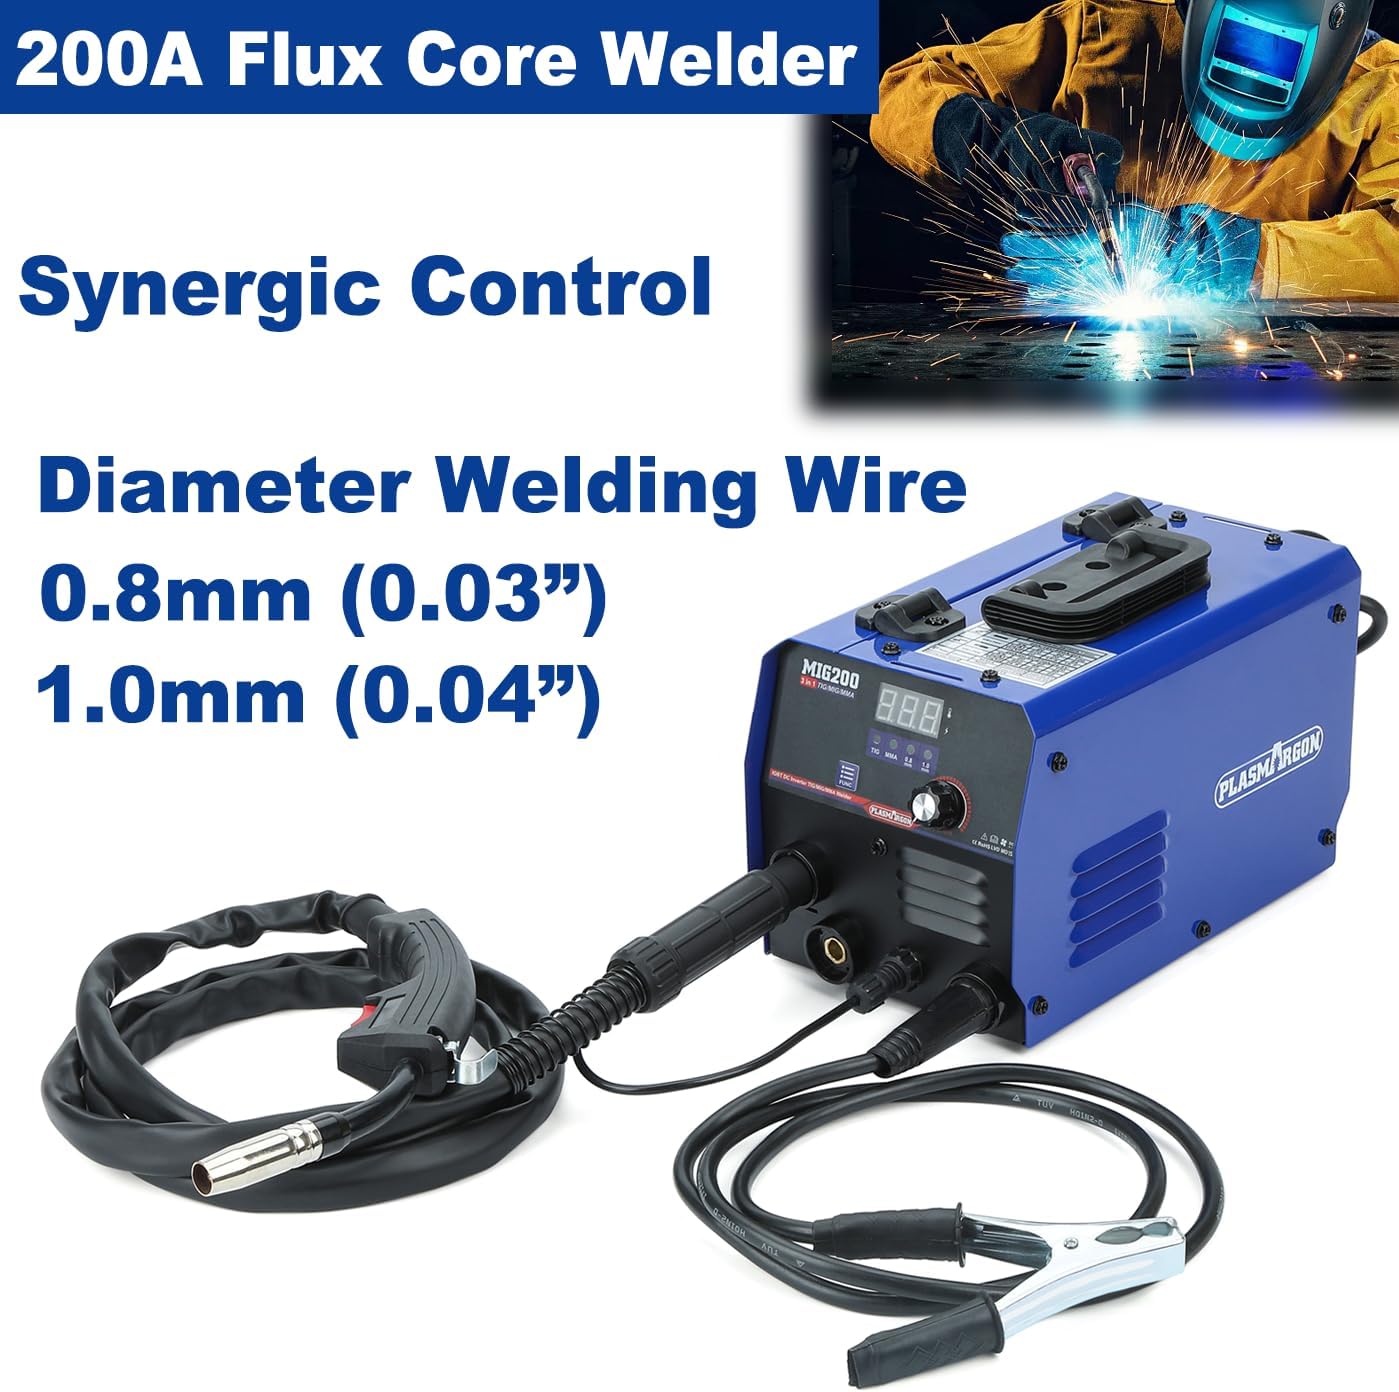
Image: The PLASMARGON MIG200 welder set up for MIG welding, showing the connected MIG torch and ground clamp.

Image: The PLASMARGON MIG200 welder configured for Stick welding, with the electrode holder and ground clamp connected.
5. Operating Instructions
5.1 Digital Panel Overview
The MIG200 features an LED digital display for clear visualization and efficient control. It monitors real-time current during welding.
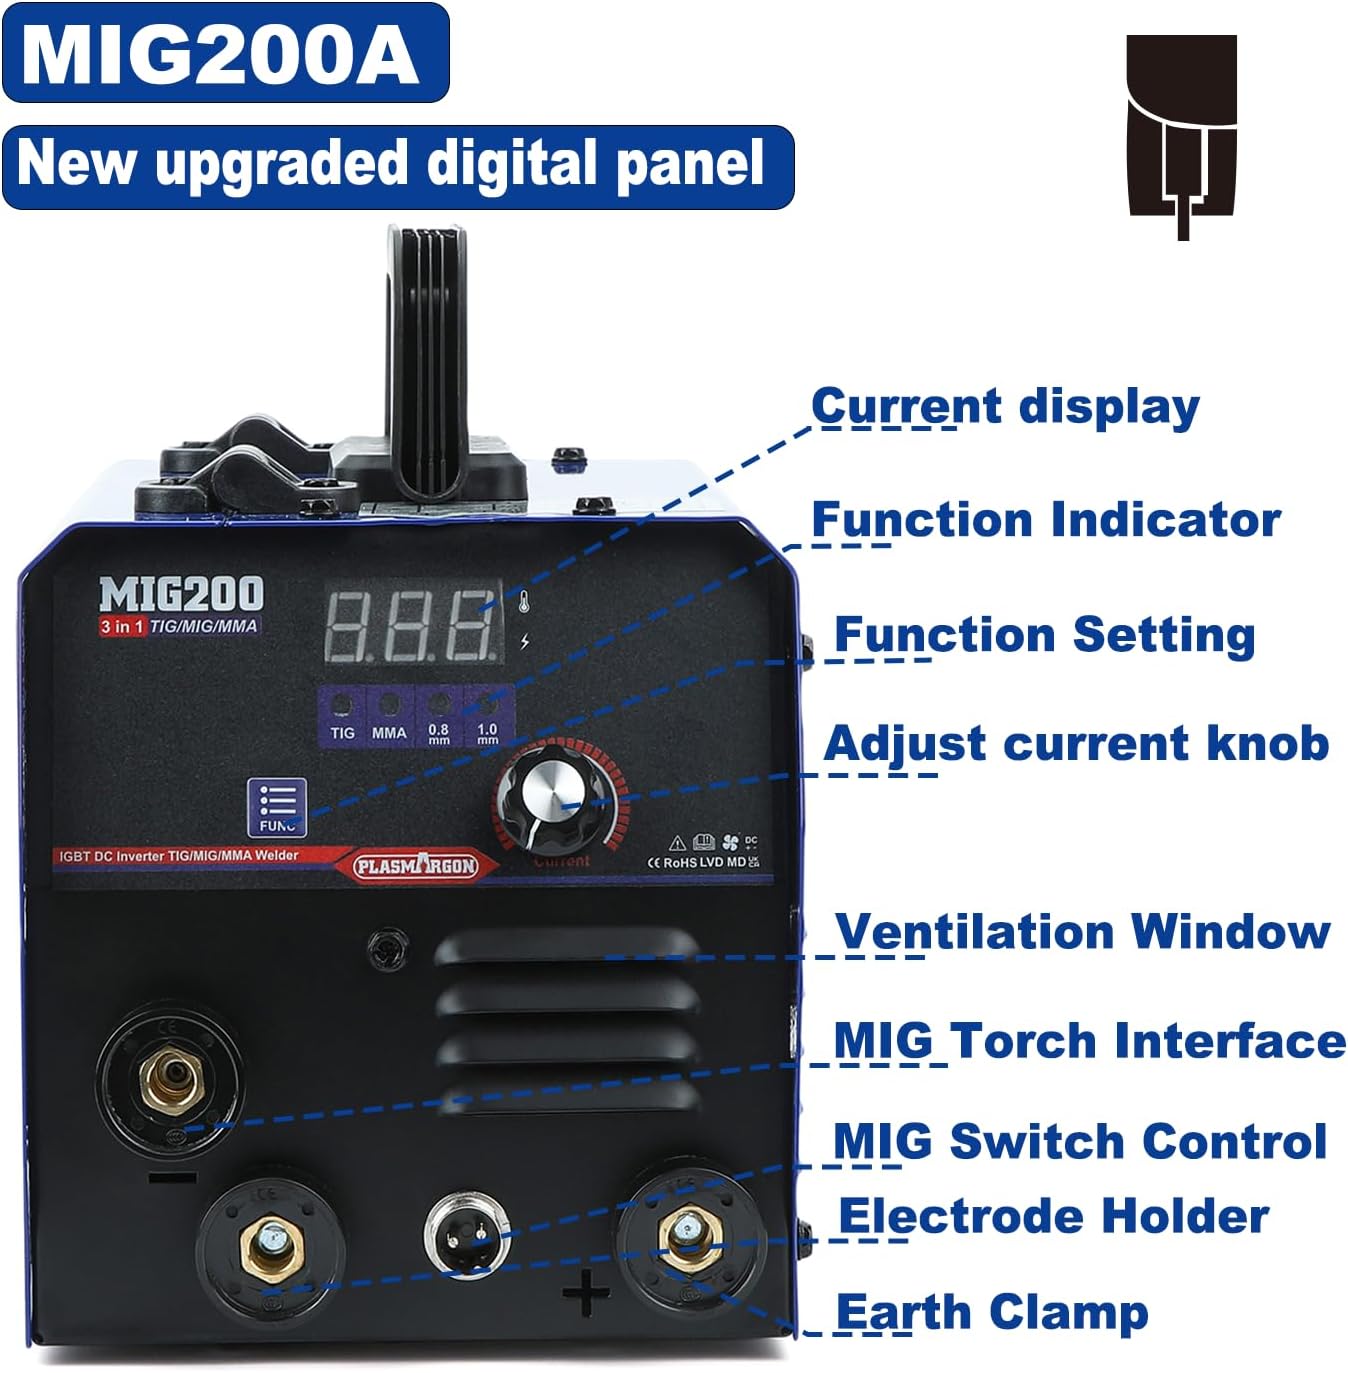
Image: A detailed view of the MIG200A's new upgraded digital panel, highlighting the current display, function indicators, function setting buttons, and current adjustment knob.
5.2 Mode Selection
Use the 'Function Selection' button on the digital panel to switch between the three welding modes: Flux Core MIG, Stick (MMA/ARC), and Lift TIG. The selected mode will be indicated on the display.
5.3 Parameter Adjustment
Adjust the amperage and voltage using the dedicated knobs on the front panel. The LED display will show the current settings. For manual arc welding, you can adjust heat start and arc force for an enhanced welding experience.
5.4 Welding Processes
The PLASMARGON MIG200 supports the following welding processes:
- Flux Core MIG Welding: This process uses flux-cored wire and does not require shielding gas, making it convenient for outdoor tasks.
- Stick (MMA/ARC) Welding: Ideal for various metals and conditions, offering deep welding pools and a nice welding surface.
- Lift TIG Welding: Provides precise control and clean welds. Note that a TIG torch is required and sold separately.

Image: Visual representation of the three welding processes supported by the machine: Flux Core MIG, Lift TIG, and Stick welding.
Video: A demonstration of the ARCCAPTAIN MIG Welder 130FIT in action, showcasing its welding capabilities across different modes.
Video: A demonstration of the Mig/MMA Welding Machine 160, illustrating its performance in both MIG and MMA welding modes.
6. Maintenance
- Regularly clean the welder's exterior and ventilation openings to prevent dust buildup.
- Inspect welding cables, torches, and clamps for damage before each use. Replace worn or damaged components immediately.
- Check and clean the MIG torch contact tip and nozzle regularly to ensure smooth wire feeding and optimal arc performance.
- Store the welder in a dry, clean environment when not in use.
7. Troubleshooting
If you encounter issues with your PLASMARGON MIG200 welder, consider the following general troubleshooting steps:
- No Power: Check the power connection, ensure the power switch is on, and verify the power outlet is functional.
- Poor Arc/No Arc: Ensure the ground clamp has good contact with the workpiece. Check for proper wire feeding (MIG), correct electrode insertion (Stick), or TIG torch connection (Lift TIG). Verify amperage/voltage settings are appropriate for the material.
- Wire Feeding Issues (MIG): Check wire spool installation, tension on the wire feeder, and ensure the contact tip is not clogged or worn.
- Overheat Protection Activated: If the overheat indicator lights up, allow the machine to cool down. Ensure ventilation is not obstructed.
For more detailed troubleshooting or specific error codes, refer to the comprehensive troubleshooting section in the full user manual.
8. Specifications
| Feature | Detail |
|---|---|
| Model Number | MIG200 |
| Power Source | AC 110V |
| Output Current (MIG/Lift TIG) | 50-200A (as per A+ content, product title states 130Amp) |
| Output Current (Stick/MMA/ARC) | 30-200A |
| Welding Capability | Up to 5.0mm mild steel plate |
| Compatible Wire Diameter | 0.8mm (0.03 inch), 1.0mm (0.04 inch) |
| Technology | IGBT Inverter |
| Item Weight | 6.38 kg (13.6 lbs) |
| Dimensions | 38 x 28.7 x 25 cm |
| Material | Plastic |

Image: The PLASMARGON MIG200 multi-function welding machine, illustrating its compact size and lightweight design with key dimensions.
9. Warranty & Support
The PLASMARGON MIG200 welding machine comes with a 1-year manufacturer's warranty. For warranty claims, technical support, or any inquiries regarding your product, please contact PLASMARGON customer service through the retailer where the product was purchased or visit the official PLASMARGON website for contact information.


