1. Introduction
The GATERON G Pro 3.0 Switches are advanced mechanical keyboard switches designed for enhanced durability and performance. Addressing user feedback, these switches feature an upgraded pin design to prevent bending during installation and removal, maintaining GATERON's commitment to high-precision production and premium quality. They are pre-lubed for a smoother typing experience and are compatible with hot-swap mechanical keyboards.

Figure 1: GATERON G Pro 3.0 Red Switch (side view and bottom view).
2. Product Features
- Actuation Force: 45 gf, Bottom-out Force: 50 gf.
- Materials: POM stem, PC Transparent top housing, Nylon bottom housing.
- Travel Distances: Pre Travel Distance: 2.0±0.6 mm, Total Travel Distance: 4.0 mm Max.
- Spring: 20.5 mm Spring steel.
- Pins: 5-Pin design for stability.
- LED Support: SMD compatible.
- Lubrication: Pre-lubed for smooth operation.

Figure 2: Exploded view showing the individual components of a GATERON G Pro 3.0 switch, including the stem, top housing, bottom housing, spring, and contacts.
3. Setup Guide
These switches are designed for hot-swappable mechanical keyboards. Follow these steps for proper installation:
- Prepare Your Keyboard: Ensure your keyboard is powered off and unplugged from your computer.
- Remove Keycaps: Use a keycap puller to carefully remove the keycaps from the switches you intend to replace or install.
- Remove Old Switches (if applicable): If replacing, use a switch puller to gently unclip and remove the existing switches from the PCB.
- Align New Switches: Carefully align the 5 pins of the GATERON G Pro 3.0 switch with the corresponding holes on the keyboard's PCB. Ensure the switch is oriented correctly (usually with the LED slot facing the top of the keyboard).
- Press Firmly: Apply gentle, even pressure to the top of the switch until it clicks into place. Do not force the switch, as this can bend the pins. If resistance is met, remove the switch, check the pins for bends, straighten them if necessary, and re-align.
- Test Functionality: After installing all switches, plug in your keyboard and test each key to ensure proper functionality before reattaching keycaps.
- Reattach Keycaps: Once all switches are confirmed working, carefully press the keycaps back onto the switch stems.
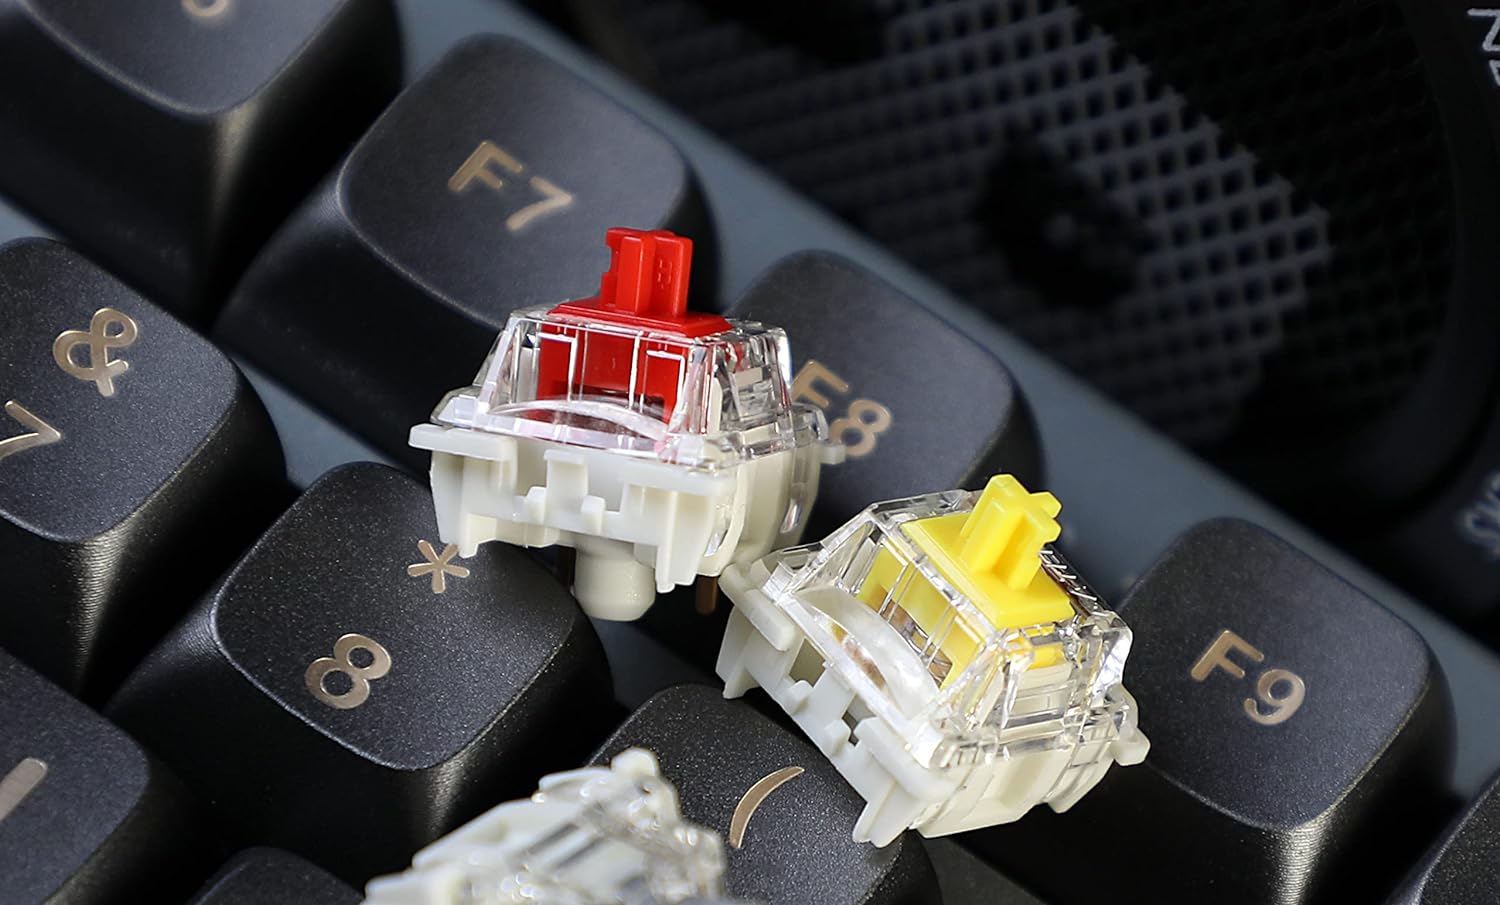
Figure 3: GATERON G Pro 3.0 switches (Red and Yellow variants) installed on a mechanical keyboard, demonstrating their appearance when mounted.
4. Operation
GATERON G Pro 3.0 switches are linear switches, meaning they provide a smooth, consistent keystroke without a tactile bump or audible click. The pre-lubrication ensures a fluid press from top to bottom. Simply press the keycap mounted on the switch to actuate the key. The 45gf actuation force provides a light and responsive feel, ideal for gaming and fast typing.
5. Maintenance and Care
To ensure the longevity and optimal performance of your GATERON G Pro 3.0 switches, consider the following maintenance tips:
- Regular Cleaning: Periodically remove keycaps and use compressed air to clear dust, crumbs, and debris from around and within the switches.
- Gentle Handling: When installing or removing switches, always use appropriate tools (switch puller) and apply gentle, even pressure to avoid bending pins or damaging the switch housing.
- Avoid Liquids: Keep liquids away from your keyboard to prevent damage to the switches and PCB. In case of a spill, immediately unplug the keyboard and allow it to dry completely before use.
- Storage: If storing switches separately, keep them in a clean, dry, and dust-free container.
6. Troubleshooting
If you encounter issues with your GATERON G Pro 3.0 switches, consider these common troubleshooting steps:
- Key Not Registering:
- Ensure the switch is fully seated in the PCB. Gently press down on the switch to confirm it is clicked into place.
- Remove the switch and inspect the pins for any bends. Straighten bent pins carefully with tweezers if necessary.
- Test the switch in another slot on the keyboard, if available, to determine if the issue is with the switch or the PCB slot.
- Scratchy or Inconsistent Feel:
- While switches are pre-lubed, minor inconsistencies can occur. Continued use often smooths out the switch.
- Ensure no debris is lodged inside the switch.
- Bent Pins During Installation:
- This is a common issue. Carefully remove the switch.
- Use fine-tipped tweezers or needle-nose pliers to gently straighten the bent pin(s). Be extremely careful as pins can break if bent too many times or too forcefully.
- Re-align the switch carefully before re-inserting.
7. Technical Specifications
| Specification | Value |
|---|---|
| Operation Mode | Mechanical |
| Current Rating | 0.01 Amps |
| Contact Type | Normally Closed |
| Connector Type | Plug In |
| Brand | GATERON |
| Terminal | Through Hole |
| Item dimensions L x W x H | 0.04 x 0.04 x 0.04 inches |
| Circuit Type | 1-way |
| Mounting Type | Surface Mount |
| Actuator Type | Linear |
| Contact Material | Plastic |
| Number of Positions | 1 |
| Upper Temperature Rating | 80 Degrees Celsius |
| Control Method | Touch |
| Connectivity Protocol | X-10 |
| Color | red |
| Unit Count | 35.0 Count |
| Number of Items | 35 |
| Manufacturer | GATERON |
| Product Dimensions | 0.04 x 0.04 x 0.04 inches |
| Item Weight | 3.17 ounces |
| ASIN | B0C65CNYP9 |
| Item model number | KS-9H10B045NW-Y51 |
| Date First Available | May 24, 2023 |

Figure 4: A selection of GATERON G Pro 3.0 switches in different colors, showcasing the variety available.
8. Warranty and Support
For warranty information and customer support, please refer to the official GATERON website or contact the seller directly through your purchase platform. Keep your proof of purchase for any warranty claims.


