
1. Introduction
Thank you for choosing the WEELMOTO Halogen Headlights Assembly. This manual provides essential information for the proper installation, operation, and maintenance of your new headlights. Please read these instructions carefully before beginning any procedures to ensure safe and correct usage.

Image: WEELMOTO Halogen Headlights Assembly installed on a Mazda 3 Sedan.
2. Compatibility
This headlight assembly is designed for specific Mazda 3 Sedan models. Please verify your vehicle's compatibility before installation:
- 2005 Mazda 3 SP23
- 2004-2006, 2008-2009 Mazda 3 (submodel: GS, GT, GX)
- 2004-2009 Mazda 3 (submodel: i, S)
Important: Not Compatible with Factory HID Models or Hatchback Models.

Image: Visual guide illustrating compatible sedan models and incompatible HID/hatchback models.
3. Product Features
The WEELMOTO Halogen Headlights Assembly offers the following features:
- OE Style Replacement: Designed to match the original equipment specifications for a precise fit.
- DOT/SAE Compliant: Meets or exceeds Department of Transportation (DOT) and Society of Automotive Engineers (SAE) standards for quality and safety.
- High Durability: Constructed with materials resistant to heat, UV aging, and freezing temperatures, ensuring a long lifespan.
- Waterproof: IP65 certified to protect against water ingress and ensure reliable performance in various weather conditions.
- Light Source: Utilizes HB3 for high beam and H7 for low beam. Note: Bulbs are not included; please use stock bulbs for installation.
- Adjustable Beams: Features vertical adjustment screws for precise light beam alignment.
- One-Way Vent: Integrated vent system designed to prevent condensation buildup within the housing.

Image: Headlight assembly demonstrating high durability against extreme temperatures.

Image: Vehicle driving in rain, showcasing the IP65 certified waterproof design.

Image: Optical lab equipment used for rigorous testing of headlight performance.
Product Testing Video
Video: Demonstrates water and optical tests performed on the WEELMOTO headlight assembly to ensure durability and performance.
4. Installation
Installation of the WEELMOTO Halogen Headlights Assembly is designed to be a plug-and-play process. However, professional installation is recommended. Always ensure the vehicle is off and the battery is disconnected before starting work.
Safety Precautions:
- Ensure the vehicle is turned off and the battery is disconnected to prevent electrical hazards.
- Wear appropriate safety gear, including gloves and eye protection.
- Avoid touching the bulb glass with bare hands, as oils can reduce bulb life.
Installation Steps:
- Remove the grille of your vehicle.
- Unscrew the clips, screws, or retainer springs that hold the existing headlight in place.
- Disconnect the wiring harness from the stock headlight and detach the old headlight assembly.
- Carefully fit the new WEELMOTO headlight assembly into position.
- Reconnect the wiring that was unplugged from the assembly. Ensure all connections are secure to prevent moisture ingress.
- Reinstall the grille and secure all fasteners.
Note: Bulbs are not included. Please use your vehicle's stock HB3 (high beam) and H7 (low beam) bulbs for installation.

Image: Detailed installation steps from the included manual.
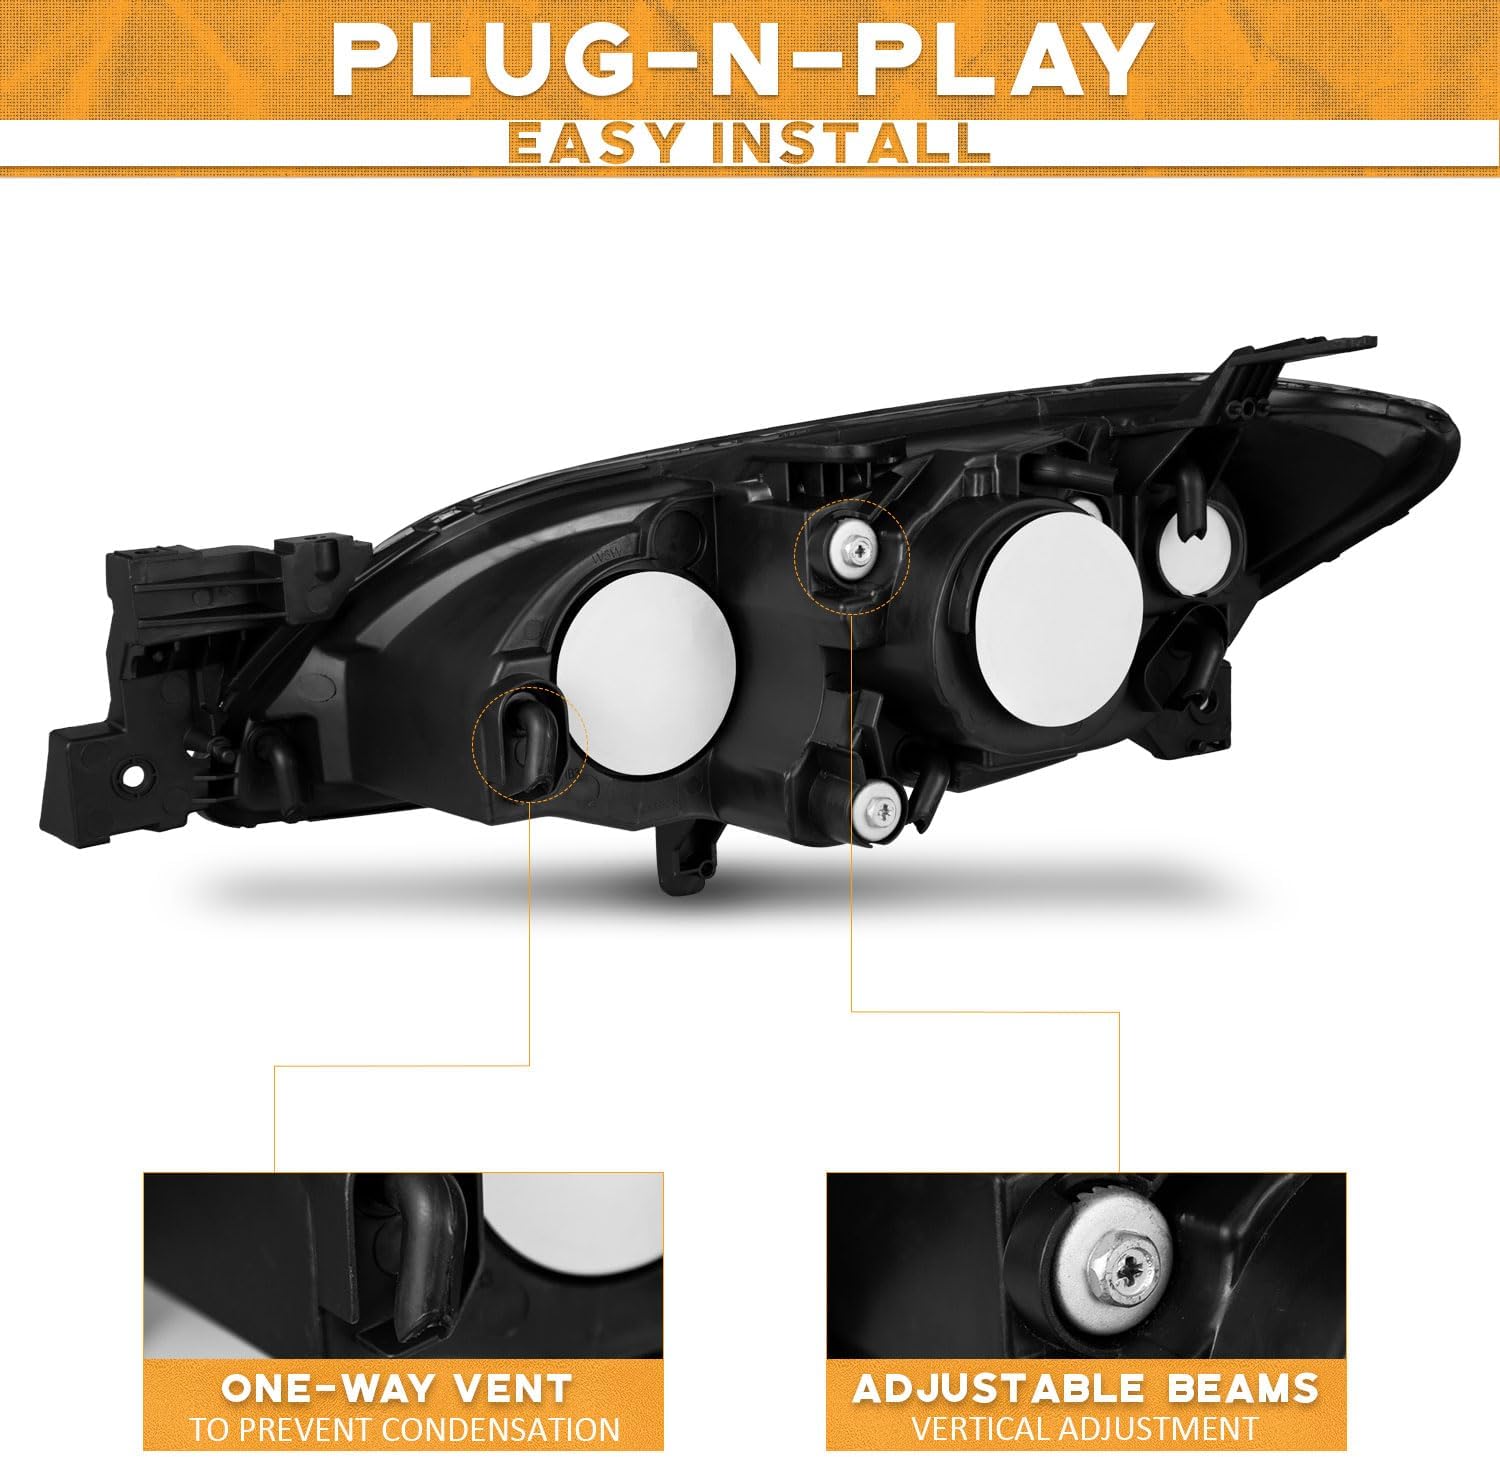
Image: Rear view of the headlight assembly highlighting the one-way vent and vertical adjustment screw.

Image: Exploded view of the headlight assembly components.
Packaging and Handling Video
Video: Shows the secure packaging and drop testing of the headlight assembly, ensuring product integrity upon arrival.
5. Operation
Your WEELMOTO Halogen Headlights Assembly provides both high and low beam functions, along with an amber turn signal reflector for enhanced visibility.
Headlight Functions:
- Low Beam (H7): Provides standard illumination for everyday driving, designed to avoid dazzling oncoming traffic.
- High Beam (HB3): Offers maximum illumination for driving in dark conditions where no oncoming traffic is present.
- Amber Reflector/Turn Signal: Enhances side visibility and indicates turns.

Image: Front view diagram labeling high beam, low beam, amber reflector, and turn signal components.
Adjusting Headlight Beams:
For optimal light distribution and safety, adjust your headlight beams after installation:
- Park your vehicle on a level surface approximately 25 feet (7.6 meters) from a wall.
- Mark the center points of each low beam light on the wall.
- Use a screwdriver to turn the vertical adjustment screw on the back of each headlight assembly until the light pattern aligns correctly with the marked points.
- Ensure the horizontal line is even and the bright spots are centered.
Caution: Do not over-adjust the beams (more than three times either clockwise or counter-clockwise) to avoid damage to the adjuster mechanism.

Image: Before and after comparison of road illumination with new headlights.

Image: SAE Light Pattern Distribution Chart for optimal visibility.

Image: Visual representation of low beam and high beam characteristics.
6. Maintenance
Proper maintenance ensures the longevity and optimal performance of your headlights.
Cleaning:
Clean the headlight lenses regularly with mild soap and water. Avoid using abrasive cleaners or harsh chemicals, as these can damage the lens material.
Addressing Temporary Condensation:
It is normal for minor condensation to occur due to temperature differences, air pressure, or other weather conditions. To resolve this:
- Check the one-way vents on the housing to ensure they are not blocked.
- Turn on the low beam for 20 minutes to help dissipate moisture.
- If persistent, carefully remove the bulbs and clear any visible moisture.
- Consider placing a silica gel packet inside the housing (if space allows) to absorb moisture.
Image: Close-up of the headlight's one-way vent, crucial for preventing condensation.
7. Troubleshooting
Common Issues:
- Condensation: Refer to the 'Addressing Temporary Condensation' section under Maintenance.
- Bulb Malfunction: If a bulb fails, replace it with a new HB3 (high beam) or H7 (low beam) halogen bulb. Ensure the correct bulb type is used.
Important Note on LED Bulbs:
Do NOT directly replace halogen bulbs with LED bulbs without proper conversion. This product is designed for halogen bulbs (HB3/H7). Using incompatible LED bulbs may result in improper light patterns, reduced visibility, and potential damage to the headlight assembly or vehicle's electrical system.

Image: Safety reminder regarding the use of LED bulbs in halogen headlight assemblies.
8. Specifications
| Feature | Detail |
|---|---|
| Brand | WEELMOTO |
| Model Number | MZM-30 |
| Compatible Vehicles | 2005 Mazda 3 SP23, 2004-2006, 2008-2009 Mazda 3 (submodel: GS, GT, GX), 2004-2009 Mazda 3 (submodel: i, S) (Not Compatible with Factory HID Models or Hatchback Models) |
| Light Source Type | High Beam: HB3 / Low Beam: H7 (Bulbs Not Included) |
| Voltage | 12 volts DC |
| Wattage | 60.06 watts |
| Lens Material | Polycarbonate |
| Lens Color | Clear Lens |
| Housing Color | Black Housing |
| Reflector Color | Amber Reflector |
| OEM Equivalent Part Numbers | BN8P510L0D, BN8P510L0C, BN8P510K0C, BN8P510K0D |
| Included Components | 1 Pair Headlights Assembly (Left Driver + Right Passenger Side) |
9. Warranty and Support
WEELMOTO stands behind the quality of its products. This headlight assembly comes with a 3-year assurance period from the date of purchase.
Customer Support:
If you encounter any issues or have questions regarding your product, please contact WEELMOTO customer service. You can typically find a 'Contact Seller' or 'Ask a Question' option on the product's purchase page. Providing your order details will help expedite the support process.
Manufacturing Process Video
Video: Overview of the design and manufacturing process, highlighting quality control measures.
