1. Introduction
The KETTLER Happy Navigator 4-in-1 Tricycle is designed to adapt and grow with your child from 10 to 72 months of age. This manual provides essential information for the safe assembly, operation, and maintenance of your tricycle. Please read all instructions carefully before assembly and use to ensure the safety of your child and the longevity of the product.
2. Safety Information
WARNING: Failure to follow these instructions may result in serious injury.
- Always supervise children when using the tricycle.
- Ensure all locking mechanisms are engaged before each use.
- The 5-point safety harness must always be used in stages where the child is secured.
- Do not use near stairs, hills, roadways, or swimming pools.
- Only one rider at a time.
- Wear appropriate safety gear, including a helmet, when the child is independently riding.
- Regularly inspect the tricycle for loose parts, damage, or wear. Discontinue use if any damage is found.
- Maximum weight capacity: Consult product labeling for specific limits.
3. Parts List
Before assembly, verify that all components listed below are present:
- Tricycle Frame (main body)
- Front Wheel Assembly
- Rear Wheel Assemblies (2)
- Seat with 5-point Safety Harness
- Parent Push-bar
- Sun Canopy
- Detachable Safety Surround (Guardrail)
- Foldable Middle Footrest
- Nonslip Pedals (2)
- Front Bottle Holder Basket
- Rear Storage Basket
- Assembly Hardware (screws, bolts, tools if included)
4. Setup and Assembly
Follow these steps to assemble your KETTLER Happy Navigator 4-in-1 Tricycle. Refer to the diagrams for visual guidance.
4.1. Initial Frame Assembly
- Unpack all components and lay them out on a clean, flat surface.
- Attach the front wheel assembly to the main frame, ensuring it clicks securely into place.
- Install the rear wheel assemblies onto the rear axle until they lock.
4.2. Seat and Safety Features Installation
- Slide the seat into the designated slot on the frame until it is firmly seated.
- Attach the detachable safety surround to the seat, ensuring both sides are securely fastened.
- Connect the 5-point safety harness straps to the seat.
4.3. Handlebar, Parent Push-bar, and Canopy
- Insert the handlebar into the front fork and tighten any securing bolts.
- Attach the parent push-bar to the rear of the tricycle frame. Adjust its height as needed.
- Mount the sun canopy onto the designated attachment points above the seat.
4.4. Accessories
- Attach the front bottle holder basket to the handlebar area.
- Secure the rear storage basket to the back of the tricycle.

Figure 1: Fully assembled KETTLER Happy Navigator 4-in-1 Tricycle with canopy, parent handle, and safety features.

Figure 2: Key features including the extendable UV-protection canopy, 5-point safety harness, detachable safety surround, front bottle holder, rear basket, EVA suspension tires, and foldable middle footrest.
5. Operating Instructions: 4 Stages of Growth
The KETTLER Happy Navigator is designed to evolve with your child's development. Adjust the tricycle according to the child's age and skill level.

Figure 3: Visual representation of the tricycle transforming through its four stages.
5.1. Stage 1: Parent-Controlled Mode (Approx. 10+ Months)
At this stage, the tricycle functions as a stroller-like ride-on, fully controlled by the parent.
- Configuration: All safety features are in place: 5-point safety harness, padded high-back seat, detachable safety surround, extendable UV-protection canopy, and foldable middle footrest. The parent push-bar is attached and adjusted to a comfortable height.
- Operation: The child's feet rest on the foldable middle footrest. The parent steers and pushes the tricycle using the adjustable parent handle. Engage the front freewheel system so pedals do not rotate with the wheel, preventing interference with the child's feet.

Figure 4: A child seated in the tricycle, demonstrating the parent-controlled mode with safety features engaged.
5.2. Stage 2: Assisted Riding (Approx. 18+ Months)
The child begins to develop balance and motor skills while the parent maintains control.
- Configuration: The 5-point safety harness and safety surround remain in place. The canopy can be removed if desired. The foldable middle footrest may still be used, or the child can attempt to place feet on the pedals (with freewheel engaged). The parent push-bar is still attached.
- Operation: The parent continues to push and steer. The child can practice holding the handlebars and placing their feet on the pedals without propulsion.

Figure 5: Tricycle configured for assisted riding, with parent handle and safety surround, but without the canopy.
5.3. Stage 3: Training Tricycle (Approx. 24+ Months)
The child learns to pedal with parental assistance.
- Configuration: Remove the detachable safety surround. The 5-point safety harness can be removed or used as needed. Engage the pedals to the front wheel by disengaging the freewheel system. The parent push-bar remains attached for steering assistance and control.
- Operation: The child practices pedaling while the parent guides the tricycle. The parent can assist with steering and provide stability.
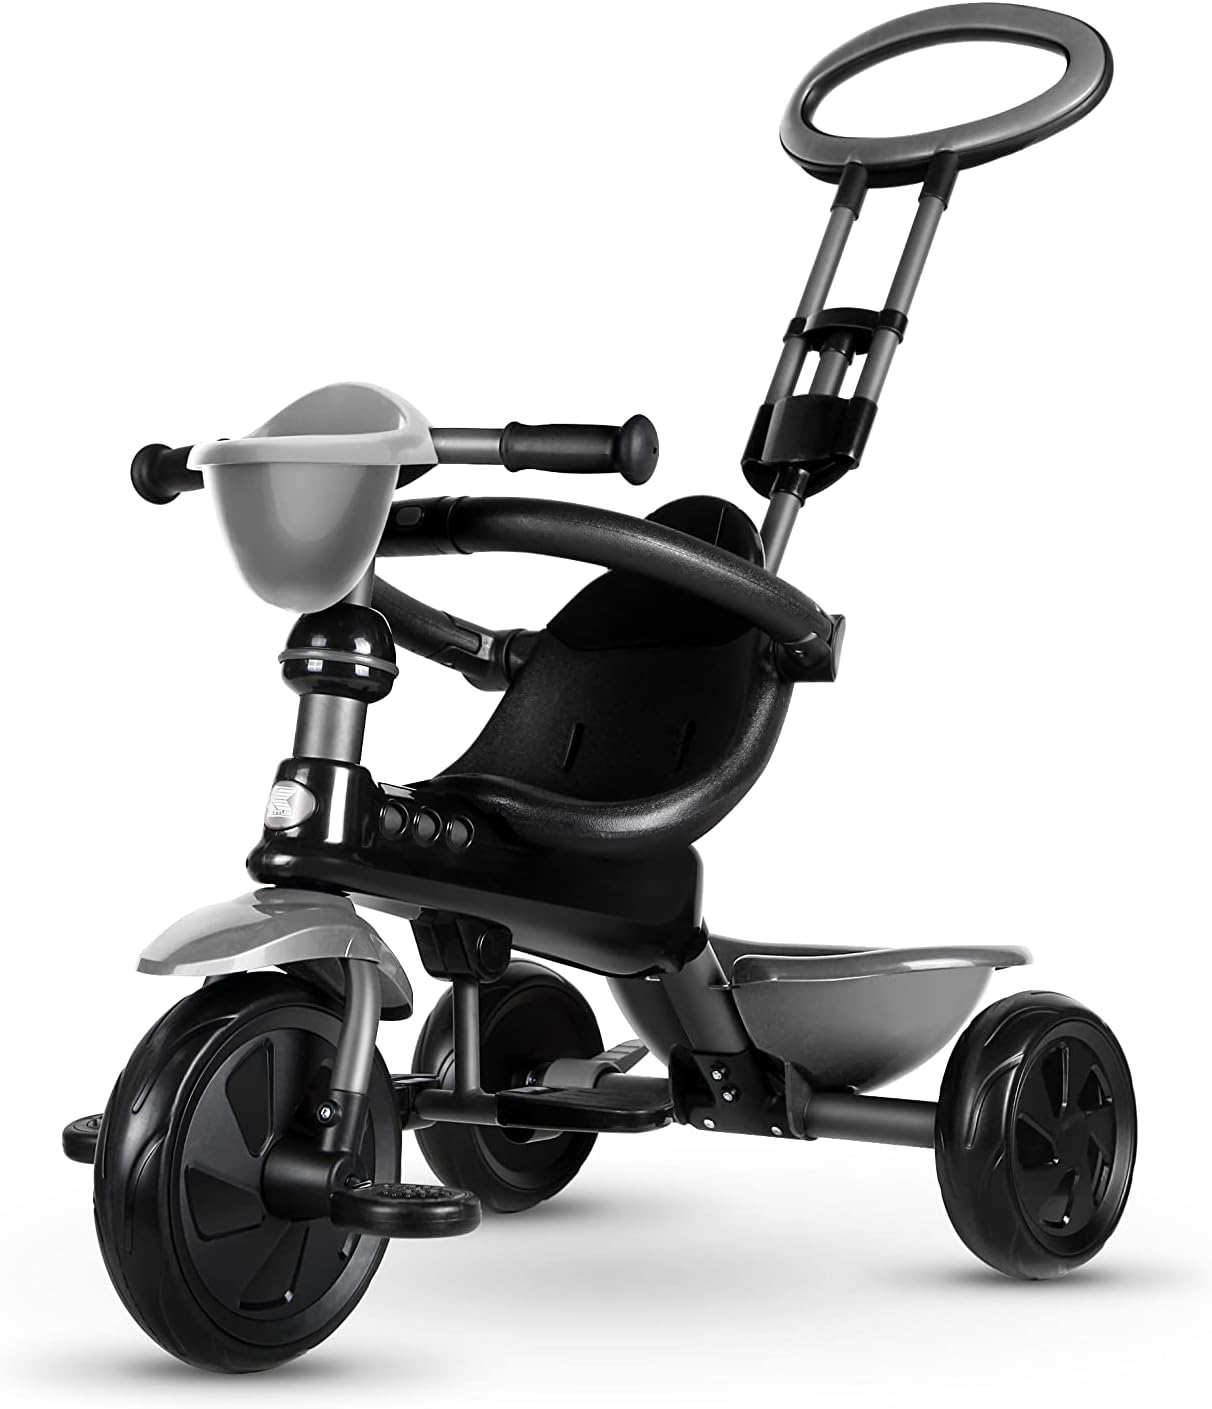
Figure 6: Tricycle configured for training, with parent handle, but without canopy and safety surround.
5.4. Stage 4: Independent Tricycle (Approx. 36+ Months)
The child is ready to pedal and steer independently.
- Configuration: Remove the parent push-bar. The child uses the pedals and handlebars for full control.
- Operation: The child rides the tricycle independently. Ensure the child wears a helmet and is supervised in a safe environment.

Figure 7: Tricycle configured for independent riding, without parent handle, canopy, or safety surround.
5.5. Freewheel System
The front freewheel system allows the pedals to be disengaged from the front wheel. This is crucial for parent-controlled stages to prevent the child's feet from being caught by rotating pedals. To engage/disengage, locate the mechanism on the front wheel hub and follow the arrows or instructions printed on it.
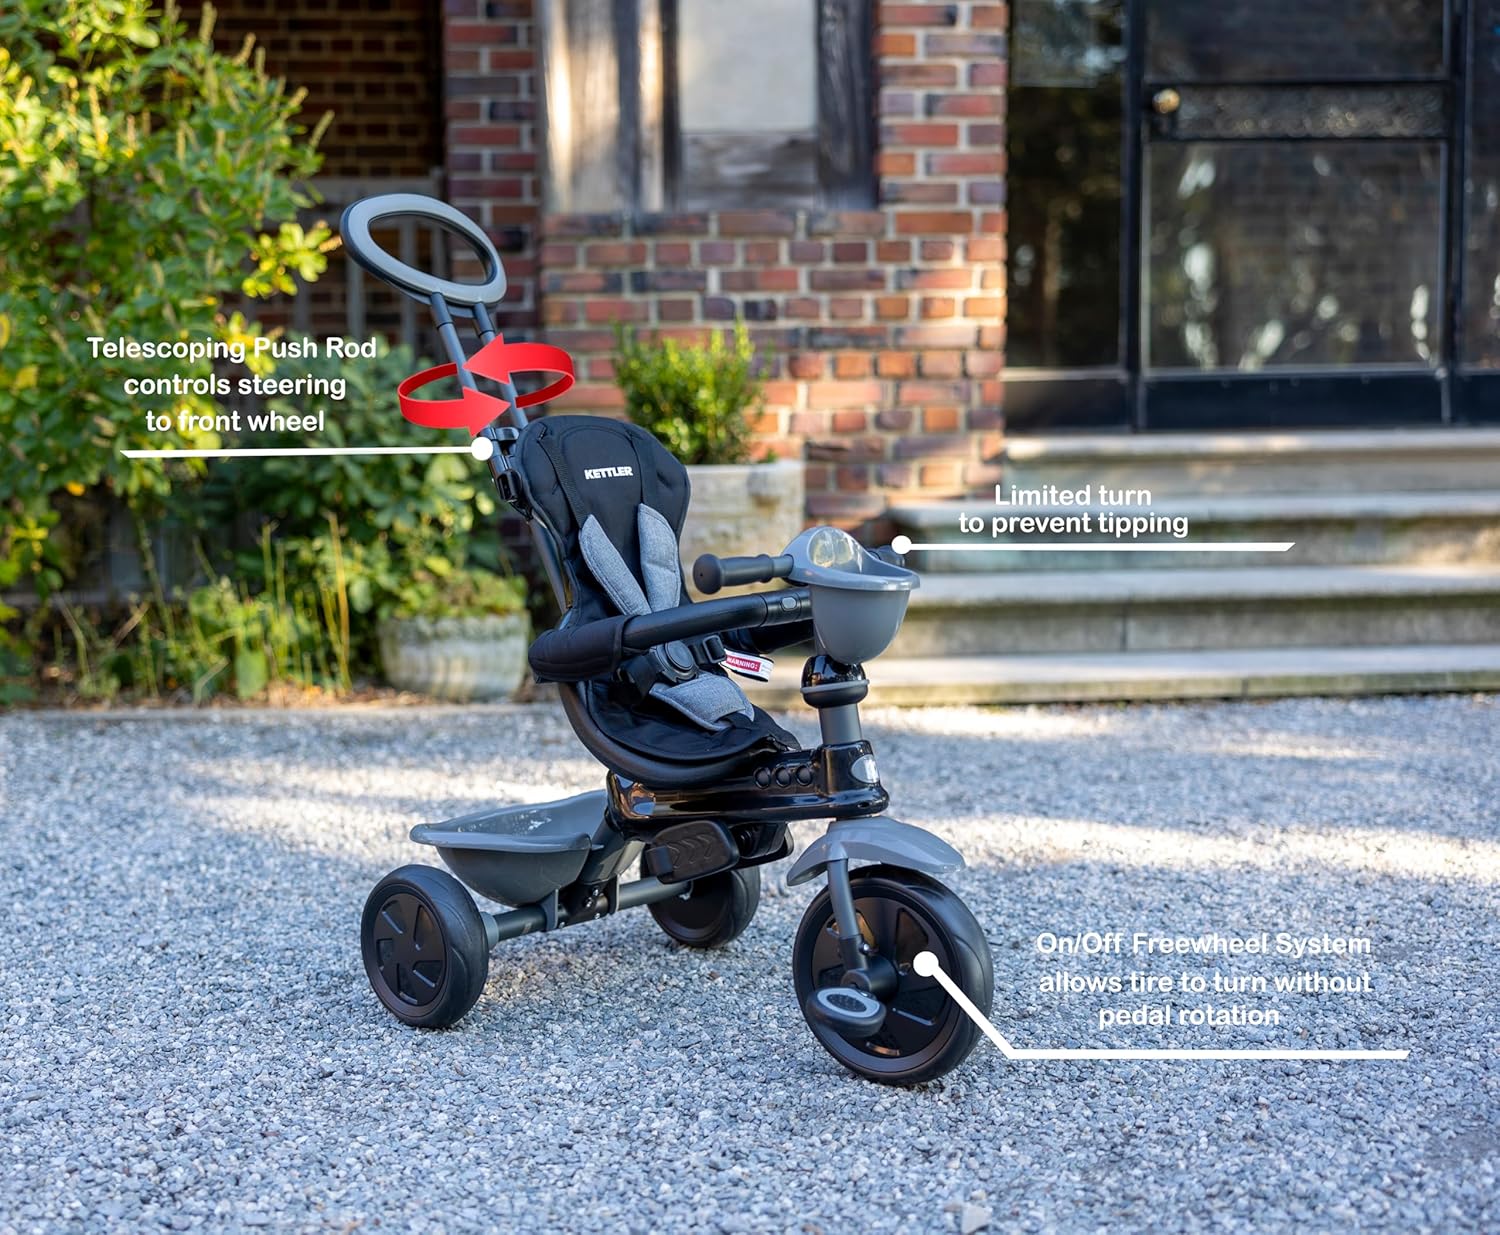
Figure 8: Illustration highlighting the telescoping push rod, limited turn feature, and the on/off freewheel system.
6. Maintenance
6.1. Cleaning
- Wipe down the frame and plastic parts with a damp cloth and mild soap.
- Do not use abrasive cleaners or solvents.
- The seat cushion can be spot cleaned or hand washed with mild detergent.
6.2. Storage
- Store the tricycle in a dry, cool place away from direct sunlight and extreme temperatures.
- Protect from rain and moisture to prevent rust on metal components.
6.3. Inspection
- Periodically check all bolts, nuts, and fasteners to ensure they are tight.
- Inspect wheels and tires for wear or damage.
- Ensure the safety harness and buckles are functioning correctly.
7. Troubleshooting
| Problem | Possible Cause | Solution |
|---|---|---|
| Tricycle difficult to steer with parent handle. | Loose connection of parent handle or front wheel. | Check and tighten all connections for the parent handle and front wheel assembly. |
| Pedals not turning the front wheel. | Freewheel system is engaged. | Disengage the freewheel system on the front wheel hub. |
| Child's feet getting caught by pedals. | Freewheel system is disengaged or footrest not used. | Engage the freewheel system or ensure the child's feet are on the foldable footrest. |
| Tricycle feels unstable. | Loose components or improper assembly. | Re-check all assembly steps and tighten all fasteners. Ensure the limited turn feature is functioning. |
8. Specifications
- Model: 8811
- Product Dimensions (L x W x H): 30 x 20.5 x 40 inches
- Item Weight: 18 pounds
- Recommended Age: 10 months and up
- Frame Material: High quality steel
- Wheel Type: Shock absorbing EVA wheels
- Safety Features: 5-point safety harness, detachable safety surround, foot brake

Figure 9: Labeled dimensions of the KETTLER Happy Navigator 4-in-1 Tricycle.
9. Warranty and Support
For warranty information, product support, or to order replacement parts, please contact KETTLER customer service. Refer to your purchase documentation or the official KETTLER website for contact details.
Manufacturer: LITTLE TIGER


