1. Product Overview
The Y&H MPPT Solar Charge Controller is designed to efficiently manage power from your solar panels to charge various battery types and power DC loads. It utilizes advanced Maximum Power Point Tracking (MPPT) technology to maximize energy harvest from the solar array, ensuring high tracking efficiency and conversion efficiency.
This controller features an intuitive LCD display for dynamic monitoring of operating data and status. It supports automatic 12V/24V voltage detection and offers multiple charging modes for Sealed, GEL, Flooded, LiFePO4, and Li(NiCoMn)O2 batteries. Its robust design ensures reliable performance for various applications, including communication base stations, home power systems, traffic lights, and solar street lights.
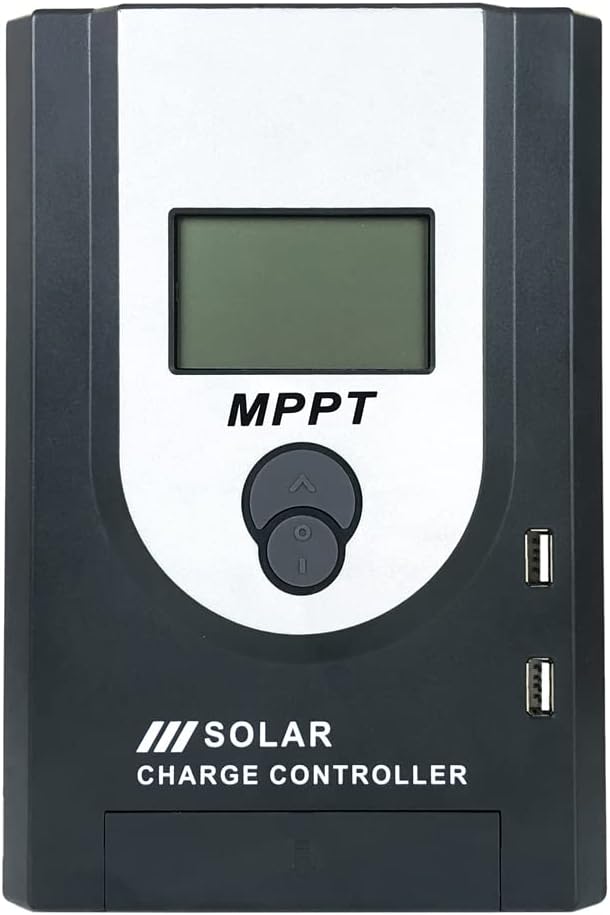
Figure 1: Front view of the Y&H MPPT Solar Charge Controller. This image shows the main unit with its LCD screen, navigation buttons, and two USB charging ports on the side.
2. Key Features
- Advanced MPPT (Maximum Power Point Tracking) technology with tracking efficiency not less than 99.5%.
- Maximum conversion efficiency up to 97%.
- Ultra-fast maximum power point tracking speed.
- Accurate identification and tracking of multi-wave peak maximum power point.
- Reliable maximum input power for PV system to ensure equipment safety.
- Wide operating voltage range for PV installation with automatic 12V/24V voltage detection.
- LCD screen dynamically displays operating data and working status.
- Multiple load control modes: General mode, Light control mode, Dual time mode, Pure charge mode, and Time control mode.
- Selectable charging procedures for Sealed, GEL, Flooded, LiFePO4, and Li(NiCoMn)O2 batteries.
- Battery temperature compensation function.
- Performance statistics recording function.
- PWM function initiated at High Voltage Disconnection (HVD) point for 20A controller to protect battery.
3. Setup and Installation
Proper installation is crucial for the safe and efficient operation of your solar charge controller. Please follow these steps carefully:
- Prepare the Installation Site: Choose a dry, well-ventilated location away from direct sunlight and heat sources. Ensure sufficient space around the controller for air circulation and heat dissipation.
- Connect the Battery: Connect the battery to the charge controller first. Ensure correct polarity (+ to + and - to -). The controller will automatically detect the battery voltage (12V or 24V). This connection provides power to the controller.
- Connect the Solar Panel: Connect the solar panel array to the charge controller. Again, observe correct polarity. The controller will begin tracking the maximum power point of the solar array.
- Connect the DC Load (Optional): If you have a DC load, connect it to the load terminals of the controller. Ensure the load current does not exceed the controller's rated current.
- Verify Connections: Double-check all connections for tightness and correct polarity before powering on the system.
Important Safety Note: Always connect the battery first and disconnect it last. This prevents potential damage to the controller from voltage surges.
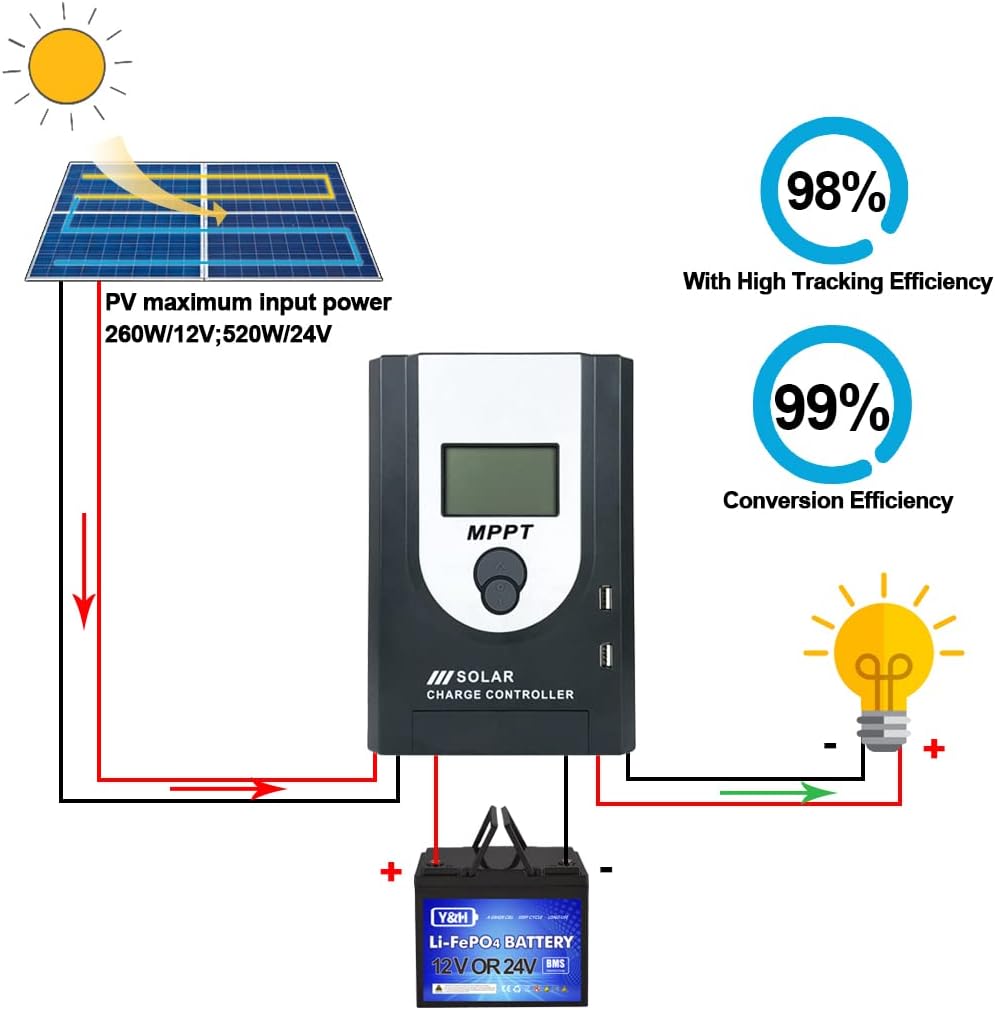
Figure 2: System connection diagram. This illustration demonstrates the proper wiring sequence: solar panel to controller, controller to battery, and controller to DC load. It also highlights the PV maximum input power for 12V and 24V systems.
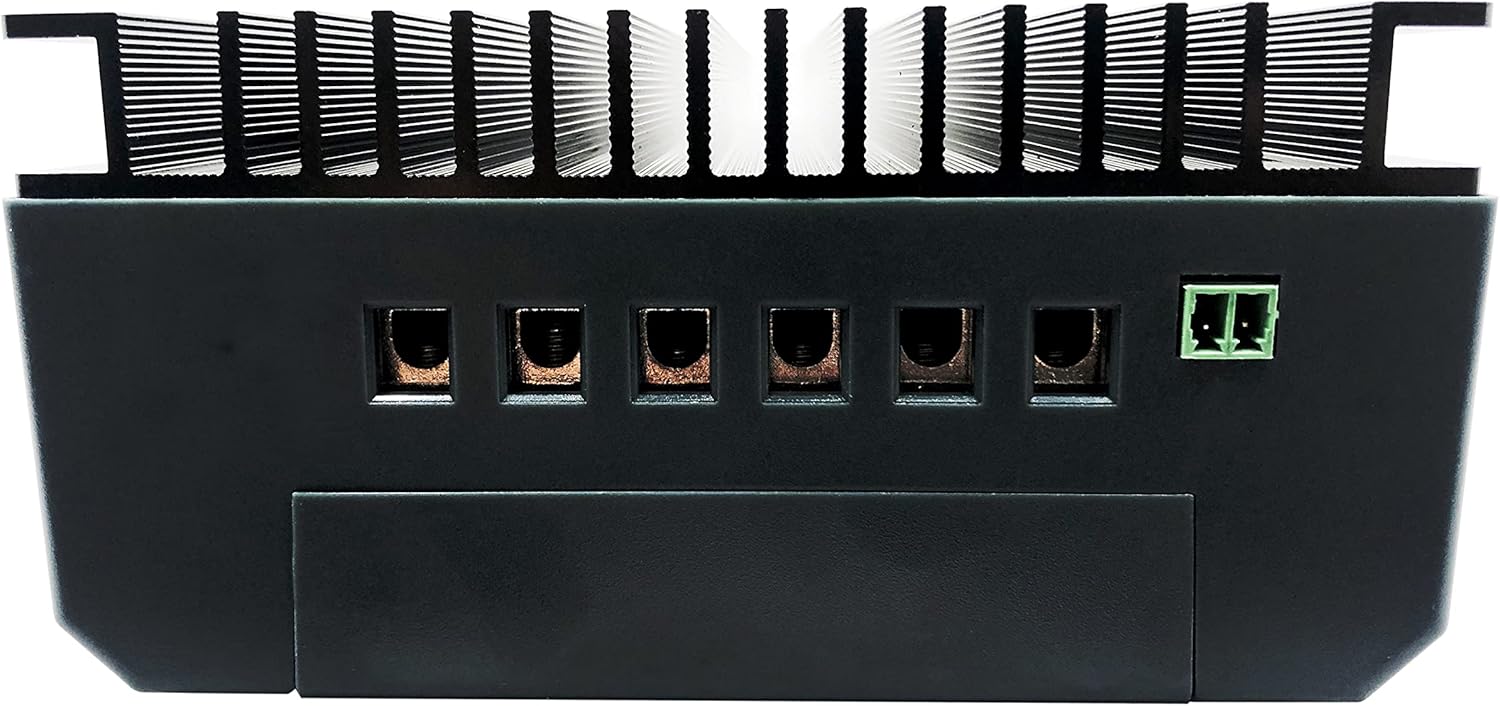
Figure 3: Rear view of the controller. This image displays the robust heatsink for heat dissipation and the various terminal connections for solar input, battery, and load.
4. Operating Instructions
4.1 LCD Display Interface
The LCD screen provides real-time information about the system's operation. Use the navigation buttons (up, down, enter) to cycle through different display parameters and adjust settings.

Figure 4: At-a-glance display interface. This diagram shows the different screens accessible via the control buttons, including main page, system voltage, battery type, resume charge, constant voltage charge, float charge, equalization charge, and absorption charge.
4.2 Battery Type Selection
The controller supports various battery types. It is crucial to select the correct battery type to ensure optimal charging and prolong battery life. Refer to your battery's specifications for the recommended charging parameters.
- Sealed: For sealed lead-acid batteries.
- GEL: For gel batteries.
- Flooded: For flooded lead-acid batteries.
- LiFePO4: For Lithium Iron Phosphate batteries.
- Li(NiCoMn)O2: For Lithium Nickel Manganese Cobalt Oxide batteries.
- User-defined: Allows for custom voltage settings for specific battery chemistries.
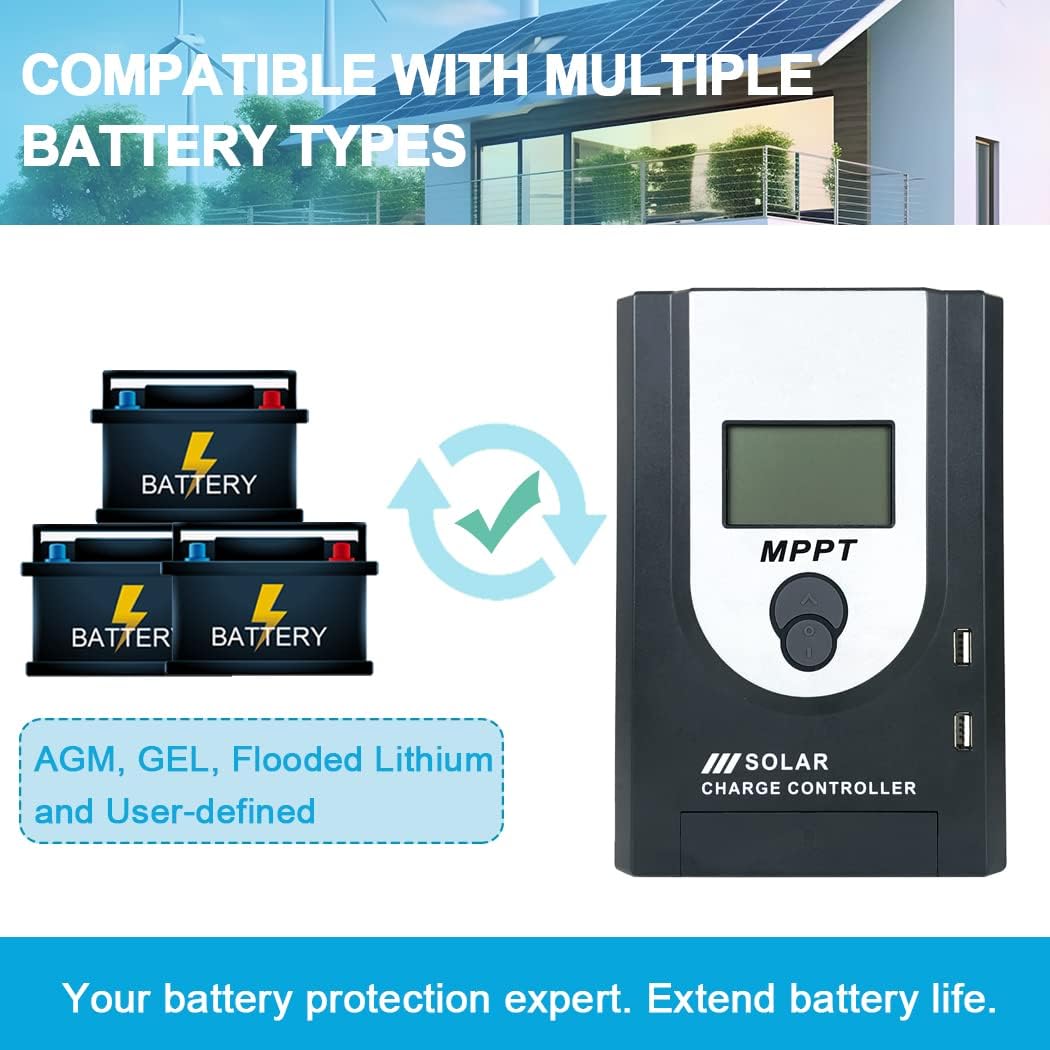
Figure 5: Compatible battery types. This image highlights the controller's versatility in supporting various battery chemistries, including AGM, GEL, Flooded, and Lithium, ensuring proper charging for each type.
4.3 Charging Stages
The controller employs a multi-stage charging algorithm to optimize battery charging and extend battery lifespan.
- Bulk Charge: Charges the battery at its maximum current until it reaches a set voltage.
- Boost Charge: Continues charging at a slightly higher voltage to ensure full charge.
- Float Charge: Maintains the battery at a lower voltage to compensate for self-discharge and keep it fully charged.
- Equalization Charge (for Flooded batteries): Periodically overcharges the battery to balance cell voltages and prevent sulfation.

Figure 6: Four charging stages. This visual explains the different phases of the battery charging algorithm, designed for rapid, efficient, and safe battery charging.
Note on PWM Function: For the 20A controller, a PWM charging function is initiated at the High Voltage Disconnection (HVD) point. This limits voltage increase to protect the battery from overcharging.
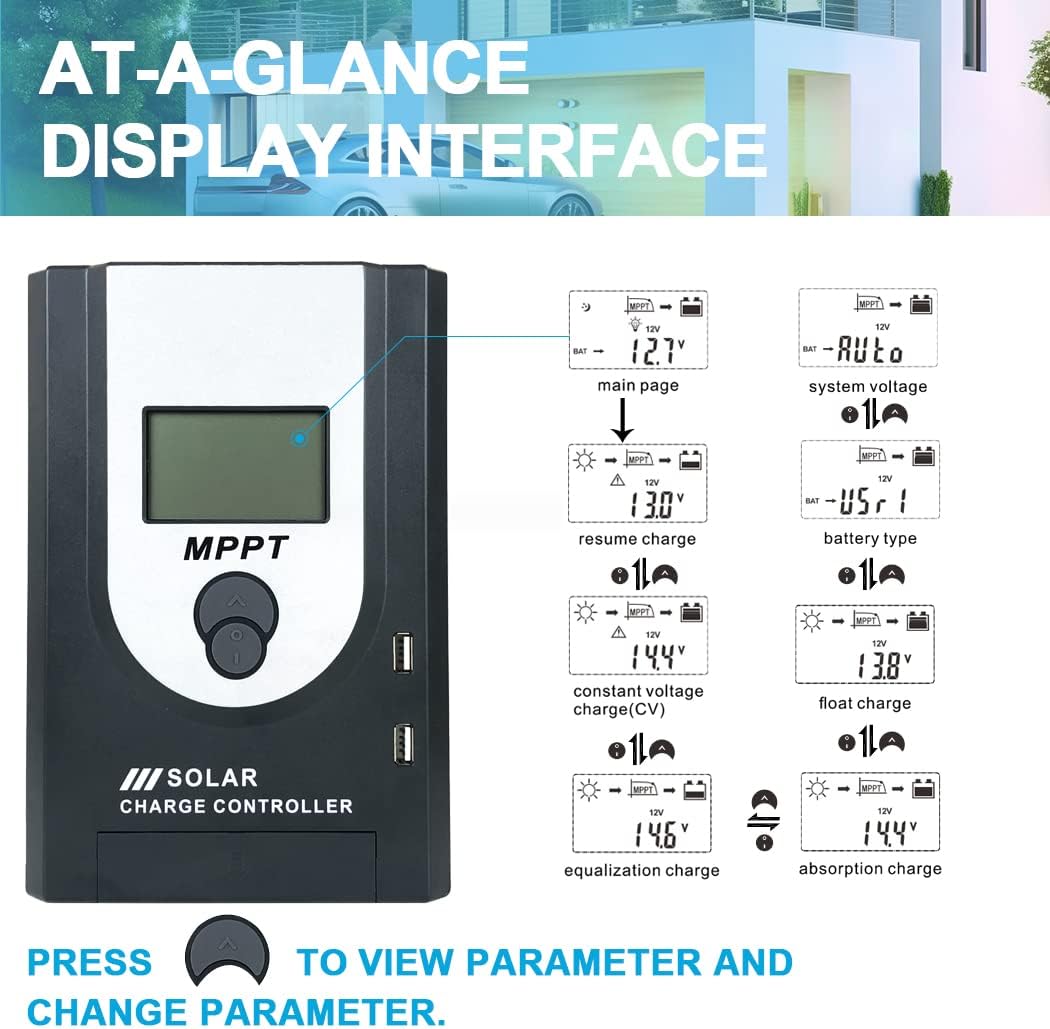
Figure 7: MPPT+PWM Charging. This image illustrates the charging process, emphasizing that for battery safety, the controller will start a PWM charging function when the battery voltage reaches the high voltage disconnection point.
4.4 Load Working Modes
The controller offers various load control modes to manage your DC output:
- Manual Mode (24H): The load output is continuously on for 24 hours.
- Solar Light Control Mode (Sunset-Sunrise): The load turns on automatically at sunset and turns off at sunrise.
- Solar Light Time Control: The load turns on at sunset and stays on for a set duration (e.g., "Sunaat ontime Sunrie" - likely means "Sunset on, for X hours, then off at sunrise").
- General Mode: Standard load control.
- Pure Charge Mode: The controller acts solely as a charger, with no load output.
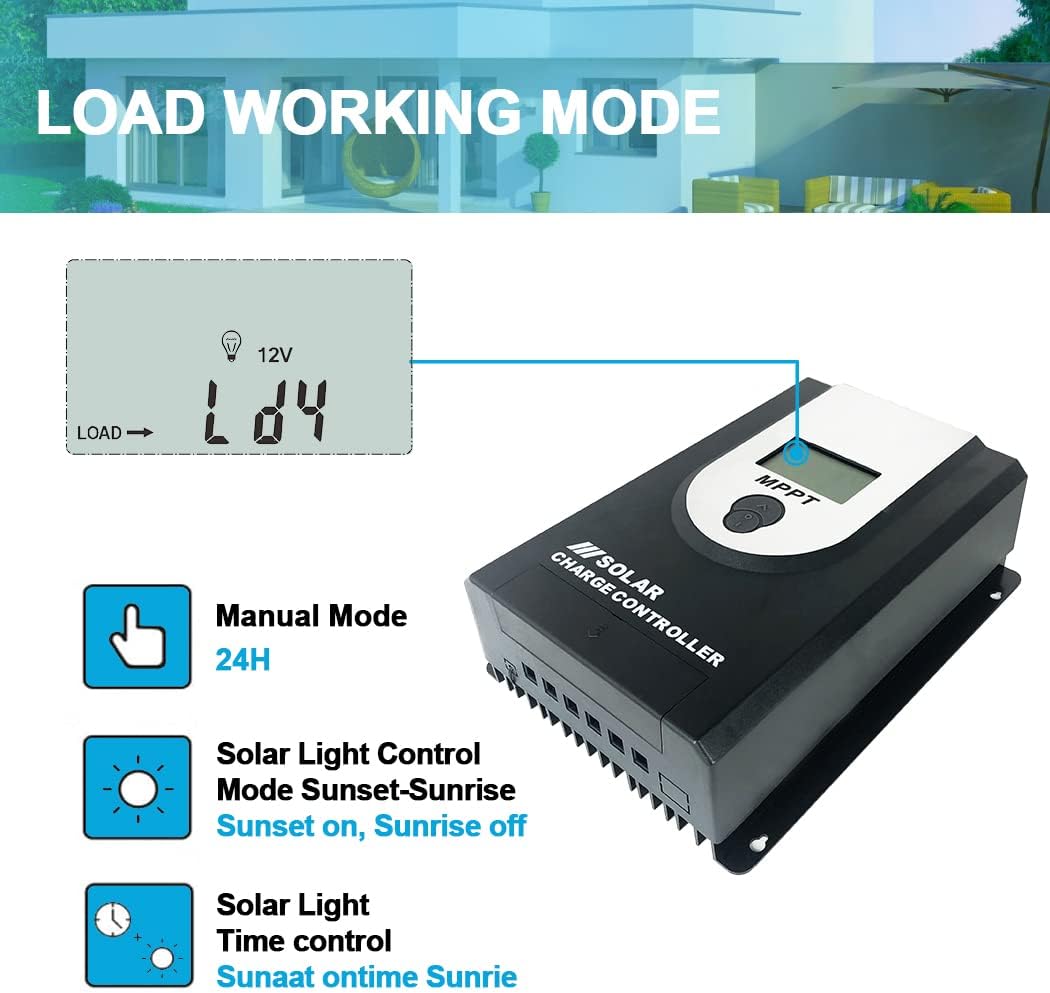
Figure 8: Load working modes. This image illustrates the various operational modes for the DC load output, including continuous operation, dusk-to-dawn control, and timed operation after sunset.
5. Maintenance
Regular maintenance ensures the longevity and optimal performance of your Y&H MPPT Solar Charge Controller.
- Visual Inspection: Periodically inspect the controller for any signs of damage, corrosion, or loose connections.
- Cleanliness: Keep the controller clean and free from dust and debris. Use a dry cloth to wipe the surface. Ensure the heatsink fins are not obstructed to allow for proper heat dissipation.
- Connection Check: Annually check all wiring connections to ensure they are secure and tight. Loose connections can lead to power loss or overheating.
- Battery Health: Monitor your battery's health and voltage regularly. Ensure the battery type setting on the controller matches your installed battery.
- Environmental Conditions: Ensure the installation environment remains within the recommended temperature and humidity ranges.
6. Troubleshooting
If you encounter issues with your solar charge controller, refer to the following common troubleshooting steps:
| Problem | Possible Cause | Solution |
|---|---|---|
| No Display/Controller Not Powering On | Battery not connected or reverse polarity. Battery voltage too low. | Ensure battery is connected correctly with proper polarity. Check battery voltage; if too low, charge it externally. |
| No Charging from Solar Panel | Solar panel not connected or reverse polarity. Insufficient sunlight. PV input voltage too low or too high. | Check solar panel connections and polarity. Ensure panels are in direct sunlight. Verify PV voltage is within the controller's operating range. |
| Load Not Working | Load not connected or reverse polarity. Load current exceeds controller rating. Battery voltage too low (LVD triggered). Incorrect load control mode selected. | Check load connections and polarity. Reduce load or use a larger controller. Charge battery. Select appropriate load control mode. |
| Battery Not Fully Charged | Incorrect battery type setting. Insufficient solar input. Battery degradation. | Verify battery type setting. Ensure adequate solar panel size and sunlight. Consider testing or replacing the battery. |
If the problem persists after following these steps, please contact customer support.
7. Specifications
| Parameter | Value |
|---|---|
| Brand | Y&H |
| Model Number | MPJ20A |
| ASIN | B0C61CXXHM |
| UPC | 716963530606 |
| Voltage | 12V / 24V (Auto-detection) |
| Included Components | MPPT Solar Charge Controller |
| Manufacturer | Y&H |
| Average Customer Review | 5.0 out of 5 stars (1 rating) |
| Date First Available on Amazon.com.be | May 23, 2023 |
8. Warranty and Support
This Y&H product is manufactured with high-quality components and undergoes rigorous testing to ensure reliability. For warranty information or technical support, please contact the manufacturer or the seller directly.
Manufacturer: Y&H
Seller: Yong Hui (via Amazon.com.be)
For assistance, you may visit the seller's page on Amazon: Yong Hui Seller Page


