1. Safety Information
No specific safety information was provided with this product. Always follow general safety practices when working with nail products and electrical tools:
- Keep all products out of reach of children.
- Use in a well-ventilated area to avoid inhaling fumes.
- Avoid contact with skin and eyes. In case of contact, rinse thoroughly with water and seek medical advice if irritation persists.
- Do not apply to damaged or infected nails.
- Ensure the electric nail drill is used with care to prevent injury.
- Always unplug the electric nail drill when not in use or when changing bits.
2. Product Overview & What's Included
The SAVILAND Acrylic Nail Kit with Drill (Model SAVIL-01) is a comprehensive set designed for both beginners and experienced users to create salon-quality nail art at home. This kit includes a wide array of tools and materials for acrylic and gel nail applications.

Image: Overview of the SAVILAND Acrylic Nail Kit contents, including powders, liquids, brushes, and tools.
Kit Components:
- 3 x Acrylic Powder (Clear/Pink/White)
- 1 x Acrylic Monomer Liquid
- 3 x Acrylic Nail Brushes (#6, #10, #12)
- 3 x Gel Nail Polish (Black/White/Red)
- 1 x Base Gel
- 1 x Top Gel
- 1 x Mini UV Nail Light (for curing gel polish)
- 1 x Electric Nail Drill with various drill bits and sanding bands
- Nail Art Decorations (glitters, sequins, rhinestones)
- Nail Files and Buffers
- Nail Forms and Nail Tips
- Dappen Dish
- Cuticle Oil Pen
- Nail Glue
- Nail Dust Brush
- Nail Trimmer
- Nail Art Tweezers
- Toe Separators
- Nail Polish Remover Pads
Video: Unboxing of a SAVILAND nail kit, showcasing various components including the nail drill, UV lamp, and different nail products.
3. Setup & Preparation
3.1 Nail Preparation
- Clean your natural nails thoroughly, ensuring they are free of oils and debris.
- Gently push back cuticles and trim if necessary.
- Lightly buff the nail surface to create a rough texture for better adhesion.
- Apply a nail prep dehydrator and non-acid pH bond (not included in this kit, but recommended for optimal adhesion) and allow to air dry.

Image: Visual guide for preparing nails, including filing and cleaning the nail surface.
3.2 Acrylic Brush Preparation
Before first use, it is important to properly prepare your acrylic brushes:
- Gently fan out the brush bristles to ensure they are separated and soft.
- Pour a small amount of acrylic monomer liquid into the dappen dish.
- Dip the brush into the monomer liquid, allowing it to soak and soften.
- Wipe off any excess liquid on a lint-free wipe. The brush is now ready for use.
Video: Demonstrates how to prepare and clean a nail brush before and after use with acrylic liquid.
4. Operating Instructions: Acrylic Nails
- After nail preparation, select the appropriate size nail form or nail tip and apply it securely to your natural nail.
- Dip your acrylic brush into the monomer liquid, then gently tap it into the acrylic powder to pick up a small bead. The bead should be a smooth, consistent texture.
- Apply the acrylic bead to your nail, starting from the cuticle area and extending it over the nail form/tip. Shape the acrylic to your desired length and thickness.
- Allow the acrylic to air dry completely. This typically takes 5-8 minutes, depending on environmental conditions.
- Once dry, carefully remove the nail form.
- Use a nail file to shape and refine the acrylic nail, ensuring smooth edges and a uniform surface.

Image: Demonstrates the process of mixing acrylic liquid and powder to create the nail extension.
Video: Step-by-step guide on applying acrylic nails, from preparation to shaping.
5. Operating Instructions: Gel Nails
For gel nail polish application, follow these steps:
- After preparing your nails (as described in Section 3.1), apply a thin layer of Base Gel.
- Cure the Base Gel under the mini UV Nail Light for 60 seconds.
- Apply a thin, even coat of your chosen Gel Nail Polish color.
- Cure the Gel Nail Polish under the mini UV Nail Light for 60-90 seconds (depending on the color and thickness). Repeat for a second coat if desired, curing after each layer.
- Finish with a thin layer of Top Gel for a glossy, protective finish.
- Cure the Top Gel under the mini UV Nail Light for 120 seconds.
- Wipe the nails with an alcohol pad to remove any sticky residue.
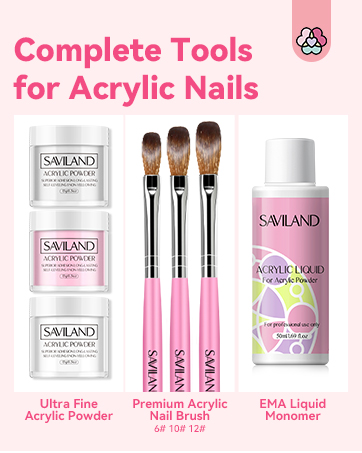
Image: Displays the classic black, white, and red gel nail polish colors included in the kit.

Image: The foldable mini UV nail lamp, used for efficient and quick curing of gel nail polish.
6. Nail Art & Decoration
Unleash your creativity with the included nail art decorations:
- Glitters and Sequins: Apply these directly onto a wet layer of gel polish or acrylic before curing/drying. Once set, apply a top coat to seal them in.
- Rhinestones: Use a small amount of nail glue or a thick layer of top coat to adhere rhinestones to your nails. Cure/dry thoroughly.
- Acrylic Carving Powder: Use the acrylic carving powder with monomer liquid and a fine brush to create intricate 3D designs on your nails.
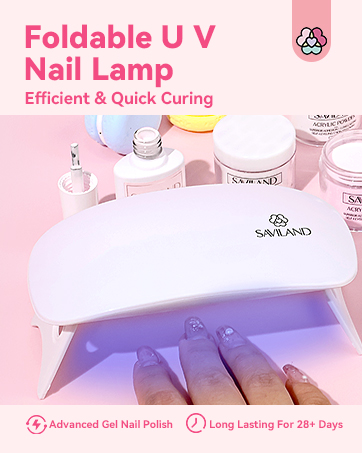
Image: Various elegant nail art designs created using the kit's components, including 3D flowers and rhinestones.
Video: Demonstrates the use of the SAVILAND Acrylic Nail Kit for practicing various nail art techniques.
7. Electric Nail Drill Usage
7.1 Changing Drill Bits
- Ensure the nail drill is unplugged or turned off before changing bits.
- Gently pull out the current drill bit from the chuck.
- Select the desired grinding drill bit and firmly insert it into the chuck until it clicks into place.
7.2 Operation
- Connect the nail drill to a power source.
- Use the control switch on the cord to adjust the speed (slow/quick) and rotation direction (positive/reverse).
- Gently apply the rotating drill bit to the nail surface for tasks such as:
- Shaping and filing acrylic or gel nails.
- Removing dead skin or cuticles.
- Buffing and polishing the nail surface.
- Removing existing nail art.
- Always use light pressure and keep the drill moving to avoid heat buildup or damage to the natural nail.
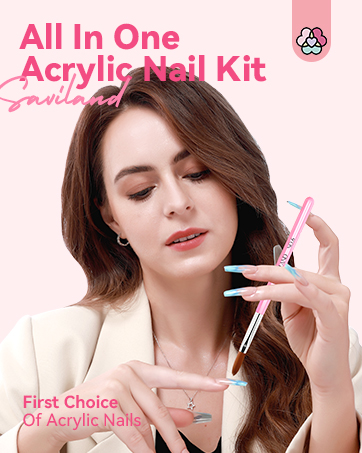
Image: The electric nail drill with its various metal and ceramic drill bits and sanding bands for different nail care tasks.
Video: Detailed demonstration of how to use the nail drill, including changing bits, adjusting speed, and performing various nail care functions.
8. Maintenance
- Brushes: Clean acrylic brushes immediately after use with monomer liquid or a brush cleaner to prevent hardening. Store flat or hanging downwards to maintain brush shape.
- Electric Nail Drill: After each use, clean the drill bits and wipe down the drill handle with an alcohol wipe. Store the drill and bits in a dry, clean place.
- UV Nail Light: Keep the UV light clean and free of dust. Avoid direct contact with the UV bulbs.
- Product Storage: Store all acrylic powders, liquids, and gel polishes in a cool, dark place away from direct sunlight and heat to maintain their quality and shelf life. Ensure lids are tightly sealed.
9. Troubleshooting
- Acrylic not drying/hardening: Ensure the correct ratio of monomer liquid to acrylic powder is used. Work in a well-ventilated area at room temperature. Avoid excessive humidity.
- Gel polish remains sticky after curing: This is normal for some gel polishes. Wipe with an alcohol pad after the final top coat cure to remove the inhibition layer.
- Gel polish peeling/chipping: Ensure proper nail preparation (buffing, dehydrating). Apply thin, even coats of gel polish. Cap the free edge of the nail with each layer. Ensure adequate curing time under the UV light.
- Nail drill not working: Check if the power cord is securely connected. Ensure the correct drill bit is inserted properly.
- Acrylic lifting: Proper nail preparation is crucial. Ensure no oil or moisture is on the nail plate. Avoid applying acrylic too close to the cuticle.
10. Specifications
| Feature | Detail |
|---|---|
| Brand | SAVILAND |
| Model Number | SAVIL-01 |
| Material | Acrylic |
| Color (Gel Polish) | White, Red, Black |
| Color (Acrylic Powder) | Clear, Pink, White |
| Package Dimensions | 12.8 x 5.8 x 4.7 inches |
| Item Weight | 3 Pounds |
11. Warranty and Support
For warranty information or product support, please refer to the contact details provided on the product packaging or visit the official SAVILAND website. Our customer service team is dedicated to assisting you with any questions or concerns regarding your SAVILAND Acrylic Nail Kit.


