
Introduction
The Alpine KCX-CAM1 is a camera input adapter designed to facilitate the connection of aftermarket cameras with a composite video RCA connector to select Alpine in-dash receivers. This adapter is specifically engineered for Alpine head units that feature a proprietary 6-pin direct camera input jack, allowing for expanded camera compatibility and integration.
Safety Information
Please read all instructions carefully before installation and use. Failure to follow these instructions may result in damage to the product, vehicle, or personal injury.
- Always disconnect the vehicle's battery negative terminal before beginning any electrical installation to prevent short circuits.
- Ensure all connections are secure and properly insulated to prevent electrical hazards.
- Do not modify the adapter or its wiring. Unauthorized modifications can void the warranty and create safety risks.
- Consult a professional installer if you are unsure about any part of the installation process.
- Route all cables away from moving parts, heat sources, and sharp edges to prevent damage.
Package Contents
Verify that all items are present before proceeding with installation:
- Alpine KCX-CAM1 Composite RCA Camera Adapter
- Instruction Manual (this document)
Setup and Installation
The KCX-CAM1 adapter simplifies the connection of an aftermarket camera to your compatible Alpine head unit. Follow these steps for proper installation:
Step 1: Prepare the Vehicle and Head Unit
- Ensure the vehicle's ignition is off and the negative terminal of the car battery is disconnected.
- Carefully remove your Alpine in-dash receiver from its mounting location to access the rear connections. Refer to your Alpine head unit's manual for specific removal instructions.
Step 2: Connect the KCX-CAM1 Adapter
Locate the 6-pin direct camera input jack on the rear of your Alpine in-dash receiver. This is a proprietary Alpine connector.
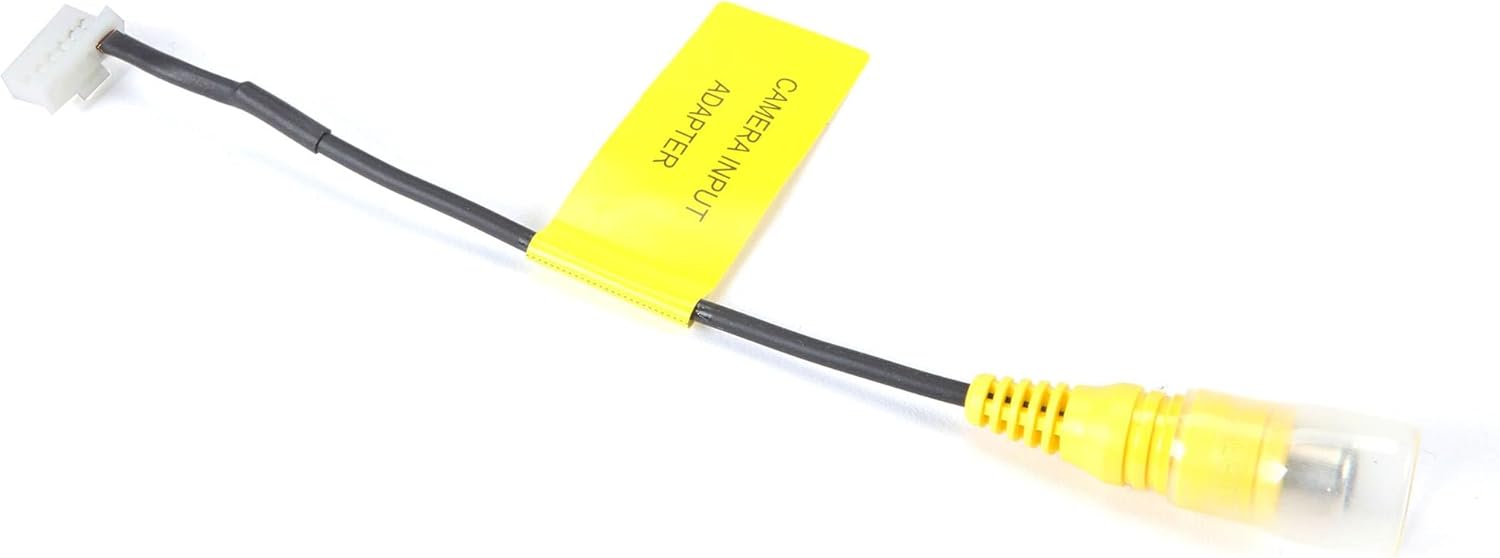
Image: The Alpine KCX-CAM1 adapter. One end features a white 6-pin connector designed to plug into compatible Alpine head units, while the other end has a yellow RCA female connector for connecting an aftermarket camera's composite video output. A yellow label on the cable reads "CAMERA INPUT ADAPTER".
- Connect the white 6-pin connector of the KCX-CAM1 adapter to the corresponding 6-pin direct camera input jack on your Alpine receiver. Ensure it clicks securely into place.
Step 3: Connect the Aftermarket Camera
- Take the composite video RCA male connector from your aftermarket camera and plug it into the yellow RCA female connector on the KCX-CAM1 adapter.
- Ensure the camera's power and ground wires are connected according to the camera's installation instructions (typically to reverse lights for a backup camera, or a switched 12V source for a front camera).
Step 4: Reassemble and Test
- Carefully reinstall your Alpine in-dash receiver into the dashboard.
- Reconnect the negative terminal of the car battery.
- Turn on your vehicle and Alpine head unit. Access the camera input function on your receiver to verify the camera video feed is displayed correctly. Refer to your Alpine head unit's manual for instructions on accessing camera views.
Operating Instructions
Once the KCX-CAM1 adapter and camera are installed, the operation of the camera will depend on your specific Alpine in-dash receiver model and the type of camera connected (e.g., backup camera, front camera).
- Backup Camera: If connected as a backup camera, the video feed should automatically display on your Alpine receiver's screen when the vehicle is shifted into reverse.
- Front/Auxiliary Camera: For front or auxiliary cameras, you may need to manually select the camera input source through your Alpine receiver's menu or a dedicated camera button. Consult your Alpine head unit's user manual for detailed instructions on accessing and switching camera views.
Maintenance
The Alpine KCX-CAM1 adapter requires minimal maintenance. To ensure optimal performance and longevity:
- Keep the connections clean and free of dust or debris.
- Ensure all cables are securely routed and not pinched or exposed to excessive heat or moisture.
- Avoid pulling on the cables directly when disconnecting; always grasp the connector housing.
Troubleshooting
If you encounter issues with your KCX-CAM1 adapter, refer to the table below for common problems and solutions:
| Problem | Possible Cause | Solution |
|---|---|---|
| No video signal from camera |
|
|
| Flickering or distorted video |
|
|
| Camera image is upside down or mirrored | Camera setting or installation issue. | This is typically a setting within the camera itself or how it's mounted. The KCX-CAM1 adapter does not affect image orientation. Refer to your camera's manual for image flip/mirror options. |
Specifications
| Feature | Detail |
|---|---|
| Model Number | KCX-CAM1 |
| Connector Type (Input) | RCA (Female) |
| Connector Type (Output) | Alpine Proprietary 6-pin (Male) |
| Compatible Devices | Aftermarket cameras with composite video RCA connector; Alpine in-dash receivers with 6-pin direct camera input jack. |
| Item Weight | 0.352 ounces (approx. 10 grams) |
| Package Dimensions | 9.33 x 4.13 x 0.47 inches (approx. 23.7 x 10.5 x 1.2 cm) |
| Manufacturer | Alpine |
Warranty Information
This product is covered by a limited warranty provided by Alpine. Please refer to the warranty card included with your purchase or visit the official Alpine website for detailed terms and conditions regarding warranty coverage, duration, and claims procedures. Keep your proof of purchase for warranty service.
Support
For technical assistance, troubleshooting beyond this manual, or warranty inquiries, please contact Alpine customer support or visit their official website:
Alpine Official Website: www.alpine-usa.com
You can also visit the Alpine store on Amazon for product information and related accessories: Alpine Store on Amazon
