1. Introduction
This manual provides detailed instructions for the safe and efficient operation of your G-Homa 24-Hour Indoor Plug-in Mechanical Timer. This device is designed to automate the on/off cycles of various indoor electrical appliances, helping to conserve energy and enhance convenience. Please read this manual thoroughly before use and retain it for future reference.

Image 1.1: Two G-Homa 24-Hour Indoor Plug-in Mechanical Timers. These timers feature a rotating dial for setting schedules and a single polarized outlet.
2. Safety Information
To ensure safe operation and prevent damage, please observe the following precautions:
- For indoor use only. Do not expose to moisture, water, or extreme temperatures.
- Do not exceed the maximum electrical ratings: 125Vac~60 Hz, 15A general purpose, 15A resistive, 1250W tungsten, 1/4 HP.
- Ensure the timer is securely plugged into a properly grounded outlet.
- Do not disassemble or attempt to repair the timer. Refer all servicing to qualified personnel.
- Keep out of reach of children.
- Unplug the timer from the wall outlet before cleaning.
- This timer is ETL listed, ensuring compliance with safety standards.
3. Product Features
The G-Homa Mechanical Timer offers the following key features:
- 24-Hour Automation: Program daily on/off cycles.
- 30-Minute Intervals: Precise scheduling with 48 on/off options per day.
- Manual Override Switch: Easily switch between 'Timer ON', 'Outlet ON' (always on), or 'OFF' modes.
- Polarized Outlet: Designed for safety with a polarized two-prong plug.
- Durable Construction: Features fireproof ABS material and nickel-plated phosphor bronze contacts for reliability.

Image 3.1: Visual representation of the timer's key features, including the convenient override switch, 30-minute interval settings, polarized outlet, and 24-hour programmable cycle.
4. Product Diagram
Familiarize yourself with the components of your G-Homa Mechanical Timer:

Image 4.1: Front view showing the dial and outlet, and back view displaying the polarized plug and product label with model number EMT3200/US and dimensions (2.28"H x 2.28"W x 1"D).
- Timing Dial: The large rotating dial with numbers 1-12 (AM/PM) for setting the current time and programming.
- Program Pins (Segments): Small segments around the dial that are pushed down for 'ON' and pulled up for 'OFF'.
- Current Time Pointer: A fixed arrow on the timer body indicating the current time on the dial.
- Manual Override Switch: Located on top, allows selection between 'Outlet ON', 'Timer ON', or 'OFF'.
- Polarized Outlet: The receptacle on the side for plugging in your appliance.
- Polarized Plug: The two-prong plug for connecting the timer to a wall outlet.
5. Setup
Follow these steps to prepare your timer for use:
- Unpack: Remove the timer from its packaging.
- Initial Charge (Optional): For the internal clock mechanism to function accurately, plug the timer into a live wall outlet for approximately 30 minutes before setting the time and program. This charges the internal battery.
- Set Current Time: Rotate the entire timing dial clockwise until the current time aligns with the 'TIME NOW' pointer (the arrow on the timer body). For example, if it's 3 PM, rotate the dial until '3 PM' is at the pointer.
6. Operating Instructions
6.1. Programming On/Off Times
The timer operates on a 24-hour cycle with 30-minute intervals. Each segment around the dial represents 30 minutes.

Image 6.1: This image illustrates the process of setting the timer. Pins pushed down correspond to 'ON' periods, while pins pulled up correspond to 'OFF' periods. Each pin represents a 30-minute interval.
- Identify Program Segments: Locate the small black segments around the edge of the dial. There are 48 segments, each representing 30 minutes.
- Set 'ON' Times: Push down the segments corresponding to the periods you want your appliance to be ON.
- Set 'OFF' Times: Pull up the segments corresponding to the periods you want your appliance to be OFF.
- Verify Settings: Double-check that the pushed-down segments align with your desired 'ON' times and pulled-up segments with 'OFF' times.
6.2. Using the Manual Override Switch
The manual override switch, located on the top of the timer, allows you to control the power output independently of the set program.

Image 6.2: A close-up view of the manual override switch, which allows users to select between 'Outlet ON', 'Timer ON', or 'OFF' modes.
- Outlet ON: Slide the switch to this position to keep the appliance continuously ON, bypassing the timer program.
- Timer ON: Slide the switch to this position for the timer to follow your programmed on/off schedule.
- OFF: Slide the switch to this position to turn off power to the appliance completely.
6.3. Connecting an Appliance
- Ensure the timer is plugged into a wall outlet.
- Plug your desired appliance into the polarized outlet on the side of the timer.
- Set the manual override switch to 'Timer ON' for automatic operation, or 'Outlet ON' for continuous power.
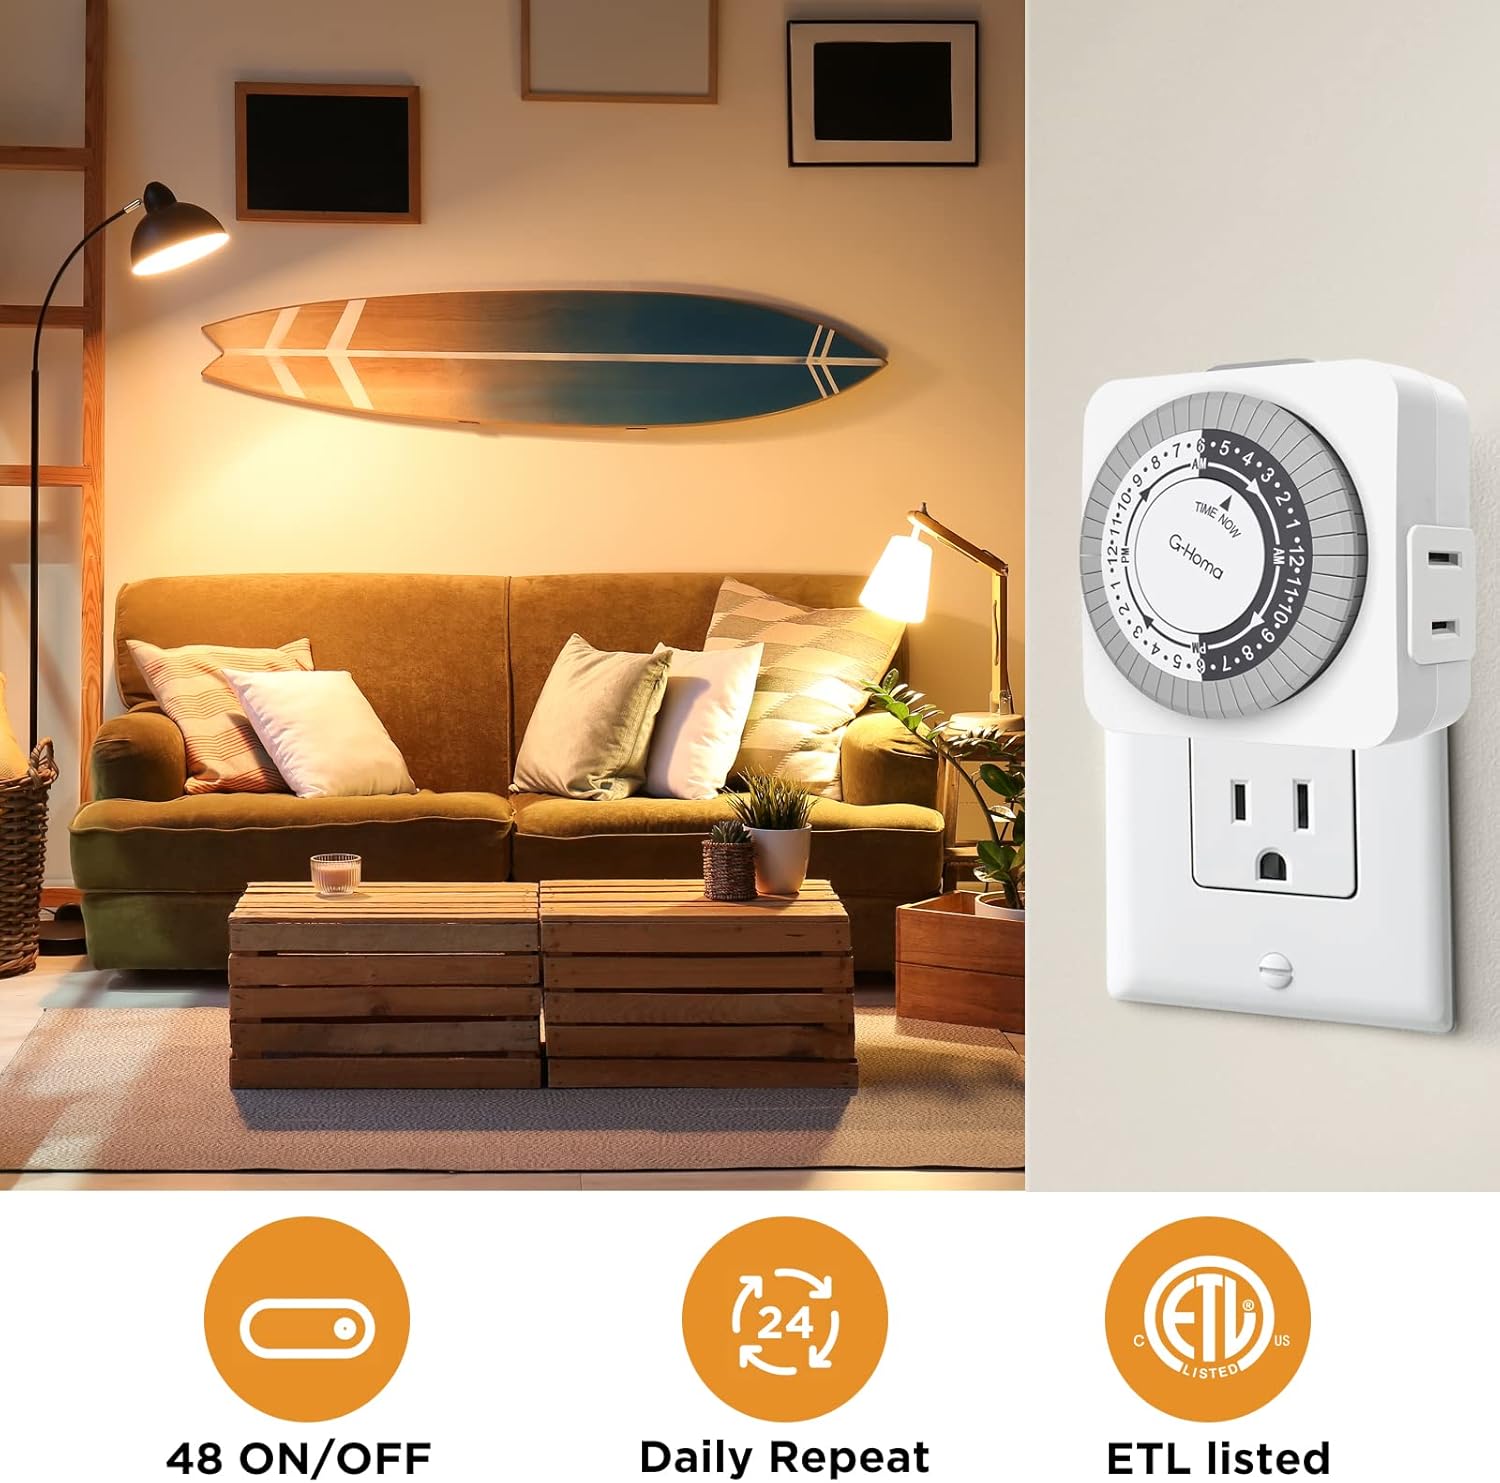
Image 6.3: The G-Homa timer is shown plugged into a wall outlet, with a lamp's power cord connected to the timer's side outlet, demonstrating a typical indoor application.

Image 6.4: This image displays a range of indoor appliances, including a coffee maker, humidifier, toaster, and blender, illustrating the versatility of the G-Homa timer for automating daily tasks.
7. Maintenance
The G-Homa Mechanical Timer requires minimal maintenance:
- Cleaning: Disconnect the timer from the power outlet before cleaning. Wipe the exterior with a soft, dry cloth. Do not use liquid cleaners or abrasive materials.
- Storage: When not in use for extended periods, store the timer in a cool, dry place away from direct sunlight.
8. Troubleshooting
If you encounter issues with your G-Homa Mechanical Timer, refer to the following common problems and solutions:
| Problem | Possible Cause | Solution |
|---|---|---|
| Appliance does not turn ON/OFF at programmed times. |
|
|
| Appliance remains continuously ON or OFF. | Manual override switch is in 'Outlet ON' or 'OFF' position. | Slide the manual override switch to 'Timer ON'. |
| Timer makes a buzzing noise. | Normal operation for some mechanical timers, or potential internal issue. | If the buzzing is excessively loud or accompanied by other issues, discontinue use and contact customer support. |
| Timer is not receiving power. |
|
|
9. Specifications
- Model: EMT3200/US
- Input Voltage: 125Vac, 60Hz
- Max Load: 15A General Purpose, 15A Resistive, 1250W Tungsten, 1/4 HP
- Minimum Setting Time: 30 minutes
- Program Options: 48 On/Off settings per 24-hour cycle
- Dimensions: 1"D x 2.28"W x 2.28"H
- Material: Fireproof ABS Plastic
- Certifications: ETL Listed
- Color: White
10. Warranty and Support
G-Homa provides professional customer services for its products. For any questions, concerns, or technical assistance, please contact G-Homa customer support.
Return Policy: This product is typically eligible for a refund or replacement within 30 days of purchase, subject to the retailer's return policy.
For the most up-to-date support information, please visit the official G-Homa website or contact your retailer.


