1. Introduction
Thank you for choosing the Proventa Ceiling Fan with Lighting. This modern appliance is designed to provide both efficient air circulation and adjustable illumination for your living spaces. It combines elegant design with practical functionality, ensuring a comfortable environment throughout the year.
This manual provides detailed instructions for installation, operation, maintenance, and troubleshooting to ensure safe and optimal use of your new ceiling fan.
2. Safety Instructions
Please read all safety instructions carefully before installation and operation. Failure to follow these instructions may result in electric shock, fire, or serious injury.
- Ensure the power supply is disconnected before installation, maintenance, or cleaning.
- Installation must be performed by a qualified electrician in accordance with local wiring regulations.
- The fan light should be mounted at a minimum height of 2.3 meters (approximately 7.5 feet) from the floor to the lowest point of the fan blades.
- Do not insert fingers or any objects into the fan blades while the fan is operating.
- This product is designed for indoor use only.
- Keep the remote control away from water and high temperatures.
- For recycling information regarding this and other types of lamps, please refer to local regulations.
- Learn more about the disposal of broken or damaged lamps by consulting local waste management guidelines.
3. Package Contents
Carefully unpack the box and ensure all items are present and undamaged. If any items are missing or damaged, please contact your retailer.
- 1 x Proventa Ceiling Fan with Integrated LED Light
- 1 x Remote Control
- 4 x Mounting Screws
- 4 x Wall Dowels
- 1 x Operating and Installation Manual

Image: Product packaging showing the ceiling fan and remote control.
4. Setup and Installation
The Proventa ceiling fan is designed for quick and uncomplicated mounting. Follow these steps for a secure installation:
- Preparation: Ensure the power supply to the installation area is turned off at the main circuit breaker.
- Mounting Bracket: Attach the mounting bracket securely to the ceiling joist or a suitable electrical box using the provided screws and dowels. Ensure the bracket is firmly fixed and can support the weight of the fan.
- Wiring: Connect the electrical wires from the ceiling to the fan's wiring according to the wiring diagram in the included manual. Use appropriate wire connectors.
- Secure the Fan: Lift the fan body and attach it to the mounting bracket. Many models feature a safety cable that can be temporarily hooked to the bracket, allowing for easier wiring. Secure the fan body to the bracket using the designated screws.
- Final Check: Double-check all connections and ensure the fan is securely mounted. Restore power and test the fan and light functions.
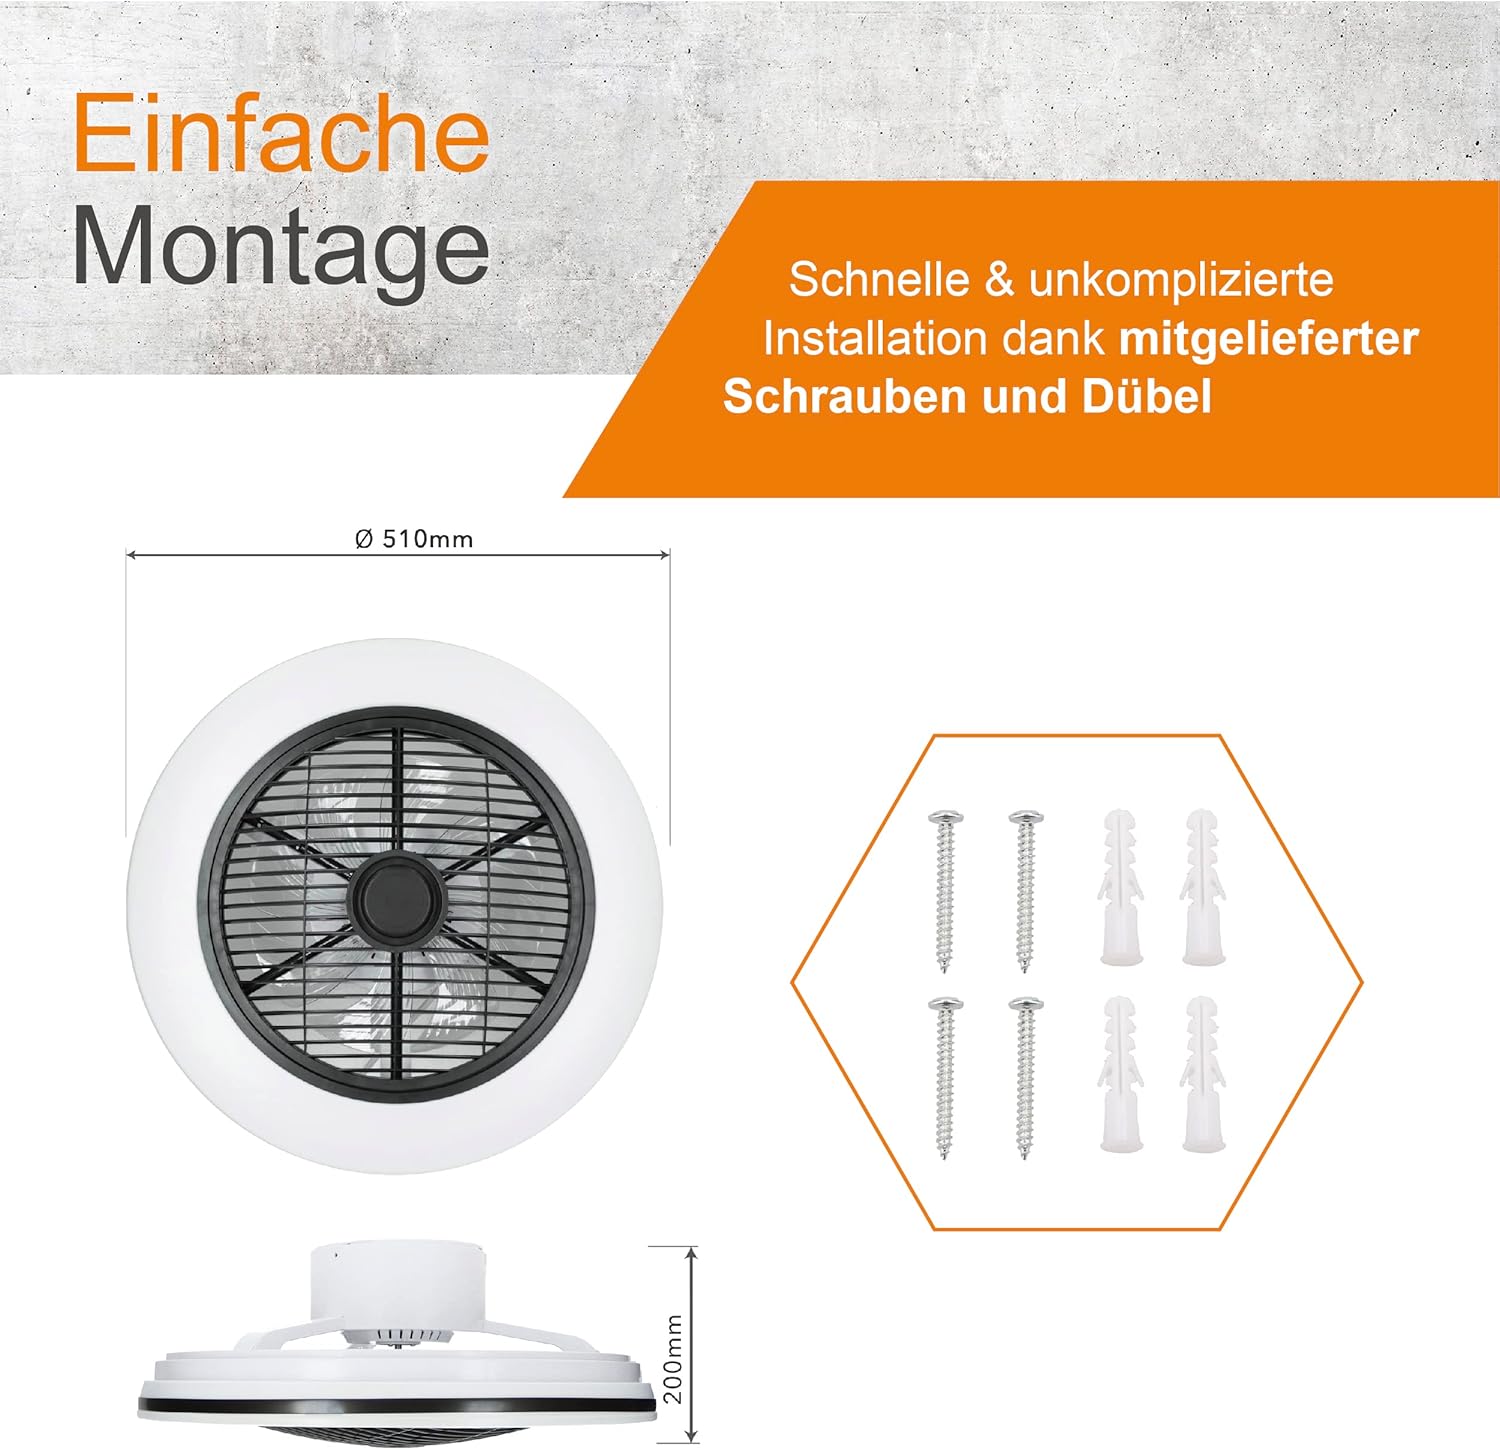
Image: Simple installation diagram with dimensions (510mm diameter, 200mm height) and included mounting hardware (screws and dowels).
5. Operating Instructions
Your Proventa ceiling fan comes with a remote control for convenient operation of all functions.
5.1 Remote Control Functions

Image: The remote control, allowing flexible adjustment of fan speed and light settings.
- Power Button: Turns the fan and light on/off.
- Fan Speed Control: Adjusts the fan speed through multiple levels.
- Light On/Off: Toggles the light independently.
- Color Temperature Adjustment: Changes the light color from warm white (2000K) to neutral white (4000K).
- Dimming: Increases or decreases the brightness of the light.
- Rotation Function: Activates or deactivates the rotating air distribution feature.
- Timer Function: Sets a timer for the fan to automatically turn off.
5.2 Summer and Winter Modes
The fan features two modes to optimize air circulation for different seasons:
- Summer Mode (Downward Airflow): In summer, the fan rotates clockwise to create a refreshing downward breeze, effectively cooling the room.
- Winter Mode (Upward Airflow): In winter, the fan rotates counter-clockwise to draw warm air from the ceiling downwards, distributing heat efficiently and saving energy.

Image: Diagram showing the adjustable airflow direction for cooling in summer and heat distribution in winter.
5.3 Adjustable Light Temperature and Dimmability
The integrated LED lighting allows you to customize the ambiance of your room:
- Color Temperature: Use the remote control to switch between warm white light (ideal for relaxation) and neutral white light (suitable for tasks or general illumination).
- Dimmable Brightness: Adjust the light intensity to your preference, creating the perfect atmosphere for any occasion.

Image: The ceiling fan light demonstrating adjustable color temperature from warm to neutral white and stepless dimming.
5.4 Optimal Air Distribution with Dual Motor
The additional motor located beneath the main fan blades enhances air circulation, ensuring that the ambient air is evenly distributed throughout the room. This feature, combined with the rotating function, provides a consistently pleasant indoor climate without direct, constant airflow.

Image: The Proventa ceiling fan in operation, illustrating the rotating air distribution for enhanced comfort.
6. Maintenance
Regular maintenance ensures the longevity and optimal performance of your ceiling fan.
- Cleaning: Before cleaning, ensure the power is turned off. Use a soft, damp cloth to wipe down the fan and light fixture. Do not use abrasive cleaners or solvents.
- Dust Removal: Periodically remove dust from the fan blades and motor housing to prevent accumulation, which can affect performance and cause noise.
- Inspection: Regularly check for any loose screws or connections. Tighten if necessary.
7. Troubleshooting
If you encounter any issues with your Proventa ceiling fan, refer to the following common problems and solutions:
- Fan Does Not Operate:
- Check if the power supply is connected and the wall switch is on.
- Ensure the remote control batteries are correctly inserted and not depleted.
- Verify that all wiring connections are secure.
- Light Does Not Turn On:
- Check the power supply and remote control batteries.
- Ensure the light function is activated on the remote.
- Excessive Noise:
- Ensure all mounting screws are tightened.
- Check for any obstructions around the fan blades.
- Dust accumulation on blades can cause imbalance; clean the blades.
- Remote Control Not Responding:
- Replace the batteries (2 AAA batteries required).
- Ensure there are no obstructions between the remote and the fan.
If the problem persists after attempting these solutions, please contact Proventa customer support.
8. Specifications
| Feature | Specification |
|---|---|
| Brand | Proventa |
| Product Dimensions | 51 x 51 x 20 cm |
| Item Weight | 4.02 Kilograms |
| Model Number | 800619 |
| Manufacturer | proventa |
| Number of Items | 1 |
| Style | Minimalist |
| Color | 51 Cm with Rotation (Warm White Light) |
| Number of Light Sources | 1 |
| Voltage | 230 Volts (AC) |
| Special Features | Dimmable |
| Shade Color | Warm White |
| Power Source | Corded Electric |
| Batteries Included | Yes (2 AAA batteries for remote) |
| Certification | CE, RoHS |
| Lamp Type | LED |
| Power Consumption | 45 Watts |
| Energy Efficiency Rating | F (View EPREL Product Page) |

Image: Energy efficiency label for the Proventa ceiling fan.

Image: Product data sheet providing detailed technical specifications.
9. Warranty and Support
Proventa stands behind the quality of its products. For any warranty claims, technical support, or inquiries not covered in this manual, please contact Proventa customer service directly. Please have your model number (800619) and purchase information ready when contacting support.
You can find contact information on the official Proventa website or through your retailer.


