1. Introduction
Thank you for choosing the Proventa 3D Air Ceiling Fan with Lighting. This innovative ceiling fan is designed to provide optimal air circulation and versatile lighting for your living space. Featuring advanced 3D Air technology, it ensures air is distributed throughout the entire room, unlike traditional fans that only blow air downwards. The fan includes both summer and winter modes for year-round comfort and can be conveniently controlled via an included remote. This manual provides detailed instructions for installation, operation, and maintenance to ensure safe and efficient use of your new appliance.

Figure 1.1: Proventa 3D Air Ceiling Fan in a living room setting, demonstrating air circulation and remote control.
2. Safety Instructions
Please read all safety instructions carefully before installation and use. Failure to follow these instructions may result in electric shock, fire, or serious personal injury.
- Ensure the power supply is disconnected before installation, cleaning, or maintenance.
- Installation must be performed by a qualified electrician in accordance with all local and national electrical codes.
- The mounting structure must be capable of supporting the weight of the fan (approximately 5.25 kg).
- Do not insert any objects into the fan blades while the fan is operating.
- Keep children and pets away from the fan during operation.
- Use only the specified voltage (230 VAC) for this appliance.
- Do not use the fan in damp or wet locations.
- Ensure all connections are secure and properly insulated.
3. Package Contents
Carefully unpack the box and ensure all items are present and undamaged. If any parts are missing or damaged, contact your retailer immediately.
- Proventa 3D Air Ceiling Fan Unit (Model S80061X-1)
- Remote Control
- Mounting Hardware (screws, wall anchors)
- User Manual (this document)
- 2 x AAA Batteries (for remote control)

Figure 3.1: Product packaging, illustrating the fan and remote control.
4. Setup and Installation
Follow these steps for proper installation of your Proventa ceiling fan. It is recommended to have two people for installation.
- Preparation: Turn off the main power supply at the circuit breaker before beginning installation. Ensure the mounting surface is clean and sturdy.
- Mounting Bracket Installation: Secure the mounting bracket to the ceiling joist or a suitable electrical junction box using the provided screws and wall anchors. Ensure it is firmly attached and can support the fan's weight.
- Wiring: Connect the electrical wires from the ceiling to the fan's wiring according to the wiring diagram provided in the separate installation guide (if applicable) or standard electrical practices (Live to Live, Neutral to Neutral, Ground to Ground). Ensure all connections are secure and insulated.
- Fan Unit Attachment: Carefully lift the fan unit and attach it to the mounting bracket. Ensure it is securely locked into place.
- Remote Control Setup: Open the battery compartment on the remote control and insert the two AAA batteries, observing the correct polarity.
- Final Check: Once installed, double-check all connections and ensure the fan is securely mounted. Restore power at the circuit breaker.

Figure 4.1: Fan dimensions and included mounting hardware for easy installation.
5. Operating Instructions
Your Proventa 3D Air Ceiling Fan is operated using the included remote control. Familiarize yourself with the buttons and their functions.
5.1 Remote Control Functions
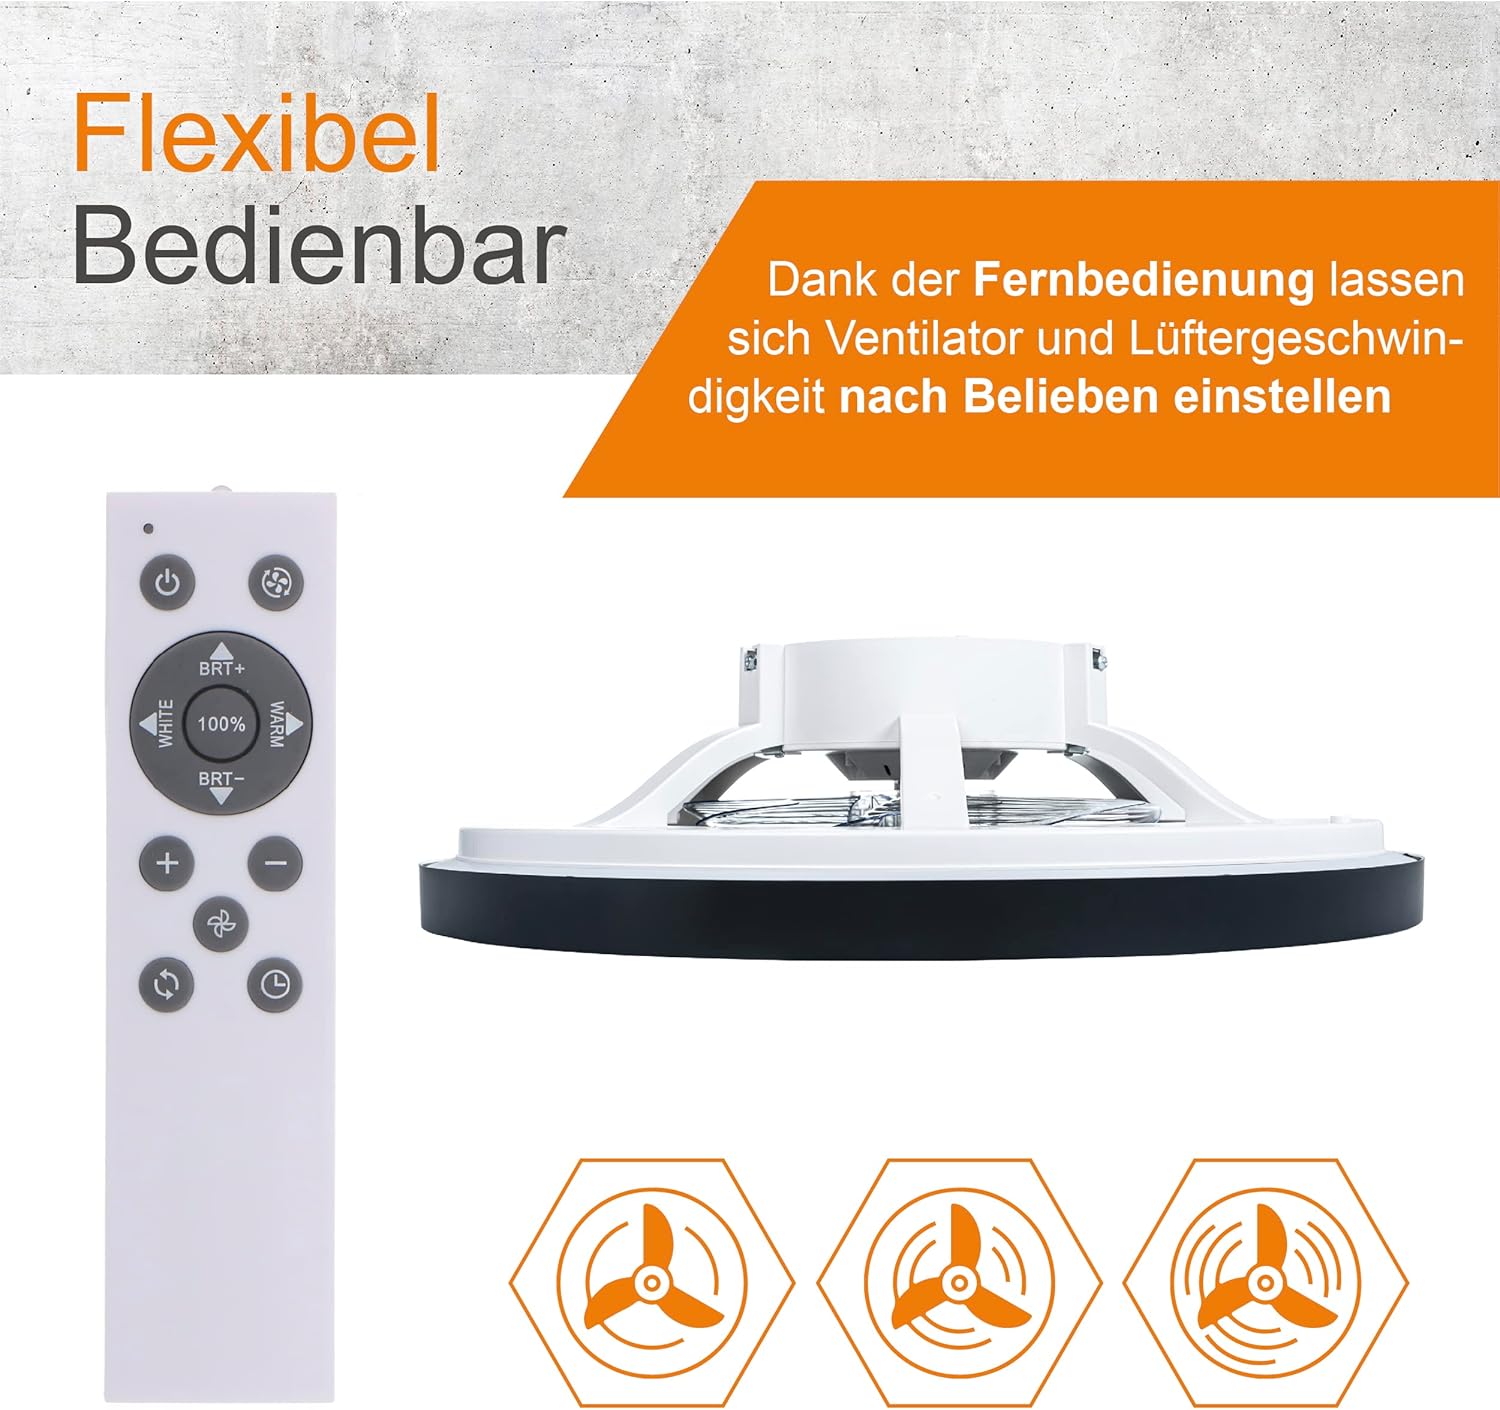
Figure 5.1: Remote control layout and fan speed indicators.
- Power Button (⏻): Turns the fan and light ON/OFF.
- Fan Speed Buttons (⇡ / ⇣): Adjusts the fan speed. The fan offers 20 adjustable speed settings.
- Light ON/OFF Button (💡): Turns the light ON/OFF independently.
- Brightness Adjustment (BRT+ / BRT-): Increases or decreases the light brightness. The light is dimmable from full brightness to soft.
- Color Temperature Adjustment (WHITE / WARM): Changes the light color from cool white to warm white.
- Timer Button (⏱): Sets a timer for the fan and/or light to turn off automatically.
- Summer/Winter Mode Button (🔄): Toggles between summer and winter modes.
5.2 Summer and Winter Modes
The Proventa 3D Air Ceiling Fan is designed for year-round use with its seasonal modes:
- Summer Mode (Downward Airflow): In this mode, the fan blades rotate to push air downwards, creating a cooling breeze effect. This helps to circulate cool air throughout the room.
- Winter Mode (Upward Airflow): In winter mode, the fan blades reverse direction to draw air upwards. This helps to circulate warm air that rises to the ceiling, pushing it back down into the living space for more efficient heating.

Figure 5.2: Summer (cooling) and Winter (warming) airflow directions.
5.3 Adjustable Lighting
The integrated LED light offers customizable ambiance:
- Color Temperature: Adjust from cool white (for active tasks) to warm white (for a cozy atmosphere).
- Brightness: Dim the light from 100% brightness down to a soft glow.
- The fan remembers your last light settings for convenience.
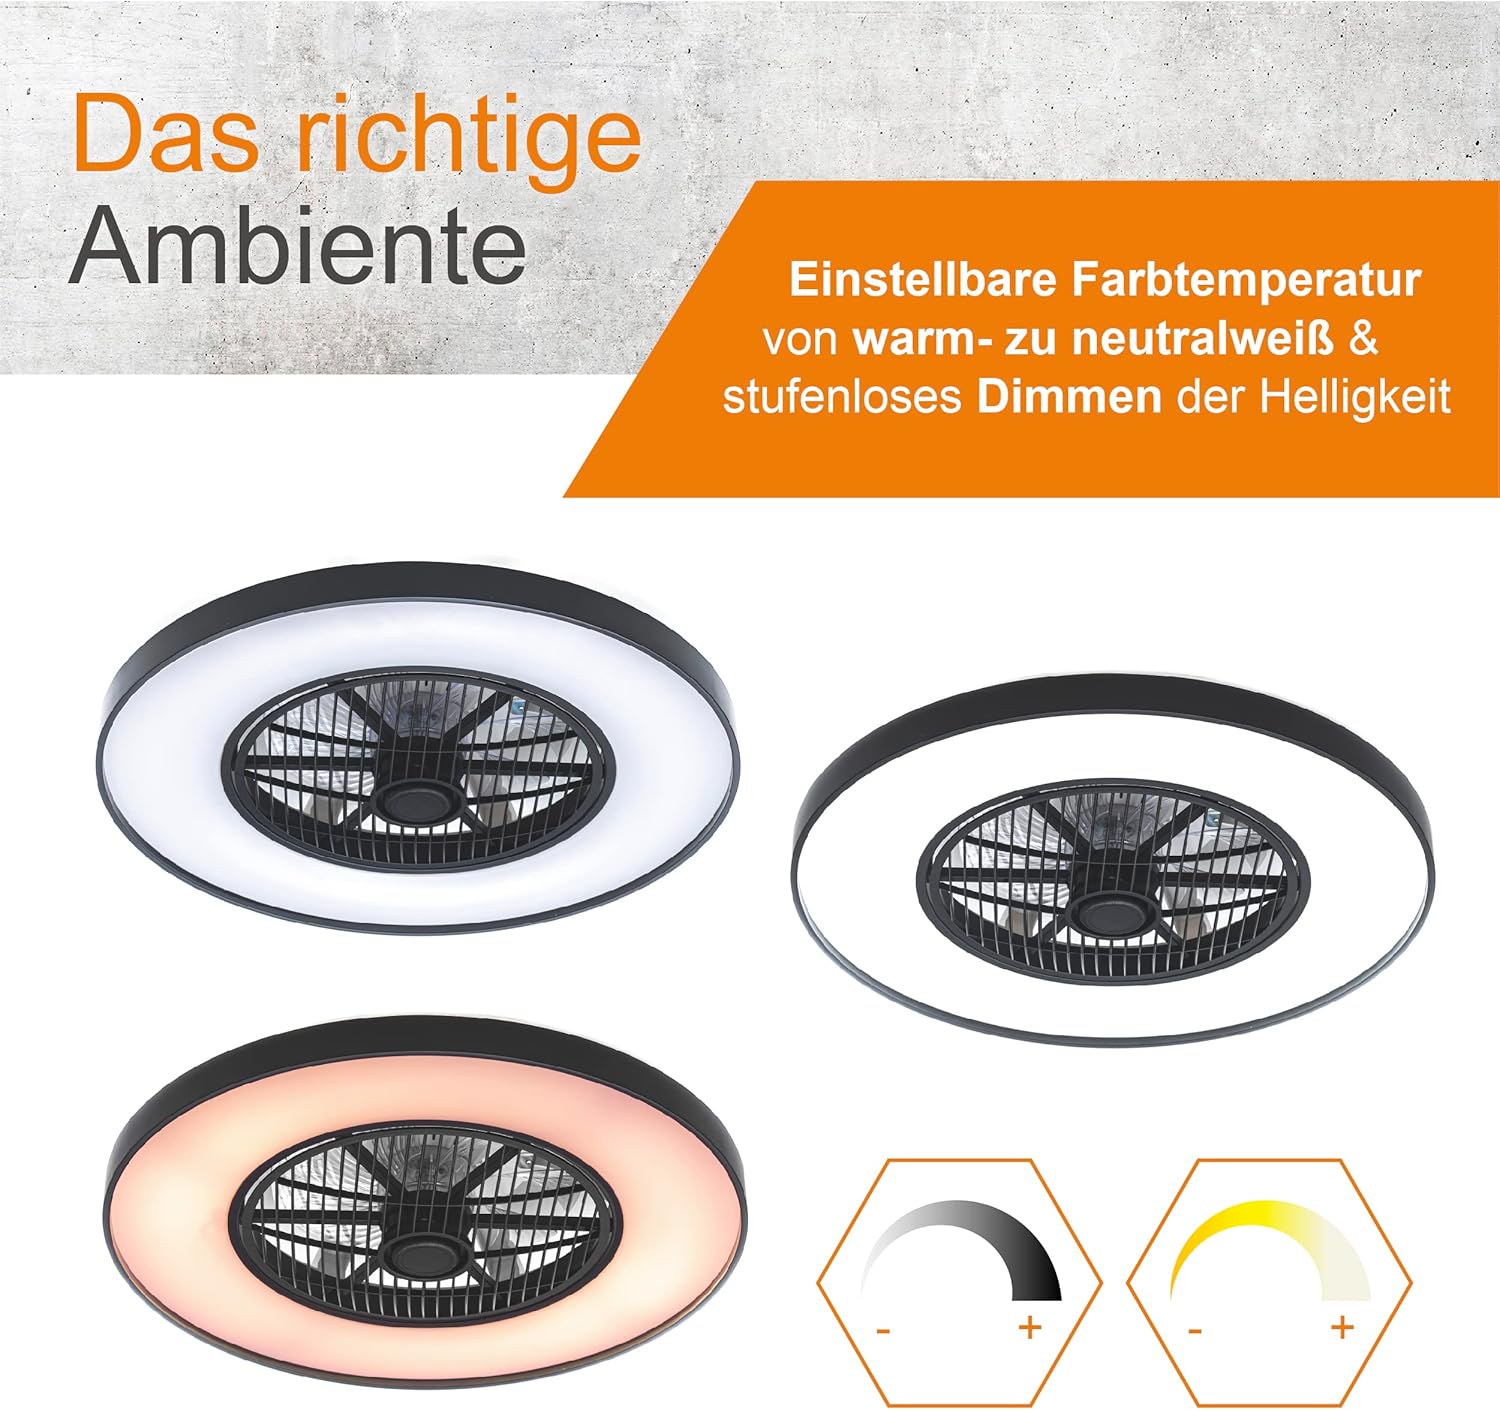
Figure 5.3: Adjustable light color temperature and brightness settings.
6. Maintenance
Regular maintenance will ensure the longevity and optimal performance of your ceiling fan.
- Cleaning: Before cleaning, ensure the power is turned off at the circuit breaker. Use a soft, damp cloth to wipe down the fan housing and blades. Do not use abrasive cleaners or solvents, as they may damage the finish.
- Dust Removal: Periodically remove dust from the fan blades and motor housing to prevent buildup, which can affect performance and efficiency.
- Check Connections: Annually, check all electrical connections and mounting screws to ensure they are secure.
- LED Light: The integrated LED light source is designed for long life and typically does not require replacement. If issues arise, contact customer support.
7. Troubleshooting
If you encounter any issues with your Proventa 3D Air Ceiling Fan, please refer to the following common problems and solutions before contacting customer support.
| Problem | Possible Cause | Solution |
|---|---|---|
| Fan does not turn on. | No power supply; Remote control batteries are dead; Loose wiring connection. | Check circuit breaker; Replace remote batteries; Check wiring connections (ensure power is off). |
| Light does not turn on. | No power supply; Light function off on remote; LED failure. | Check circuit breaker; Press light ON/OFF button on remote; Contact customer support. |
| Fan makes unusual noise. | Loose mounting screws; Obstruction in fan blades; Motor issue. | Tighten all mounting screws; Ensure nothing is obstructing the blades; Contact customer support if noise persists. |
| Remote control not working. | Dead batteries; Remote out of range; Interference. | Replace batteries; Ensure you are within range; Remove any potential interference sources. |
8. Specifications
Detailed technical specifications for the Proventa 3D Air Ceiling Fan with Lighting.
| Feature | Specification |
|---|---|
| Brand | Proventa |
| Model Number | S80061X-1 |
| Product Dimensions | 60.4 cm (Diameter) x 17 cm (Height) |
| Weight | 5.25 kg |
| Material | Metal |
| Color | Black |
| Voltage | 230 VAC |
| Wattage (Light) | 60 watts |
| Luminous Flux | 3000 Lumen |
| Color Temperature | 3000 Kelvin (Adjustable) |
| Light Source Type | LED |
| Number of Fan Speeds | 20 |
| Control Method | Remote Control |
| Batteries Required | 2 x AAA (included) |
| Certifications | CE, RoHS |

Figure 8.1: Energy Efficiency Label. For more details, scan the QR code or visit EPREL Database.

Figure 8.2: Detailed Product Data Sheet.
9. Warranty and Support
Proventa products are manufactured to high-quality standards. For warranty information, technical support, or service inquiries, please contact your retailer or visit the official Proventa website. Please have your model number (S80061X-1) and purchase date available when contacting support.
Manufacturer: Proventa
Model: S80061X-1


