
1. Introduction
This manual provides detailed instructions for the safe and efficient operation, maintenance, and troubleshooting of your FOHERE 20L/24h Electric Dehumidifier. Please read this manual thoroughly before using the appliance and retain it for future reference.
2. Safety Instructions
Always observe the following basic safety precautions when using electrical appliances to reduce the risk of fire, electric shock, or injury.
- Ensure the power supply voltage matches the rating label on the dehumidifier.
- Do not operate the dehumidifier with a damaged cord or plug.
- Do not immerse the unit, power cord, or plug in water or other liquids.
- Keep the appliance away from heat sources and direct sunlight.
- Ensure adequate ventilation around the unit; do not block air inlets or outlets.
- Always unplug the dehumidifier before cleaning, moving, or performing any maintenance.
- Do not allow children to play with or operate the dehumidifier.
- Empty the water tank regularly to prevent overflow.
- Do not use the appliance in areas where flammable gases or liquids are stored.
3. Product Overview
3.1 Components

Figure 3.1: The FOHERE 20L/24h Dehumidifier, showcasing its compact design and the mobile application interface for smart control. The unit is white with a top control panel and side air vents.
3.2 Control Panel

Figure 3.2: Close-up of the dehumidifier's top control panel, indicating buttons for Timer, Swing, Humidity Adjustment (+/-), Mode, and ON/OFF, along with indicators for Timer, WiFi, Tank Full, Dry, Fan, and Laundry modes.
The control panel features an LED display and touch-sensitive buttons for various functions:
- Timer Button: Sets the auto-on or auto-off time.
- Swing Button: Activates or deactivates the oscillating air outlet.
- Humidity Adjustment (+/-) Buttons: Increases or decreases the desired humidity level.
- Mode Button: Cycles through operating modes (Dry, Fan, Laundry).
- ON/OFF Button: Powers the unit on or off.
- Indicators: Lights for Timer, WiFi connection, Tank Full, Dry mode, Fan mode, and Laundry mode.
4. Setup
4.1 Unpacking
Carefully remove the dehumidifier from its packaging. Inspect the unit for any signs of damage. Retain the packaging materials for future storage or transport.
4.2 Placement
Place the dehumidifier on a flat, stable surface in the desired room. Ensure there is at least 20 cm (8 inches) of clear space around all sides of the unit for proper airflow. Avoid placing it near heat sources or in direct sunlight.
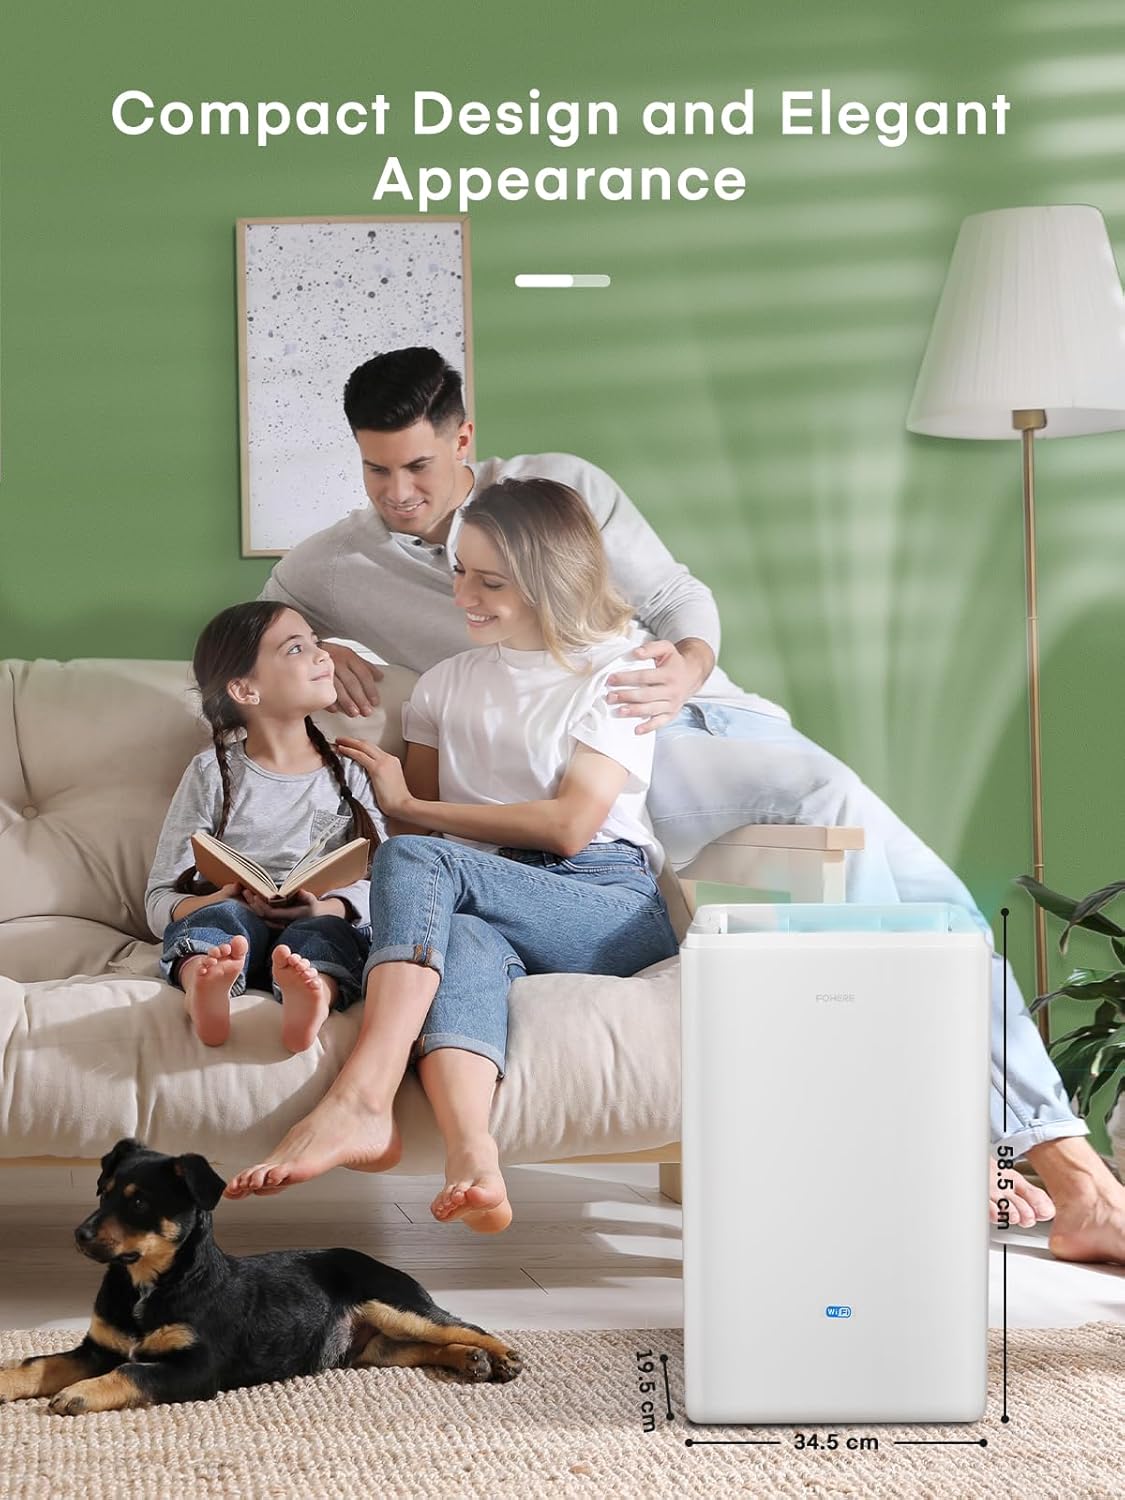
Figure 4.1: The dehumidifier positioned in a living room, illustrating its compact dimensions of 39.7 cm (height) x 24.3 cm (width) x 64 cm (depth), making it suitable for various indoor spaces.
4.3 Power Connection
Plug the power cord into a grounded electrical outlet. Ensure the outlet meets the power requirements of the dehumidifier.
4.4 Drainage Options
Your dehumidifier offers two drainage methods:
- Manual Tank Drainage: The dehumidifier collects water in its internal 4.2L water tank. When the tank is full, the unit will automatically shut off and the 'Tank Full' indicator will illuminate. Empty the tank by carefully pulling it out from the side of the unit and pouring out the collected water. Reinsert the tank firmly until it clicks into place.
- Continuous Drainage: For continuous operation without needing to empty the tank, connect the included drain hose to the continuous drainage port on the back of the unit. Route the hose to a suitable drain (e.g., floor drain, sink) ensuring it is sloped downwards for gravity drainage.
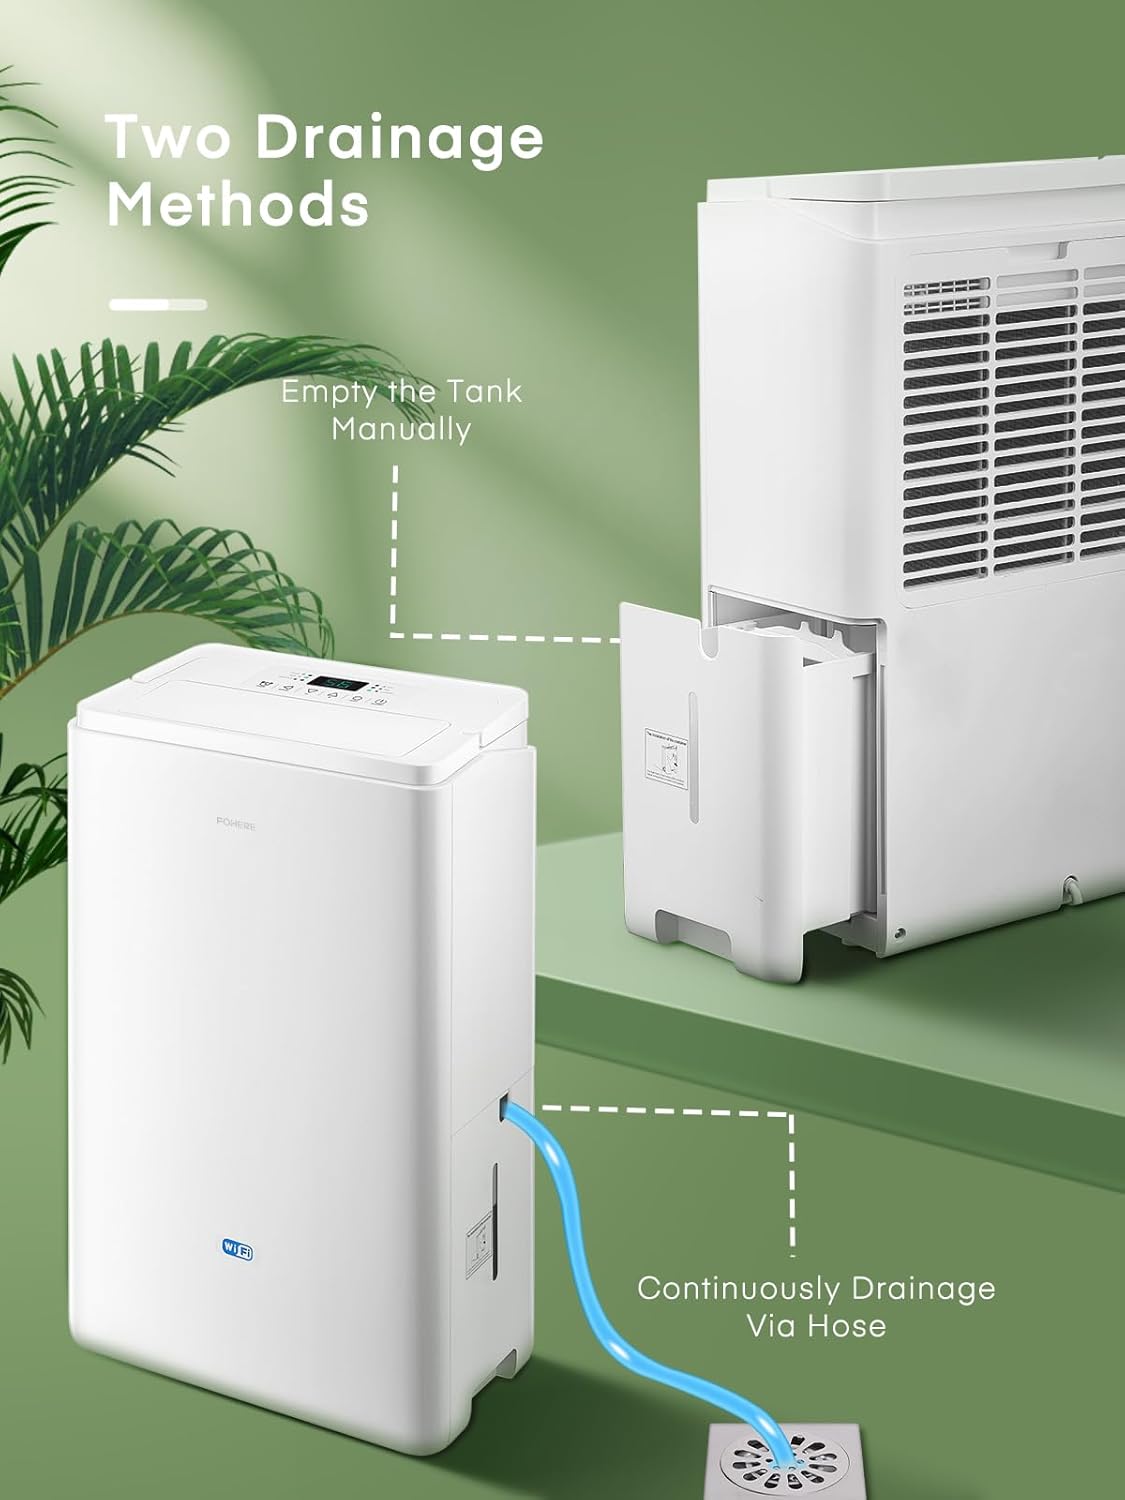
Figure 4.2: Illustration of the two drainage methods: manually emptying the removable water tank and connecting a hose for continuous drainage directly to a floor drain.
5. Operating Instructions
5.1 Basic Operation
- Press the ON/OFF button to power on the dehumidifier.
- The unit will start operating in its default mode.
5.2 Operating Modes
Press the Mode button to cycle through the available operating modes:

Figure 5.1: The control panel highlighting the three main operation modes: Dry, Fan, and Laundry, along with the Swing function.
- Dry Mode: Standard dehumidification for general use.
- Fan Mode: Operates as a fan, circulating air without dehumidification.
- Laundry Mode: Designed for faster drying of clothes in a confined space. The unit operates at a higher fan speed and continuous dehumidification.
5.3 Humidity Setting
In Dry mode, use the + or - buttons to set your desired humidity level (e.g., 40% to 80% relative humidity). The unit will operate until the ambient humidity reaches the set level, then cycle on and off to maintain it.
5.4 Timer Function
Press the Timer button to set an auto-on or auto-off time (from 1 to 24 hours). Each press increases the time by one hour. The timer indicator will light up when active.
5.5 Oscillating Mode
Press the Swing button to activate the oscillating function, which helps distribute dehumidified air more evenly throughout the room. Press again to stop oscillation.
5.6 APP and WiFi Control
The dehumidifier can be controlled remotely via a smartphone application. Follow the instructions provided in the separate APP setup guide to connect your device to your home WiFi network. Once connected, you can adjust modes, set humidity, create schedules, and monitor real-time humidity from your phone.

Figure 5.2: An illustrative diagram demonstrating how smart app control simplifies life by allowing users to adjust modes, humidity, create schedules, view real-time humidity, and set timers remotely.
6. Maintenance
Regular maintenance ensures optimal performance and extends the lifespan of your dehumidifier.
6.1 Cleaning the Air Filter
The air filter should be cleaned every two weeks or more frequently depending on usage and air quality. A dirty filter can reduce efficiency and airflow.
- Turn off the dehumidifier and unplug it from the power outlet.
- Locate the air filter cover on the back or side of the unit.
- Remove the filter by gently pulling it out.
- Clean the filter with a vacuum cleaner or wash it with warm, soapy water. Rinse thoroughly.
- Allow the filter to air dry completely before reinserting it. Do not use a dryer or direct heat.
- Slide the dry filter back into its slot and close the cover.

Figure 6.1: A hand demonstrating the removal of the washable air filter from the back of the dehumidifier for cleaning.
6.2 Cleaning the Water Tank
Clean the water tank regularly to prevent mold and mildew growth.
- Turn off and unplug the unit.
- Remove the water tank.
- Wash the tank with mild detergent and warm water. Rinse thoroughly.
- Dry the tank completely before reinserting it into the dehumidifier.

Figure 6.2: A hand demonstrating the removal of the 4.2L water tank from the side of the dehumidifier.
6.3 Storage
If the dehumidifier will not be used for an extended period:
- Empty and clean the water tank.
- Clean the air filter.
- Unplug the unit and coil the power cord neatly.
- Store the dehumidifier in a cool, dry place, preferably in its original packaging.
7. Troubleshooting
Before contacting customer support, please refer to the following table for common issues and their solutions.
| Problem | Possible Cause | Solution |
|---|---|---|
| Dehumidifier does not turn on. | No power supply; Power cord not plugged in; Power outage. | Check power outlet; Ensure plug is fully inserted; Check household circuit breaker. |
| Unit stops operating, 'Tank Full' indicator is on. | Water tank is full or not properly inserted. | Empty the water tank and reinsert it correctly. |
| No or low dehumidification. | Air filter is dirty; Room temperature is too low; Air inlet/outlet blocked; Humidity setting is too high. | Clean the air filter; Ensure room temperature is above 5°C (41°F); Clear obstructions; Lower the desired humidity setting. |
| Unit is noisy. | Unit is not on a level surface; Air filter is dirty; Internal components vibrating. | Place on a flat, stable surface; Clean the air filter; If noise persists, contact customer support. |
| Water leaking from the unit. | Water tank not properly inserted; Continuous drain hose is loose or clogged. | Ensure water tank is fully seated; Check continuous drain hose connection and clear any blockages. |
8. Specifications
| Feature | Specification |
|---|---|
| Brand | FOHERE |
| Model Number | DEW 20LEB |
| Dehumidification Capacity | 20 Litres/24h |
| Water Tank Capacity | 4.2 Litres |
| Power / Wattage | 445 watts |
| Noise Level | 41 dB |
| Product Dimensions (L x W x H) | 39.7 x 24.3 x 64 cm |
| Item Weight | 13.7 kg |
| Recommended Floor Area | Up to 50 Square Meters |
| Material | Plastic, Metal |
| Special Features | Continuous Draining, Timer, Automatic, APP WiFi Control, Oscillating Mode, Clothes Drying |
9. Warranty and Support
FOHERE products are manufactured to high-quality standards. For information regarding warranty coverage, technical support, or service inquiries, please refer to the warranty card included with your purchase or contact FOHERE customer service through the official website or your retailer.
