
1. Introduction and Overview
The TESmart PAP KVM Switch is designed to manage two computers with two monitors using a single set of keyboard and mouse. This device supports Picture-and-Picture (PAP) functionality, allowing you to view content from both connected computers simultaneously on your dual monitor setup. It is ideal for users who need to switch between multiple systems efficiently while maintaining a dual-monitor configuration.
Key features include 4K@30Hz resolution support, EDID emulators for stable display settings, various switching methods (hotkeys, buttons, IR remote), and integrated audio and microphone support.

Image: The TESmart PAP KVM Switch unit shown with its accompanying cables, including HDMI and USB-B cables.

Image: A typical desk setup demonstrating the TESmart KVM switch managing two monitors for a hybrid work environment. Icons indicate HDMI+HDMI, 4K@30Hz, Hotkey Switching, EDID Emulation, USB 2.0, and Headset support.
2. Package Contents
Please verify that all items listed below are included in your package:
- 1x TESmart 2x2 HDMI KVM Switch PAP
- 2x 5ft (HDMI+USB-B) Cables
- 2x 5ft HDMI Cables
- 1x IR Remote Control (AAA batteries not included)
- 1x DC 12V Power Adapter
- 1x User Manual

Image: Visual representation of the items included in the product package: the KVM switch unit, KVM cables, HDMI cables, IR remote, user manual, and power adapter.
3. Setup and Installation
Follow these steps to set up your TESmart PAP KVM Switch:
- Power Off Devices: Ensure all computers and monitors are powered off before making any connections.
- Connect Monitors: Connect your two monitors to the "Display A" and "Display B" HDMI output ports on the KVM switch using HDMI cables.
- Connect Computers (PC1):
- Connect the HDMI output from PC1 to the "Input A" port under "PC1" on the KVM switch.
- Connect the USB-B port of PC1 to the "USB 1" port under "PC1" on the KVM switch using the provided HDMI+USB-B cable.
- Connect Computers (PC2):
- Connect the HDMI output from PC2 to the "Input B" port under "PC2" on the KVM switch.
- Connect the USB-B port of PC2 to the "USB 2" port under "PC2" on the KVM switch using the provided HDMI+USB-B cable.
- Connect Keyboard and Mouse: Connect your USB keyboard and mouse to the dedicated keyboard and mouse USB ports on the KVM switch.
- Connect Peripherals (Optional): If you have additional USB peripherals (e.g., USB hub, printer, scanner, U disk), connect them to the USB 2.0 port on the KVM switch. Note: Hotkey switching is not supported when the keyboard is connected to the USB 2.0 port.
- Connect Audio (Optional): Connect your headset or speakers to the integrated microphone and L/R audio output ports on the KVM switch.
- Power On: Connect the DC 12V power adapter to the KVM switch and then plug it into a power outlet. Power on your monitors and computers.
The KVM switch supports hot-plugging, allowing you to add or remove devices without powering off the switch or connected devices.

Image: A detailed diagram illustrating the connection points on the TESmart KVM switch, showing inputs for two PCs (HDMI and USB) and outputs for two monitors, along with ports for keyboard, mouse, headset, printer, U disk, and barcode scanner.

Image: The KVM switch highlighting the USB 2.0 port, indicating its use for sharing peripherals like printers, U disks, and barcode scanners between connected computers.
4. Operating Instructions
4.1 Switching Between Computers
The TESmart KVM switch offers multiple methods for switching between connected computers:
- Front Panel Buttons: Press the "Select" buttons on the front panel of the KVM switch to cycle through the connected computers.
- IR Remote Control: Use the included IR remote control to switch inputs. (Requires AAA batteries, not included).
- Keyboard Hotkeys: Utilize specific keyboard hotkey combinations for quick switching.
- Auto Scan: The KVM switch can be configured to automatically scan and switch between active inputs.

Image: Demonstrates three switching methods: keyboard hotkeys, front panel buttons on the KVM switch, and the IR remote control.
4.2 Hotkey Customization
You can customize hotkey combinations for personalized control. Refer to the detailed hotkey instructions in the full user manual for specific sequences. It is recommended to AVOID setting F1, F11, Alt, and the numbers 1, 2, 3, 4 as hotkeys to prevent conflicts with system functions.

Image: Illustrates the concept of hotkey customization, showing a generic hotkey combination (Hotkey + Hotkey + F1 + Any Key). It also highlights keys to avoid for hotkey assignment.
4.3 Display Modes
The KVM switch supports various display modes for your dual monitor setup:
- Mirrored Display: Both monitors display the same content from the selected PC.
- Extended Display: The desktop of the selected PC is extended across both monitors.
- Picture-and-Picture (PAP) / Different on Each: Each monitor displays content from a different PC. For example, PC1 on Monitor 1 and PC2 on Monitor 2. This allows you to view both systems simultaneously.
- Mixed Display: One monitor shows PC1, the other shows PC2.
- Thumbnails Display Mode: Displays smaller versions of both PC desktops on each monitor.

Image: Illustrates two primary display modes: Mirrored (both monitors show PC1) and Extended (PC2 desktop extended across both monitors).

Image: Shows three advanced display modes: Extended (PC1 desktop across both monitors), Mixed (PC1 on one monitor, PC2 on the other), and Thumbnails (smaller views of both PCs on each monitor).
4.4 EDID Emulation
The KVM switch features EDID emulators on each input port. This ensures that your computers always receive the correct display information, preventing resolution or display settings from changing when you switch between inputs. This provides a seamless and stable video output experience.

Image: A comparison showing how EDID emulation maintains consistent window settings after switching (left, green check) versus without EDID emulation where display settings may change (right, red exclamation).
4.5 Audio and USB Focus Lock
The KVM switch allows for independent control of audio and USB peripherals. You can configure the device to maintain audio output from one computer while working on another, or keep a USB device (like a printer) connected to a specific computer regardless of the active video input. This ensures uninterrupted workflow for specific tasks.

Image: Illustrates the "Lock-in Connectivity" feature, showing PC1 displayed on monitors while PC2 is used for printing (USB Focus Lock) or audio playback (Audio Focus Lock).

Image: Shows a headset connected to the KVM switch, emphasizing the "MIC in, World Out" capability for audio input and output.
4.6 Keyboard and Mouse Compatibility
The KVM switch is designed for high compatibility with most wired, wireless (2.4G receiver), mechanical, multimedia, and gaming keyboards and mice due to its upgraded pass-through mode (Semi-DDM USB). Bluetooth keyboards and mice are not supported.

Image: Displays various types of keyboards and mice (common, wireless with 2.4G receiver, multimedia, mechanical) that are compatible with the TESmart KVM switch.
4.7 Seamless Switching
The KVM switch provides near-instantaneous keyboard and mouse switching with zero latency, enhancing workflow efficiency and gaming experience by eliminating delays when transitioning between computers.

Image: A visual comparison showing the speed of switching. The top panel indicates a 5-second loading time, while the bottom panel shows the TESmart KVM switching in 1 second.
5. Maintenance
To ensure the longevity and optimal performance of your TESmart PAP KVM Switch, follow these general maintenance guidelines:
- Cleaning: Use a soft, dry cloth to clean the exterior of the KVM switch. Avoid using liquid cleaners or aerosols, as they may damage the device.
- Ventilation: Ensure the KVM switch is placed in a well-ventilated area to prevent overheating. Do not block any ventilation openings.
- Power Supply: Always use the provided DC 12V power adapter. Using an incorrect power supply may damage the unit.
- Cable Management: Keep cables organized and free from kinks or excessive bending to prevent damage to the cables and ports.
- Environmental Conditions: Avoid exposing the device to extreme temperatures, humidity, or direct sunlight.
6. Troubleshooting
If you encounter issues with your TESmart PAP KVM Switch, refer to the following common troubleshooting steps:
- No Display/Flickering Screen:
- Ensure all HDMI cables are securely connected to both the KVM switch and your monitors/computers.
- Verify that the KVM switch is powered on and its indicator lights are active.
- Check your computer's display settings to ensure they are configured for dual monitors and the correct resolution (up to 4K@30Hz).
- Try restarting the KVM switch and then your computers.
- Ensure your laptop is capable of dual monitors before purchasing or troubleshooting.
- Keyboard/Mouse Not Responding:
- Ensure the keyboard and mouse are connected to the dedicated USB ports on the KVM switch.
- If using a wireless keyboard/mouse, ensure the receiver is properly plugged into the dedicated port.
- If the keyboard is connected to the USB 2.0 port, hotkey switching will not work. Connect it to the dedicated keyboard port.
- Try unplugging and replugging the keyboard and mouse.
- Verify that the keyboard and mouse are not Bluetooth models, as these are not supported.
- Audio Issues:
- Check that your headset or speakers are correctly plugged into the audio output ports on the KVM switch.
- Ensure the audio output settings on your computer are directed to the KVM switch.
- Verify that the audio focus lock feature is not preventing audio from the desired computer.
- Hotkey Issues:
- Ensure your keyboard is connected to the dedicated keyboard USB port, not the USB 2.0 port.
- Review the hotkey combinations in the full user manual.
- Avoid using F1, F11, Alt, or numbers 1, 2, 3, 4 as custom hotkeys.
If problems persist, please contact TESmart customer support for further assistance.
7. Specifications
| Feature | Detail |
|---|---|
| Model Number | HKS202-EP23 |
| Product Dimensions (L x W x H) | 11.81 x 4.33 x 1.18 inches |
| Weight | 1.1 Pounds |
| Operation Mode | ON-OFF |
| Current Rating | 2 Amps |
| Operating Voltage | 12 Volts (DC) |
| Contact Type | Normally Open |
| Connector Type | Plug In |
| Terminal | Solder |
| Circuit Type | 2-way |
| Mounting Type | Plug In Mount |
| Video Resolution | Up to 4K@30Hz (downward compatible) |
| Operating Systems Supported | Unix, Windows, Debian, Ubuntu, Fedora, Mac OS X, Raspbian, Ubuntu for Raspberry Pi, other Linux basic systems |
8. Warranty and Support
TESmart is committed to providing excellent customer service and product support.
- Warranty: This KVM Switch comes with a 1-year warranty. Additional warranty options (e.g., 1+2 year) may be available. Please refer to your purchase documentation for details.
- Technical Support: TESmart offers 24/7 technical support. If you have any questions, concerns, or require assistance with your product, please reach out to our customer experience design team.
- Firmware Service: Custom firmware services may be available for specific compatibility needs.
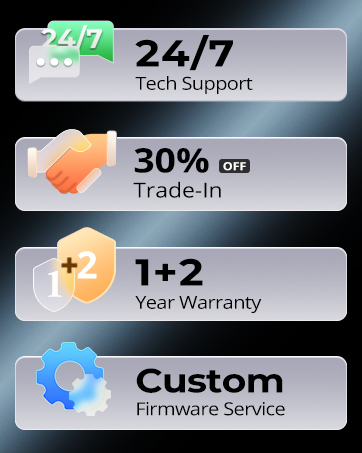
Image: Displays icons representing 24/7 Tech Support, 30% Off Trade-In, 1+2 Year Warranty, and Custom Firmware Service, highlighting TESmart's commitment to customer support.
For the most up-to-date support information and contact details, please visit the official TESmart website or refer to the contact information provided in your product packaging.


