
1. Introduction
This manual provides detailed instructions for the installation and proper use of your BRAINWAVZ Corner Wall Mount. This product is designed to securely hold your Eufy T8410X, IndoorCam E220, or IndoorCam S220 security camera, offering optimal viewing angles and reducing clutter.
2. Product Compatibility
The BRAINWAVZ Corner Wall Mount is specifically designed for and compatible with the following Eufy camera models:
- Eufy T8410X
- Eufy IndoorCam E220
- Eufy IndoorCam S220
Important: This mount is not compatible with any other camera models or brands.

Image: Visual confirmation of compatible Eufy camera models (T8410X, IndoorCam E220, S220).
3. Package Contents
Please ensure all the following items are included in your package:
- 1 x BRAINWAVZ Corner Wall Mount
- Mounting Screws
- Wall Plugs (Anchors)
- Washers
- Screw Caps
- 3M VHB Adhesive Tape (pre-applied or separate strips)
- 1/4" Mounting Bolt (for securing camera to mount)

Image: The BRAINWAVZ Corner Wall Mount, a compatible Eufy camera, and the complete set of mounting hardware.
4. Setup and Installation
The BRAINWAVZ Corner Wall Mount offers two primary installation methods: screw-in mounting for maximum security and adhesive mounting for quick, tool-free application.
4.1. Preparing Your Camera
- Ensure your Eufy camera is powered off before installation.
- Locate the adapter plate that came with your Eufy camera. This plate is essential for securing the camera to the mount.
4.2. Screw-in Mounting (Recommended for Maximum Security)
This method provides the most secure attachment for your camera mount.
- Select Location: Choose a corner on a wall or wood surface where you wish to install the mount. Ensure the surface is clean and dry.
- Mark Drill Holes: Hold the mount in the desired position and mark the locations for the screw holes using a pencil.
- Drill Pilot Holes: For drywall, drill pilot holes and insert the wall plugs (anchors). For wood, drill appropriate pilot holes.
- Secure Mount: Align the mount with the drilled holes. Insert the screws through the mount, using washers if necessary, and tighten them securely. Cover screw heads with screw caps for a finished look.
- Attach Camera: Place your Eufy camera's adapter plate onto the mount. Then, place your Eufy camera onto the adapter plate, ensuring it drops securely into the mount's base. Use the included 1/4" mounting bolt to fix the camera firmly in place.
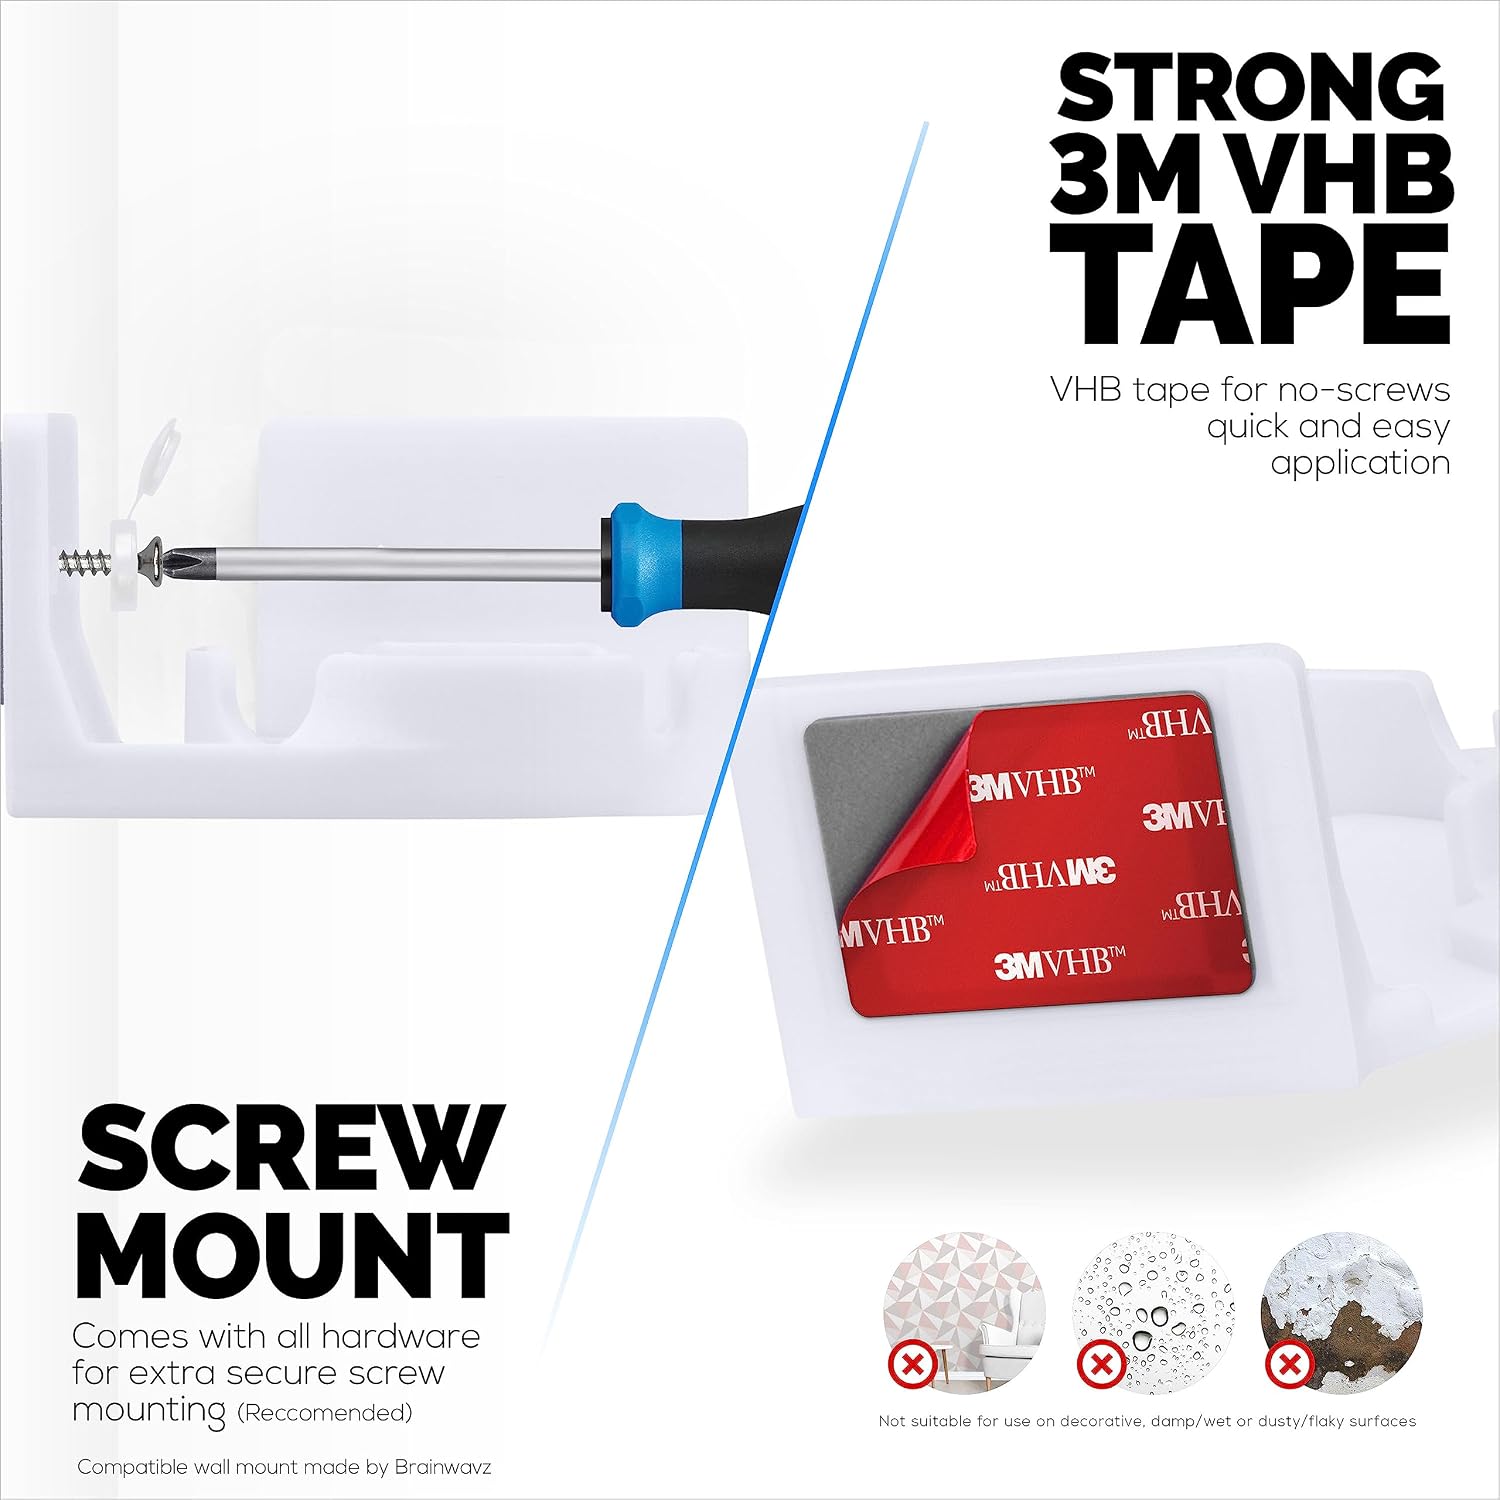
Image: Detailed view of the screw-in mounting option, showing a screwdriver securing the mount to a wall.
4.3. Self-Adhesive Mounting (Tool-Free Option)
This method offers a quick and easy installation without the need for tools. It uses strong 3M VHB tape.
- Clean Surface: Thoroughly clean the desired corner surface. Ensure it is completely dry and free of dust, grease, or debris.
- Peel Backing: Carefully peel off the red protective backing from the 3M VHB tape located on the back of the mount.
- Apply Mount: Press the mount firmly onto the cleaned corner surface. Apply consistent pressure for at least 30 seconds to ensure good adhesion.
- Allow Curing Time: For optimal adhesion, allow the adhesive to set for a few hours (ideally 24 hours) before placing the camera on the mount.
- Attach Camera: Once the adhesive has cured, place your Eufy camera's adapter plate onto the mount. Then, place your Eufy camera onto the adapter plate, ensuring it drops securely into the mount's base. Use the included 1/4" mounting bolt to fix the camera firmly in place.
Warning: DO NOT PLACE ON PAINTED, DAMP, OR PLASTERED WALLS. These surfaces are not suitable for adhesive mounting and may result in the mount falling, causing damage to the camera or property.

Image: A multi-panel view demonstrating the drop-in camera placement, the 3M VHB adhesive tape, and various angles of the corner mount.
4.4. Drop-in Design and Cable Access
The mount features a convenient drop-in design for easy camera placement and removal. It also includes an open access point at the rear to allow the power cable to sit flat and pass through easily, maintaining a tidy installation.

Image: Illustration of the camera dropping into the mount and the rear opening for power cable management.
4.5. Upside-Down Installation
The mount can be installed upside down to fit into tighter locations or to achieve specific viewing angles. Ensure the camera is securely fixed with the 1/4" bolt when installed in this orientation.

Image: Visual guide for installing the mount and camera in an inverted position, highlighting the 1/4" bolt for security.
5. Operating (Optimal Placement)
While the mount itself does not have operational functions, its placement significantly impacts your camera's effectiveness.
- Corner Advantage: Mounting your camera in a corner provides a wider field of view, helping to reduce blind spots and offer better coverage of the area.
- Secure Positioning: The corner placement keeps the camera out of the way, minimizing the risk of it being accidentally knocked or moved.
- Adjusting Camera Angle: Once mounted, adjust your Eufy camera's pan and tilt functions as needed to achieve your desired monitoring area.

Image: A Eufy camera securely installed in a room corner using the BRAINWAVZ mount, demonstrating its discreet placement and wide viewing potential.
6. Maintenance
To ensure the longevity and appearance of your BRAINWAVZ Corner Wall Mount:
- Cleaning: Wipe the mount periodically with a soft, dry, or slightly damp cloth. Avoid abrasive cleaners or solvents.
- Inspection: Regularly check the mount for any signs of wear or damage. Ensure screws are tight if using the screw-in method, or that the adhesive remains secure if using the adhesive method.
- Environmental Conditions: Avoid prolonged exposure to direct sunlight or extreme temperatures, as this may affect the material over time.
7. Troubleshooting
- Mount is not sticking (Adhesive Method):
Ensure the surface was thoroughly cleaned and dry before application. Avoid painted, damp, or plastered walls. Apply firm pressure for at least 30 seconds and allow sufficient curing time (24 hours recommended) before placing the camera. - Camera feels loose on the mount:
Ensure the Eufy camera's adapter plate is correctly seated in the mount. Verify that the 1/4" mounting bolt is securely tightened to fix the camera in place. - Mount is wobbly (Screw-in Method):
Check that all screws are fully tightened. If installing into drywall, ensure wall plugs (anchors) are properly inserted and secure. - Power cable is not sitting flat:
Ensure the power cable is routed through the designated opening at the rear of the mount. Adjust the cable to prevent kinks or pressure points.
8. Specifications
| Feature | Detail |
|---|---|
| Product Name | BRAINWAVZ Corner Wall Mount |
| Compatible Devices | Eufy T8410X (IndoorCam S220 / E220) |
| Mounting Type | Wall Mount (Screw-in or Adhesive) |
| Material | Durable Plastic |
| Color | White |
| Item Weight | 5.6 ounces |
| Package Dimensions | 4.53 x 4.33 x 2.36 inches |