
Introduction
Welcome to the user manual for your Proscenic P11 Mopping Vacuum Cleaner. This guide provides comprehensive instructions for the safe and efficient operation, maintenance, and troubleshooting of your new appliance. Please read this manual thoroughly before using the product and retain it for future reference.
Safety Instructions
To ensure safe operation, always follow these basic precautions:
- Read all instructions before use.
- Do not operate the vacuum cleaner with a damaged cord or plug.
- Keep hair, loose clothing, fingers, and all parts of the body away from openings and moving parts.
- Do not pick up flammable or combustible materials, or anything that is burning or smoking.
- Use only as described in this manual. Use only manufacturer's recommended attachments.
- Unplug from outlet when not in use and before cleaning.
- This appliance is not intended for use by persons (including children) with reduced physical, sensory or mental capabilities, or lack of experience and knowledge, unless they have been given supervision or instruction concerning use of the appliance by a person responsible for their safety.
Product Overview
Familiarize yourself with the components of your Proscenic P11 Mopping Vacuum Cleaner.

Figure 1: Overview of the Proscenic P11 Mopping Vacuum Cleaner and its various attachments, including the main unit, extension wand, floor brush, mopping tank, mop pads, crevice tool, and dusting brush.
Main Components:
- Main Unit: Contains the motor, dustbin, and control panel.
- Extension Wand: Connects the main unit to the floor brush or other attachments.
- Motorized Floor Brush: Equipped with LED lights for illuminating dark areas and a roller brush for effective cleaning.
- Water Tank & Mop Pad: Detachable unit for mopping hard floors.
- Crevice Tool: For cleaning narrow gaps and corners.
- Dusting Brush: For cleaning delicate surfaces and upholstery.
- Wall-Mounted Charging Dock: For convenient storage and charging.
- Removable Battery: Provides power to the unit.
Setup
1. Assembly
- Attach the Extension Wand: Insert the top end of the extension wand into the main unit until it clicks into place.
- Attach the Floor Brush: Insert the bottom end of the extension wand into the motorized floor brush until it clicks into place.
- Install Wall-Mounted Charging Dock: Choose a suitable location near a power outlet. Secure the dock to the wall using the provided screws and anchors.
2. Charging the Battery
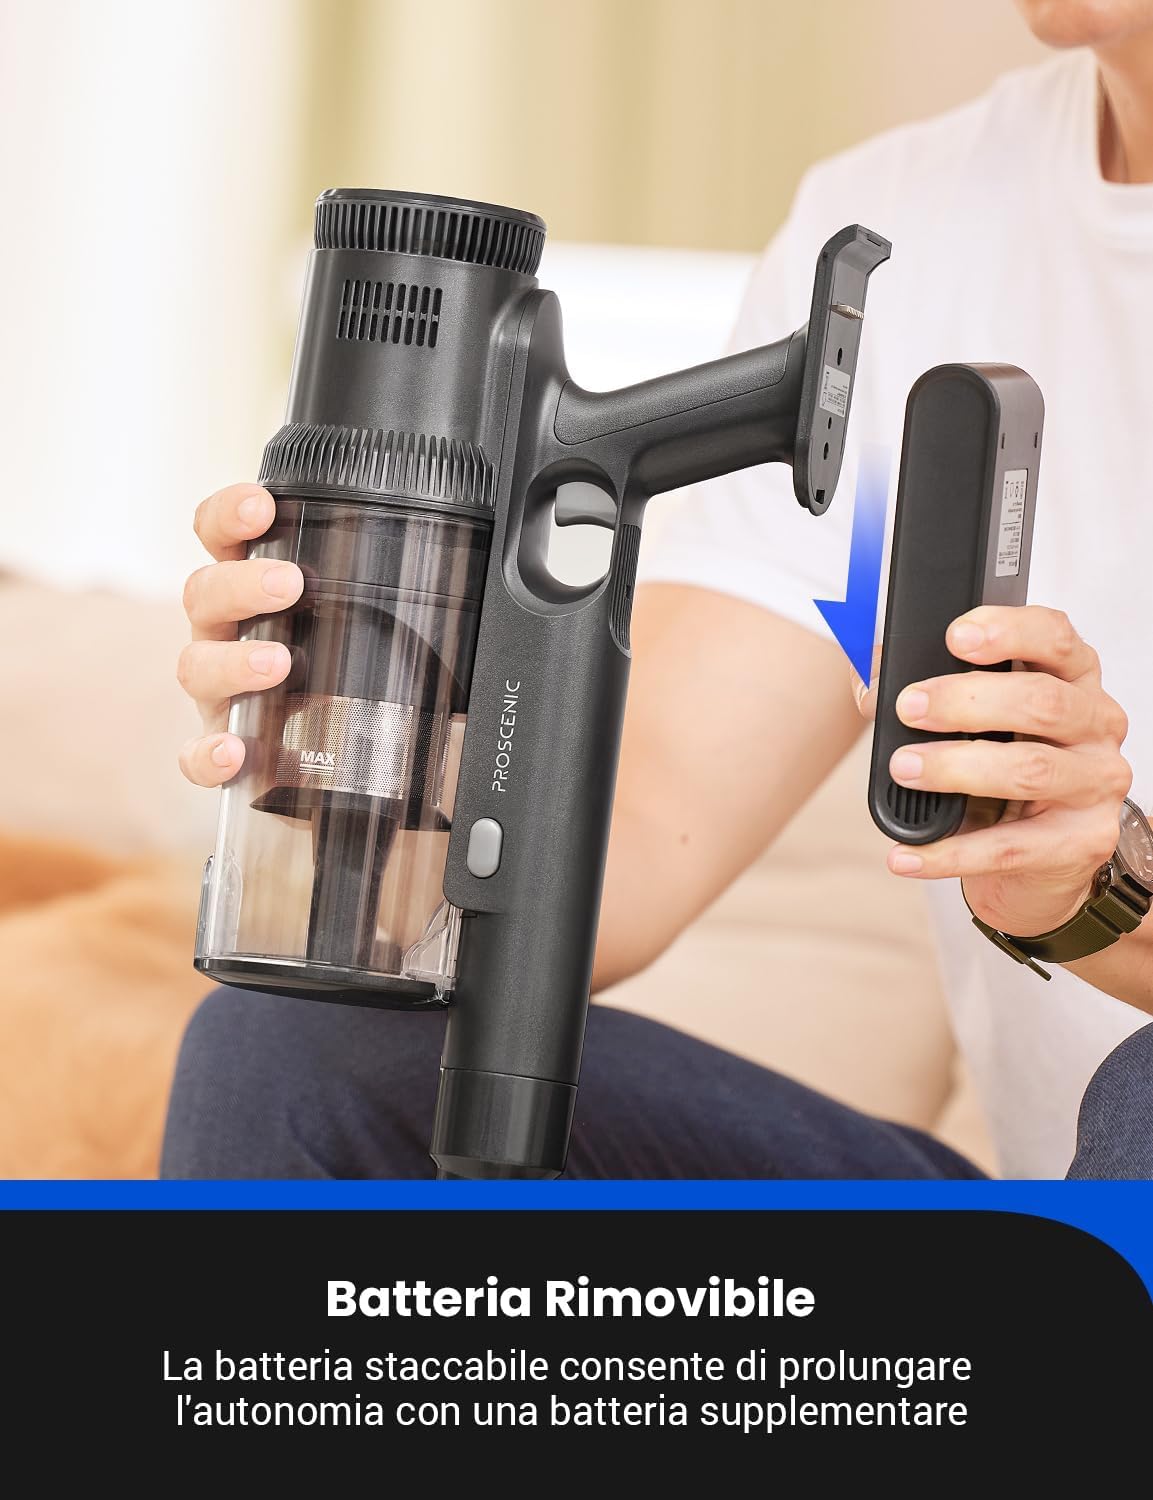
Figure 2: The removable battery pack can be easily detached for charging or replacement, offering extended cleaning time with an optional spare battery.
Before first use, fully charge the battery. The battery can be charged while attached to the main unit on the charging dock, or separately.
- Connect the power adapter to the charging dock and plug it into a wall outlet.
- Place the vacuum cleaner onto the charging dock, ensuring the charging contacts align. The display screen will indicate charging status.
- A full charge typically takes approximately 4-5 hours.
Operating Instructions
1. Power On/Off and Mode Selection
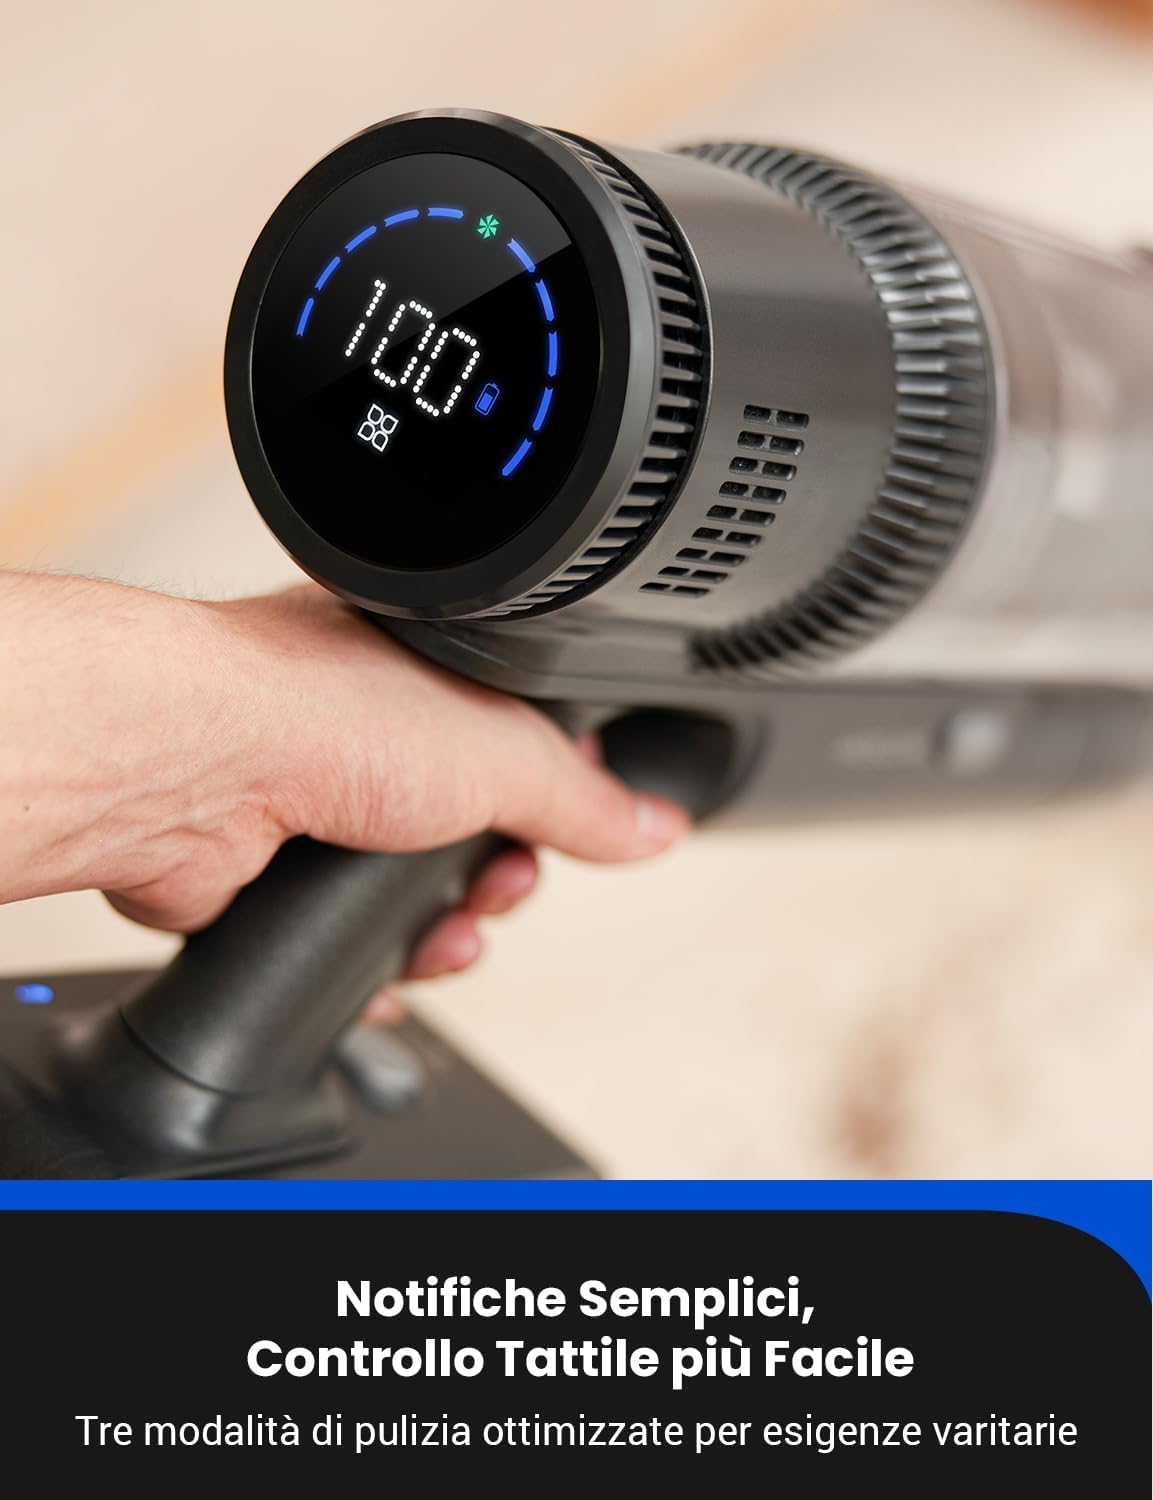
Figure 3: The intuitive touch screen display provides simple notifications and easy control, allowing selection between three optimized cleaning modes.
- Press the power button on the handle to turn the vacuum cleaner on or off.
- Use the touch screen display to select between different cleaning modes (e.g., Eco, Standard, Max) based on your cleaning needs. The screen will show battery level and current mode.
2. Vacuuming
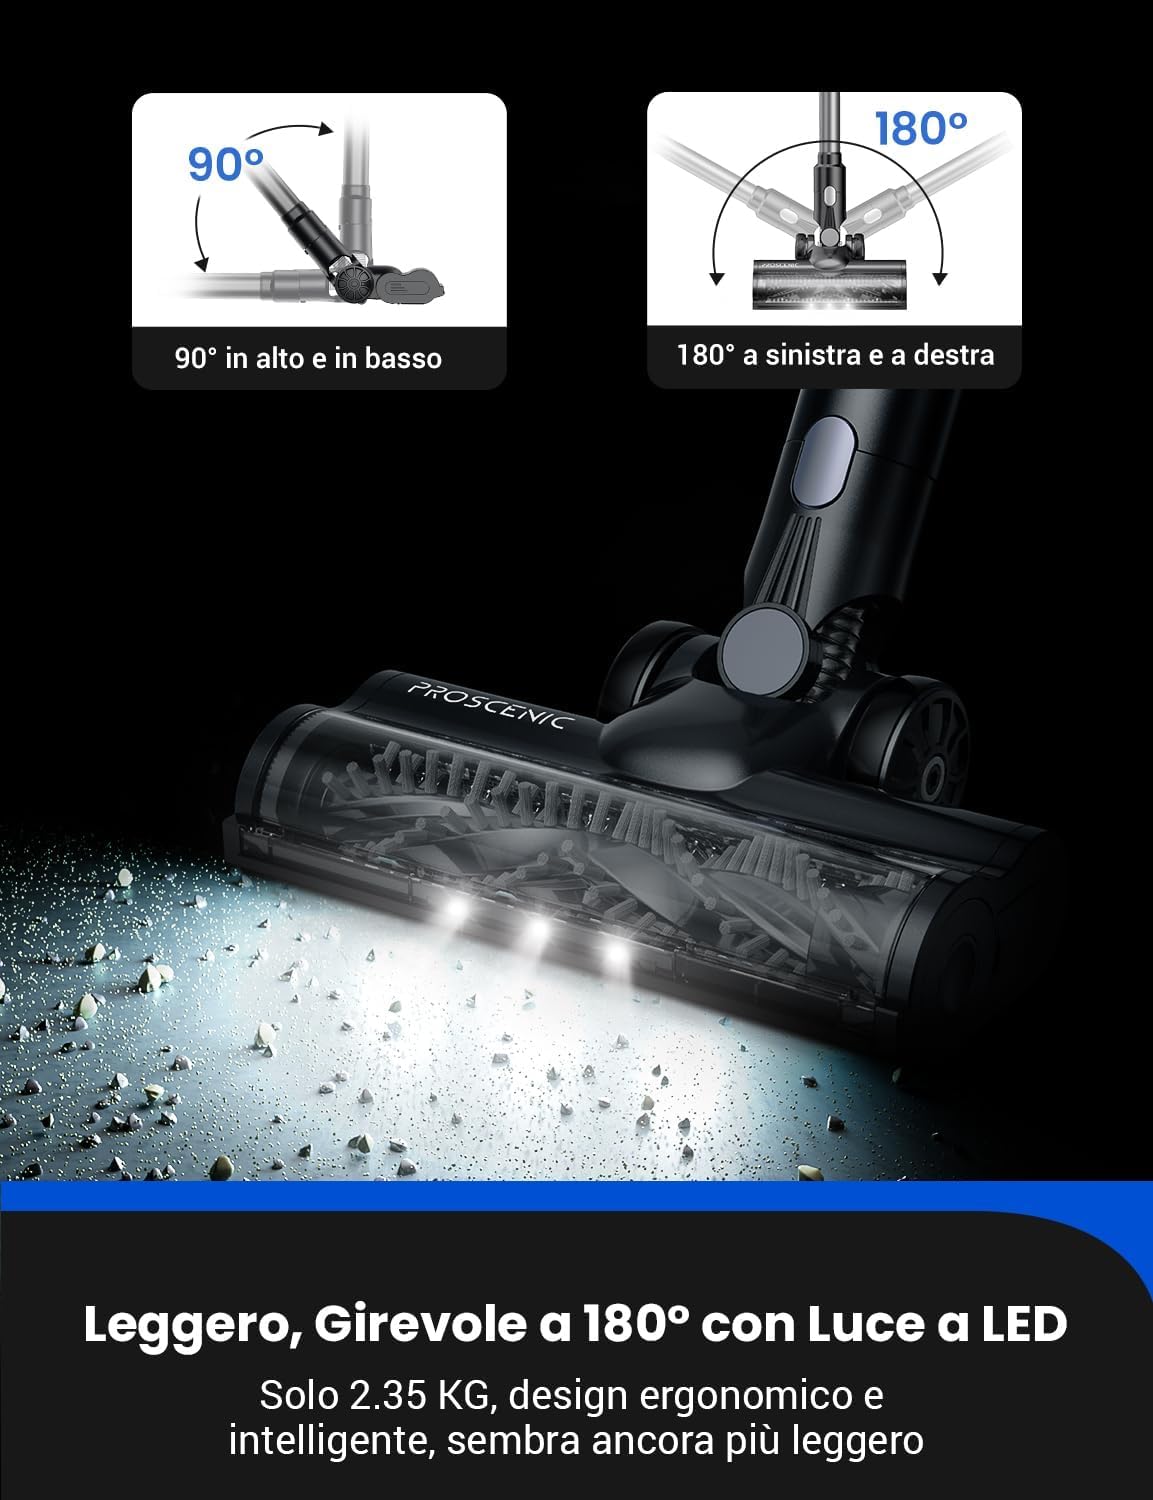
Figure 4: The lightweight and ergonomic design allows for 90-degree vertical and 180-degree horizontal maneuverability, with integrated LED lights to illuminate dust in dark areas.
Move the vacuum cleaner back and forth over the area to be cleaned. The motorized floor brush is designed to effectively pick up dust and debris from various floor types. The integrated LED lights on the brush head help illuminate hidden dust under furniture or in dark corners.
3. Mopping Function
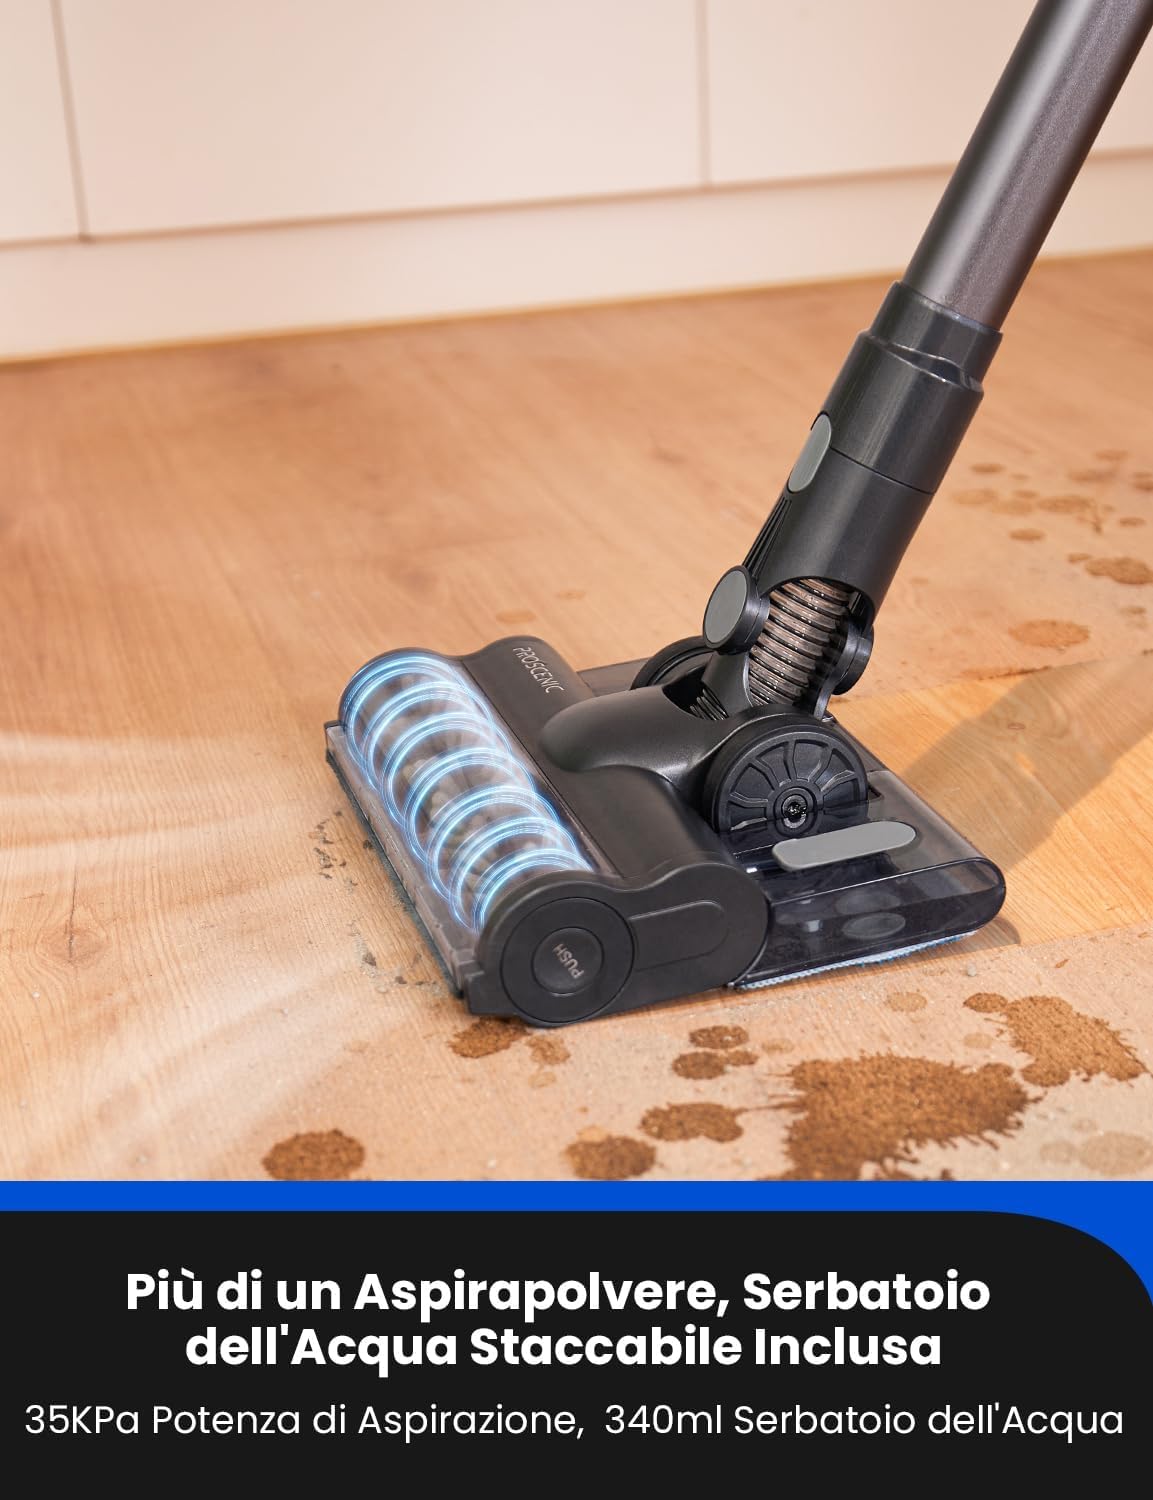
Figure 5: The Proscenic P11 functions as both a vacuum and a mop, featuring a detachable water tank for wet cleaning. It offers 35Kpa suction power and a 340ml water tank capacity.
- Fill the detachable water tank with clean water. You may add a small amount of neutral floor cleaning solution if desired (refer to solution instructions).
- Attach the mop pad securely to the bottom of the water tank.
- Attach the filled water tank to the motorized floor brush.
- Begin vacuuming and mopping simultaneously. The water will slowly dispense onto the mop pad, allowing for wet cleaning.
- For optimal results, vacuum the area first to remove loose debris before mopping.
4. Using Attachments
To use the crevice tool or dusting brush, detach the extension wand from the main unit and directly attach the desired accessory. These are ideal for cleaning upholstery, car interiors, tight spaces, and delicate surfaces.
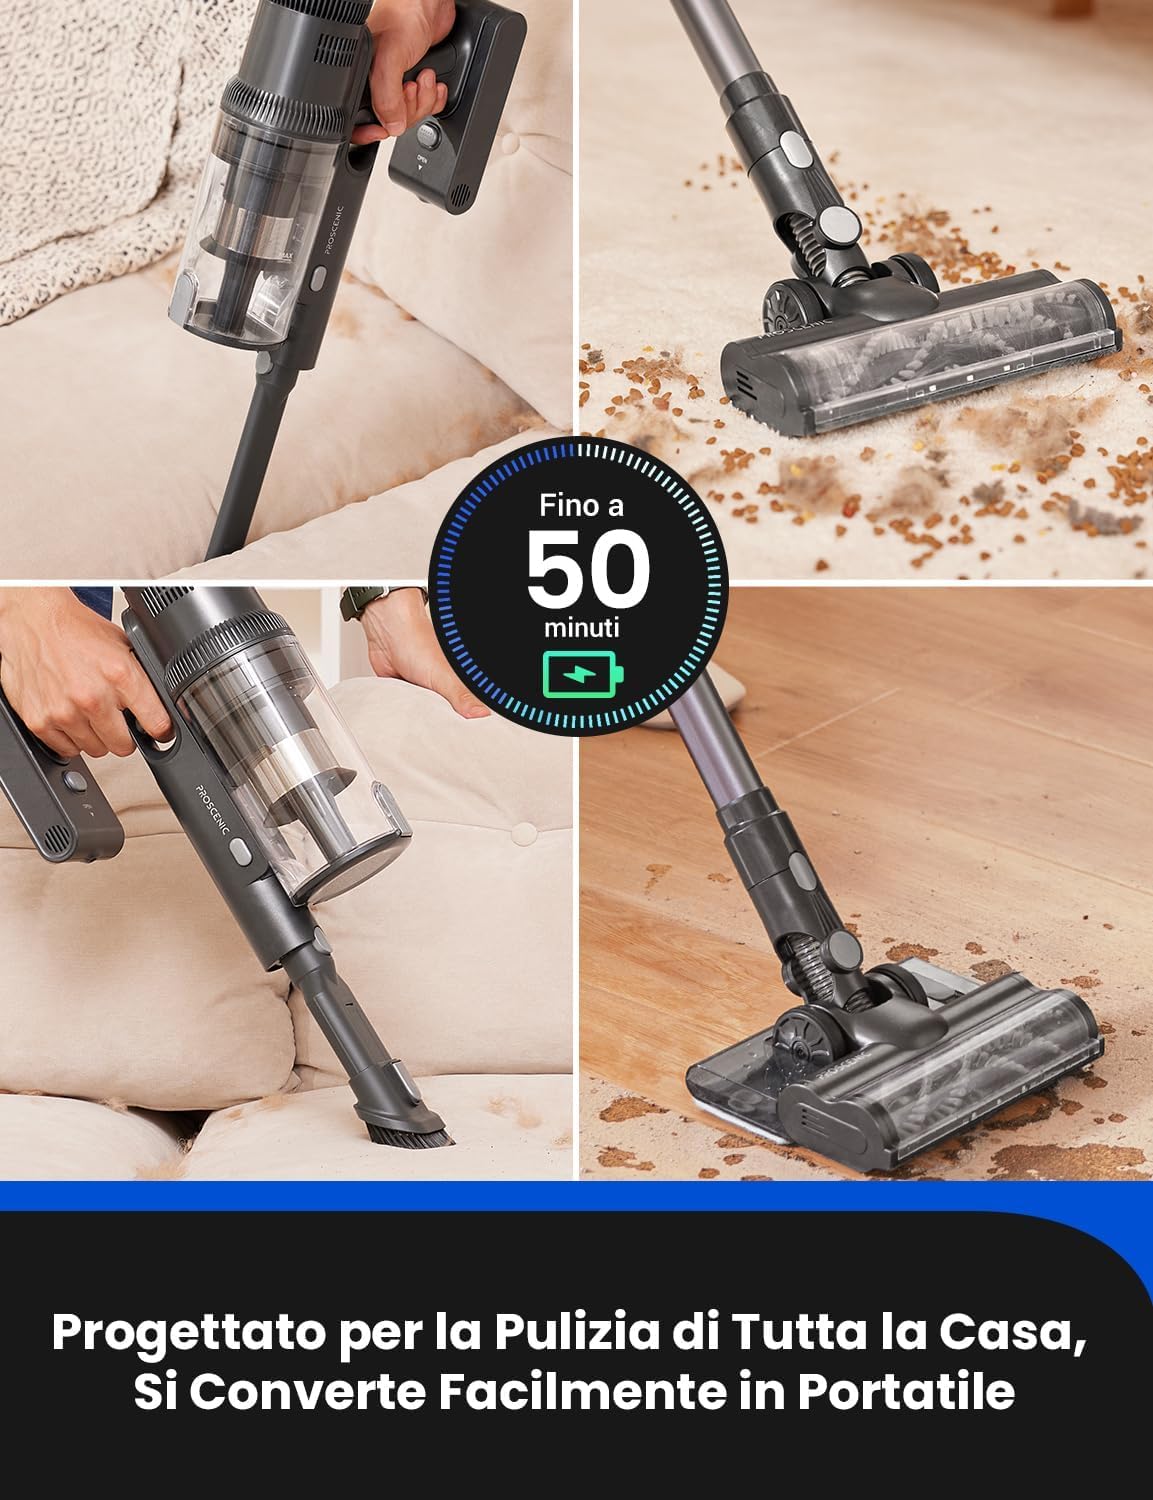
Figure 6: The Proscenic P11 is designed for whole-house cleaning and easily converts into a portable handheld vacuum for versatile use on different surfaces like sofas and floors, offering up to 50 minutes of runtime.
Maintenance
Regular maintenance ensures optimal performance and extends the lifespan of your vacuum cleaner.
1. Emptying the Dustbin
- Press the dustbin release button to detach the dustbin from the main unit.
- Open the dustbin lid and empty contents into a trash can.
- Close the lid and reattach the dustbin to the main unit.
2. Cleaning Filters

Figure 7: The Proscenic P11 features a 5-stage filtration system, including a cyclone system, stainless steel mesh, cone filtration, and HEPA air inlet/outlet, designed to capture 99.99% of dust particles for cleaner air.
The P11 features a 5-stage filtration system. Clean the filters regularly to maintain suction power.
- Remove the dustbin and then carefully remove the filter components (HEPA filter, metal mesh filter, sponge filter).
- Tap off loose dust. For thorough cleaning, rinse the filters under cold running water.
- Ensure all filter components are completely dry before reassembling them into the dustbin and attaching to the main unit. Drying may take up to 24 hours.
3. Cleaning the Brush Roll
- Turn off the vacuum cleaner and detach the motorized floor brush.
- Locate the brush roll release tab/lock and open it to remove the brush roll.
- Use scissors or a cleaning tool to remove any tangled hair or debris from the brush roll.
- Reinsert the brush roll and secure the release tab/lock.
4. Cleaning the Water Tank and Mop Pad
- After each mopping session, empty any remaining water from the tank.
- Rinse the water tank with clean water.
- Remove the mop pad and wash it by hand or machine (follow care label instructions). Allow it to air dry completely.
5. Battery Care
- Store the vacuum cleaner in a cool, dry place.
- If storing for an extended period, charge the battery to approximately 50% and recharge every 3-6 months to prevent deep discharge.
- Use only the original charger and battery provided by Proscenic.
Troubleshooting
| Problem | Possible Cause | Solution |
|---|---|---|
| Vacuum cleaner does not turn on. | Battery is not charged or not properly installed. | Charge the battery fully. Ensure the battery is securely clicked into place. |
| Low suction power. | Dustbin is full. Filters are clogged. Brush roll is tangled. | Empty the dustbin. Clean or replace filters. Remove tangled hair/debris from brush roll. |
| Mopping function not working. | Water tank is empty. Mop pad is not attached correctly. | Fill the water tank. Ensure mop pad is securely attached. |
| Brush roll stops spinning. | Obstruction in the brush roll. Overheat protection activated. | Clear any obstructions. Turn off the vacuum and let it cool down for 30 minutes. |
| Short battery life. | Using Max mode frequently. Battery degradation. | Use lower power modes for general cleaning. Contact customer support for battery replacement if degradation is significant. |
Specifications
| Feature | Specification |
|---|---|
| Brand | Proscenic |
| Model Number | P11MOPPING |
| Capacity (Dustbin) | 0.45 Liters |
| Noise Level | 78 dB |
| Amperage | 2 Amps |
| Control Method | Touch Screen / Push Button |
| Item Weight | 8.14 pounds |
| Product Dimensions | 48.03 x 9.37 x 4.8 inches |
| Batteries | 1 Lithium Ion battery required (included) |
Warranty and Support
Proscenic products are manufactured to the highest quality standards. For information regarding warranty coverage, technical support, or replacement parts, please refer to the warranty card included with your purchase or visit the official Proscenic website.
Website: www.proscenic.com (Note: This is a placeholder URL, please refer to your product's official documentation for the correct support website.)
Customer Service: Please contact your local distributor or the Proscenic customer service team for assistance.