
Introduction
This manual provides essential instructions for the installation, operation, maintenance, and troubleshooting of your HIKSEMI Hikvision Wave SATA 3.0 512GB Solid State Drive. Please read this manual thoroughly before using the product to ensure proper functionality and longevity.
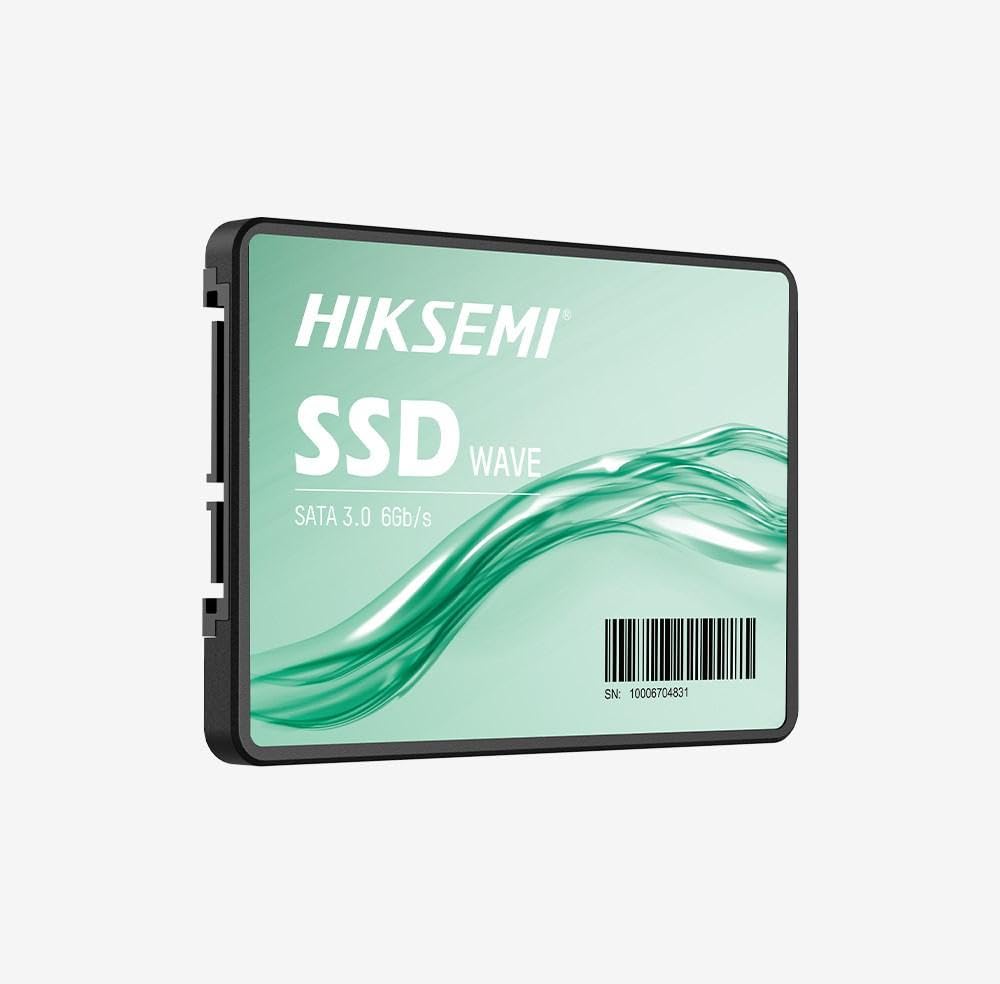
Image: HIKSEMI Hikvision Wave SATA 3.0 512GB Solid State Drive. This image displays the compact 2.5-inch form factor of the SSD, highlighting its sleek design and standard SATA interface connectors.
Safety Information
Observe the following safety precautions to prevent damage to the drive or injury to yourself:
- Always handle the SSD by its edges to avoid touching the circuit board or connectors.
- Ensure your computer is powered off and unplugged before installation.
- Discharge static electricity by touching a grounded metal object before handling the SSD.
- Do not expose the SSD to moisture, extreme temperatures, or strong magnetic fields.
- Do not attempt to disassemble or modify the SSD. This will void the warranty.
Package Contents
Verify that all items are present in the package:
- HIKSEMI Hikvision Wave SATA 3.0 512GB Solid State Drive (HS-SSD-WAVE-S-512G)
- Quick Start Guide (if included)
Note: SATA data and power cables are typically not included and must be purchased separately if not already present in your system.
Setup and Installation
1. Physical Installation (Desktop PC)
- Prepare your system: Power off your computer and unplug the power cord. Open the computer case.
- Locate a drive bay: Find an available 2.5-inch drive bay. If only 3.5-inch bays are available, you may need a 2.5-inch to 3.5-inch adapter bracket (not included).
- Mount the SSD: Secure the SSD into the drive bay using screws.
- Connect cables:
- Connect one end of a SATA data cable to the SSD and the other end to an available SATA port on your motherboard.
- Connect a SATA power cable from your power supply unit (PSU) to the SSD.
- Close the case: Reassemble your computer case and reconnect the power cord.
2. Physical Installation (Laptop)
- Prepare your laptop: Power off your laptop, unplug the power adapter, and remove the battery (if removable). Consult your laptop's manual for specific instructions on accessing the drive bay.
- Remove old drive (if applicable): Carefully remove the existing hard drive or SSD.
- Install the SSD: Insert the HIKSEMI Wave SSD into the drive bay. Secure it with any screws or brackets that held the previous drive.
- Reassemble: Close the drive bay cover, reinsert the battery, and reconnect the power adapter.
3. Initializing and Formatting the SSD (Windows)
- Boot your computer: Power on your computer.
- Open Disk Management: Right-click on the Start button (Windows 10/11) or search for "Disk Management" (Windows 7/8). Select "Disk Management".
- Initialize the disk: A "Initialize Disk" window should appear automatically for new drives. Select GPT (GUID Partition Table) for drives larger than 2TB or for UEFI-based systems, or MBR (Master Boot Record) for older systems or drives 2TB or smaller. Click "OK".
- Create a new simple volume: Locate your new SSD (it will likely show as "Unallocated Space"). Right-click on the unallocated space and select "New Simple Volume...".
- Follow the wizard: Follow the on-screen prompts to assign a drive letter, choose a file system (NTFS is recommended for Windows), and perform a quick format.
- Your SSD is now ready for use.
Operating the SSD
Once installed and formatted, your HIKSEMI Wave SSD functions like any other storage drive. You can use it for:
- Operating System Installation: Install your operating system (Windows, macOS, Linux) for faster boot times and overall system responsiveness.
- Application Storage: Install frequently used applications and games to benefit from quicker loading times.
- Data Storage: Store documents, photos, videos, and other files.
The SSD utilizes the SATA 3.0 interface, providing theoretical transfer speeds up to 6 Gbps. Actual performance may vary based on your system hardware, software, and workload.
Maintenance
SSDs require less maintenance than traditional hard drives, but a few practices can help ensure optimal performance and longevity:
- Enable TRIM: Ensure your operating system has TRIM enabled. TRIM helps the SSD manage deleted data blocks efficiently, maintaining performance over time. Modern operating systems (Windows 7+, macOS 10.6.8+, most Linux distributions) typically enable TRIM by default.
- Avoid Defragmentation: Do not defragment an SSD. Defragmentation is unnecessary for SSDs and can reduce their lifespan by increasing write cycles.
- Firmware Updates: Periodically check the HIKSEMI official website for firmware updates for your specific SSD model. Firmware updates can improve performance, stability, and compatibility. Follow the manufacturer's instructions carefully when performing updates.
- Maintain Free Space: While not strictly necessary, keeping some free space (e.g., 10-15%) on your SSD can help maintain performance, especially for drives with smaller capacities.
- Data Backup: Regularly back up important data to another storage device. While SSDs are reliable, no storage device is immune to failure.
Troubleshooting
If you encounter issues with your HIKSEMI Wave SSD, refer to the following common troubleshooting steps:
- SSD Not Detected:
- Check all SATA data and power cable connections. Ensure they are securely seated.
- Try a different SATA port on your motherboard and a different SATA power connector from your PSU.
- Verify that the SATA controller mode in your system's BIOS/UEFI is set to AHCI (Advanced Host Controller Interface).
- Check Disk Management (Windows) or Disk Utility (macOS) to see if the drive is detected but uninitialized/unformatted.
- Slow Performance:
- Ensure TRIM is enabled (as described in the Maintenance section).
- Verify that the SSD is connected to a SATA 3.0 (6 Gbps) port on your motherboard, not an older SATA 2.0 (3 Gbps) port.
- Check for background processes consuming system resources.
- Ensure your system drivers (especially chipset drivers) are up to date.
- Operating System Errors/Crashes:
- Run a disk check utility (e.g.,
chkdskin Windows) to scan for file system errors. - Consider reinstalling the operating system if issues persist after checking hardware connections and drivers.
- Run a disk check utility (e.g.,
Specifications
| Feature | Specification |
|---|---|
| Model Number | HS-SSD-WAVE-S-512G |
| Digital Storage Capacity | 512 GB |
| Hard Disk Interface | Serial ATA (SATA 3.0) |
| Form Factor | 2.5 Inches |
| Read Speed (Max) | 560 Megabytes Per Second |
| Write Speed (Max) | 490 Megabytes Per Second |
| Compatible Devices | Desktop, Laptop |
| Special Feature | Lightweight |
| Item Weight | 0.02 Kilograms |
| Manufacturer | Hangzhou Hikvision Digital Technology Co., Ltd. |
Warranty Information
The HIKSEMI Hikvision Wave SATA 3.0 512GB Solid State Drive comes with a 3-Year Limited Warranty from the date of purchase. This warranty covers defects in materials and workmanship under normal use. It does not cover damage caused by misuse, accident, modification, unauthorized repair, or improper installation.
Please retain your proof of purchase for warranty claims.
Customer Support
For technical assistance, warranty claims, or further inquiries, please visit the official HIKSEMI support website or contact their customer service department. Refer to the product packaging or the official website for the most current contact information.
Online resources may include FAQs, driver downloads, and firmware updates.
Disposal Information
This product contains electronic components and should not be disposed of with household waste. Please follow local regulations for the proper disposal of electronic waste. Recycling helps protect the environment and human health.