
VDIAGTOOL VD30
Contents
VDIAGTOOL VD30 Enhanced OBD2 Scanner User Manual
Model: VD30 | Brand: VDIAGTOOL
Introduction
The VDIAGTOOL VD30 is an enhanced OBD2 scanner designed for comprehensive automotive diagnostics. This user manual provides detailed instructions on how to set up, operate, and maintain your VD30 scanner to effectively diagnose vehicle issues, read and clear trouble codes, and monitor various vehicle parameters.
What's in the Box
- VD30 OBD2 Scanner Code Reader * 1
- Data Cable * 1
- Instruction Manual * 1
- Packing Box * 1
Product Overview & Key Features
The VDIAGTOOL VD30 offers a range of powerful diagnostic functions to help you understand and resolve vehicle issues efficiently.
- Full OBD2 Modes: Performs all 10 OBD2 tests, including reading/clearing codes, live data, freeze frame, I/M readiness, O2 sensor test, on-board monitor test (Mode $06), component test (Mode $08), and vehicle info.
- Turn Off Check Engine Light (CEL): Quickly identifies the cause of the CEL and allows you to clear the fault codes.
- Live Data (4-In-1 Graphing): Displays real-time sensor data in text or graphical format, including engine RPM, coolant temp, fuel trims, and more.
- One-Click I/M Readiness (Smog Check): Checks emission readiness status to help prepare your vehicle for annual smog tests.
- DTC Lookup: Built-in library with over 10,000 Diagnostic Trouble Code definitions for quick reference.
- Voltage Test: Monitors real-time vehicle battery voltage.
- User-Friendly Design: Features a 2.8” large display, red-yellow-green LEDs for issue severity, and one-click hotkeys for ease of use.
- Wide Vehicle Compatibility: Compatible with most American, European, and Asian OBDII compliant vehicles (1996 and newer in the US).
- Plug & Play: No battery or charger required, powered directly by the OBDII port.
- Data Review, Playback & Printing: Allows reviewing recorded data, playing it back, and printing reports via PC.

Figure 1: VDIAGTOOL VD30 Scanner Main Interface.
Setup
The VDIAGTOOL VD30 scanner is designed for simple plug-and-play operation.
- Locate the OBDII Port: The 16-pin OBDII Data Link Connector (DLC) is usually located under the dashboard on the driver's side of the vehicle. Refer to your vehicle's service manual if you cannot locate it.
- Connect the Scanner: Plug the VD30 scanner's OBDII cable into the vehicle's DLC. The scanner will power on automatically.
- Turn Ignition On: Turn the vehicle's ignition to the "ON" position (engine can be off or running, depending on the test).

Figure 2: Connecting the VD30 Scanner to the OBDII Port.
Operating Instructions
1. Reading and Clearing Codes
This is the primary function for diagnosing and resolving Check Engine Light issues.
- From the main menu, select "OBDII/EOBD" and press ENTER.
- Select "Read Codes" to view stored, pending, or permanent Diagnostic Trouble Codes (DTCs).
- To clear codes, select "Erase Codes" and confirm. This will turn off the Check Engine Light.
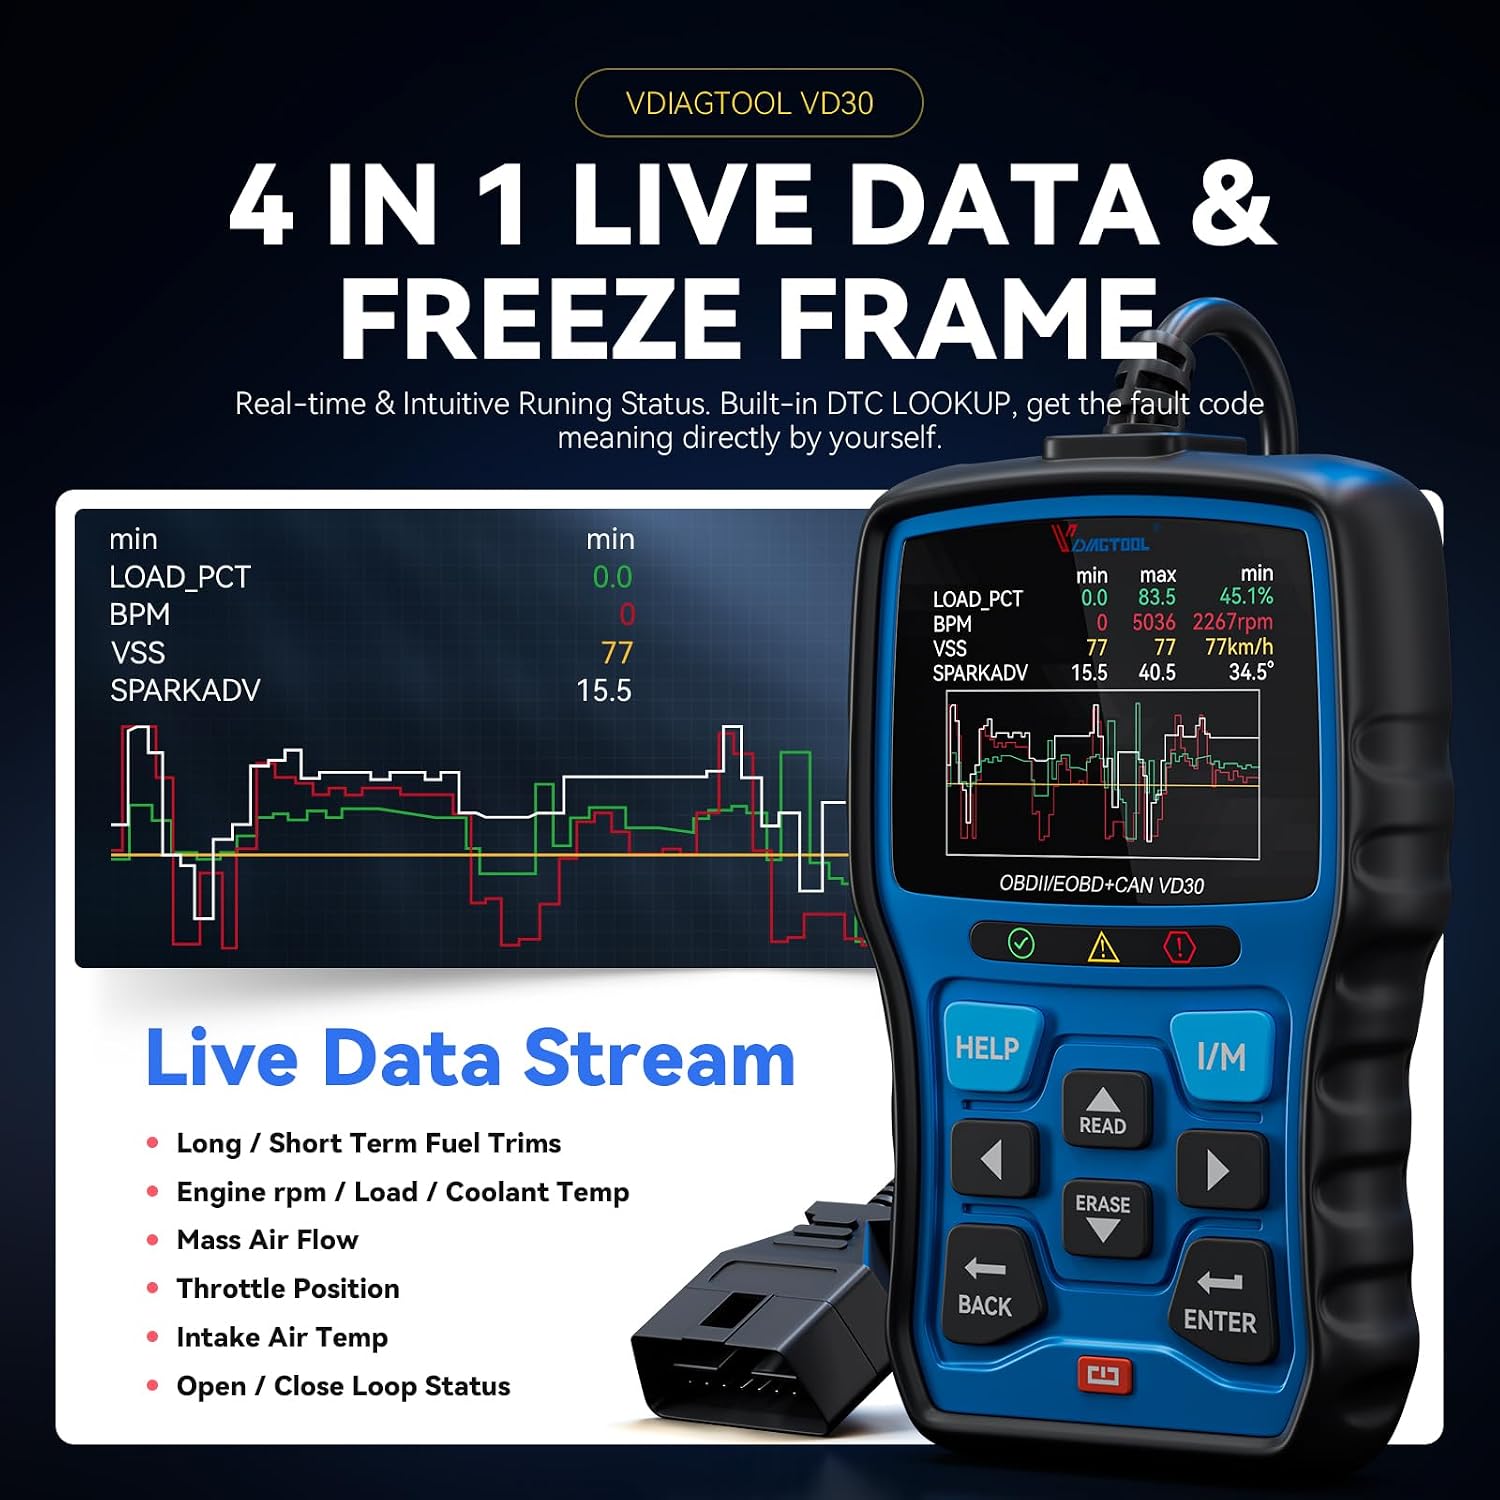
Figure 3: Diagnostic Menu for Reading/Erasing Codes.
Video 1: Demonstrates reading and clearing codes using the VDIAGTOOL VD30 scanner.
2. Live Data (4-In-1 Graphing)
Monitor real-time data streams from various vehicle sensors.
- From the "OBDII/EOBD" menu, select "Live Data".
- Choose "Complete Data Set" to view all available parameters or "Custom Data Set" to select specific ones.
- Select "Graph Data Set" to view selected parameters in a graphical format for easier analysis.

Figure 4: Live Data Stream with 4-in-1 Graphing.
3. One-Click I/M Readiness (Smog Check)
Quickly check if your vehicle's emission systems are ready for a smog test.
- Press the dedicated "I/M" hotkey on the scanner.
- The screen will display the status of various monitors (e.g., Misfire, Fuel System, O2 Sensor). "OK" indicates readiness, "INC" indicates incomplete, and "N/A" indicates not applicable.

Figure 5: I/M Readiness Status Display.
4. DTC Lookup
Access the built-in DTC library to understand the meaning of trouble codes.
- From the main menu, select "DTC Lookup".
- Enter the DTC code using the navigation buttons.
- The scanner will display the definition of the code.

Figure 6: DTC Lookup Interface.
5. Voltage Test
Check the real-time voltage of your vehicle's battery.
- From the main menu, select "Battery".
- The scanner will display the current battery voltage.

Figure 7: Battery Voltage Test Screen.
6. On-Board Monitor Test (Mode $06)
Access results of on-board diagnostic monitoring tests for specific components/systems that are not continuously monitored.
- From the "OBDII/EOBD" menu, select "On-Board Monitor Test".
- Follow the on-screen prompts to select the desired monitor test and view results.
7. Component Test (Mode $08)
Initiate a leak test for the vehicle's EVAP system or other component tests.
- From the "OBDII/EOBD" menu, select "Component Test".
- Follow the on-screen prompts to perform the test.
8. Retrieve Vehicle Information
View the vehicle's Vehicle Identification Number (VIN), Calibration ID (CALID), Calibration Verification Number (CVN), and In-use Performance Tracking (IPT).
- From the "OBDII/EOBD" menu, select "Vehicle Info".
- The scanner will display the available vehicle information.
9. Data Review, Playback & Printing
Review previously recorded diagnostic data, play it back, or print it for further analysis.
- From the main menu, select "Review" to access recorded data.
- To print data, connect the scanner to a Windows PC using the provided USB cable. Select "Print Data" from the main menu and follow the instructions in the user manual for software installation and printing.

Figure 8: Data Upgrade and Printing via PC.
Maintenance
Software Updates
The VDIAGTOOL VD30 offers lifetime free software updates to ensure compatibility with new vehicle models and diagnostic protocols.
- Connect the scanner to a Windows PC using the provided USB cable.
- Visit the official VDIAGTOOL website to download the update tool and follow the on-screen instructions for installation and updating.
Troubleshooting
If you encounter issues with your VD30 scanner, refer to the following common troubleshooting tips:
- Scanner does not power on: Ensure the OBDII cable is securely connected to the vehicle's DLC and the vehicle's ignition is in the "ON" position. The scanner is powered directly by the vehicle.
- "LINKING ERROR" message: Verify the ignition is on, the cable is connected properly, and the vehicle is OBDII compliant. Try connecting to a different OBDII compliant vehicle if possible.
- No codes found but CEL is on: Some vehicles may have manufacturer-specific codes that are not generic OBDII codes. The VD30 primarily reads generic OBDII codes.
- Data stream values appear incorrect: Ensure the correct unit of measure is selected in the "Setup" menu.
- Screen is blank or frozen: Disconnect the scanner from the vehicle, wait a few seconds, and reconnect. If the issue persists, perform a tool self-test via the "Setup" menu.
Specifications
| Feature | Specification |
|---|---|
| Manufacturer | VDIAGTOOL |
| Model | VD30 |
| Item Weight | 14.9 ounces |
| Product Dimensions | 5.7 x 3.35 x 1.18 inches |
| Display Resolution | 320x240 |
| Operating Voltage | 12 Volts (via OBDII port) |
| Supported Protocols | J1850 PWM, J1850 VPW, ISO9141-2, KWP2000, CAN |
| Supported Languages | 11 Languages (English, French, German, Russian, Spanish, Italian, Portuguese, Hungarian, Swedish, Slovak, Czech) |
Warranty & Support
VDIAGTOOL stands behind its products with comprehensive support:
- Warranty: 3 Years Warranty.
- Software Updates: Lifetime free software updates via Windows PC.
- Technical Support: 24/7 technical support available.
For further assistance, please visit the official VDIAGTOOL website or contact their customer service.
Ask a question about this manual
Ask about setup, troubleshooting, compatibility, parts, safety, or missing instructions. Manuals+ will review the question and use this page’s manual context to help answer it.