
RockJam RJ6170-SK
RockJam 61-Key Keyboard Piano Kit User Manual
Model: RJ6170-SK
Introduction
This manual provides comprehensive instructions for the setup, operation, and maintenance of your RockJam 61-Key Keyboard Piano Kit. This kit includes a digital keyboard with 61 full-size keys giving you that traditional piano feel whilst maintaining a portable and compact design that can be powered by either mains (power supply included) or batteries. It features an LED panel that both displays and engages the 200 rhythms, 200 tones, a teaching function, and 30 demo songs that are part of its functionality. The kit also includes a sturdy keyboard stand, a comfortable padded bench, headphones, and access to the Simply Piano App for enhanced learning.
Setup
1. Unpacking and Contents Verification
Carefully unpack all components from the box. Ensure the following items are present:
- RockJam 61-Key Digital Keyboard
- Keyboard Stand
- Keyboard Bench
- Headphones
- Power Supply (Mains Adapter)
- Simply Piano Application Access Code
- Keynote Stickers

Figure 1: Complete RockJam 61-Key Keyboard Piano Kit setup.
2. Assembling the Keyboard Stand
The keyboard stand is an X-style design for stability. Unfold the stand and adjust its height using the central locking mechanism to a comfortable playing position. Ensure all locking pins are securely engaged before placing the keyboard on top.

Figure 2: The adjustable X-style keyboard stand.
3. Assembling the Bench
The padded bench is also foldable for easy storage. Unfold the legs until they lock into place, forming a stable seat. The thick padding ensures comfort during extended playing sessions.

Figure 3: The foldable padded bench.
4. Power Connection
Connect the included power supply to the DC 9V input port located on the rear of the keyboard. Plug the adapter into a standard wall outlet. Alternatively, the keyboard can be powered by batteries (not included) for portable use.

Figure 4: Rear panel connections including DC 9V power input.
5. Connecting Headphones
For private practice, plug the included headphones into the "PHONES" jack on the rear panel of the keyboard. This will mute the internal speakers.

Figure 5: RockJam headphones for private listening.
6. Applying Keynote Stickers
For beginners, the included keynote stickers can be applied to the keys to help identify notes. Carefully peel and stick them onto the white keys as indicated in the separate sticker guide (if provided).

Figure 6: Keynote stickers applied to keyboard keys.
Operating Instructions
1. Power On/Off and Volume Control
Press the POWER button to turn the keyboard on or off. Adjust the master volume using the VOLUME knob or buttons, typically located on the left side of the control panel.
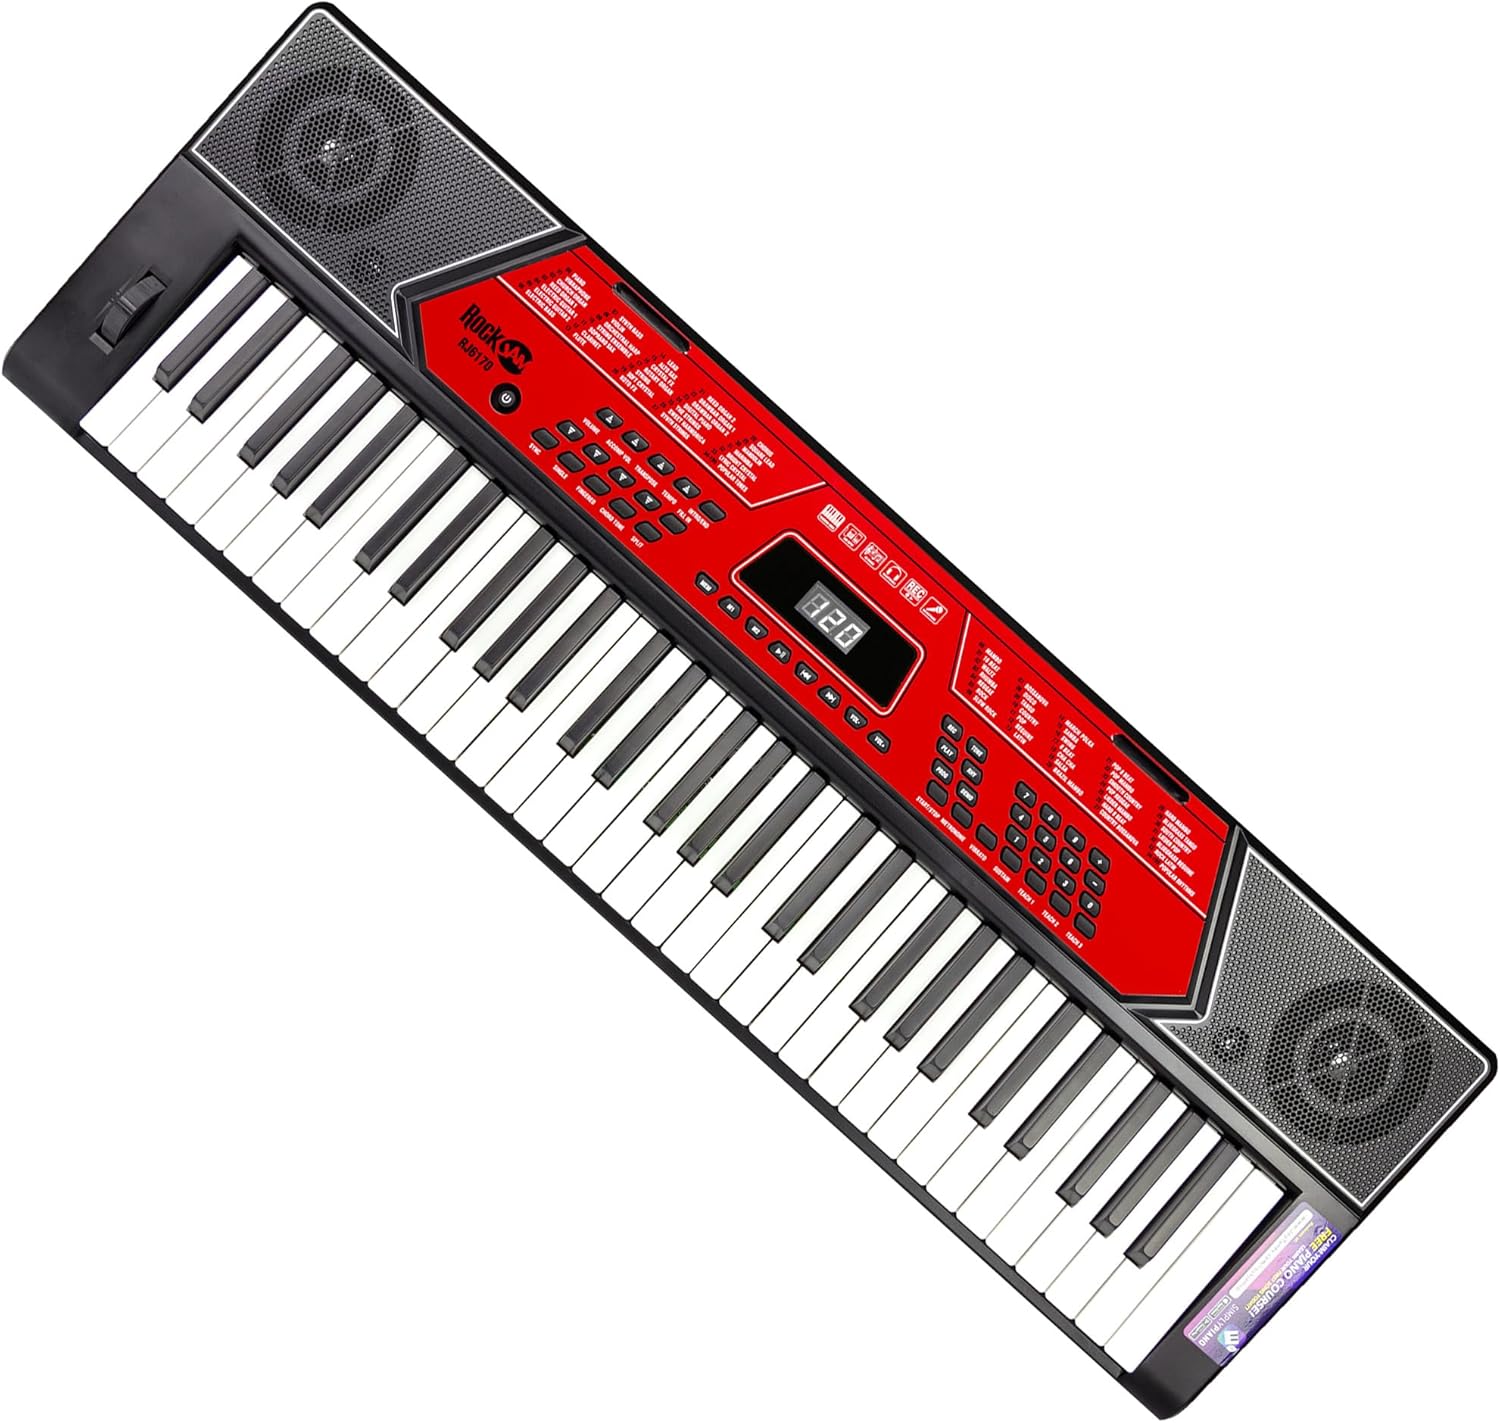
Figure 7: Keyboard control panel with power and volume controls.
2. Selecting Tones and Rhythms
The keyboard features 200 different tones (instrument sounds) and 200 rhythms (backing tracks). Use the dedicated buttons or numeric keypad on the control panel to select your desired tone or rhythm. The LED display will show the current selection.
3. Teaching Function
Engage the teaching function to assist with learning songs. Refer to the on-screen prompts on the LED display and the specific instructions for the teaching modes (e.g., One-Key, Follow, Ensemble).
4. Record and Playback
The record function allows you to capture your performances. Press the RECORD button to start recording, play your piece, and then press PLAY to listen back. This feature is useful for reviewing your progress and layering sounds.
5. Auxiliary Input (AUX IN)
Connect an external audio device (e.g., smartphone, MP3 player) to the AUX IN jack on the rear panel using a 3.5mm audio cable. This allows you to play along with your favorite songs through the keyboard's speakers.
6. USB and MIDI Connectivity
The keyboard supports USB and MIDI connectivity. Use the USB port to connect to a computer for MIDI data transfer, allowing the keyboard to function as a MIDI controller with compatible software. The MIDI port provides traditional MIDI IN/OUT capabilities.
Maintenance
1. Cleaning
To clean the keyboard and accessories, use a soft, dry cloth. For stubborn marks, a slightly damp cloth with mild soap can be used, followed by a dry cloth. Avoid using abrasive cleaners, solvents, or excessive moisture, as these can damage the finish and internal components.
2. Storage
When not in use, store the keyboard kit in a cool, dry place away from direct sunlight, extreme temperatures, and high humidity. If storing for an extended period, remove any batteries to prevent leakage.
3. Battery Replacement
If using batteries, replace them when the keyboard's performance degrades or it fails to power on. Refer to the battery compartment for the correct battery type and polarity. Always use new batteries of the same type and replace all batteries at once.
Troubleshooting
| Problem | Possible Cause | Solution |
|---|---|---|
| No power | Power adapter not connected, faulty outlet, dead batteries. | Ensure power adapter is securely connected and outlet is functional. If using batteries, replace them. |
| No sound from speakers | Volume too low, headphones connected, internal speaker issue. | Increase volume. Disconnect headphones. Check if a tone is selected. |
| Keys not responding | Keyboard mode issue, internal fault. | Restart the keyboard. Ensure no specific mode (e.g., teaching mode) is preventing normal play. |
| Distorted sound | Volume too high, faulty connection, external interference. | Reduce volume. Check all cable connections. Move away from other electronic devices. |
If the problem persists after attempting these solutions, please contact customer support.
Specifications
| Feature | Detail |
|---|---|
| Model Name | RJ6170-SK |
| Number of Keys | 61 (Full-size) |
| Dimensions (L x W x H) | 93.5 x 28.5 x 7.8 cm |
| Item Weight | 3.3 kg |
| Tones | 200 |
| Rhythms | 200 |
| Demo Songs | 30 |
| Connectivity | Auxiliary, USB, MIDI |
| Headphone Jack | 3.5mm Jack |
| Power Source | Corded Electric (9V DC) or Batteries |
| Supported Software | Simply Piano (iOS, Android) |
| Material | Plastic + Steel |
Warranty and Support
Your RockJam 61-Key Keyboard Piano Kit is covered by a manufacturer's warranty. Please refer to the warranty card included with your product for specific terms and conditions. For technical support, troubleshooting assistance beyond this manual, or warranty claims, please contact RockJam customer service through their official website or the retailer where the product was purchased.
For more information, visit the official RockJam Store: RockJam Store on Amazon
Related documentsRJ6170-SK


Ask a question about this manual
Ask about setup, troubleshooting, compatibility, parts, safety, or missing instructions. Manuals+ will review the question and use this page’s manual context to help answer it.