
Kerpu YJ7500
Kerpu Spot Welder User Manual
Model: YJ7500
Introduction
The Kerpu YJ7500 Spot Welder is a portable, high-performance device designed for precise spot welding of various battery types and thin metal sheets. Featuring an intuitive LCD display, 80 adjustable gear settings, and a 7500mAh battery, it offers versatility for DIY battery pack assembly, mobile phone battery repair, and other electronic device maintenance. This manual provides essential information for safe operation, setup, maintenance, and troubleshooting to ensure optimal performance and longevity of your device.
Safety Information
Please read all safety warnings and instructions carefully before using the spot welder. Failure to follow these instructions may result in electric shock, fire, or serious injury.
- Always wear appropriate personal protective equipment, including safety glasses, when operating the spot welder.
- Ensure the work area is well-ventilated and free from flammable materials.
- Do not operate the device in wet or damp conditions.
- Keep children and unauthorized persons away from the operating area.
- Avoid touching the welding pens or welded material immediately after welding, as they may be hot.
- The device features multiple protection functions including over-charge, over-discharge, and over-temperature protection. An overheating protection device automatically cuts off power if overheating occurs.
- The device will automatically shut down after 8 minutes of inactivity to protect personal safety and conserve battery.
- Only use the provided charging cable and accessories.
Package Contents
Verify that all items listed below are included in your package:
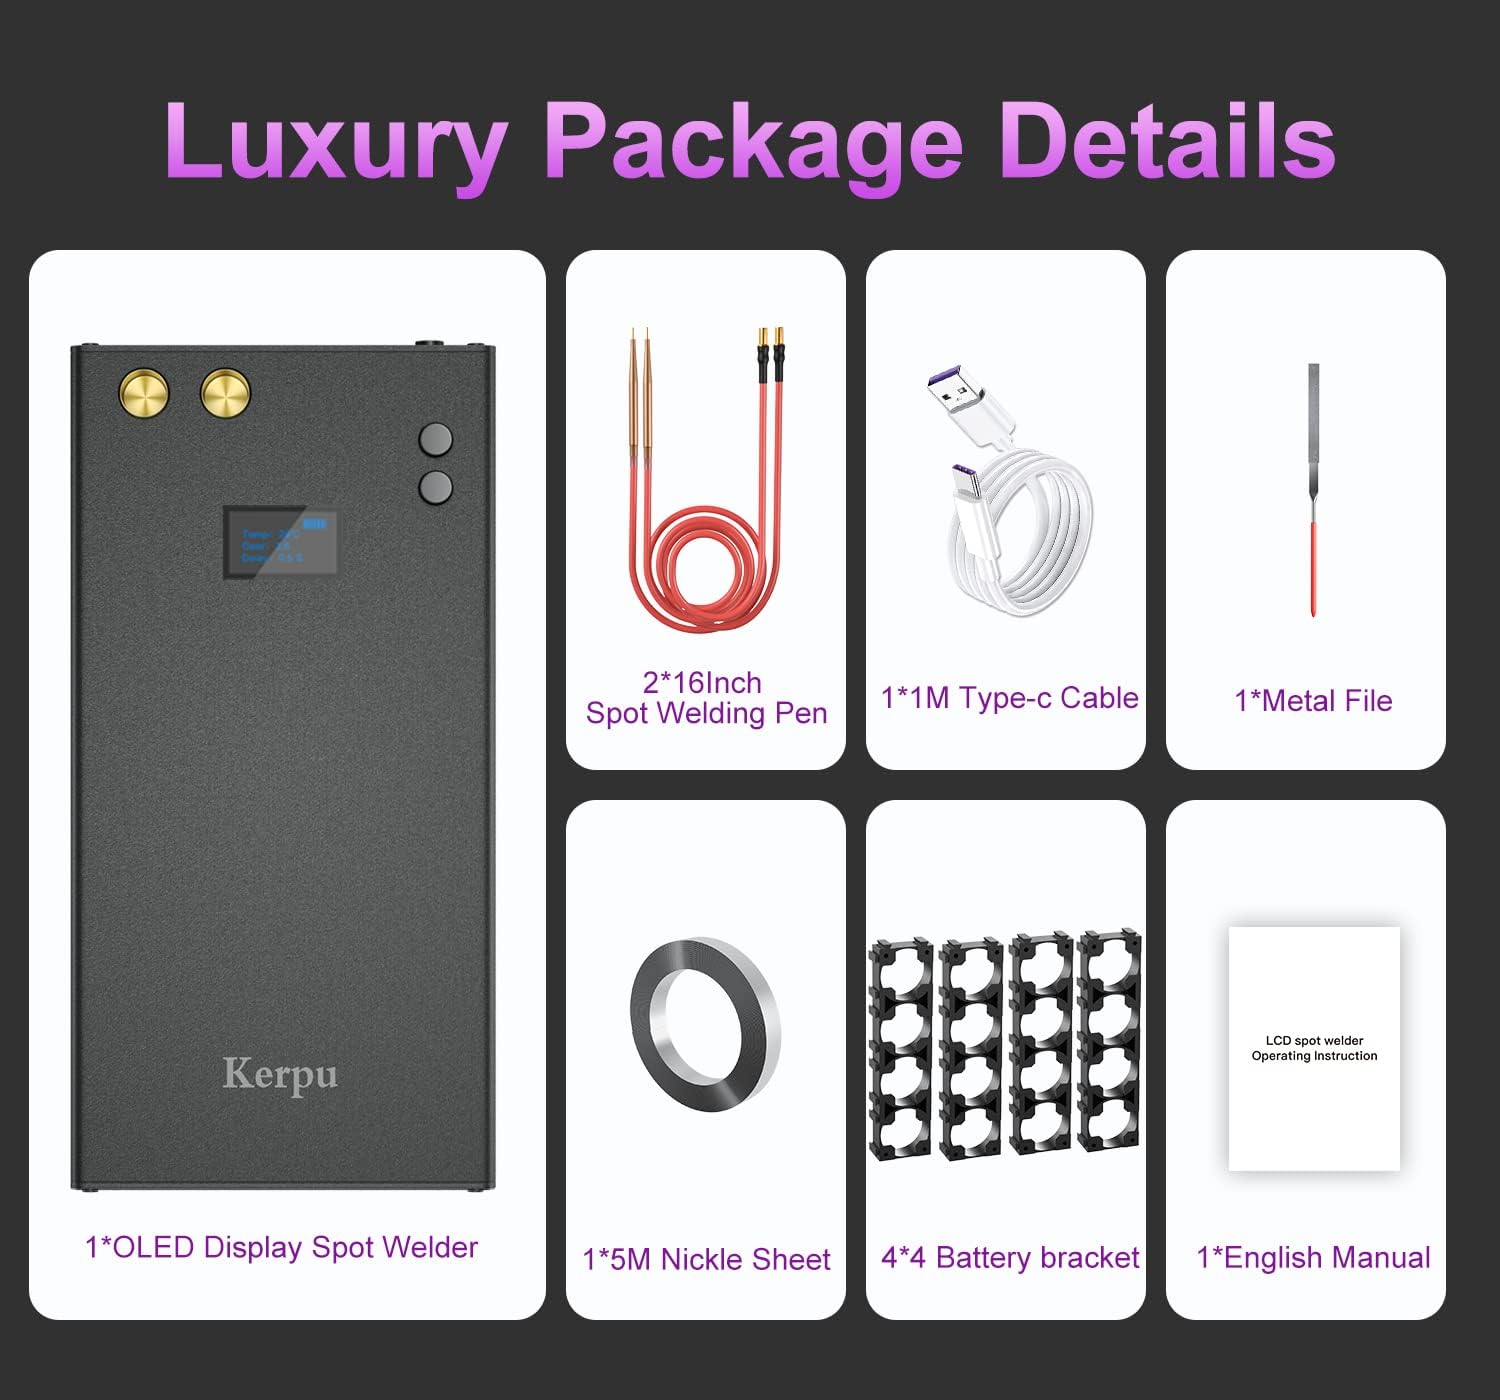
Image: Contents of the Kerpu Spot Welder package, including the welder unit, welding pens, nickel sheet, battery holder, metal file, Type-C charging cable, and English manual.
- 1x Kerpu 7500mAh Battery Spot Welder Unit
- 2x Spot Welding Pens (cable length 30cm + pen head 9cm)
- 1x 5M Nickel-plated Foil (L=5m, W=1cm, Thickness=0.1mm)
- 1x 4x4 Battery Holder
- 1x Metal File
- 1x Type-C Charging Cable
- 1x English Instruction Manual
Product Overview
The Kerpu Spot Welder is designed for ease of use and portability. Familiarize yourself with its components and features:

Image: Diagram of the Kerpu Spot Welder showing its dimensions and labeled components including soldering pen interface, gear adjustable buttons, power on/off & delay time adjustable button, OLED colorful display, Type-C charging port, and USB port.
- Soldering Pen Interface: Connect the welding pens here.
- 1-8 Gear Adjustable Button: Adjusts welding power in 1-unit increments. Also functions as a language switch (Chinese/English).
- Power On/Off & Delay Time Adjustable Button: Controls power and adjusts welding delay time in 0.5-unit increments.
- OLED Colorful Display: Shows real-time information including remaining battery, system internal temperature, power display (gear), and time interval display.
- 0.1-0.9 Gear Adjustable Button: Fine-tunes welding power in 0.1-unit increments.
- Type-C Charging Port: For charging the spot welder unit.
- USB Port: Can be used for charging your smartphone (power bank function).

Image: Close-up of the Kerpu Spot Welder's LCD screen, displaying temperature, current gear setting, and welding delay time. It also indicates battery level.
The LCD screen provides clear and complete information on Delay, Gear, and Temperature. The temperature display helps monitor the device's internal temperature, indicating when a rest period might be needed. Delay time can be adjusted in 0.5-second units, and gear settings can be adjusted from 1 to 8.0 with 0.1-unit precision for professional welding scenarios.
Setup
- Charge the Device: Before first use, fully charge the spot welder using the provided Type-C charging cable. Connect the cable to the Type-C charging port on the device and a suitable USB power adapter (not included). The LCD screen will indicate charging status. A full charge takes approximately 2.5 hours.
- Connect Welding Pens: Insert the gold-plated terminals of the spot welding pens into the corresponding interfaces on the top of the spot welder unit. Ensure a secure connection.
- Prepare Materials: Ensure the surfaces of the materials to be welded (e.g., battery terminals, nickel strips) are clean and free of oxidation or debris. Use the included metal file if necessary to prepare surfaces.

Image: Close-up of the gold-plated terminal welding pens, highlighting their fine conductivity and low contact resistance for quick detachment and easy portability. The length of the welding pen cable is approximately 43cm.
Operating Instructions
- Power On: Press and hold the On/Off button for 2 seconds to power on the device. The LCD screen will illuminate.
- Adjust Gear Setting: Use the gear adjustment buttons (1-8 gear and 0.1-0.9 gear) to select the appropriate welding power. Start with a lower setting and gradually increase if needed. The optimal gear setting depends on the material thickness and type.

Image: Illustration demonstrating the 80-gear adjustable output power, showing different gear ranges and their corresponding weld spot appearances. This allows for precise welding for various materials.
- Adjust Delay Time (Optional): If necessary, adjust the welding delay time using the dedicated button. This controls the time between the pens touching the material and the weld pulse.
- Perform Welding:
- Place the nickel sheet or material to be welded onto the battery terminal or target surface.
- Hold both welding pens firmly and press their tips simultaneously onto the nickel sheet, ensuring good contact with both the nickel sheet and the underlying material.
- The device will automatically detect contact and initiate a weld pulse. You will hear a distinct "pop" sound and see a small spark.
- Lift the welding pens after the weld is complete.

Image: A user performing spot welding on a battery pack using the Kerpu Spot Welder and its welding pens.

Image: Close-up view of the welding pens making contact with cylindrical battery terminals, demonstrating the welding process.

Image: Illustration of the spot welder being used to repair a mobile phone battery, showing the precision of the welding pens.

Image: Depiction of the spot welder being used to join two thin metal sheets, demonstrating its capability beyond battery welding.
- Power Off: Press and hold the On/Off button for 2 seconds to power off the device when not in use. The device will also automatically shut down after 8 minutes of inactivity.
Maintenance
- Cleaning: Regularly clean the welding pen tips and the device body with a dry, soft cloth. Ensure no metal dust or debris accumulates around the welding pens or ports.
- Storage: Store the spot welder in a cool, dry place away from direct sunlight and moisture. Keep it in its original packaging or a protective case when not in use.
- Battery Care: To prolong battery life, avoid fully discharging the device frequently. Recharge it when the battery indicator is low. If storing for extended periods, charge the battery to approximately 50-70% every few months.
- Welding Pen Tips: Inspect the welding pen tips periodically for wear. If they become dull or damaged, they may affect welding performance. Replace if necessary.
Troubleshooting
| Problem | Possible Cause | Solution |
|---|---|---|
| Device does not power on. | Low battery; Power button not held long enough. | Charge the device fully. Press and hold the On/Off button for 2 seconds. |
| Weak or inconsistent welds. | Insufficient gear setting; Poor contact with material; Dirty welding tips; Material too thick. | Increase the gear setting. Ensure firm and simultaneous contact with both pens. Clean welding tips. Ensure material thickness is within specifications (max 0.2mm for iron/steel). |
| Device overheats and shuts down. | Continuous heavy use; High ambient temperature. | Allow the device to cool down. Operate in a cooler environment. Take breaks during prolonged use. |
| No weld spark when pens touch. | Pens not making proper contact; Device not powered on; Faulty pens. | Ensure firm and simultaneous contact. Verify device is powered on. Check pen connections. If problem persists, contact support. |
Specifications
| Feature | Detail |
|---|---|
| Model Number | YJ7500 |
| Battery Capacity | 7500mAh Lithium Polymer |
| Adjustable Gears | 80 Grades (1.0 to 8.0, adjustable in 0.1 and 1 unit increments) |
| Display | LCD Screen (shows Delay, Gear, Temperature) |
| Charging Port | Type-C (5V/2A input) |
| Charging Time | Approx. 2.5 hours for full charge |
| Output | USB-A (for power bank function) |
| Welding Thickness | Up to 0.2mm for iron, steel, stainless steel sheets |
| Item Weight | 1.79 pounds |
| Package Dimensions | 10.12 x 5.91 x 2.01 inches |
| First Available Date | May 9, 2023 |
Warranty and Support
Kerpu is committed to providing high-quality products and excellent customer service. While specific warranty terms are not detailed in this manual, we stand behind our products and are ready to assist with any issues or questions you may have.
For technical support, troubleshooting assistance, or any inquiries regarding your Kerpu Spot Welder, please contact our customer support team:
Email: tswaus@163.com
Your satisfaction is very important to us. Please do not hesitate to reach out.
Related documentsYJ7500


Ask a question about this manual
Ask about setup, troubleshooting, compatibility, parts, safety, or missing instructions. Manuals+ will review the question and use this page’s manual context to help answer it.