1. Introduction
This manual provides essential information for the proper installation, operation, and maintenance of your AC Infinity IONFRAME EVO10 LED Grow Light. Please read these instructions thoroughly before use to ensure optimal performance and longevity of your product.
The IONFRAME EVO10 is a high-performance LED grow light designed for indoor plant cultivation in grow rooms and greenhouses. It features advanced Samsung LM301H EVO LEDs, offering superior light intensity and efficiency. The light includes a schedule controller for precise environmental management and is compatible with the UIS platform for WiFi app control.
2. Product Features
- Advanced LED Technology: Utilizes Samsung LM301H EVO LEDs, rated at 3.14 µmol/J PPE, providing high efficiency and light intensity.
- Integrated Control System: Features a schedule controller with sunrise/sunset dimming and 10 brightness levels.
- Smart Connectivity: UIS platform-compatible for seamless integration and control via a WiFi app.
- Optimized Light Distribution: Bar-style fixture with algorithmically spaced diodes ensures even coverage, deep canopy penetration, and reduced hotspots.
- Efficient Cooling: Passive cooling LED driver is removable to manage heat dissipation.
- Expandable System: Supports daisy-chaining with up to 80 grow lights (requires 2-in-1 splitter, not included).
3. Setup and Installation
Carefully unpack all components and inspect for any damage. Ensure all parts listed in the packaging are present.
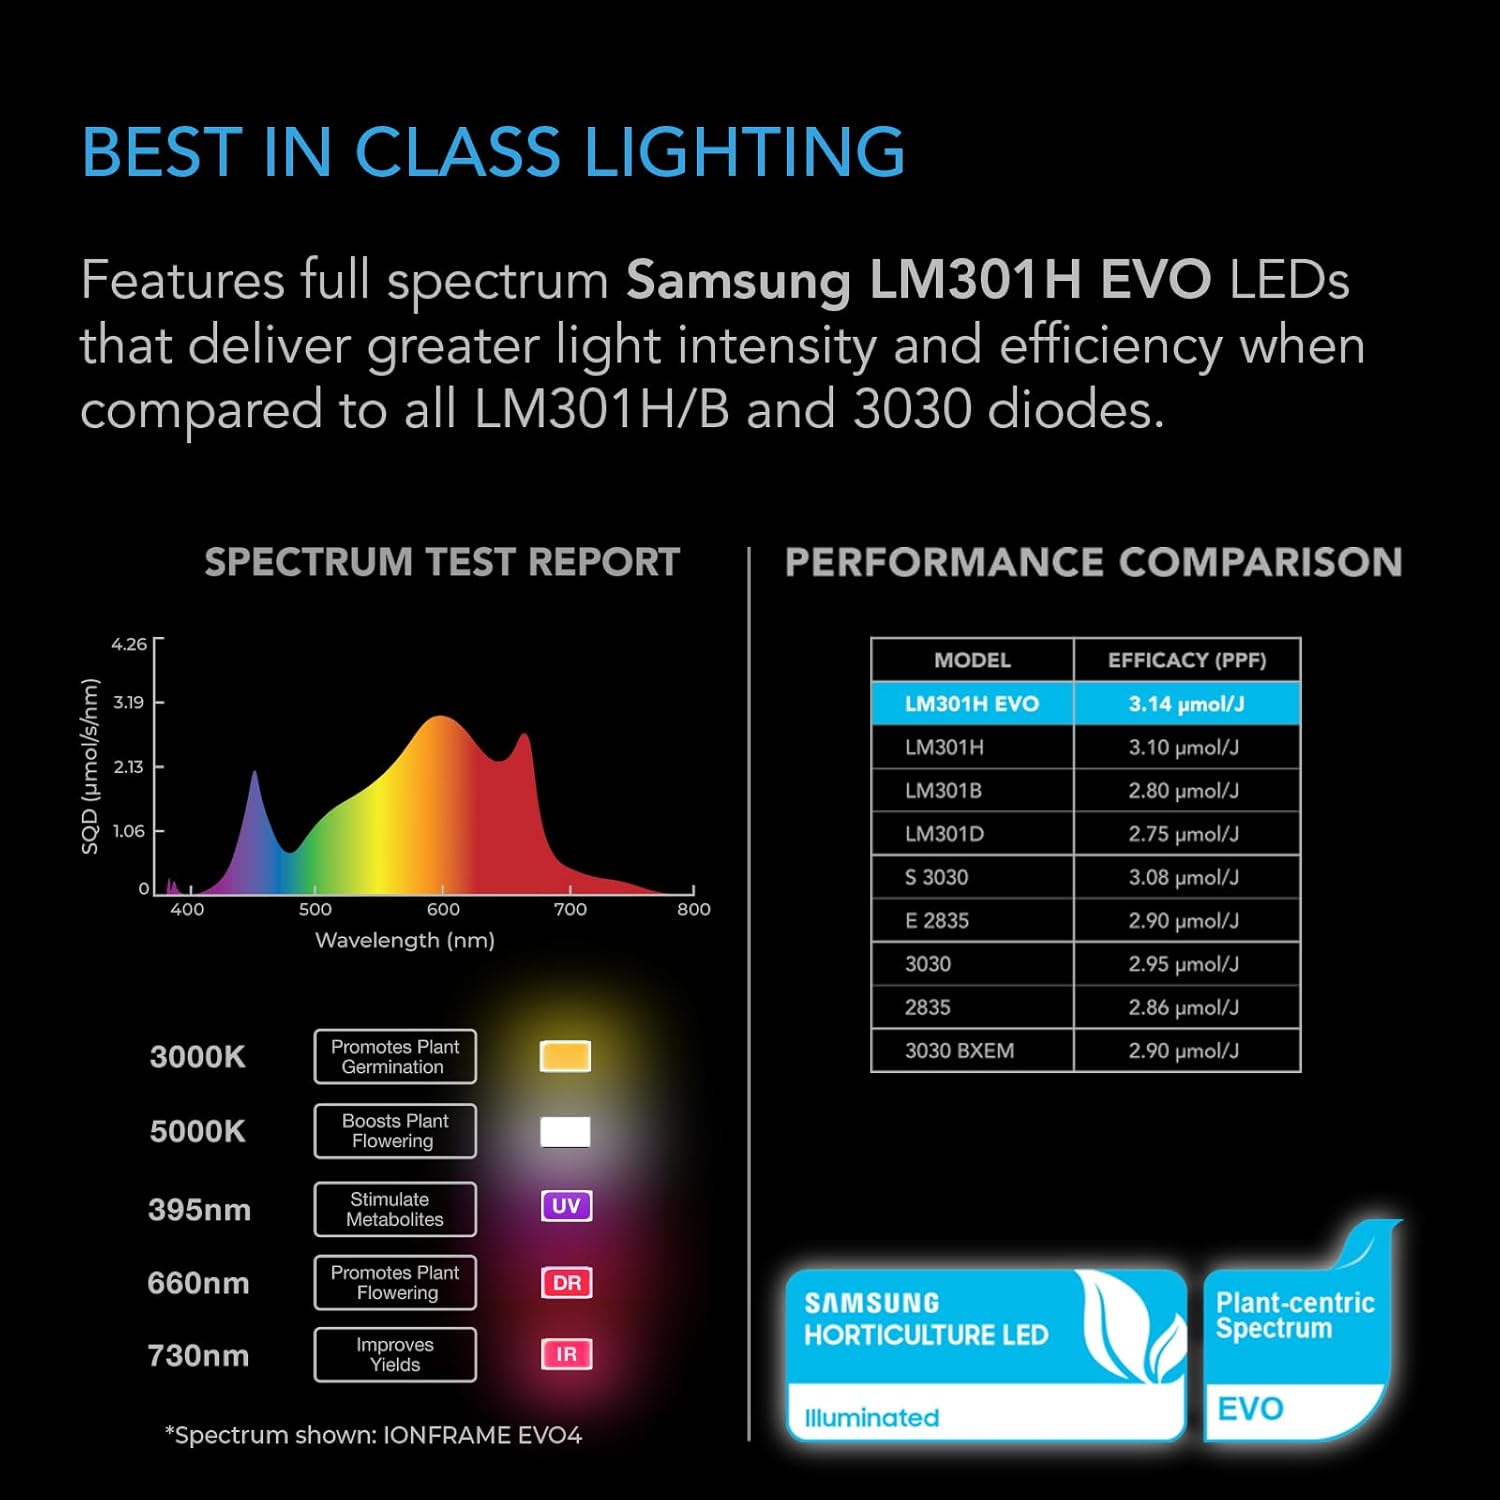
Figure 3.1: The AC Infinity IONFRAME EVO10 LED Grow Light, showcasing its bar-style design and multiple LED strips.
3.1 Mounting the Grow Light
- Identify suitable mounting points within your grow tent or greenhouse structure. The light is designed for overhead suspension.
- Attach the provided hanging hardware to the designated points on the light fixture.
- Securely hang the light at the desired height above your plant canopy. Ensure the light is level and stable.

Figure 3.2: The IONFRAME EVO10 LED Grow Light suspended inside a grow tent, illustrating a typical installation scenario.
3.2 Connecting the Controller and Power
- Connect the LED driver to the main light fixture. The driver can be mounted remotely to help balance heat dissipation in the grow space.
- Plug the power cord into the LED driver, then into a suitable power outlet.
- Connect the included schedule controller to the light fixture. The controller allows for direct adjustment of settings.

Figure 3.3: Diagram showing the connections for the schedule controller and the remotely mountable LED driver for the grow light.
3.3 UIS Platform Integration (Optional)
For advanced control, connect your IONFRAME EVO10 to the AC Infinity UIS platform. This enables WiFi app control and integration with other AC Infinity devices.
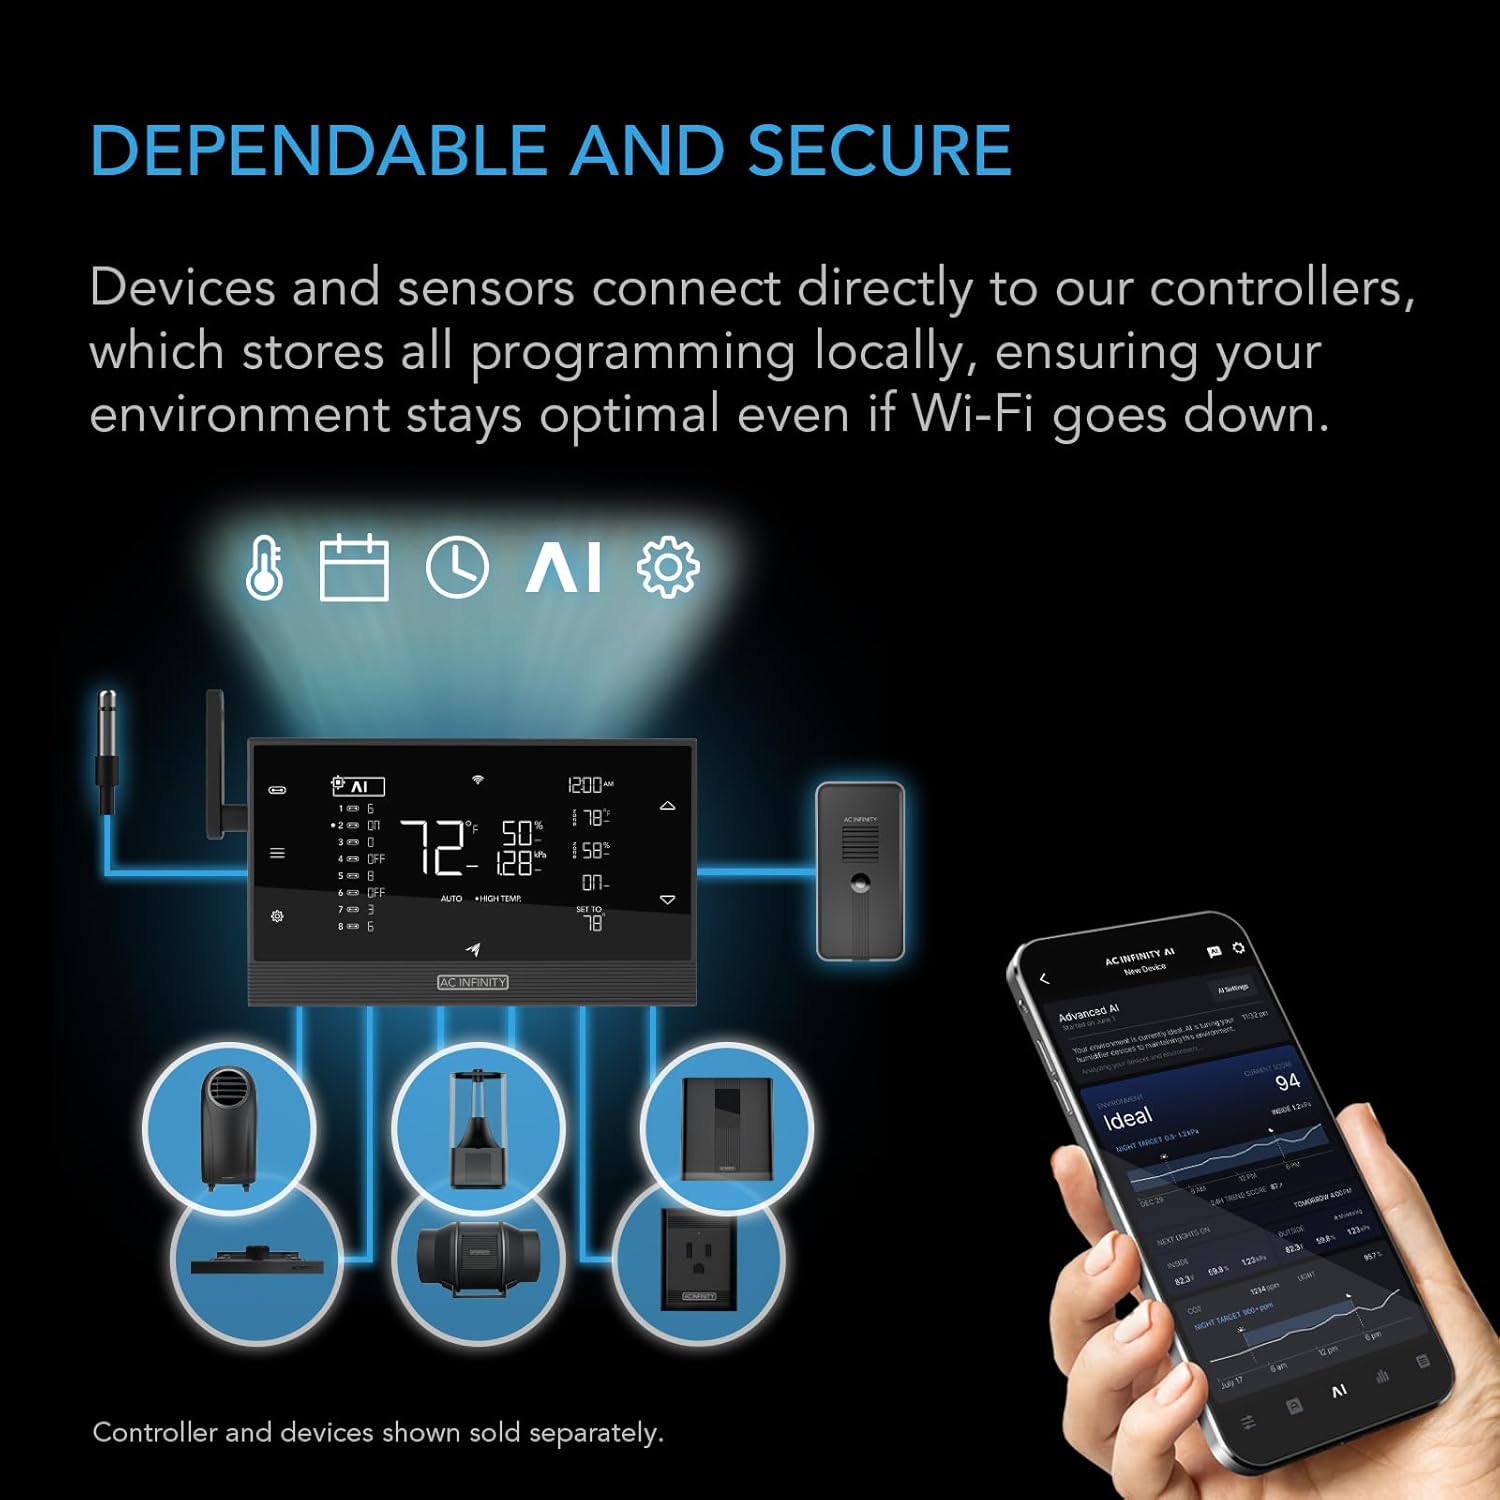
Figure 3.4: Illustration of the AC Infinity UIS platform, demonstrating how the grow light connects to a central controller and can be managed via a smartphone app.
4. Operating Instructions
The IONFRAME EVO10 offers flexible control options for managing your plant's lighting cycle.
4.1 Manual Control
Use the physical buttons on the schedule controller to adjust brightness levels (10 settings available) and set basic on/off times.
4.2 Schedule Control
The controller allows programming of light schedules, including specific on/off times and sunrise/sunset dimming features. This simulates natural light cycles, reducing plant stress.
4.3 App Control (via UIS Platform)
Once connected to the UIS platform, you can manage all light settings, schedules, and monitor environmental conditions directly from the AC Infinity app on your smartphone. This includes advanced automations and alerts.
5. Maintenance
Regular maintenance ensures the longevity and efficiency of your grow light.
- Cleaning: Periodically wipe the LED bars and fixture with a soft, dry cloth to remove dust and debris. Ensure the light is unplugged before cleaning.
- Inspection: Regularly check all cables and connections for any signs of wear or damage.
- Ventilation: Ensure adequate airflow around the LED driver and fixture to prevent overheating, especially if the driver is not remotely mounted.
6. Troubleshooting
If you encounter issues with your IONFRAME EVO10, refer to the following common solutions:
- Light Not Turning On: Check power connections, ensure the outlet is functional, and verify the controller settings.
- Flickering Lights: Ensure all connections are secure. If using a dimmer, confirm it is compatible and properly configured.
- Uneven Light Distribution: Verify the light is hung level and at the recommended height for your coverage area.
- App Connectivity Issues: Check your WiFi connection and ensure the UIS controller is properly paired with the app. Refer to the UIS platform manual for detailed connectivity troubleshooting.
7. Specifications
| Feature | Specification |
|---|---|
| Model Name | IONFRAME EVO10 |
| Wattage | 1000 watts |
| LED Type | Samsung LM301H EVO |
| Diode Count | 3710 |
| Efficiency | 3.14 µmol/J PPE |
| Veg. Coverage | 7 x 7 ft. |
| Flower Coverage | 6 x 6 ft. |
| Product Dimensions | 44.49"D x 44.09"W x 3.39"H |
| Item Weight | 49.8 pounds |
| Material | Aluminum |
| Control Method | App, Remote |
| Special Feature | Dimmable, Full Spectrum |
| Power Source | Corded Electric |
| ETL Certification | 5021417 |

Figure 7.1: Detailed specifications and dimensions of the AC Infinity IONFRAME EVO10 LED Grow Light and its controller.
8. Warranty and Support
AC Infinity products are designed for durability and performance. For warranty information, please refer to the official AC Infinity website or contact customer support directly. Keep your proof of purchase for any warranty claims.
For technical assistance, troubleshooting, or product inquiries, please visit the AC Infinity support page or contact their customer service team. Contact information can typically be found on the product packaging or the official AC Infinity website.


