
Introduction
This manual provides essential instructions for the safe assembly, operation, and maintenance of your YITAMOTOR 40-inch Tow Plug Lawn Aerator. Please read this manual thoroughly before use to ensure proper function and to prevent injury or damage to the equipment. Keep this manual for future reference.
Safety Information
- Always wear appropriate personal protective equipment, including gloves and eye protection, during assembly and operation.
- Ensure all fasteners are securely tightened before each use. Loose parts can cause injury or damage.
- Keep hands and feet clear of moving parts, especially the aerating tines, during operation.
- Do not operate the aerator on hard surfaces such as concrete or asphalt, as this can damage the tines and the equipment.
- Always attach the aerator securely to a lawn tractor, ATV, or ZTR with a universal hitch.
- Do not exceed the recommended operating speed of the towing vehicle.
- Keep children and pets away from the aerator during operation and storage.
- Exercise caution when turning or maneuvering the aerator, especially on slopes.
Parts List
Before assembly, verify that all components are present and undamaged. If any parts are missing or damaged, contact customer support.
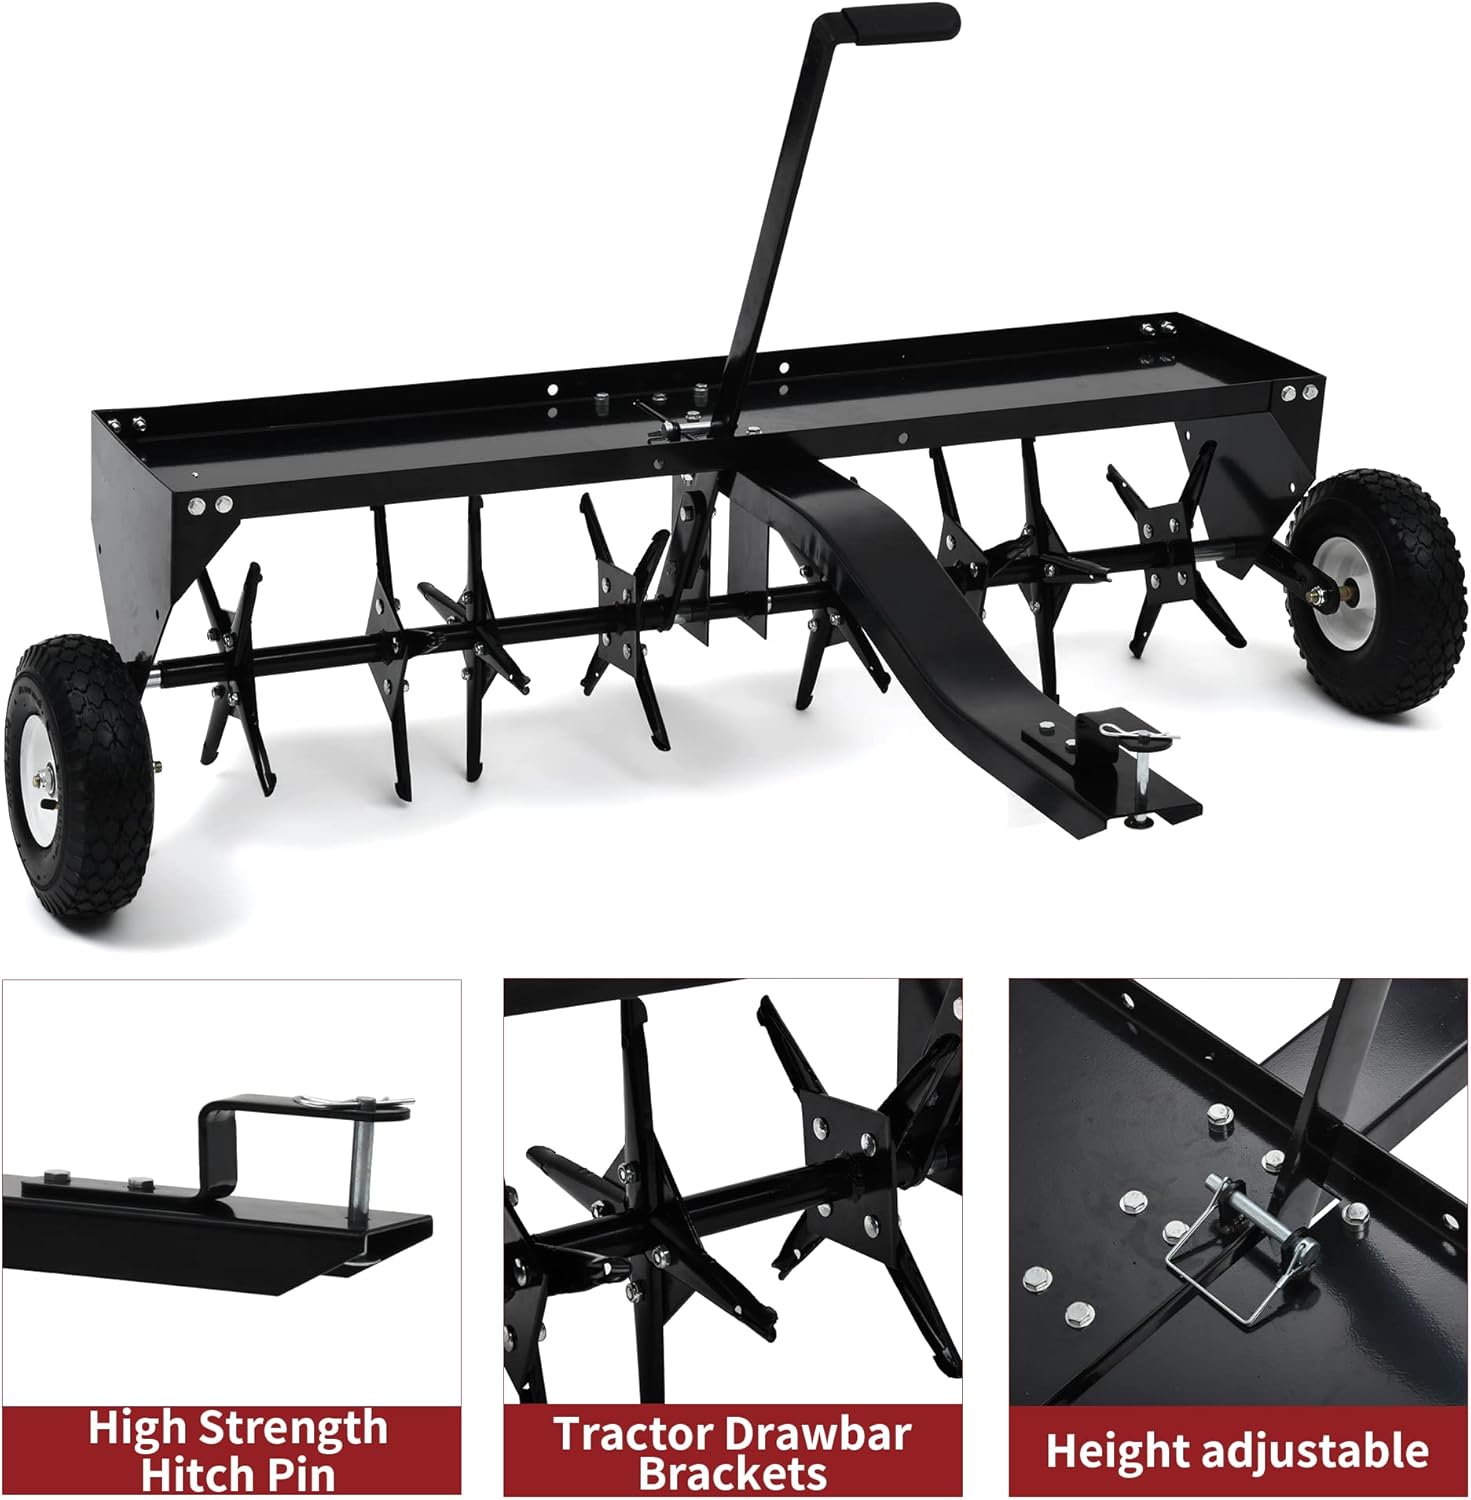
Figure 1: Overview of the YITAMOTOR 40-inch Tow Plug Lawn Aerator, highlighting the high-strength hitch pin, tractor drawbar brackets, and height adjustment mechanism.
- Main Frame / Weight Tray
- Aerator Shaft with Spike Disks (24 galvanized plug coring knives)
- Wheels (2)
- Axle
- Tow Bar Assembly
- Lift Handle
- Hitch Pin and Cotter Pin
- Fasteners (various nuts, bolts, washers)
Assembly Instructions
Follow these steps carefully for proper assembly. It is recommended to lay out all parts before beginning.
- Attach Wheels to Axle: Securely attach the two wheels to the axle using the provided hardware. Ensure bearings are properly seated.
- Install Aerator Shaft: Insert the aerator shaft, which includes the spike disks, into the designated slots on the main frame. Ensure the shaft rotates freely.
- Assemble Main Frame: Connect the various sections of the main frame and weight tray using the appropriate bolts, washers, and nuts. Tighten all connections firmly.
- Attach Tow Bar: Connect the tow bar assembly to the front of the main frame. The universal hitch is designed to attach to various towing vehicles.
- Install Lift Handle: Attach the lift handle to the main frame. This handle allows for raising and lowering the aerator tines.
- Final Check: Double-check all bolts, nuts, and pins to ensure they are fully tightened and secured.

Figure 2: Detail of the universal hitch for attachment to towing vehicles.
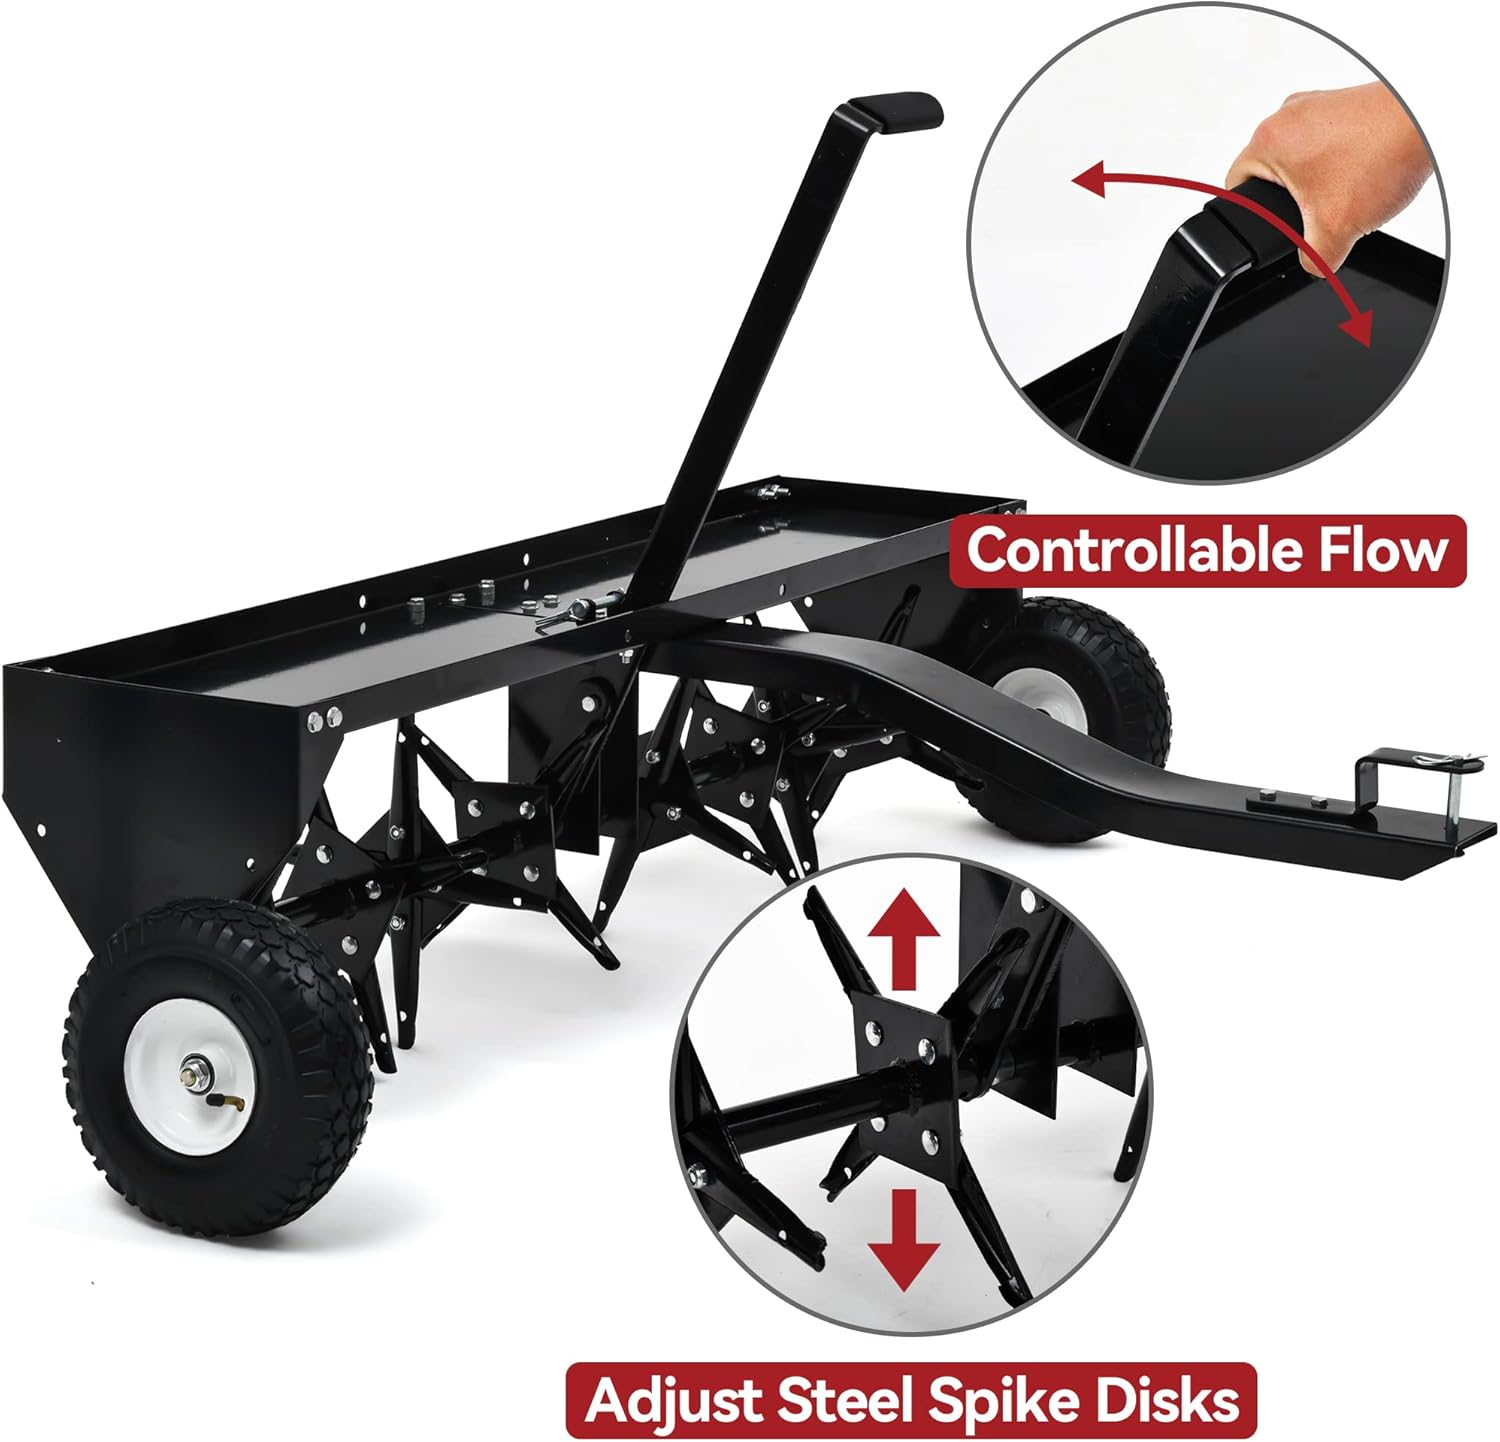
Figure 3: The control handle for adjusting the aerator's position and a close-up of the adjustable spike disks.
Setup
- Attach to Towing Vehicle: Connect the aerator's tow bar to the hitch of your lawn tractor, ATV, or ZTR using the provided hitch pin. Ensure a secure connection.
- Add Weight (Optional but Recommended): For optimal soil penetration, place cinder blocks or other suitable weights onto the aerator's weight tray. The amount of weight needed will vary based on soil type and desired penetration depth.
- Adjust Tine Height: Use the lift handle to raise or lower the aerator tines. In the raised position, the wheels support the aerator for transport. In the lowered position, the tines engage the soil for aeration.

Figure 4: The aerator properly attached to a lawn tractor, ready for use.
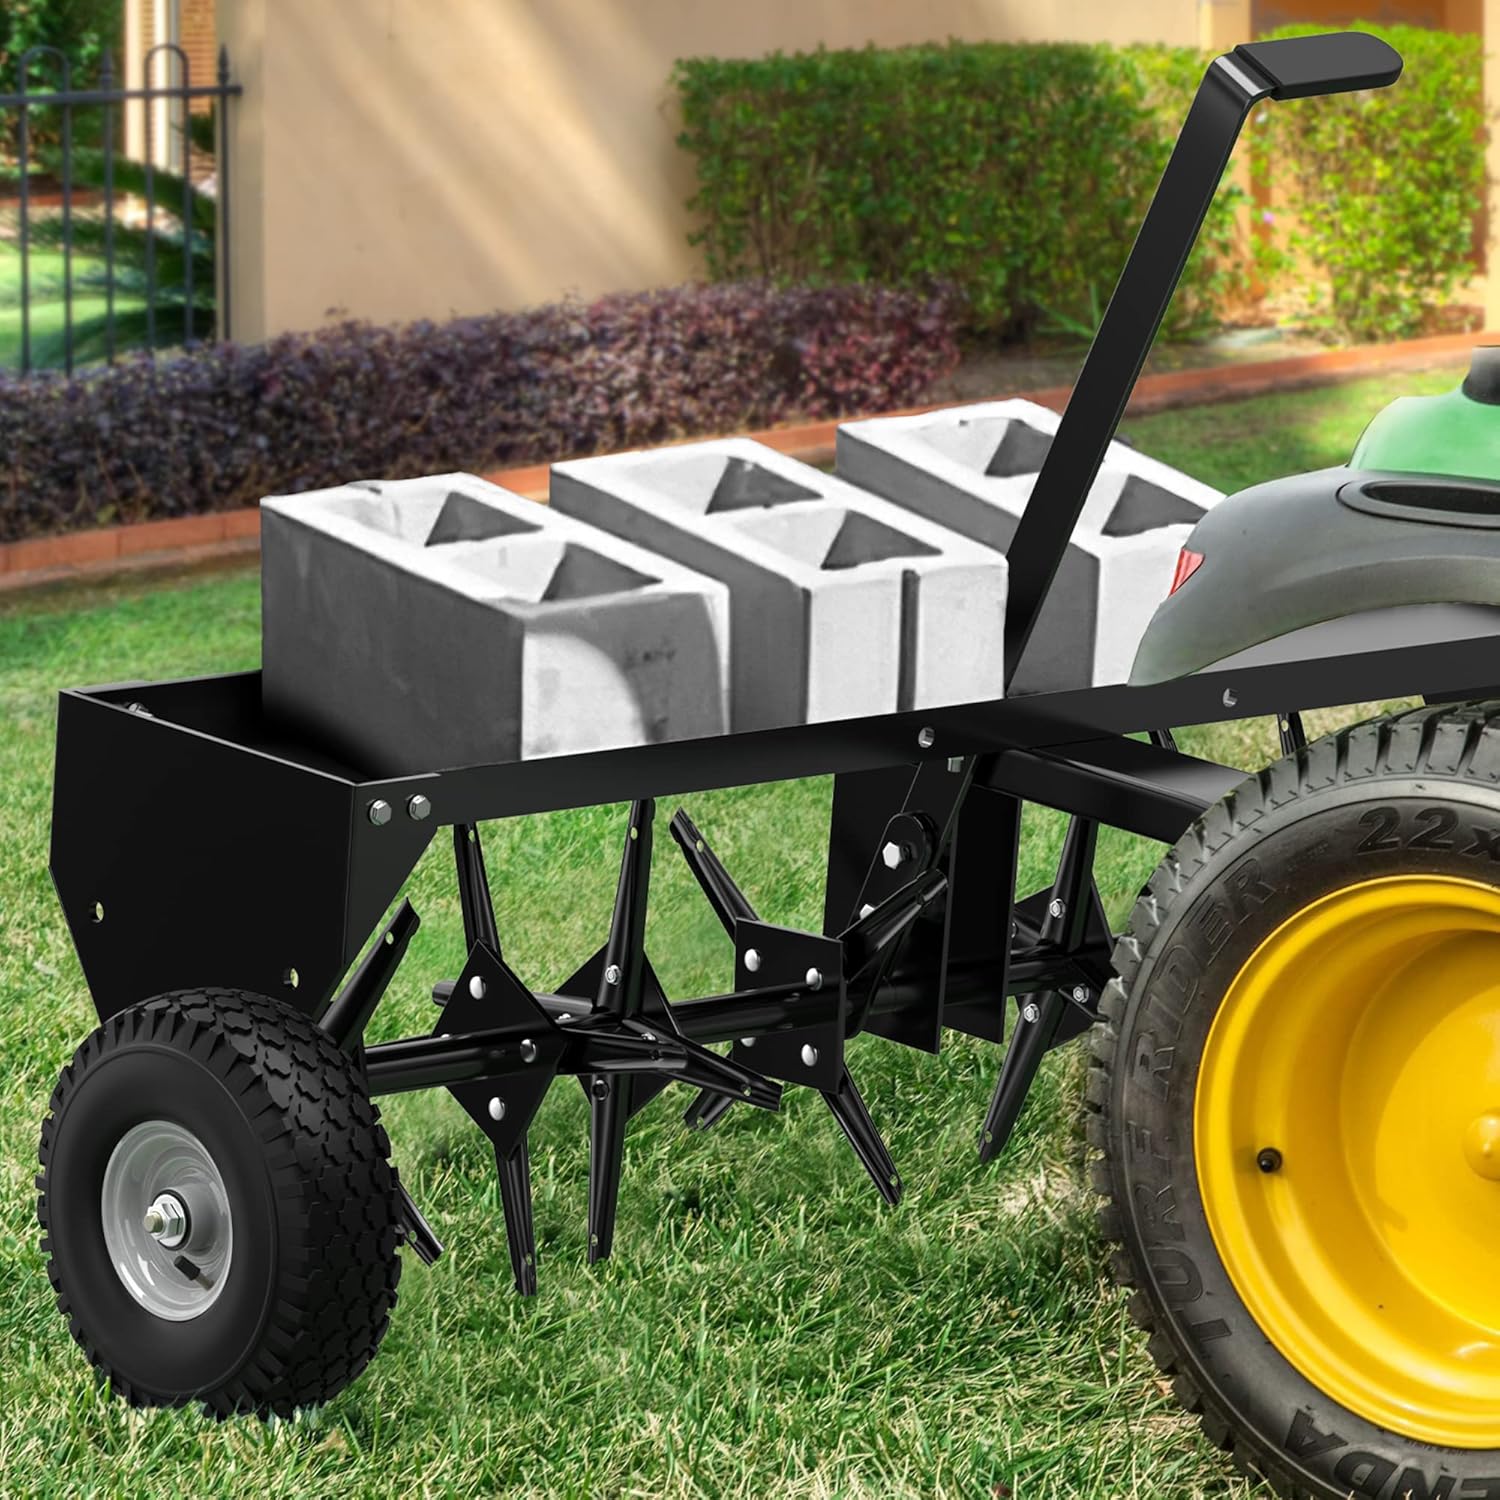
Figure 5: Cinder blocks placed on the aerator's tray to increase penetration depth.
Operating Instructions
- Prepare Lawn: For best results, aerate when the soil is moist but not waterlogged. Avoid aerating extremely dry or hard soil.
- Engage Tines: Once in the desired starting position, lower the lift handle to engage the aerating tines with the ground.
- Begin Aeration: Drive the towing vehicle at a slow, consistent speed across the lawn. Overlap passes slightly to ensure complete coverage.
- Maneuvering: When turning or crossing hard surfaces (driveways, sidewalks), raise the aerator tines using the lift handle to prevent damage.
- Optimal Penetration: The 24 galvanized and sharpened plug coring knives are designed to penetrate up to 2 inches, creating reservoirs for oxygen, fertilizer, and water.
- Completion: Once aeration is complete, raise the tines for transport and detach the aerator from the towing vehicle.
Maintenance
- Cleaning: After each use, clean soil and debris from the aerator tines and frame. This prevents rust and maintains performance.
- Inspection: Regularly inspect the tines for wear or damage. Replace bent or broken tines promptly. Check all fasteners for tightness.
- Lubrication: Periodically lubricate moving parts, such as the axle and lift handle pivot points, with a suitable grease or oil.
- Storage: Store the aerator in a dry, covered area to protect it from the elements.
Troubleshooting
- Tines Not Penetrating:
- Ensure sufficient weight is added to the tray.
- Check soil moisture; aerate when soil is moist.
- Verify tines are fully lowered.
- Aerator Drags or Skips:
- Reduce towing speed.
- Check for obstructions in the tines.
- Uneven Aeration:
- Ensure consistent towing speed and overlapping passes.
- Verify the aerator is level when attached to the towing vehicle.
- Wheels Not Lifting Aerator:
- Check the lift handle mechanism for proper function and adjustment.
- Ensure no obstructions are preventing the wheels from fully engaging.
Specifications
| Working Width | 40 inches |
| Item Weight | 68 pounds |
| Product Dimensions | 40 x 40.4 x 15 inches |
| Aeration Depth | Up to 2 inches |
| Number of Tines | 24 Galvanized Plug Coring Knives |

Figure 6: Key dimensions of the YITAMOTOR 40-inch Tow Plug Lawn Aerator.
Warranty and Support
For warranty information or technical assistance, please refer to the contact details provided at the point of purchase or visit the official YITAMOTOR website. Keep your purchase receipt for warranty claims.
