
1. Introduction
This manual provides comprehensive instructions for the setup, operation, and maintenance of your SZELAM 10-inch Digital Wall Clock, Model 6635. Please read this guide thoroughly to ensure optimal performance and longevity of your device.
2. Package Contents
- 1 x SZELAM 10-inch Digital Wall Clock
- 1 x USB Charging Cable
- 1 x Power Adapter
- 1 x Remote Control
- 1 x Product Manual (this document)
- 2 x Adhesive Hooks
- 1 x Nail
- 1 x CR2032 Battery (for memory function, included)

3. Product Overview
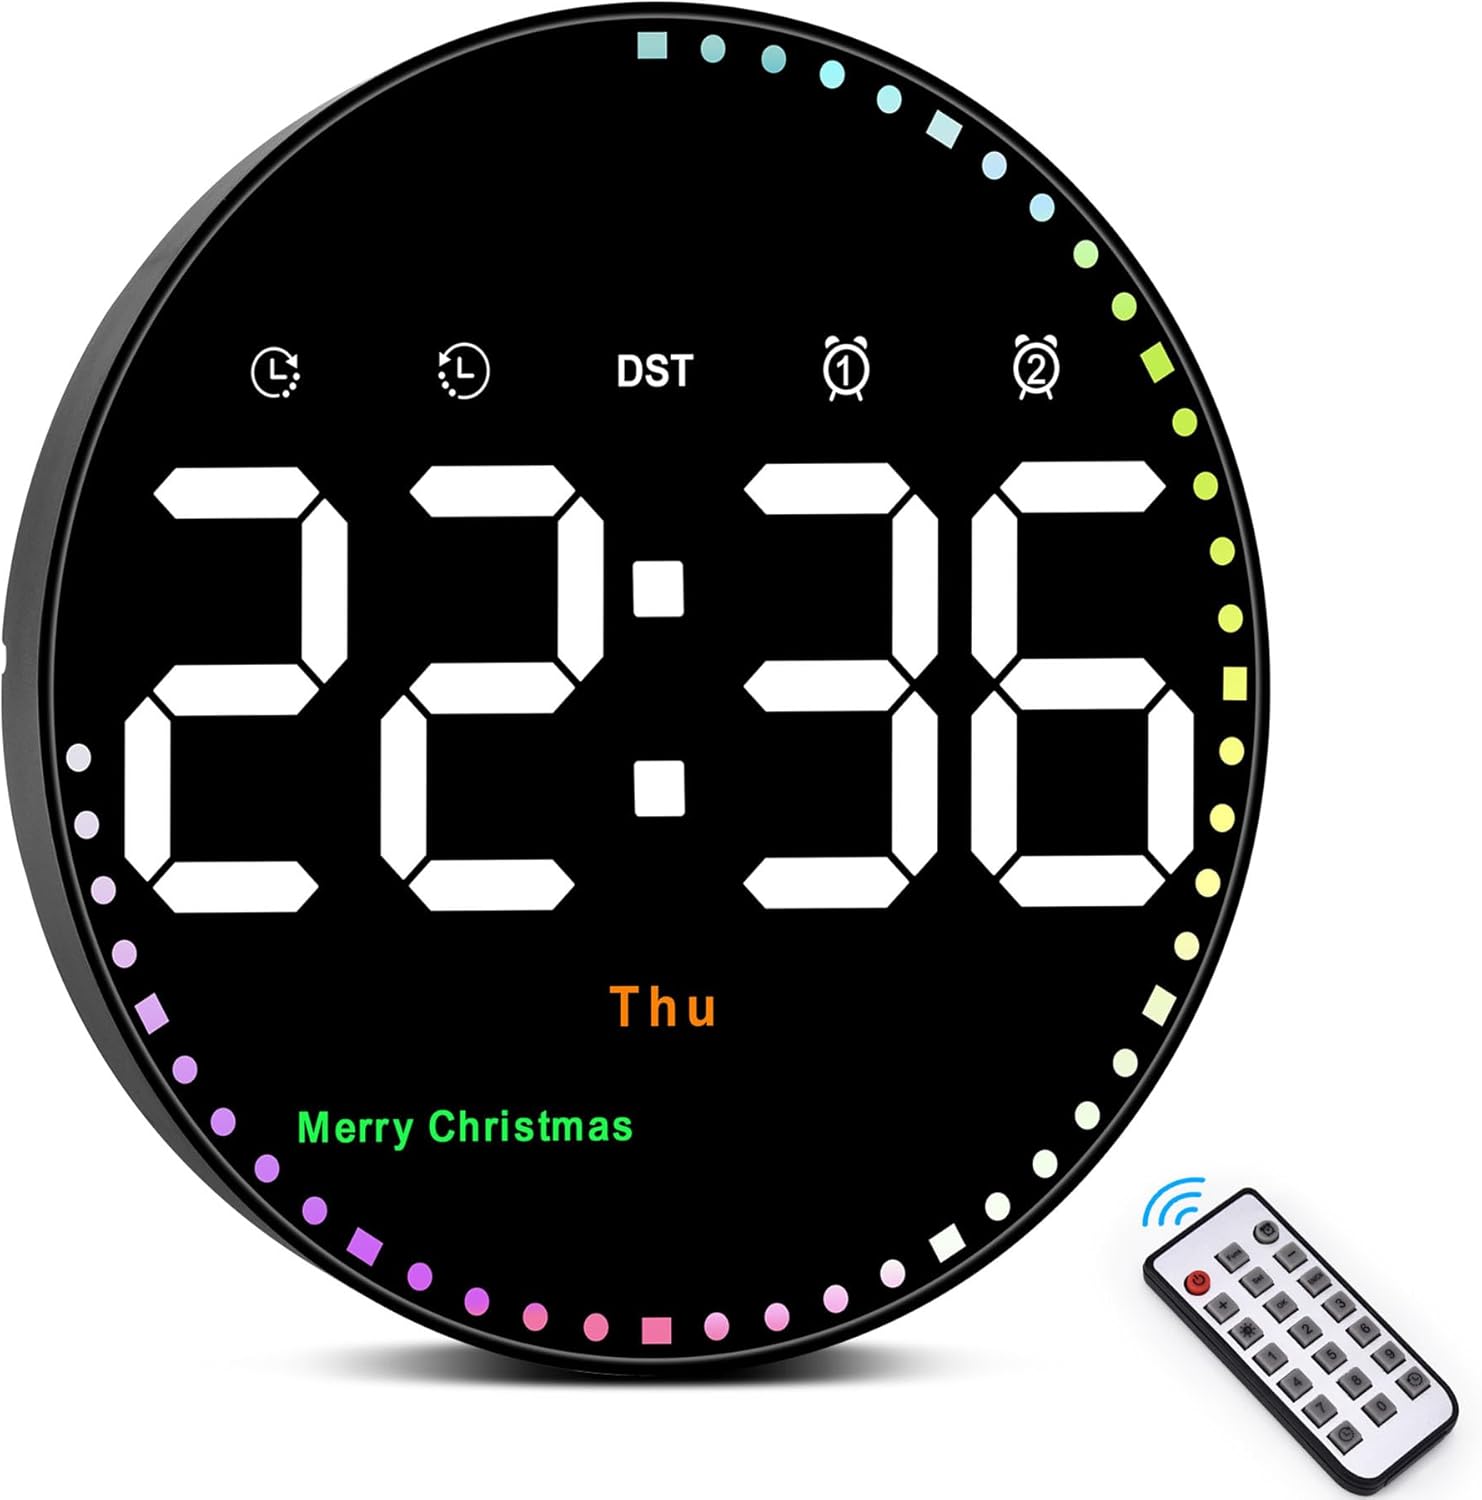
The SZELAM Digital Wall Clock features a large 10-inch display for clear visibility. It includes a remote control for easy adjustments, adjustable brightness, calendar, temperature display, and various time modes. The clock also features a colorful second-hand display and holiday reminders.


4. Setup
4.1 Power Connection
The clock requires continuous USB power to display. Connect the provided USB charging cable to the DC 5V 1A port on the back of the clock and plug the power adapter into a standard electrical outlet.
4.2 Battery Installation (Memory Function)
For memory backup during power outages, install 2 AAA batteries (not included) into the battery compartment on the back of the clock. This ensures time data is not lost, eliminating the need for a full reset after power interruption.
4.3 Mounting the Clock
The clock can be wall-mounted using the provided adhesive hooks or nail. Ensure the mounting surface is clean and dry before applying adhesive hooks for secure placement. The back of the clock features a power cord channel to manage the cable neatly.
Video: Demonstrates the setup and placement of the digital wall clock in various home and office environments.
5. Operating Instructions
5.1 Time Setting
To set the time, date, and temperature unit, use the remote control:
- Press the SET button on the remote to enter time setting mode.
- Use the "+" or "-" buttons to switch between 12/24-hour format. Press SET to confirm.
- Enter the numeric time (hour and minute) using the number keys on the remote. Press SET to confirm each segment.
- Adjust the year, month, and day similarly using the "+" or "-" buttons and confirming with SET.
- Adjust the temperature unit (°F/°C) using the "+" or "-" buttons. Press SET to confirm.
Video: Step-by-step guide on how to set the time on your SZELAM Digital Wall Clock using the remote control.
5.2 Brightness Adjustment
The clock offers 10 levels of adjustable brightness and an automatic dimming feature:
- Manual Adjustment: Press the light bulb icon button on the remote to cycle through 10 brightness levels (L-01 to L-10).
- Auto Dimming: The clock has a built-in automatic dimming sensor that adjusts brightness based on ambient light, ensuring comfortable viewing day and night.

Video: Demonstrates the 10-level adjustable brightness feature and auto-dimming functionality of the clock.
5.3 Display Modes
The clock supports two main display modes:
- Time Only: Displays only the current time.
- Cycle Display: Cycles through time, date, and temperature.
Use the remote control to switch between these modes.

5.4 Alarm Function
The clock supports two independent alarms. To set and manage alarms:
- Press the alarm clock icon button on the remote to display Alarm 1. Press it again to switch to Alarm 2.
- While an alarm is displayed, press the SET button to enter alarm setting mode.
- Enter the desired alarm time using the numeric keys. Press SET to confirm.
- Use "+" or "-" to select the alarm mode (e.g., Monday-Friday, Monday-Saturday, Every day). Press SET to confirm.
- To turn an alarm on or off, press "+" or "-" at normal time. An alarm mark will light up when the alarm is active.
- To stop a sounding alarm, press any button on the remote.
Video: Instructions on how to set and manage alarms on the SZELAM Digital Wall Clock.
5.5 DST Function (Daylight Saving Time)
To activate or deactivate Daylight Saving Time (DST), long press the "-" button on the remote control. The clock will adjust by one hour forward or backward accordingly.

5.6 Timer and Countdown Function
The clock includes both timer (count-up) and countdown functions, up to 99 minutes and 99 seconds.
- Count-up: Press the timer icon button on the remote, then press OK to start. Press OK again to stop. Long press the timer icon button to exit and return to time status.
- Countdown: Press the countdown icon button on the remote. Use numeric keys (0-9) to set the desired countdown time. Press OK to start. Press OK again to stop.
Video: Demonstrates the timer and countdown functions, showing how to set and operate them.
6. Maintenance
- Clean the clock display and body with a soft, dry cloth. Avoid using abrasive cleaners or solvents.
- Ensure the clock is placed in a dry environment, away from direct sunlight or extreme temperatures.
- If the clock will not be used for an extended period, remove the AAA batteries to prevent leakage.
7. Troubleshooting
- Clock not displaying: Ensure the USB cable is securely connected to both the clock and the power adapter, and the adapter is plugged into a working outlet. The clock requires continuous power to display.
- Remote control not working: Check if the remote control's battery is correctly installed and not depleted. Ensure there are no obstructions between the remote and the clock.
- Time not saving after power outage: Verify that 2 AAA batteries are installed in the battery compartment for the memory function.
- Incorrect time/date: Follow the "Time Setting" instructions in Section 5.1 to reset the time and date.
8. Specifications
| Brand | SZELAM |
| Model Number | 6635 |
| Display Type | Digital |
| Product Dimensions | 10"W x 10"H |
| Power Source | Corded Electric (USB) |
| Backup Battery | 2 x AAA batteries (not included, for memory only) |
| Special Features | Temperature Display, Adjustable Brightness (10-level & Auto), 12/24H, Calendar, Timer, Countdown, Holiday Reminders, Remote Control |
| Material | Plastic |
| Mounting Type | Wall Mount |
9. Warranty and Support
Your SZELAM Digital Wall Clock comes with a 30-day unconditional money-back/exchange policy and a 1-year warranty. For any support or warranty claims, please contact SZELAM customer service.

