1. Introduction
The 4DRC G1 RC Plane is a 3-channel remote-controlled aircraft designed for both beginners and experienced pilots. Featuring a 6-axis intelligent gyro stabilization system, it offers smooth flight and easy control. This manual provides essential information for assembly, operation, maintenance, and troubleshooting to ensure a safe and enjoyable flying experience.
Please read this manual thoroughly before operating the aircraft.
2. What's in the Box
Verify that all components are present before proceeding with assembly.
- 4DRC G1 RC Plane (G1-grey)
- Remote Controller
- 2 x Lithium Ion Batteries (for plane)
- USB Charging Cable
- Spare Propellers
- Landing Gear
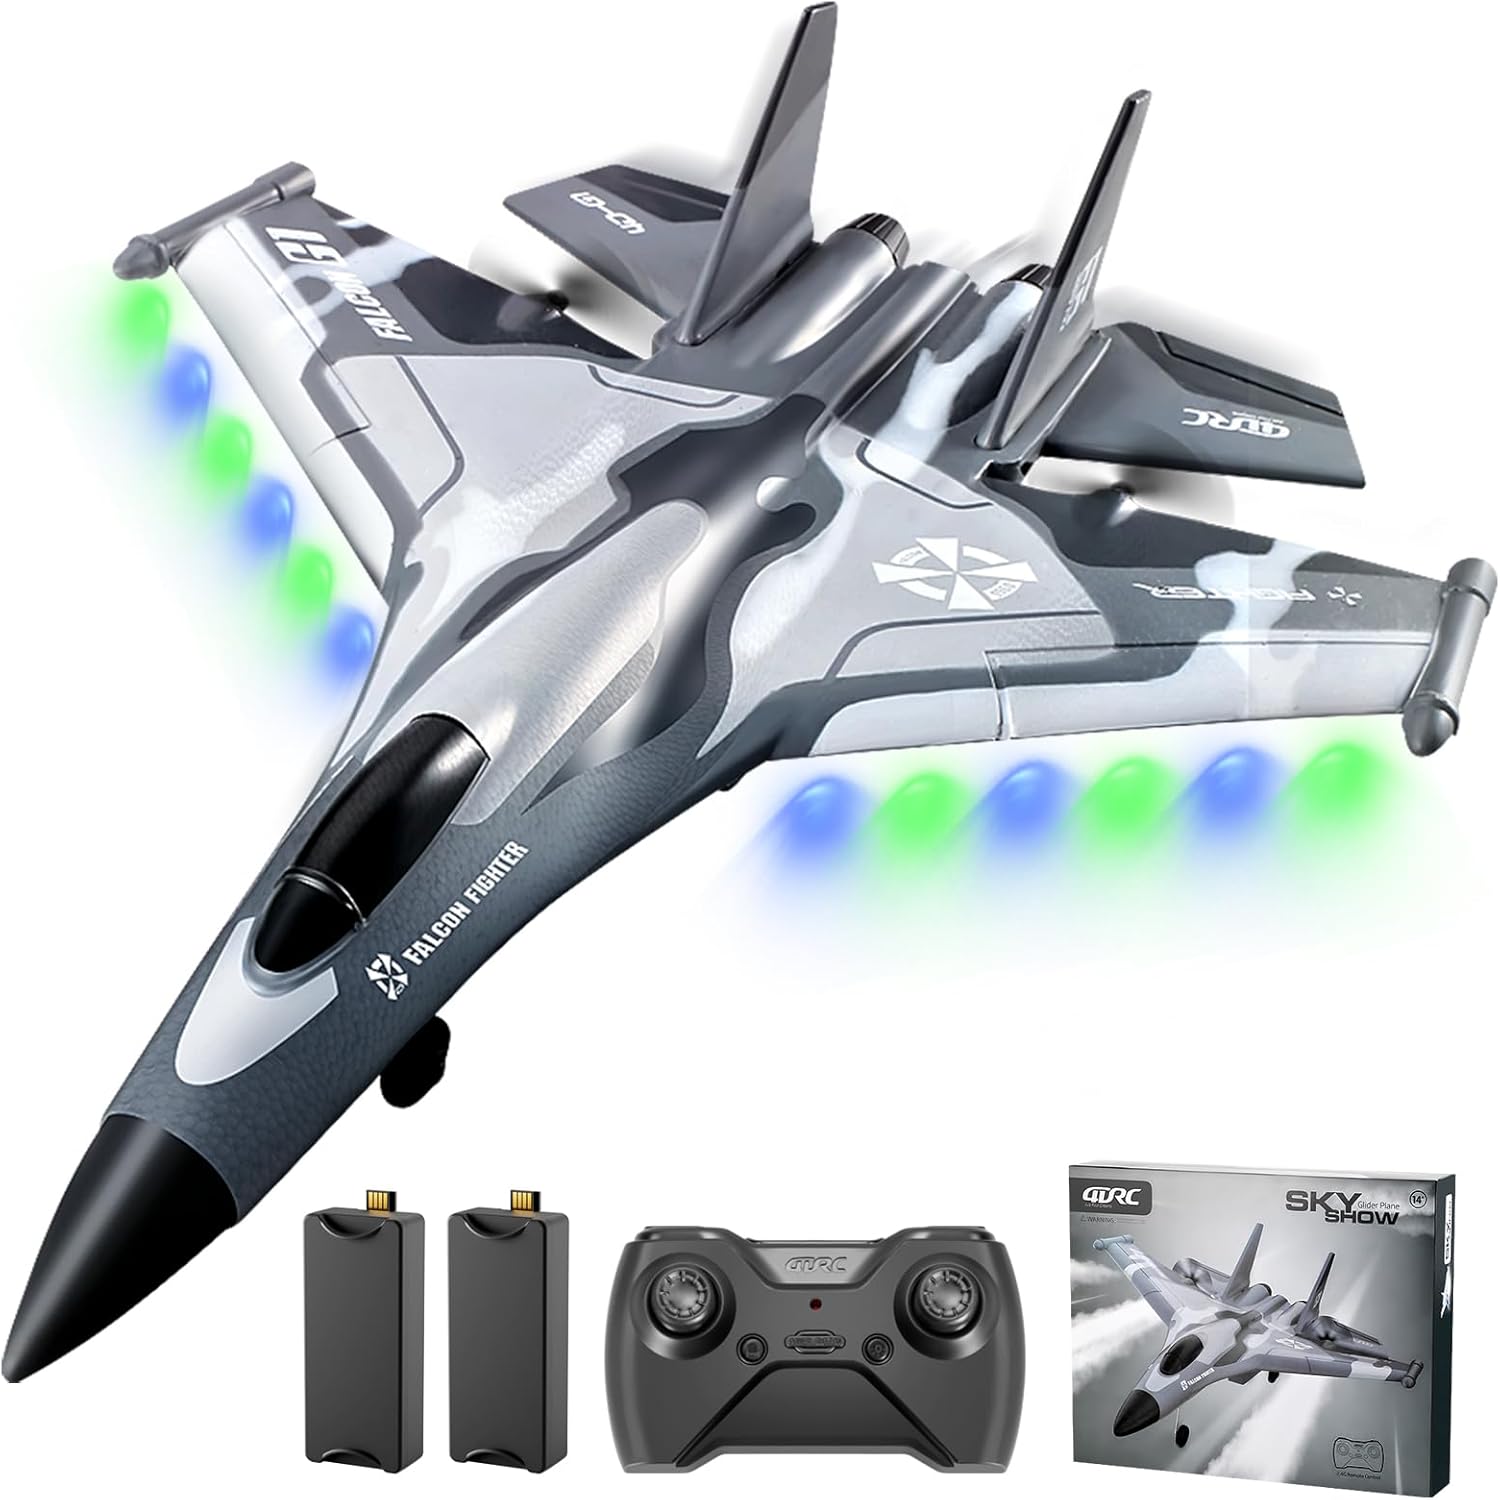
Figure 2.1: Contents of the 4DRC G1 RC Plane package, including the aircraft, remote, and two batteries.
3. Setup
3.1 Battery Installation and Charging
- Aircraft Battery: Insert the provided Lithium Ion battery into the battery compartment of the G1 RC Plane. Ensure it is securely connected.
- Remote Controller Batteries: Open the battery cover on the back of the remote controller and insert 3x AAA batteries (not included). Ensure correct polarity.
- Charging: Connect the aircraft battery to the USB charging cable. Plug the USB cable into a compatible USB power source (e.g., computer, USB wall adapter). The charging indicator light will show charging status (e.g., red for charging, off for fully charged). A full charge typically takes 60-90 minutes.

Figure 3.1: Battery installation in the aircraft and an illustration of battery life.
3.2 Pairing the Remote Controller
- Ensure the aircraft battery is fully charged and installed.
- Turn on the remote controller. The indicator light will flash.
- Turn on the aircraft. Place it on a flat surface.
- The aircraft and remote controller will automatically pair. The indicator lights on both devices will become solid when pairing is successful.
3.3 Pre-Flight Check
- Ensure batteries are fully charged in both the aircraft and remote.
- Verify that the propellers are securely attached and free from damage.
- Check that all control surfaces move freely and correctly in response to remote input.
- Choose an open area free from obstacles, people, and animals for flight. Avoid flying in windy conditions.
4. Operating Instructions
4.1 Take-Off Procedures
The 4DRC G1 supports two take-off methods:
- Ground Take-off: Place the aircraft on a smooth, flat surface. Gradually increase throttle and steer the aircraft until it gains sufficient speed for lift-off.
- Hand Throw Take-off: Hold the aircraft firmly and gently throw it forward into the wind while simultaneously increasing throttle.

Figure 4.1: Ground take-off and hand throw take-off methods.
4.2 Flight Controls
The G1 RC Plane features a 3-channel control system:
- Throttle: Controls ascending and descending.
- Direction: Controls left and right turns.
- Altitude Hold: The 6-axis intelligent gyro stabilization system assists in maintaining altitude for easier control.

Figure 4.2: The 6-axis gyro stabilizer helps maintain flight stability.
4.3 Special Features
- 3 Speed Modes: Adjust flight speed for different skill levels (30%, 60%, 80% power).
- 360-Degree Circling: Perform aerobatic maneuvers with a dedicated button (refer to remote control diagram for specific button).
- Headless Mode: Simplifies control by orienting the plane relative to the pilot, regardless of the plane's actual front.
- One-Key Take-Off/Landing: Press a single button for automated take-off or landing sequences.
- Smart Alert: The 2.4 GHz radio system alerts you when the aircraft's battery is low or approaching the RC range limit (up to 500 feet).

Figure 4.3: The G1 RC Plane offers three distinct speed modes.

Figure 4.4: Headless Mode and One Key Take Off/Landing features.
5. Maintenance
5.1 EPP Foam Material Care
The G1 RC Plane is constructed from durable EPP foam material, designed to withstand minor impacts. However, proper care is essential:
- Avoid prolonged exposure to direct sunlight or extreme temperatures, which can degrade the foam.
- Clean the aircraft with a soft, damp cloth. Do not use harsh chemicals.
- In case of minor damage, use foam-safe adhesive for repairs.

Figure 5.1: The durable EPP foam construction of the aircraft.
5.2 Battery Care
- Always use the provided charging cable.
- Do not overcharge or over-discharge batteries.
- Store batteries in a cool, dry place away from direct sunlight.
- If the aircraft will not be used for an extended period, remove the batteries from both the aircraft and the remote controller.
6. Troubleshooting
| Problem | Possible Cause | Solution |
|---|---|---|
| Aircraft does not respond to remote. | Low battery in aircraft or remote; not paired; interference. | Charge batteries; re-pair aircraft and remote; move to an area with less interference. |
| Aircraft flies erratically or pulls to one side. | Gyro not calibrated; damaged propeller; windy conditions. | Recalibrate gyro (refer to remote instructions); replace damaged propeller; fly in calm conditions. |
| Short flight time. | Battery not fully charged; old battery; continuous high-speed flight. | Ensure full charge; consider replacing old batteries; vary flight speed. |
| Remote controller not working. | Incorrect battery installation; dead batteries. | Check battery polarity; replace with fresh batteries. |
7. Specifications
- Model: G1
- Brand: 4DRC
- Product Dimensions: 7 x 8 x 7 inches
- Item Weight: 14.4 ounces
- Control Frequency: 2.4GHz
- Channels: 4 Channel
- Stabilization: 6-axis Gyro Stabilizer
- Battery Type: Lithium Ion (2 included)
- Manufacturer Recommended Age: 8 years and up
8. Warranty and Support
For any questions, technical support, or warranty inquiries regarding your 4DRC G1 RC Plane, please contact 4DRC customer service. Refer to the product packaging or the official 4DRC website for contact information.
Please retain your proof of purchase for warranty claims.


