
Portal 8 Person Family Camping Tent
PORTAL 8 Person Family Camping Tent User Manual
Model: 8 Person Family Camping Tent with Screen Porch
Introduction
Thank you for choosing the PORTAL 8 Person Family Camping Tent. This manual provides comprehensive instructions for the safe and efficient setup, operation, and maintenance of your new tent. Please read this manual thoroughly before attempting to set up or use the tent to ensure a successful and enjoyable camping experience.
This spacious tent is designed to comfortably accommodate up to 8 campers or 2 queen airbeds, featuring a generous 76-inch center height for ample headroom. It includes a screen porch for bug-free relaxation and is constructed with weather-resistant materials for durability.
Safety Information
- Fire Safety: Keep all flame and heat sources away from this tent fabric. The tent fabric is not fireproof. It will burn if left in continuous contact with any flame source.
- Ventilation: Ensure adequate ventilation to prevent suffocation. Do not use fuel-burning devices inside the tent.
- Weather Conditions: While designed to be weather-resistant, this tent is not intended for extreme weather conditions. In strong winds or heavy rain, ensure the tent is firmly staked and guyed out. Seek alternative shelter during severe storms.
- Site Selection: Choose a level, clear site free of sharp objects, rocks, and debris. Avoid setting up under trees with dead branches.
- Children: Children should be supervised by an adult when inside or around the tent.
- Staking: Always use all provided stakes and guy lines to secure the tent properly, especially in windy conditions.
Parts List
Before beginning setup, verify that all components are present:
- Tent Body (Main fabric structure)
- Rainfly (Waterproof outer cover)
- Tent Poles (Various lengths, typically color-coded or marked)
- Steel Stakes (For securing the tent to the ground)
- Guy Ropes (For added stability in windy conditions)
- Carry Bag (For storage and transport)
- Instruction Manual (This document)
- Mud Mat (Detachable, for screen porch entrance)

Figure 1: Tent Dimensions and Packed Size. This image illustrates the overall dimensions of the tent, including its length (20 feet), width (8 feet), and peak height (76 inches). It also shows the packed dimensions of the carry bag (8.77 x 8.77 x 27.7 inches) and indicates that the tent can sleep 8 people or fit 2 full air mattresses.
Setup Instructions
Setting up the PORTAL 8 Person Family Camping Tent is best done with two or more people. Follow these steps carefully for a secure and stable setup.
- Choose Your Site: Select a flat, dry area free of sharp objects. Clear any debris that could damage the tent floor.
- Unpack and Layout: Remove the tent and all components from the carry bag. Unroll the tent body and lay it flat on the chosen site. Ensure the door is facing the desired direction.
- Assemble Poles: Connect the pole sections. The tent typically uses several main poles for the cabin structure and additional poles for the screen porch. Refer to the pole diagram (if available in physical manual) for specific pole placement.
- Insert Poles: Slide the assembled poles through the fabric sleeves or attach them to the clips on the tent body. For this tent, it's common to have a central hub system or crisscrossing poles.
- Raise the Tent: With assistance, lift the tent structure by pushing the poles into their designated grommets or pins at the base of the tent. This will give the tent its shape.
- Stake the Base: Secure the four corners of the tent to the ground using the steel stakes. Then, stake down all remaining stake-out points around the base of the tent.
- Attach Rainfly: Drape the rainfly over the tent body, ensuring it is correctly oriented (usually indicated by a logo or specific features aligning with the tent door). Secure the rainfly to the tent poles or tent body using the attached buckles, clips, or Velcro straps.
- Guy Out the Tent: Extend and stake out all guy ropes provided. These ropes add significant stability, especially in windy conditions. Adjust the tensioners on the guy ropes to make them taut.
- Screen Porch Setup: Ensure the screen porch area is fully extended and its poles (if separate) are properly installed and secured.

Figure 2: Fully Assembled Tent. This image displays the PORTAL 8 Person Family Camping Tent completely set up, showcasing its cabin-style structure, main entrance, and integrated screen porch.

Figure 3: Spacious Interior. A person standing upright inside the tent illustrates the generous 76-inch (6.3 feet) center height, providing ample room for movement and comfort.
Operating Instructions
Using the Screen Porch
The integrated screen porch provides a bug-free area for relaxation, storage, or dining. Simply zip open the main tent door and enjoy the screened-in space. The detachable mud mat can be placed at the entrance of the screen porch for shoe storage.

Figure 4: Screen Porch Use. This image shows a person comfortably seated within the tent's screen porch, highlighting its utility as a bug-free outdoor relaxation area.
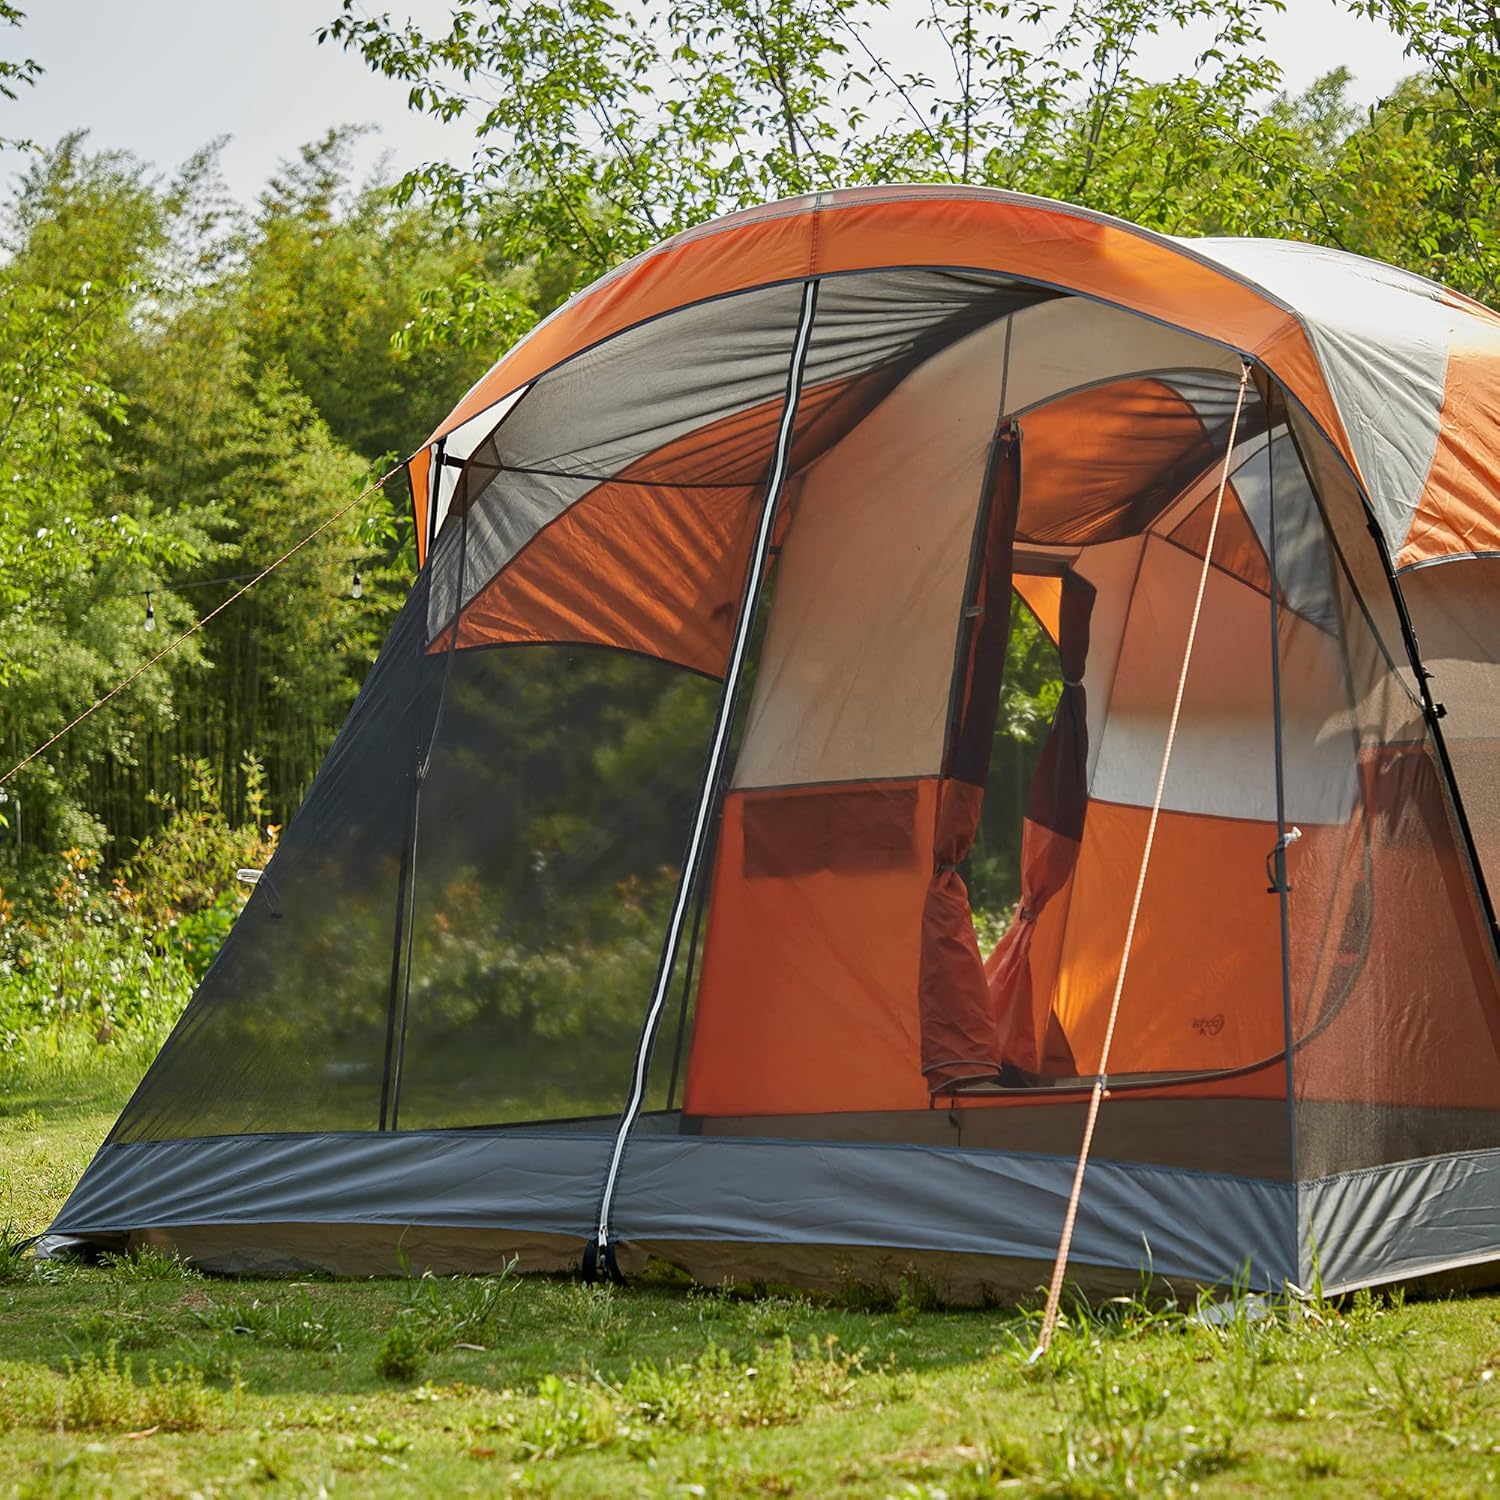
Figure 5: Screen Porch Exterior. An exterior view of the tent's screen porch, demonstrating its mesh construction for ventilation and insect protection.
Ventilation and Airflow
The tent features high-density mesh doors, windows, and a mesh ceiling to ensure excellent airflow and ventilation. Large vents are designed to draw cool air from the ground and allow hot air to escape through the mesh ceiling, maintaining a comfortable interior temperature.

Figure 6: Advanced Ventilation. This interior shot highlights the tent's mesh windows and ceiling, designed to provide optimal airflow and a clear view of the surroundings.
Interior Features
- Storage Pockets: Utilize the several mesh pockets located on the side walls for organizing small items like phones, flashlights, or books.
- Gear Loft: A gear loft is located on the top of the tent for lightweight storage, keeping items off the floor.
- Lamp Clip: A carabiner clip is provided for hanging a camping lamp or lantern, illuminating the tent interior.
- Roll-Up Door: The main door can be rolled up and secured to keep it open for easy entry/exit or increased airflow.

Figure 7: Interior Storage. A close-up view of the tent's interior mesh pockets, demonstrating convenient storage solutions for personal items.

Figure 8: Tent Interior. A perspective from inside the tent looking towards the back, showing the spaciousness and internal structure.
Maintenance
Cleaning Your Tent
- Spot Cleaning: For small dirt spots, use a soft sponge or cloth with mild soap and lukewarm water. Gently rub the affected area.
- Avoid Harsh Chemicals: Do not use detergents, bleach, or stain removers, as these can damage the tent's waterproof coating and fabric.
- Rinsing: Rinse thoroughly with clean water to remove all soap residue.
- Drying: It is crucial to dry the tent completely before packing it away. Lay it out in a shaded, well-ventilated area or hang it until absolutely dry. Packing a damp tent can lead to mildew, mold, and fabric degradation.
Storage
Once completely dry, fold the tent neatly and place it back into its carry bag. Store the tent in a cool, dry place away from direct sunlight and extreme temperatures. Proper storage extends the lifespan of your tent.

Figure 9: Waterproof Fabric. This image visually demonstrates the waterproof capabilities of the tent fabric, showing water beading and running off the surface, ensuring a dry interior.
Troubleshooting
| Problem | Possible Cause | Solution |
|---|---|---|
| Tent is unstable or sways in wind. | Not properly staked or guyed out. | Ensure all stake points are used and stakes are fully driven into the ground. Extend and tension all guy ropes. |
| Water leakage inside the tent. | Rainfly not properly positioned or secured; damaged fabric/seams. | Check rainfly alignment and ensure it covers the tent completely. Verify all buckles/clips are fastened. Inspect for tears or seam issues; apply seam sealer if necessary. |
| Condensation inside the tent. | Insufficient ventilation. | Open mesh windows and vents to increase airflow. Avoid cooking or using unvented heaters inside. |
| Poles difficult to assemble/disassemble. | Dirt in ferrules; bent sections. | Clean pole sections. If bent, attempt to straighten carefully or replace. Do not force assembly. |
| Zippers snagging or not closing. | Fabric caught in zipper; dirt/debris. | Gently pull fabric away from zipper. Clean zipper teeth with a brush. Apply zipper lubricant if needed. |
Specifications
| Feature | Detail |
|---|---|
| Brand | Portal |
| Occupancy | 8 Person |
| Product Dimensions (L x W x H) | 240"L x 96"W x 76"H (20' x 8' x 6.3') |
| Item Weight | 25.8 Pounds |
| Floor Width | 76 Inches |
| Recommended Uses | Camping & Hiking |
| Shape | Rectangular (Cabin Tent) |
| Seasons | 3 Season |
| Included Components | Carry Bag, Pole, Rainfly, Stakes |
| Water Resistance Technology | 1500 Mm |
| Fabric Material | Polyester Taffeta 68D |
Warranty and Support
PORTAL stands behind the quality of its products. For specific warranty details, please refer to the warranty card included with your purchase or visit the official Portal website.
For customer support, technical assistance, or to inquire about replacement parts, please contact Portal customer service through their official website or the contact information provided on your product packaging.
Online Resources: For additional setup videos or FAQs, please visit the Portal Store on Amazon.
Related documents8 Person Family Camping Tent

Ask a question about this manual
Ask about setup, troubleshooting, compatibility, parts, safety, or missing instructions. Manuals+ will review the question and use this page’s manual context to help answer it.