Aquasana WH-SFWC-SR
Aquasana Rhino WH-SFWC-SR Salt-Free Water Conditioner Replacement Tank User Manual
Model: WH-SFWC-SR | Brand: Aquasana
1. Product Overview
The Aquasana Rhino Salt-Free Water Conditioner Replacement Tank is designed to extend the lifespan of your home's plumbing and water-using appliances. It effectively inhibits scale buildup without using salt, phosphates, or other harsh chemicals. This system utilizes Scale Control Media (SCM) technology to transform dissolved hard minerals into inactive microscopic crystal particles, which are then harmlessly passed through your water system.
Unlike traditional salt-based water softeners, this conditioner does not demineralize your water, preserving its natural taste. It is a replacement tank for Aquasana Rhino 1,000,000 Gallons, Rhino 600,000 Gallons, and OptimH2O systems, specifically compatible with WH-1000, EQ-1000, EQ-600, and EQ-OPTM models.
Key Features:
- Salt-Free Scale Prevention: Minimizes scale buildup in pipes and plumbing without salt or chemicals.
- SCM Technology: Uses water flow to prevent hard water minerals from binding and forming scale.
- Appliance Protection: Shields water heaters, washing machines, dishwashers, and other appliances from hard water damage.
- Easy Replacement: Engineered for quick and simple tank changes.
- Long-Lasting: Provides high-performance whole home water descaling for up to 10 years or 1,000,000 gallons.
- Moderate Hardness Solution: Best suited for water with hardness below 15 grains per gallon, alkalinity under 250 mg/L, and pH below 8.3.
Figure 1: Aquasana Rhino Salt-Free Water Conditioner Replacement Tank.
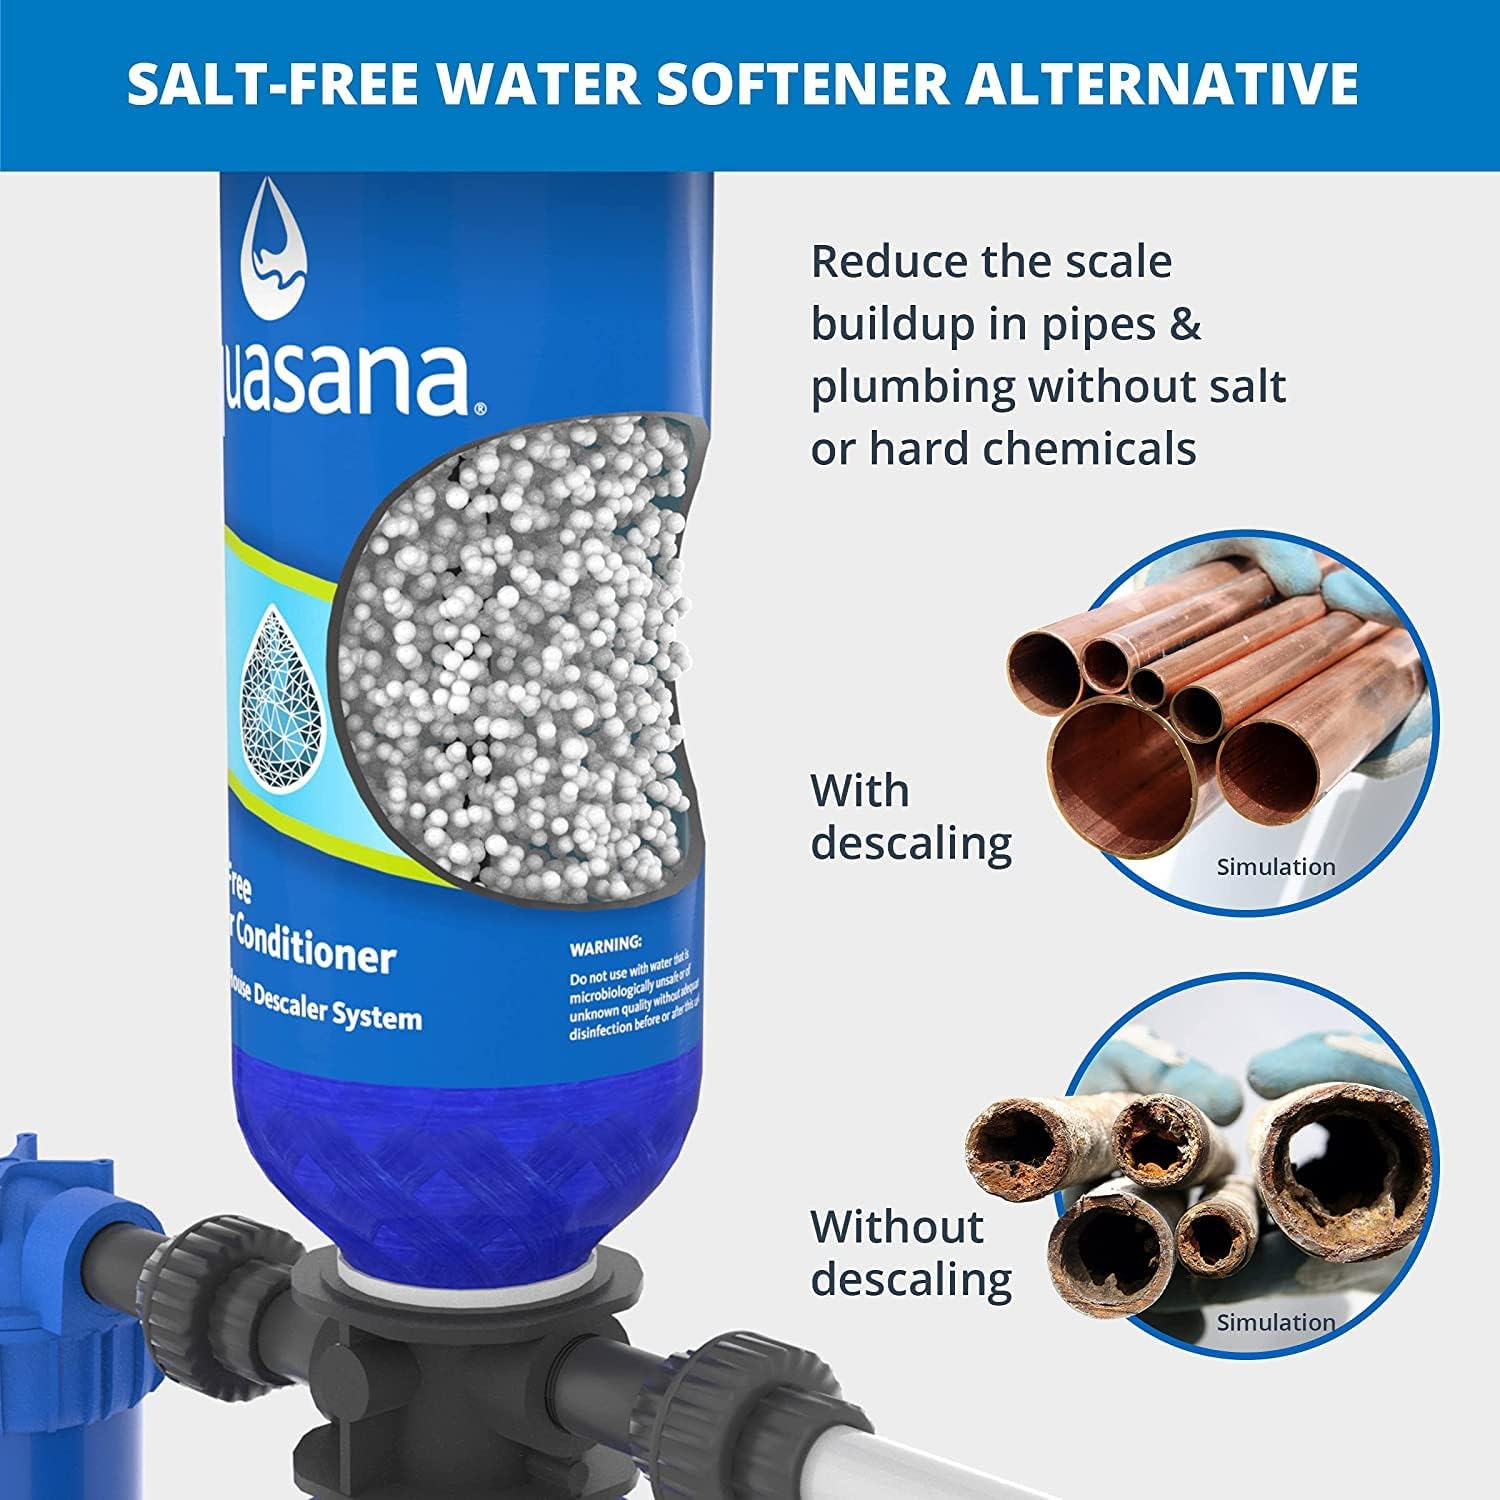
Figure 2: Visual comparison of pipes with and without descaling, illustrating the effectiveness of the salt-free conditioner in reducing scale buildup.
2. Specifications
| Attribute | Value |
|---|---|
| Brand | Aquasana |
| Model Name | WH-SFWC-SR |
| Installation Type | Home water line point of entry |
| Purification Method | Scale Control Media (SCM) technology |
| Power Source | Manual Operation |
| Maximum Flow Rate | 15.3 Gallons Per Minute |
| Upper Temperature Rating | 90 Degrees Fahrenheit |
| Supported Water TDS Level Maximum (PPM) | 256 |
| Item Weight | 23 pounds |
| Product Dimensions | 9 x 9 x 46 inches |
| Color | Blue |
| UPC | 816749017786 |

Figure 3: Dimensions of the Aquasana Rhino Salt-Free Water Conditioner Replacement Tank, showing a height of 46 inches and a width of 9 inches.
3. Installation Instructions
This section provides general guidance for installing the Aquasana Rhino Salt-Free Water Conditioner Replacement Tank. For detailed, model-specific instructions, always refer to the complete Owner's Manual provided with your system. Professional installation is recommended.
3.1. Safety Precautions
- DO NOT use pipe dope.
- Install your system indoors and out of direct sunlight.
- All fittings should be properly tightened.
- This system must be installed vertically.
- If installing on metallic plumbing, two grounding clamps and #4 copper wire are essential for safety.
- Some local codes may require the use of a licensed plumber or certified installer when disrupting a potable water line.
- In areas with high pressure, a pressure relief valve and a water hammer arrestor may be necessary.
- It is imperative that this system is flushed properly prior to installation.
3.2. Installation Overview Video
The following video demonstrates the installation process for the Aquasana Rhino Whole House Water Filter System, which includes the Salt-Free Water Conditioner. Please note that the exact order and components may vary by model. Refer to your Owner's Manual for specific details.
Video 1: Aquasana Rhino Whole House Water Filter System Installation Guide. This video provides a visual walkthrough of the installation process for a complete system, including the salt-free water conditioner.
3.3. Step-by-Step Installation Highlights
- Select Location: Install the unit where the main water line enters your home, before connecting to the water heater. Ensure adequate space for the tank and any additional components.
- Turn Off Water Main: Locate and turn off the main water supply to your home prior to beginning any plumbing work.
- Drain Water Lines: Relieve pressure in your water lines by opening a faucet inside your home until water stops flowing.
- Prepare Tank Connections: Wrap pipe nipples with NSF certified plumber's tape. Connect the nipples to the system's inlet and outlet ports. Tighten with a wrench, but do not overtighten.
- Connect Additional Tanks (if applicable): If installing an additional Rhino tank, Salt-Free Water Conditioner, or any other filter add-on, connect fittings with the primary Rhino tank. Tighten with a wrench.
- Install Shut-Off Valve and Ensure Spacing: Measure the distance for the Pre-Filter, Rhino tank, and optional add-ons. Mark the pipe accordingly. If installing optional add-ons, consult their separate owner's manuals.
- Cut Pipes: Cut pipes at the marked locations. Clean the ends, ensuring no burrs, sharp edges, or deep scratches. Cut tubing as straight as possible.
- Configure System: Fit the Rhino tank and optional add-ons into the system fittings. Ensure all parts are flowing through the IN port in the correct direction of water flow.
- Install Pre-Filter Support: Screw the Pre-Filter support bracket onto the wall or a support brace.
- Plumb in UV Filter (if applicable): Use mounting brackets to secure the UV Reactor to wood or drywall, installing it after the system filters. Mount the Controller to the wall above the UV Reactor. Use PVC pipe, elbows, and reducers to connect from the Post-Filter to the UV inlet.
- Insert UV Components (if applicable):
- Carefully remove the Quartz Sleeve from packaging. DO NOT touch the Quartz Sleeve with your hands; use gloves.
- Slide the sleeve into the UV Reactor and gently push it in to lock it into the centering springs.
- Slide the O-Ring onto the Quartz Sleeve.
- Hand tighten the Gland Nut over the Quartz Sleeve onto the threaded end of the UV Reactor. DO NOT use tools to tighten.
- Insert the Compression Spring into the Quartz Sleeve.
- Insert the UV Lamp into the UV Reactor.
- Plug the connector into the UV Lamp. Insert it into the Gland Nut and lock with a ¼ turn.
- Tighten the captive ground screw to the ground lug on the UV Reactor.
- Turn On Water Main: After plumbing is complete and glue has cured, turn on the water main.
- Flush System: Attach a garden hose to the drain valve. Turn on the drain valve and allow water to flush for 15-30 minutes. Use this time to inspect for leaks. Surge flush for 5-10 minutes. Turn off the drain valve.

Figure 4: An example of a complete Aquasana Rhino Whole House Water Filter System installation, including pre-filter, main tanks, and post-filter.
4. Operating Instructions
Once installed and flushed, your Aquasana Rhino Salt-Free Water Conditioner operates automatically. Water flows through the system, and the SCM technology prevents scale buildup. No manual intervention is typically required for daily operation.
- Ensure all valves are in the open position for normal operation after flushing.
- Monitor for any unusual changes in water pressure or flow, which could indicate a need for maintenance.
5. Maintenance
Regular maintenance ensures optimal performance and longevity of your Aquasana Rhino Salt-Free Water Conditioner. The primary maintenance task for this product is the replacement of the conditioner tank.
5.1. Replacement Schedule
- The Aquasana Rhino Salt-Free Water Conditioner Replacement Tank is designed for long-lasting performance, typically up to 10 years or 1,000,000 gallons, whichever comes first.
- Refer to your system's specific model and water usage for precise replacement intervals.
5.2. Tank Replacement Procedure
Replacing the conditioner tank is designed to be a quick and simple process. Always refer to your specific system's Owner's Manual for detailed instructions.
- Turn off the main water supply to your home.
- Relieve water pressure by opening a nearby faucet.
- Close any bypass valves on your system, if present.
- Disconnect the old conditioner tank from the system.
- Install the new replacement tank, ensuring all connections are secure and properly sealed with plumber's tape.
- Slowly turn on the main water supply.
- Flush the system as described in the "Installation Instructions" section to remove any air or loose media.
- Check for leaks around all connections.
6. Troubleshooting
If you encounter issues with your Aquasana Rhino Salt-Free Water Conditioner, consult the following common troubleshooting tips. For persistent problems, refer to your Owner's Manual or contact Aquasana customer support.
| Problem | Possible Cause | Solution |
|---|---|---|
| Reduced Water Flow/Pressure | Clogged pre-filter (if applicable); air in the system; partially closed valves. | Check and replace pre-filter if necessary. Flush the system to remove air. Ensure all valves are fully open. |
| Visible Leaks | Loose connections; improperly applied plumber's tape; damaged O-rings. | Tighten connections. Reapply plumber's tape if needed. Inspect and replace O-rings if damaged. |
| No Improvement in Scale Issues | Incorrect installation; water hardness exceeding system capacity; system not properly flushed. | Verify installation steps. Check water hardness levels against product specifications. Ensure the system was thoroughly flushed after installation. |
7. Warranty and Support
Aquasana offers a 90-day satisfaction guarantee and comprehensive warranties on its products. For specific warranty details, product registration, or technical support, please refer to the official Aquasana website or contact their customer service directly.
- Manufacturer: Aquasana Inc.
- EU Spare Part Availability Duration: 10 Years
- Visit the Aquasana Store on Amazon
Related Documents - WH-SFWC-SR
 |
Aquasana Whole House Salt-Free Water Conditioner Owner's Manual Owner's manual for the Aquasana WH-SFWC-S and WH-SFWC-T Whole House Salt-Free Water Conditioner system, providing detailed instructions for installation, maintenance, troubleshooting, filter replacements, and warranty information. |
 |
Aquasana Rhino Whole House Water Filter WH-1000 Owner's Manual Comprehensive owner's manual for the Aquasana Rhino WH-1000 Whole House Water Filter system. Includes installation instructions, system configuration, troubleshooting guide, maintenance, filter replacement procedures, specifications, and warranty information. |
 |
Aquasana Rhino WH-1000 Whole House Water Filter Owner's Manual and Installation Guide Comprehensive guide for installing, maintaining, and troubleshooting the Aquasana Rhino WH-1000 whole house water filter system. Learn about system components, filter replacement, specifications, warranty information, and the Water for Life program. |
 |
Aquasana Rhino Chloramines Whole House Water Filter WH-1011 Owner's Manual and Installation Guide Comprehensive owner's manual and installation guide for the Aquasana Rhino Chloramines Whole House Water Filter system (Model WH-1011). Learn about system components, installation steps, troubleshooting, maintenance, filter replacements, performance specifications, and warranty information. |
 |
Aquasana Rhino Water Filter Limited Warranty - WH-1011 Official limited warranty document for the Aquasana Rhino Whole House Water Filter system, model WH-1011. Details coverage, exclusions, warranty period, and service procedures for consumers in the United States. |
 |
Aquasana Rhino WH-1011 Chloramines Whole House Water Filter: Owner's Manual & Installation Guide Comprehensive guide for the Aquasana Rhino WH-1011 whole house water filter system, covering installation, maintenance, troubleshooting, and warranty for effective chloramine and chlorine reduction. |