1. Important Safety Information
Please read all instructions carefully before using the appliance. Keep this manual for future reference. Improper use can cause injury or damage.
- Electrical Safety: Ensure the appliance is connected to a properly grounded outlet. Do not immerse the appliance, cord, or plug in water or other liquids.
- Hot Surfaces: The fryer and its components become very hot during operation. Always use oven mitts or heat-resistant gloves when handling hot parts. Allow the appliance to cool completely before cleaning or storage.
- Oil Handling: Use caution when filling or draining hot oil. Never overfill the oil container. Hot oil can cause severe burns.
- Children and Pets: Keep children and pets away from the appliance during operation and while it is cooling.
- Ventilation: Ensure adequate ventilation around the appliance during use.
- Maintenance: Do not attempt to repair the appliance yourself. Contact qualified service personnel for any repairs.
2. Product Overview
The ELBA E30-610X is a 30cm built-in electric fryer designed for home use, featuring a durable stainless steel construction and precise temperature control.

Figure 2.1: Top view of the ELBA E30-610X Built-in Electric Fryer with its stainless steel lid closed, showing the integrated design and front controls.
Key Features:
- Stainless steel construction for durability and easy cleaning.
- Front-mounted controls for convenient operation.
- Precise temperature control capability.
- Removable oil container for easy filling and draining.
- Removable frying basket.
- Tilting electric heating element for simplified cleaning.
- Removable safety cover.
- Indicator light for operational status.
- Integrated safety thermostat.
Components:
- Control Knobs: Located at the front for temperature adjustment and power.
- Indicator Light: Illuminates when the heating element is active.
- Stainless Steel Lid: Covers the frying area when not in use or for safety.
- Oil Container: Holds the cooking oil.
- Frying Basket: Used to hold food during frying.
- Heating Element: Submerged in oil to heat it. Designed to tilt for cleaning.
- Safety Thermostat: Prevents overheating.
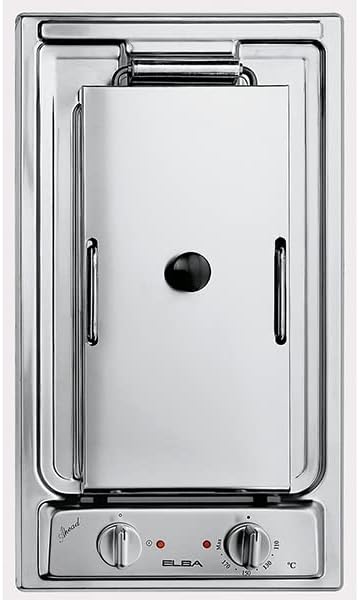
Figure 2.2: Close-up view of the front control panel, showing the ELBA branding and the two control knobs for temperature and power.
3. Setup and Installation
This appliance is designed for built-in installation. Installation should only be performed by a qualified technician in accordance with local regulations and the provided installation template (if applicable).
Initial Setup:
- Unpacking: Carefully remove all packaging materials. Inspect the appliance for any signs of damage.
- Cleaning: Before first use, clean all removable parts (oil container, basket, lid) with warm soapy water. Wipe the exterior of the appliance with a damp cloth. Ensure all parts are completely dry before assembly and use.
- Placement: Ensure the appliance is correctly seated in its built-in cavity and secured according to installation instructions.
- Electrical Connection: Verify that the electrical supply matches the voltage and frequency specified on the appliance's rating label. Connect the appliance to a grounded power outlet.
4. Operating Instructions
Follow these steps for safe and effective operation of your electric fryer.
- Prepare the Fryer: Ensure the oil container is clean and properly seated.
- Add Oil: Fill the oil container with suitable cooking oil to a level between the MIN and MAX marks. Do not overfill.
- Insert Basket: Place the empty frying basket into the oil container.
- Set Temperature: Turn the temperature control knob to the desired frying temperature. The indicator light will illuminate, indicating that the heating element is active.
- Preheat Oil: Allow the oil to preheat until the indicator light turns off, signifying that the set temperature has been reached. The light may cycle on and off during frying to maintain temperature.
- Add Food: Carefully lower the food into the hot oil using the frying basket. Do not overload the basket, as this can lower the oil temperature and result in soggy food.
- Frying: Fry food until it is golden brown and cooked through. Refer to cooking charts for recommended times for various foods.
- Remove Food: Lift the basket out of the oil and allow excess oil to drain. Place fried food on paper towels to absorb any remaining oil.
- Turn Off: Once frying is complete, turn the temperature control knob to the 'OFF' position.
- Cool Down: Allow the oil and appliance to cool completely before handling or cleaning.
5. Maintenance and Cleaning
Regular cleaning and maintenance will ensure the longevity and optimal performance of your fryer.
- Always Unplug: Before cleaning, always ensure the appliance is unplugged from the power outlet and has cooled down completely.
- Drain Oil: Once the oil has cooled, carefully remove the oil container and drain the used oil. Dispose of used oil responsibly.
- Clean Oil Container and Basket: Wash the removable oil container, frying basket, and lid with warm soapy water. Rinse thoroughly and dry completely. These parts may be dishwasher safe; refer to specific product markings.
- Clean Heating Element: The heating element can be tilted upwards for easier access. Carefully wipe it with a damp cloth. Do not use abrasive cleaners or scourers. Ensure it is dry before lowering it back into position.
- Clean Exterior: Wipe the stainless steel exterior with a soft, damp cloth and a mild detergent. Dry thoroughly to prevent water spots. Do not use abrasive cleaners or metal polishers that could scratch the surface.
- Removable Safety Cover: Clean the removable safety cover as you would the lid, with warm soapy water, rinsing, and drying thoroughly.
- Storage: Store the appliance with the lid closed in a clean, dry place.
6. Troubleshooting
If you encounter any issues with your fryer, refer to the following table for common problems and solutions.
| Problem | Possible Cause | Solution |
|---|---|---|
| Fryer does not turn on. | No power supply; Safety thermostat tripped. | Check if the appliance is properly plugged in. Check the circuit breaker. Allow the appliance to cool down completely; the safety thermostat may reset automatically. If not, contact service. |
| Oil not heating up. | Temperature knob not set; Heating element fault. | Ensure the temperature knob is set to a desired temperature. If the indicator light does not come on, contact service. |
| Indicator light not working. | Light bulb failure; Heating element not active. | If the fryer is heating but the light is off, the bulb may need replacement (contact service). If the fryer is not heating, refer to "Oil not heating up" solution. |
| Food is soggy/not crispy. | Oil temperature too low; Overloading the basket. | Ensure oil is preheated to the correct temperature. Fry smaller batches of food. |
If the problem persists after trying these solutions, please contact ELBA customer support or a qualified service technician.
7. Specifications
Detailed technical specifications for the ELBA E30-610X electric fryer.
| Feature | Detail |
|---|---|
| Brand | ELBA |
| Model Number | E30-610X |
| Material | Stainless Steel |
| Fuel Type | Electric |
| Product Dimensions (W x D) | 28.8 cm x 51.0 cm (288 mm x 510 mm) |
| Item Weight | Approximately 1 kg (2.2 pounds) |
| Manufacturer Warranty | 5 years |
| Country of Origin | Italy |
8. Warranty and Support
Your ELBA E30-610X electric fryer comes with a comprehensive warranty and dedicated customer support.
Warranty Information:
This product is covered by a 5-year manufacturer's warranty from the date of purchase. This warranty covers defects in materials and workmanship under normal household use. It does not cover damage resulting from misuse, accident, alteration, neglect, or unauthorized repair.
Customer Support:
For technical assistance, warranty claims, or to purchase spare parts, please contact your local ELBA service center or the retailer where the product was purchased. Please have your model number (E30-610X) and proof of purchase ready when contacting support.


