1. Introduction
This manual provides detailed instructions for the installation, operation, and maintenance of your Weiser SmartCode 10 Keyless Entry Door Lock and Weiser Fairfax Door Knob. These products are designed to enhance security and convenience for both residential and commercial applications. Please read this manual thoroughly before installation and use to ensure proper function and longevity of your locks.
2. Product Components
The Weiser SmartCode 10 Keyless Entry Door Lock and the Weiser Fairfax Door Knob are distinct components that work together to secure your door. The SmartCode 10 provides keyless access via a keypad and a traditional key override, while the Fairfax Door Knob offers standard keyed entry.

Image 2.1: Overview of the Weiser SmartCode 10 Keyless Entry Door Lock (left) and the Weiser Fairfax Door Knob (right).
2.1 Weiser SmartCode 10 Keyless Entry Door Lock
- Keypad for code entry
- Exterior lever handle
- Key cylinder for manual override
- Interior lever handle
- Interior turn piece (for locking/unlocking)
- Battery compartment (9V battery)
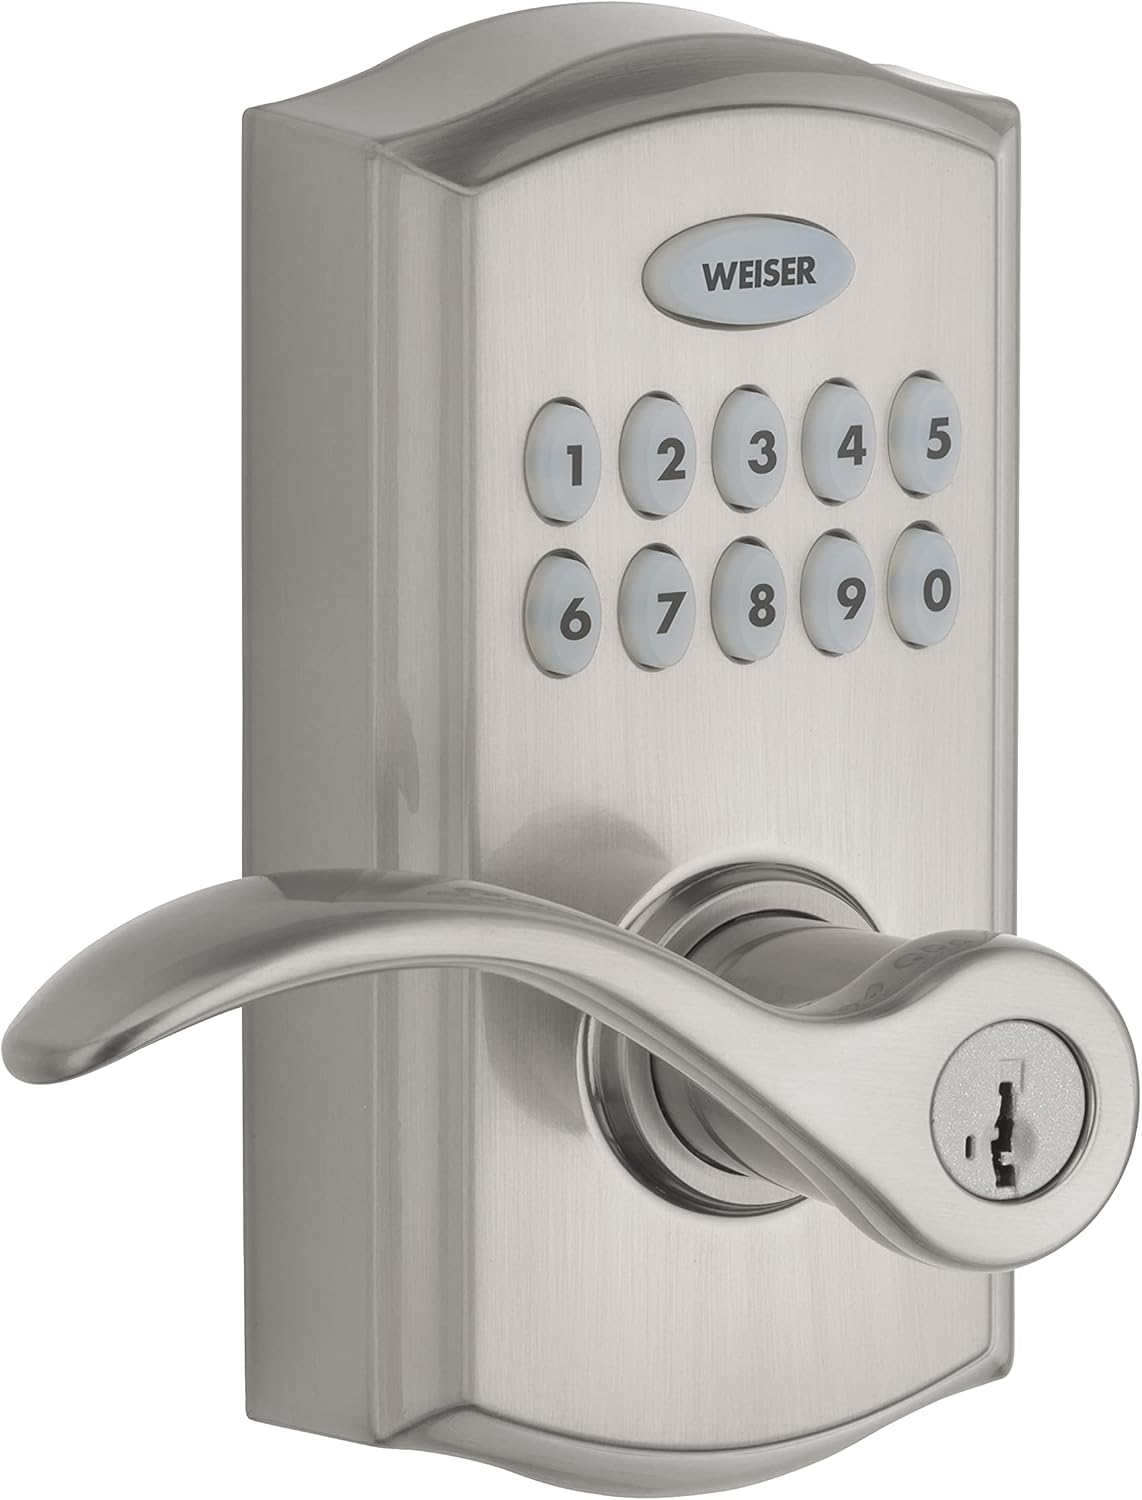
Image 2.2: Detailed view of the SmartCode 10 exterior unit, showing the keypad and key cylinder.
2.2 Weiser Fairfax Door Knob
- Exterior door knob with key cylinder
- Interior door knob with turn piece
- Adjustable latch mechanism

Image 2.3: Detailed view of the Fairfax Door Knob exterior unit, featuring the key cylinder.
3. Setup and Installation
Installation of both the SmartCode 10 and Fairfax Door Knob is designed to be straightforward for standard door preparations. Ensure your door meets the following specifications:
- Door Thickness: 1-3/8" to 1-3/4"
- Backset: Adjustable for 2-3/8" or 2-3/4"
- Cross Bore: 2-1/8"
3.1 SmartCode 10 Installation
The SmartCode 10 is reversible and can be installed on both left-hand and right-hand doors. Follow the detailed instructions provided in the separate installation guide included with your product for specific steps. Key steps include:
- Prepare the door and frame.
- Install the latch and strike plate.
- Install the exterior keypad assembly.
- Install the interior assembly and secure it.
- Install the 9V battery.
- Perform the door handing process (automatic or manual, refer to specific guide).

Image 3.1: SmartCode 10 Keyless Entry Door Lock installed on a door, showing the exterior keypad and lever.
3.2 Fairfax Door Knob Installation
The Fairfax Door Knob also fits standard door preparations and is easy to install. Refer to its dedicated installation guide for precise instructions. Key steps typically involve:
- Install the latch into the door edge.
- Install the exterior and interior knobs, ensuring the spindle engages correctly.
- Secure the knobs with screws.
- Install the strike plate on the door frame.

Image 3.2: SmartCode 10 Keyless Entry Door Lock installed on a door, showing the interior lever and turn piece. The Fairfax knob would be installed similarly.
3.3 SmartKey Re-key Technology
Both the SmartCode 10 and Fairfax Door Knob feature SmartKey re-key technology. This allows you to re-key your lock yourself in seconds, maintaining security and convenience. Instructions for re-keying are provided with the SmartKey tool and should be followed carefully.
4. Operating Instructions
4.1 Weiser SmartCode 10 Keyless Entry Door Lock
- Unlocking with a User Code: Enter your 4-8 digit user code on the keypad, then press the Weiser button. The lock will unlock.
- Locking the Door: Press the Weiser button on the keypad. The door will lock automatically.
- Auto-Lock Function: The lock can be programmed to automatically re-lock after a set period (e.g., 30 seconds) after being unlocked. This feature enhances security.
- Passage Mode: This mode allows the door to remain unlocked for continuous access. To activate/deactivate, refer to the programming instructions in your detailed guide.
- Emergency Egress: The interior lever handle is always free for exit, regardless of the lock's status. This is a safety feature allowing quick escape in emergencies.
- Key Override: In case of battery depletion or if preferred, the lock can be operated using the physical key provided. Insert the key and turn to unlock or lock.
- Programming User Codes: Up to 30 user codes can be programmed. Refer to the programming section of your SmartCode 10 manual for steps on adding, deleting, or changing user codes. Programming can be done from the outside.
4.2 Weiser Fairfax Door Knob
- Unlocking with a Key: Insert the key into the exterior knob's cylinder and turn to unlock.
- Locking from Outside: Turn the key in the exterior knob's cylinder to the locked position, then remove the key.
- Locking/Unlocking from Inside: Use the turn piece on the interior knob to lock or unlock the door.
5. Maintenance
- Battery Replacement (SmartCode 10): The SmartCode 10 operates on a 9V battery. Replace the battery when the low battery indicator activates (refer to your specific manual for indicator details). To replace, access the battery compartment on the interior assembly.
- Cleaning: Clean the lock surfaces with a soft, damp cloth. Avoid abrasive cleaners or solvents, as these can damage the finish.
- Exterior Unit Design: The exterior unit of the SmartCode 10 is sealed and includes a drip hole at the bottom to allow moisture to escape. Do not obstruct this hole.
- Lubrication: Periodically lubricate the key cylinder with a graphite-based lubricant if key operation becomes stiff. Do not use oil-based lubricants.
6. Troubleshooting
If you encounter issues with your Weiser locks, refer to the following common troubleshooting tips:
- Lock Not Responding (SmartCode 10): Check the 9V battery. If the battery is low or depleted, replace it.
- Exterior Handle Moves But Does Not Unlock (SmartCode 10): This is normal behavior when the lock is engaged. The handle is designed to move freely without engaging the bolt when locked. Ensure a valid user code is entered or the key is used to unlock.
- Auto-Lock Delay Adjustment: The SmartCode 10 auto-lock delay can be set up to a maximum of 99 seconds. If you are unable to achieve this setting, ensure you are following the programming instructions precisely. The auto-lock feature cannot be completely disabled.
- Key Cannot Be Removed (SmartCode 10/Fairfax Knob): For keyed entry, the key must be returned to the fully locked or unlocked position before it can be removed from the cylinder.
- Interior Handle Not Engaging Bolt: The interior handle of the SmartCode 10 is designed to always engage the bolt for emergency egress, regardless of the lock's status. This is a safety feature.
- Loose Handle/Lever: Ensure all mounting screws are securely fastened. If a set screw is loose, tighten it carefully. If a specialized set screw is required, contact Weiser customer support for assistance.
- Difficulty Re-keying: Ensure you are using the correct SmartKey tool and following the re-keying instructions precisely.
7. Specifications
| Feature | Specification |
|---|---|
| Brand | Weiser |
| Model (SmartCode 10) | SmartCode 10 |
| Colour | Satin Nickel |
| Style | Commercial |
| Finish | Brushed |
| Material | Metal |
| Pattern | Handle + Door Knob |
| Lock Type | Keypad (SmartCode 10), Keyed (Fairfax) |
| Special Features | Auto-Lock, Fob Unlock (SmartCode 10) |
| User Codes (SmartCode 10) | Up to 30 |
| Power Source (SmartCode 10) | 9V Battery |
| Door Thickness Compatibility | 1-3/8" - 1-3/4" |
| Backset Compatibility | 2-3/8" - 2-3/4" |
8. Warranty and Support
8.1 Warranty Information
The Weiser SmartCode 10 Keyless Entry Door Lock comes with a 1-year limited warranty. Please retain your proof of purchase for warranty claims. The Fairfax Door Knob's warranty information should be referenced in its individual packaging or on the Weiser website.
8.2 Customer Support
For further assistance, technical support, or to inquire about replacement parts, please contact Weiser customer service. Refer to the contact information provided in your product packaging or visit the official Weiser website for the most up-to-date support details.


