
1. Introduction
The Keychron Q5 Pro is a highly customizable 96% layout wireless mechanical keyboard designed for a premium typing experience. It features QMK/VIA support for key remapping, a full aluminum body, double-gasket design, hot-swappable switches, and KSA Double-Shot PBT keycaps. This manual provides detailed instructions for setting up, operating, and maintaining your Keychron Q5 Pro keyboard.

2. Package Contents
Verify that all items are present in your Keychron Q5 Pro package:
- 1x Fully Assembled Keyboard (including Aluminum Case, PCB, PC Plate, Sound Absorbing Foam, Case Foam, Battery, Silicone Gaskets, Bottom Case)
- 1x Type-C to Type-C Cable
- 1x Type-A to Type-C Adapter
- 1x Switch Puller
- 1x Keycap Puller
- 1x Screwdriver
- 1x Hex Key
- 14x Gaskets (10 Installed and 4 in the Box)
- 7 sets x Stabilizers
- 1 set x Keycaps (Double-Shot KSA PBT)
- 1 set x Switches

3. Setup
3.1 Initial Charging
Before first use, connect the keyboard to a power source using the provided USB Type-C cable to fully charge the internal 4000mAh battery. The charging indicator will show the charging status.

3.2 Connecting Wirelessly (Bluetooth)
- Locate the mode switch on the back of the keyboard. Slide it to the 'BT' position for Bluetooth mode.
- On your device (computer, tablet, smartphone), enable Bluetooth and search for available devices.
- Select 'Keychron Q5 Pro' from the list of devices to pair.
- The keyboard can connect to up to 3 devices. Use Fn + 1, Fn + 2, or Fn + 3 to switch between paired devices.
3.3 Connecting Wired (USB)
- Locate the mode switch on the back of the keyboard. Slide it to the 'Cable' position for wired mode.
- Connect the provided USB Type-C cable from the keyboard to your computer's USB port.
- The keyboard will be recognized automatically by your operating system.
3.4 Operating System Compatibility Switch
The Keychron Q5 Pro includes a switch to toggle between Windows and macOS layouts. Ensure this switch is set to your operating system for correct key functionality.

4. Operating Instructions
4.1 QMK/VIA Key Remapping
The Keychron Q5 Pro supports QMK/VIA, an open-source software that allows you to remap keys and program macros. This includes customizing the rotary knob functions.
- Download the VIA software from the official Keychron website.
- Connect the keyboard in wired mode to your computer. Key remapping can only be performed in wired mode.
- Launch the VIA software and follow the on-screen instructions to customize key assignments and macros.
- Once programmed, the custom keymap will function in both wired and wireless modes.
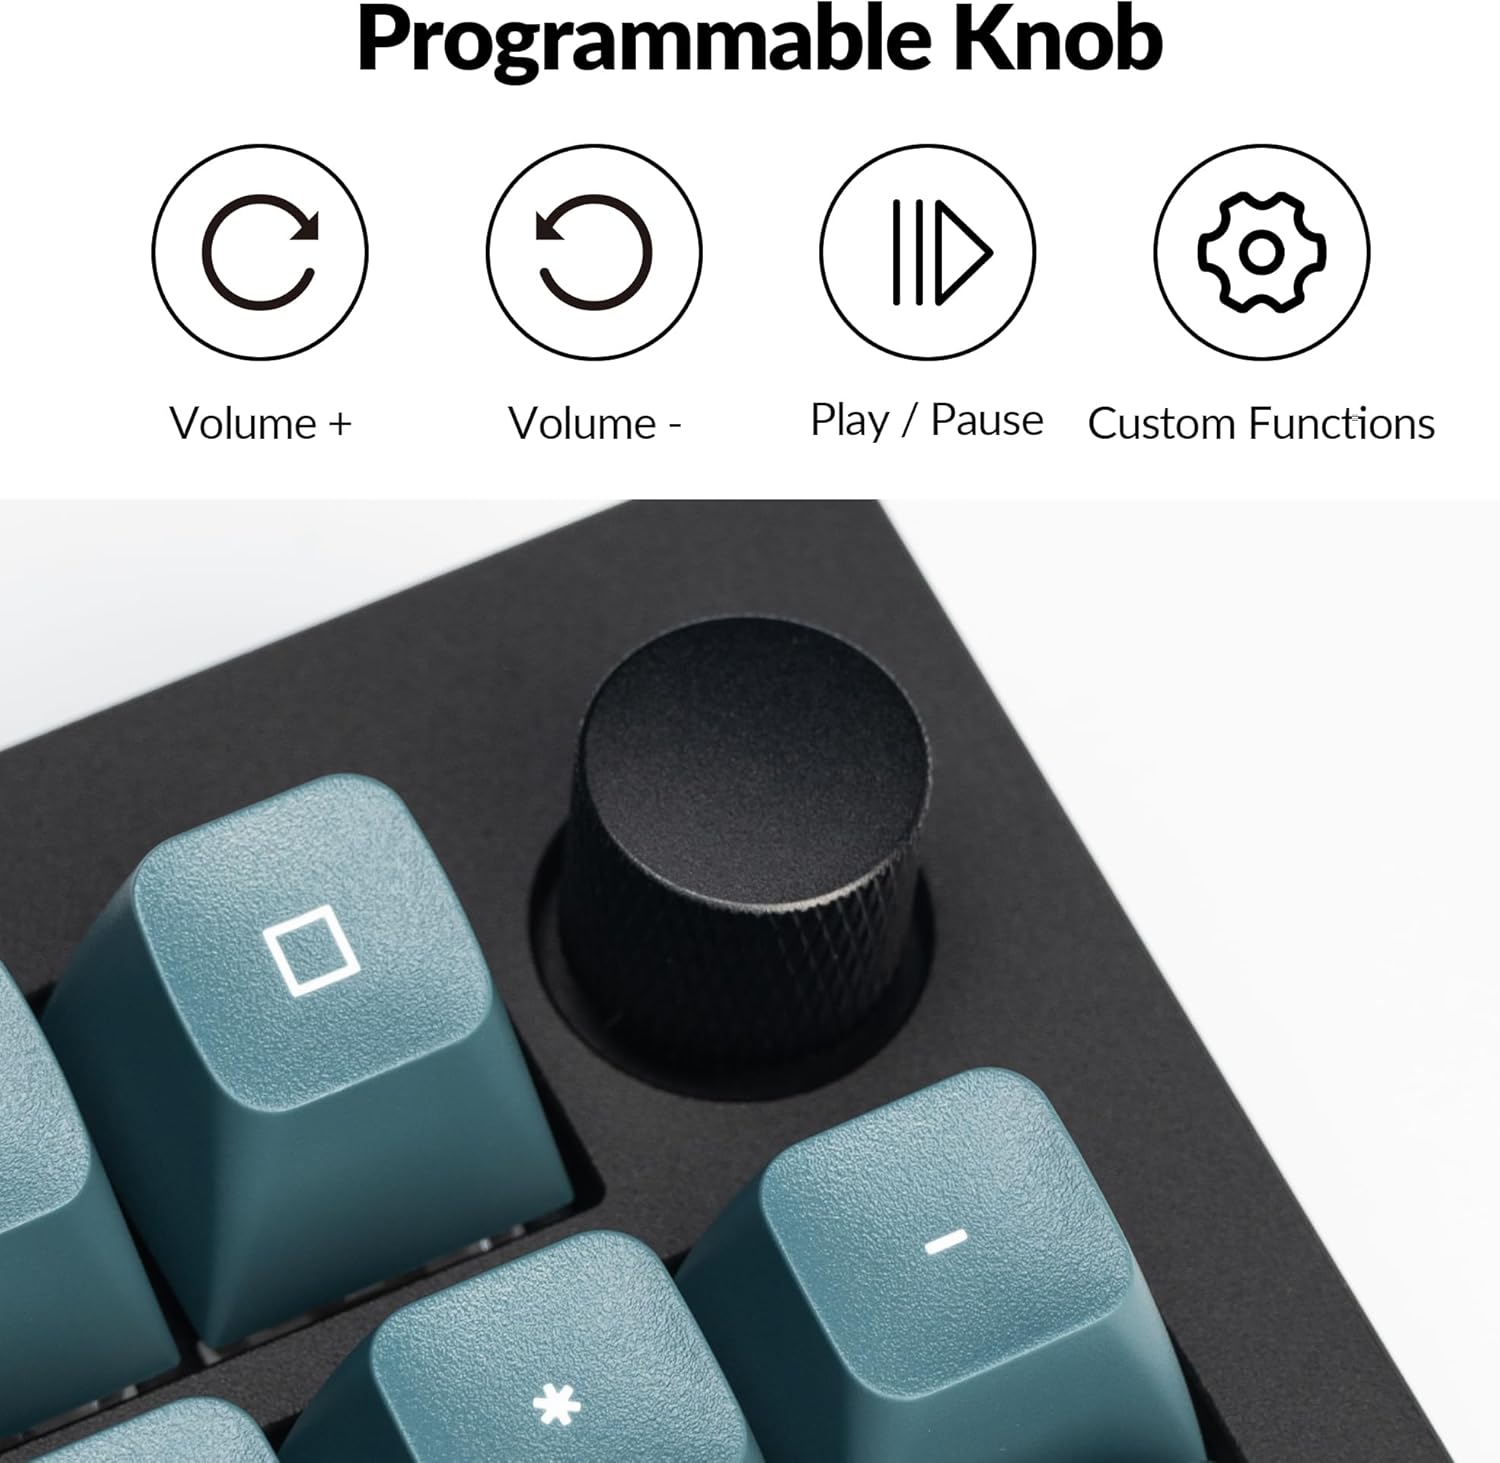
4.2 Programmable Rotary Knob
The rotary knob on the Keychron Q5 Pro offers versatile control. By default, it controls volume (rotate) and play/pause (press). Its functions can be customized using the VIA software.
- Rotate Clockwise: Increase Volume
- Rotate Counter-clockwise: Decrease Volume
- Press: Play/Pause Media
- Custom functions can be assigned via VIA software.

4.3 Hot-Swappable Switches
The Q5 Pro features hot-swappable sockets, allowing you to change mechanical switches without soldering. This supports most 3-pin and 5-pin MX-style mechanical switches.
- Power off the keyboard or disconnect it from your computer.
- Use the provided keycap puller to carefully remove the desired keycap.
- Use the provided switch puller to gently grip and pull the switch vertically out of its socket.
- Align the pins of the new switch with the holes on the PCB. Ensure the pins are straight.
- Press the new switch firmly into the socket until it clicks into place.
- Replace the keycap.


4.4 Keycaps and Backlighting
The Q5 Pro comes with KSA profile double-shot PBT keycaps, known for their durability and oil resistance. The keyboard features south-facing RGB backlighting, which is optimized for non-shine-through keycaps.

5. Maintenance
5.1 Cleaning
- General Cleaning: Use a soft, dry cloth to wipe the keyboard surface. For stubborn dirt, slightly dampen the cloth with water or a mild cleaning solution.
- Keycap Cleaning: Keycaps can be removed using the provided keycap puller and cleaned with mild soap and water. Ensure they are completely dry before reattaching.
- Dust Removal: Use compressed air to remove dust and debris from between the keycaps and switches.
5.2 Stabilizers
The Q5 Pro utilizes screw-in stabilizers for enhanced key stability. If a large key (e.g., Spacebar, Shift, Enter) feels wobbly or rattles, the stabilizers may need lubrication or adjustment. Refer to online resources or Keychron support for detailed stabilizer maintenance guides.

6. Troubleshooting
- Keyboard not responding: Ensure the keyboard is charged. Check the mode switch (BT/Cable) and ensure it's set correctly. If in Bluetooth mode, re-pair the device. If in wired mode, try a different USB port or cable.
- Keys not registering: If a specific key is not working, try hot-swapping the switch with a known working one to determine if the issue is with the switch or the PCB socket. Ensure switches are fully seated.
- Bluetooth connectivity issues: Ensure the keyboard is within range of your device. Remove and re-pair the keyboard in your device's Bluetooth settings. Ensure no other devices are interfering with the connection.
- QMK/VIA software not detecting keyboard: Ensure the keyboard is connected in wired mode. Download the latest VIA software and firmware from the official Keychron website.
- Backlight not working: Check the keyboard's backlight settings. Ensure the brightness is turned up. If specific LEDs are not working, it may indicate a hardware issue.
7. Specifications
| Feature | Detail |
|---|---|
| Model Number | Q5P-M3 |
| Layout | 96% |
| Connectivity | Bluetooth 5.1 (Wireless), USB Type-C (Wired) |
| Polling Rate | 1000 Hz (Wired), 90 Hz (Wireless) |
| Switches | Hot-swappable K Pro Brown Switch (3-pin & 5-pin MX style compatible) |
| Keycaps | KSA Profile Double-Shot PBT |
| Body Material | Full Aluminum |
| Gasket Design | Double-Gasket |
| Battery | 4000mAh Lithium Polymer |
| Operating System Compatibility | macOS, Windows, Linux |
| Backlighting | South-facing RGB |
| Product Dimensions | 16.06 x 5.71 x 1.41 inches |
| Item Weight | 4.76 pounds |
7.1 Keychron K Pro Switch Features

7.2 Exploded View of Components

8. Warranty and Support
For warranty information, technical support, or further assistance, please visit the official Keychron website or contact their customer service. Keep your proof of purchase for warranty claims.
- Official Website: www.keychron.com
- Support Email: Refer to the official website for current support contact information.


