1. Introduction
The Bushnell LPX150 Walkie Talkie Radio is designed for reliable two-way communication, offering robust performance for various outdoor and indoor activities. This manual provides essential information for setting up, operating, and maintaining your LPX150 radios.
2. What's in the Box
Your Bushnell LPX150 package includes the following items:
- 2x LPX150 Walkie Talkie Two Way Radios
- 6x 300mAH NiMH Rechargeable Batteries (each radio can also be used with 3 AAA alkaline batteries [not included])
- 2x Belt Clips
- 1x USB-C Charging Cable
- User Guide

Image: Bushnell LPX150 package contents.
3. Product Overview
The LPX150 radios feature a rugged design and offer ultra-clear long-distance reception. They are equipped with 22 channels to reduce unwanted interference and include an emergency weather radio function.
Key Features:
- 0.5W Power: Provides up to 20 miles (32 kilometers) of range in optimal conditions.
- 22 Channels: Reduces interference for clear communication.
- NOAA Weather Radio: All hazards emergency weather radio for safety.
- Shock Resistant: Durable design for outdoor use.
- Water Resistant: Withstands exposure to moisture.
- USB-C Charging: Convenient and modern charging solution.
- Rechargeable Batteries: Includes NiMH rechargeable batteries.
- Key Lock: Prevents accidental setting changes.
- Power Saver Mode: Extends battery life.
- Speaker/Microphone Jack: For external audio accessories.

Image: Front view of the Bushnell LPX150 Walkie Talkie.
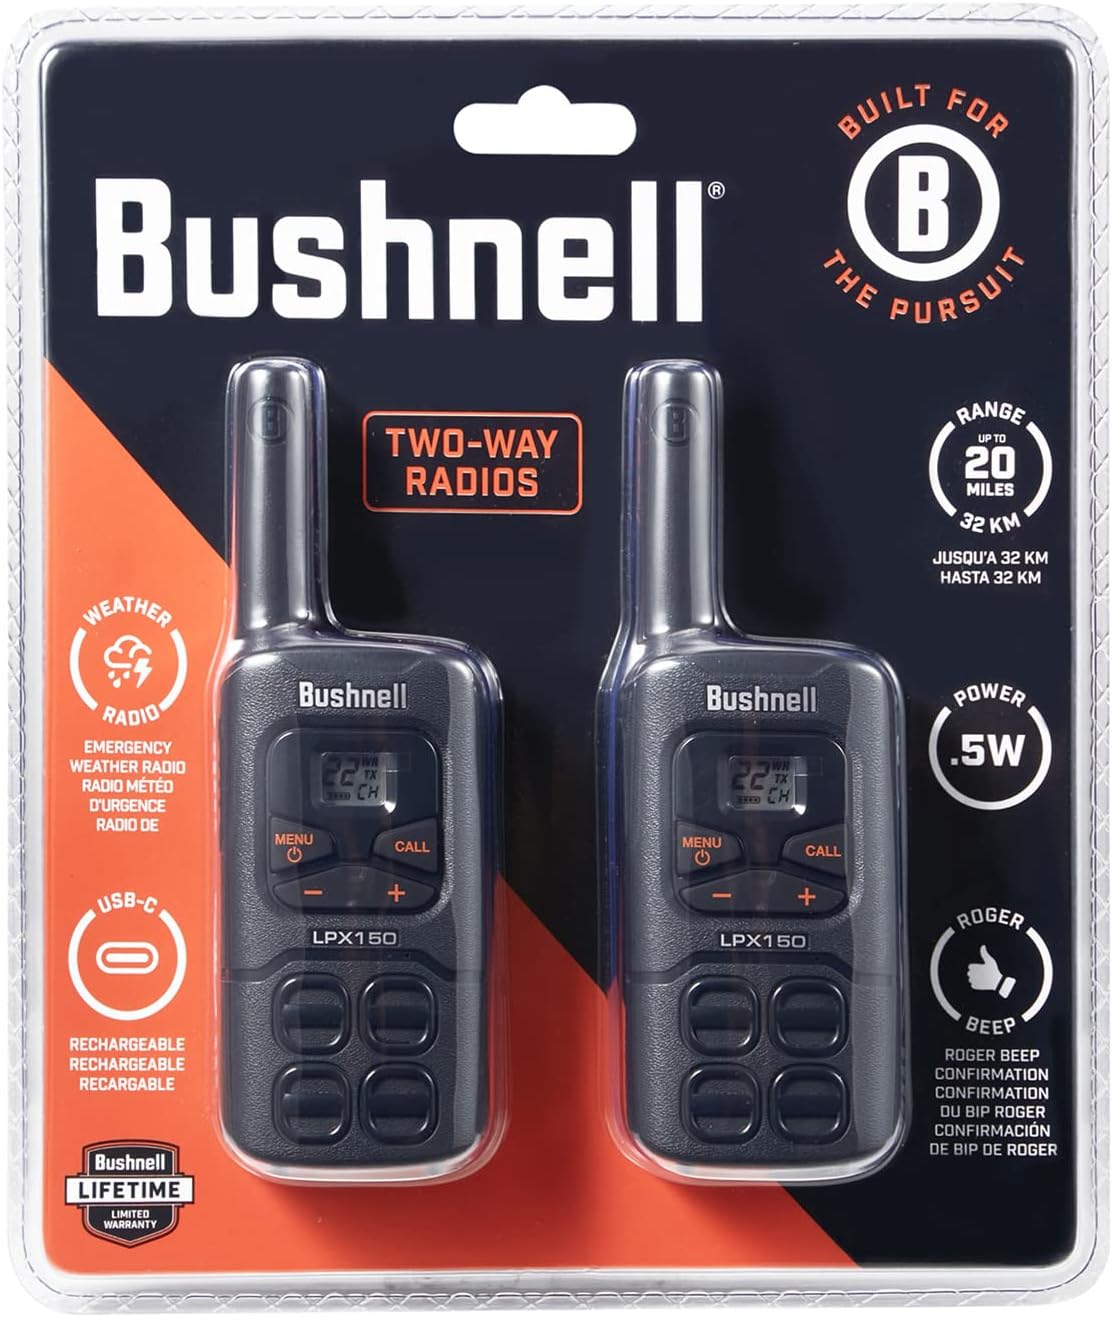
Image: Side view of the Bushnell LPX150 Walkie Talkie with belt clip.
4. Setup
4.1. Battery Installation
- Open the battery compartment cover on the back of the radio.
- Insert the 300mAH NiMH rechargeable batteries, ensuring correct polarity (+/-). Alternatively, you may use 3 AAA alkaline batteries (not included).
- Close the battery compartment cover securely.
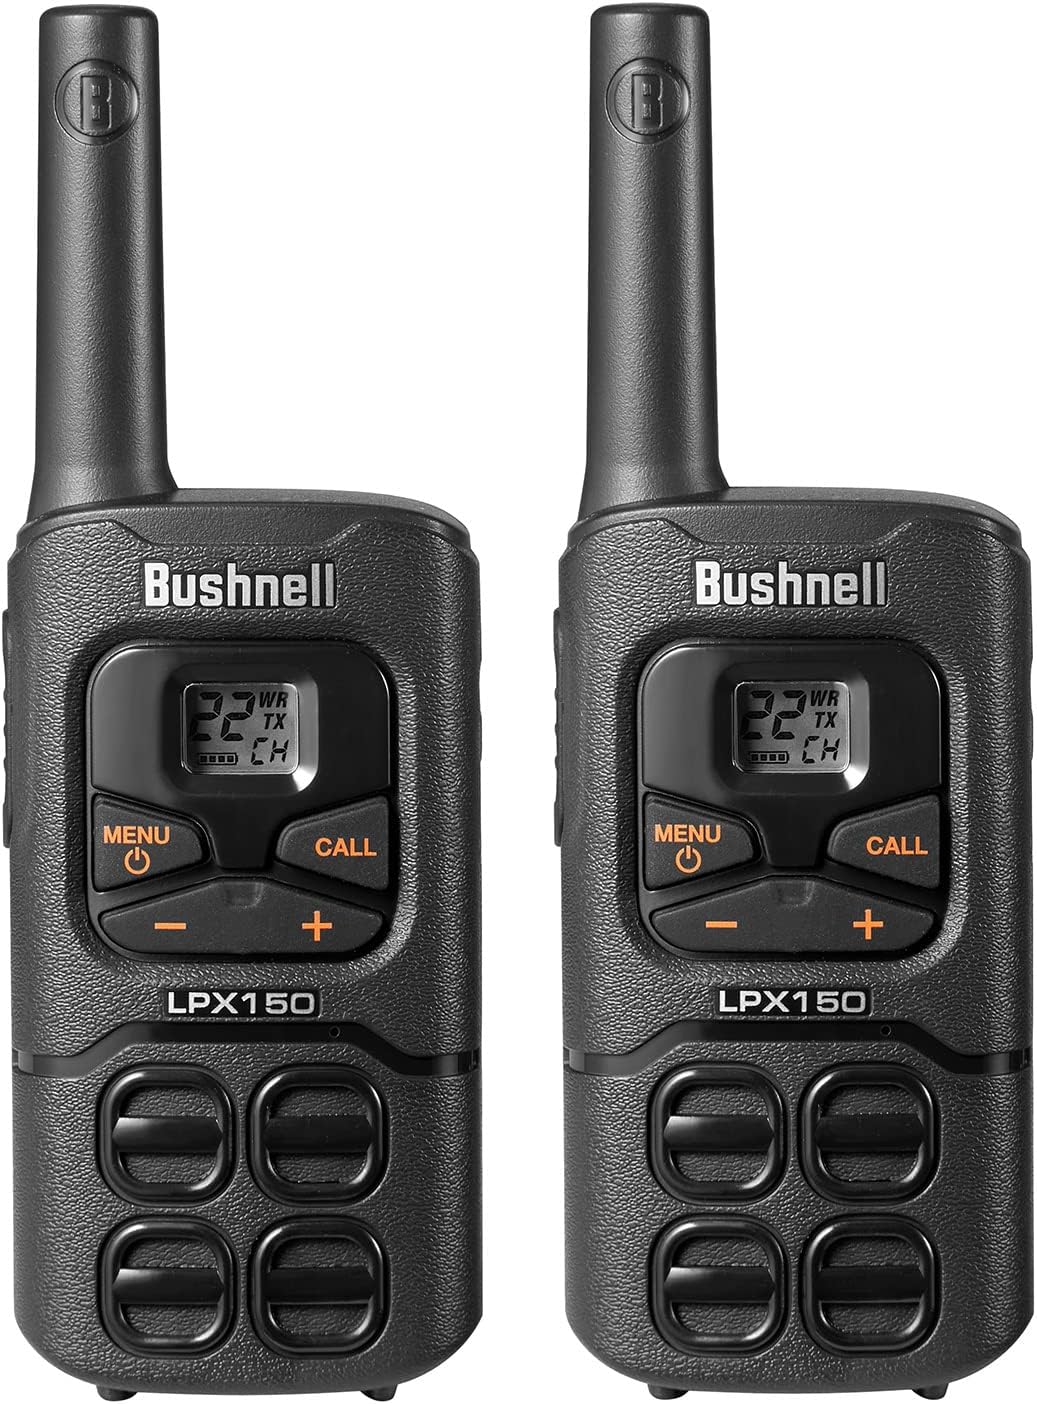
Image: Battery compartment with batteries.
4.2. Charging the Radios
Use the provided USB-C charging cable to charge your radios. The radios can be charged individually or via a charging station (if included with your specific package).
- Connect the USB-C cable to the charging port on the radio.
- Plug the other end of the USB-C cable into a compatible USB power source (e.g., wall adapter, computer USB port).
- The battery indicator on the display will show charging status.

Image: USB-C charging port.
5. Operating Instructions
5.1. Power On/Off
- To turn on: Rotate the power/volume knob clockwise until you hear a click and the display lights up.
- To turn off: Rotate the power/volume knob counter-clockwise until you hear a click and the display turns off.
5.2. Channel Selection
- Press the MENU button to enter the menu. The channel number will flash.
- Use the UP (+) or DOWN (-) buttons to select your desired channel (1-22).
- Press MENU again or wait a few seconds to confirm your selection and exit the menu.
- Ensure all radios intended for communication are set to the same channel.
5.3. Transmitting (Talking)
- To transmit your voice, press and hold the PTT (Push-To-Talk) button located on the side of the radio.
- Speak clearly into the microphone (located below the display).
- Release the PTT button when you are finished speaking to allow the other party to respond.
5.4. Monitoring
- Press the MON button to temporarily disable the squelch and listen for weak signals on the current channel.
- Release the MON button to re-enable squelch.
5.5. Key Lock
- To lock the keypad, press and hold the MENU button until the key lock icon appears on the display.
- To unlock the keypad, press and hold the MENU button again until the key lock icon disappears.
5.6. Flashlight
- Press the LIGHT button (usually indicated by a lightbulb icon) to turn the built-in LED flashlight on or off.
5.7. NOAA Weather Radio
- Press the W/A button to access NOAA weather channels.
- Use the UP (+) or DOWN (-) buttons to scan through available weather channels.
- Press W/A again to exit weather mode.
5.8. Range Expectations
The maximum range of the LPX150 is up to 20 miles (32 kilometers) under optimal, unobstructed conditions. Actual range may vary significantly based on terrain, weather, electromagnetic interference, and obstructions.
- Unobstructed (Line of Sight): Up to 20 miles.
- Partial Obstruction (e.g., light foliage, hills): 2 to 5 miles.
- Heavy Obstruction (e.g., dense urban areas, mountains): Less than 1 mile.
5.9. Product Overview Video
Video: A brief overview of the Bushnell LPX150 Walkie Talkie's features and design.
6. Specifications
| Feature | Value |
|---|---|
| Model Number | LPX150 |
| Product Dimensions | 6.93 x 2.32 x 1.38 inches |
| Item Weight | 5.8 ounces |
| Number of Channels | 22 |
| Frequency Range | UHF |
| Talking Range Maximum | 20 Miles (32 km) |
| Water Resistance Level | Water Resistant |
| Special Feature | Rechargeable |
| Batteries | 6 AA batteries required (included) - NiMH rechargeable |
| Manufacturer | Shineflex US LLC |
7. Maintenance
- Cleaning: Use a soft, damp cloth to clean the exterior of the radios. Do not use harsh chemicals or abrasive cleaners.
- Battery Care: For optimal battery life, fully charge the NiMH batteries before first use. If storing the radios for an extended period, remove the batteries.
- Storage: Store the radios in a cool, dry place away from direct sunlight and extreme temperatures.
8. Troubleshooting
| Problem | Solution |
|---|---|
| No power | Check battery installation and charge level. Ensure batteries are correctly inserted and fully charged. |
| Poor reception/static | Ensure both radios are on the same channel. Check for obstructions between radios. Move to a higher elevation or clearer line of sight. |
| Unable to communicate | Verify both radios are powered on and on the same channel. Check battery levels. Ensure the PTT button is fully pressed when speaking and released when listening. |
9. Warranty and Support
The Bushnell LPX150 Walkie Talkie Radio comes with a 180-day battery warranty. For product support, warranty claims, or additional information, please contact the manufacturer, Shineflex US LLC, or visit the official Bushnell website.


