waveshare 9.3-inch 1600x600 Capacitive Touch Display User Manual
Model: 9.3inch 1600x600 LCD
1. Introduction
This manual provides detailed instructions for the setup, operation, and maintenance of your waveshare 9.3-inch Capacitive Touch Display. This high-resolution display is designed for versatile use with various single-board computers and operating systems, offering a responsive touch interface and clear visuals.
2. Product Features
- Display Type: 9.3-inch IPS Capacitive Touch Display.
- Resolution: 1600 × 600 pixels, providing high brightness and clear visuals.
- Touch Functionality: Up to 10-point capacitive touch, depending on the operating system.
- Panel Durability: Optical Bonding Toughened Glass Panel with up to 6H hardness, offering enhanced durability and dust resistance.
- Viewing Angle: Excellent display performance with a 178° wide viewing angle.
- Interfaces: HDMI interface for video input.
- Compatibility: Supports all versions of Raspberry Pi (Ubuntu, single point touch, driver free), Jetson Nano/Orin Nano, and Windows 11/10/8.1/8/7 (10-point touch, driver free).
- Brightness Control: Supports DDC/CI brightness adjustment.
3. Package Contents
Verify that all items listed below are included in your package:
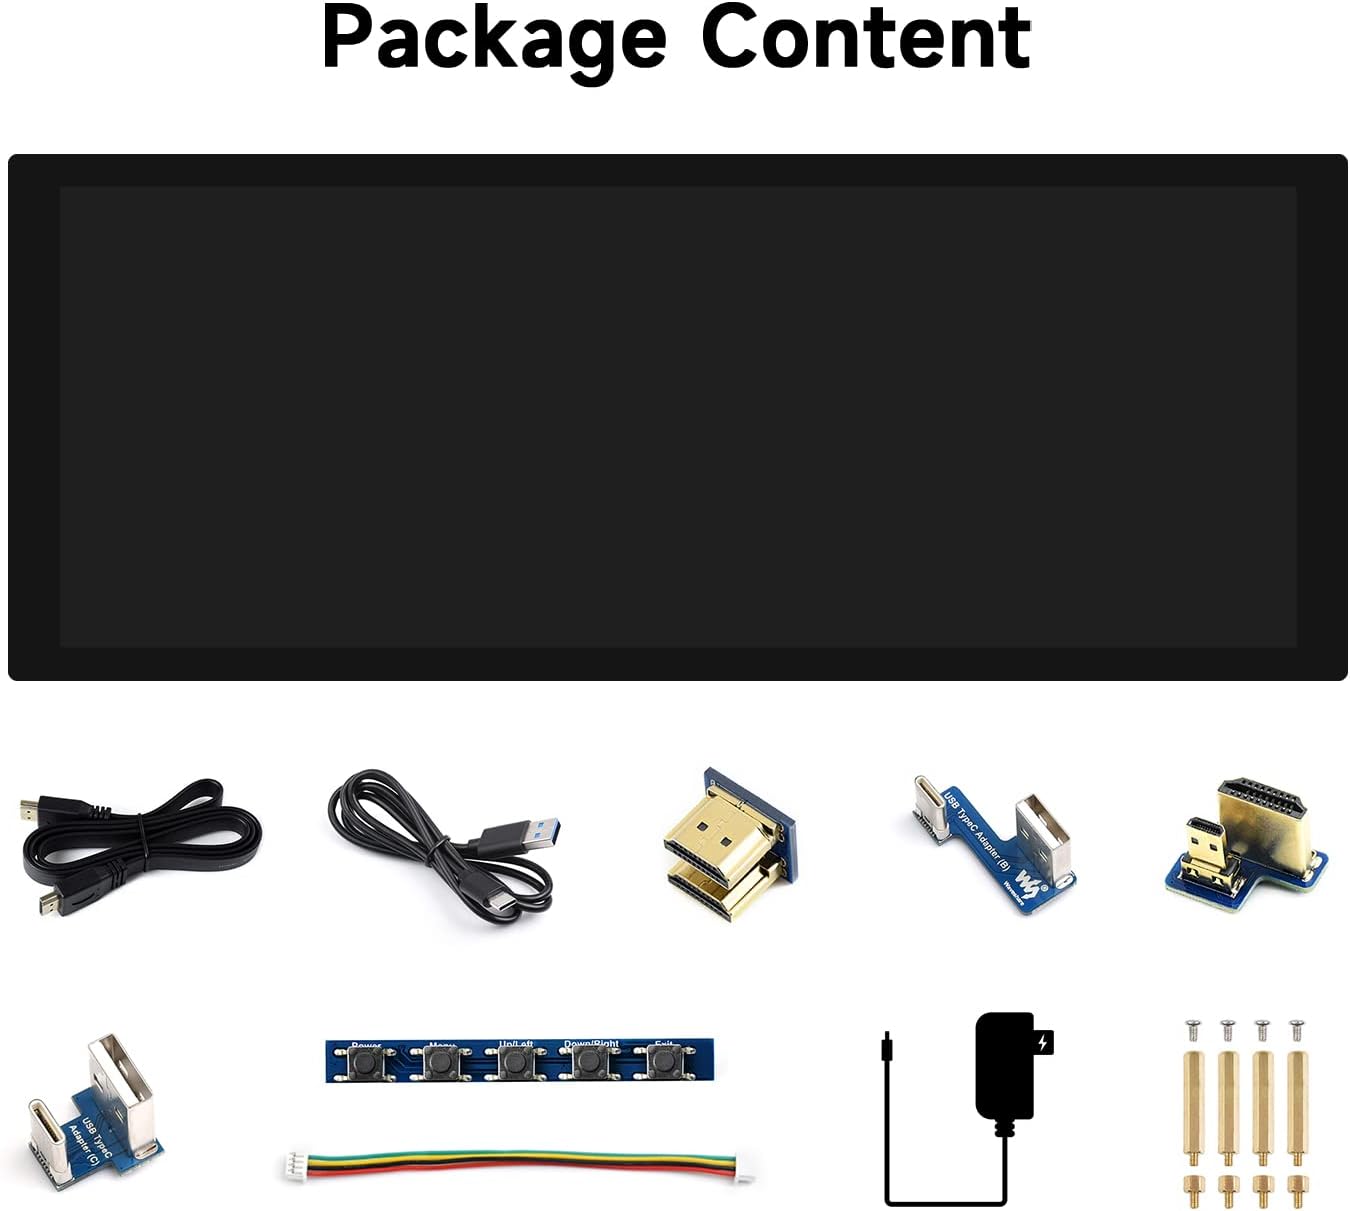
Image: Overview of the waveshare 9.3-inch display package contents, including the display, USB cables, HDMI adapters, a button board, power adapter, and mounting screws.
- 9.3-inch Capacitive Touch Display Unit
- USB-A to USB-C Cable (for touch and power)
- HDMI to HDMI Cable
- HDMI Adapter (various types for different Raspberry Pi models)
- USB Type-A to USB Type-C Adapter
- Button Control Board with Cable
- 5V/2.5A Power Adapter
- Mounting Screws and Spacers
4. Interface Introduction
Familiarize yourself with the various ports and buttons on the display unit.

Image: Detailed view of the display's interface, highlighting the Backlight ON/OFF switch, Audio Jack, HDMI Port, Power Supply input, Touch Port, Speaker Header, and Button Board Header.
- 1. Backlight ON/OFF: Switch to control the display backlight.
- 2. Audio Jack: 3.5mm audio output.
- 3. HDMI Port: For video input from your device.
- 4. Power Supply: USB Type-C port for power input.
- 5. Touch Port: USB Type-C port for touch data transmission.
- 6. Speaker Header: For connecting external speakers.
- 7. Button Board Header: For connecting the included button control board.
5. Setup and Connection
5.1. General Connection Principles
The waveshare 9.3-inch display requires both a video signal (via HDMI) and power/touch data (via USB-C). Ensure all connections are secure before powering on your devices.
5.2. Connecting to Raspberry Pi
This display supports all versions of Raspberry Pi. Specific adapters may be required for certain models (e.g., mini-HDMI for Raspberry Pi Zero).
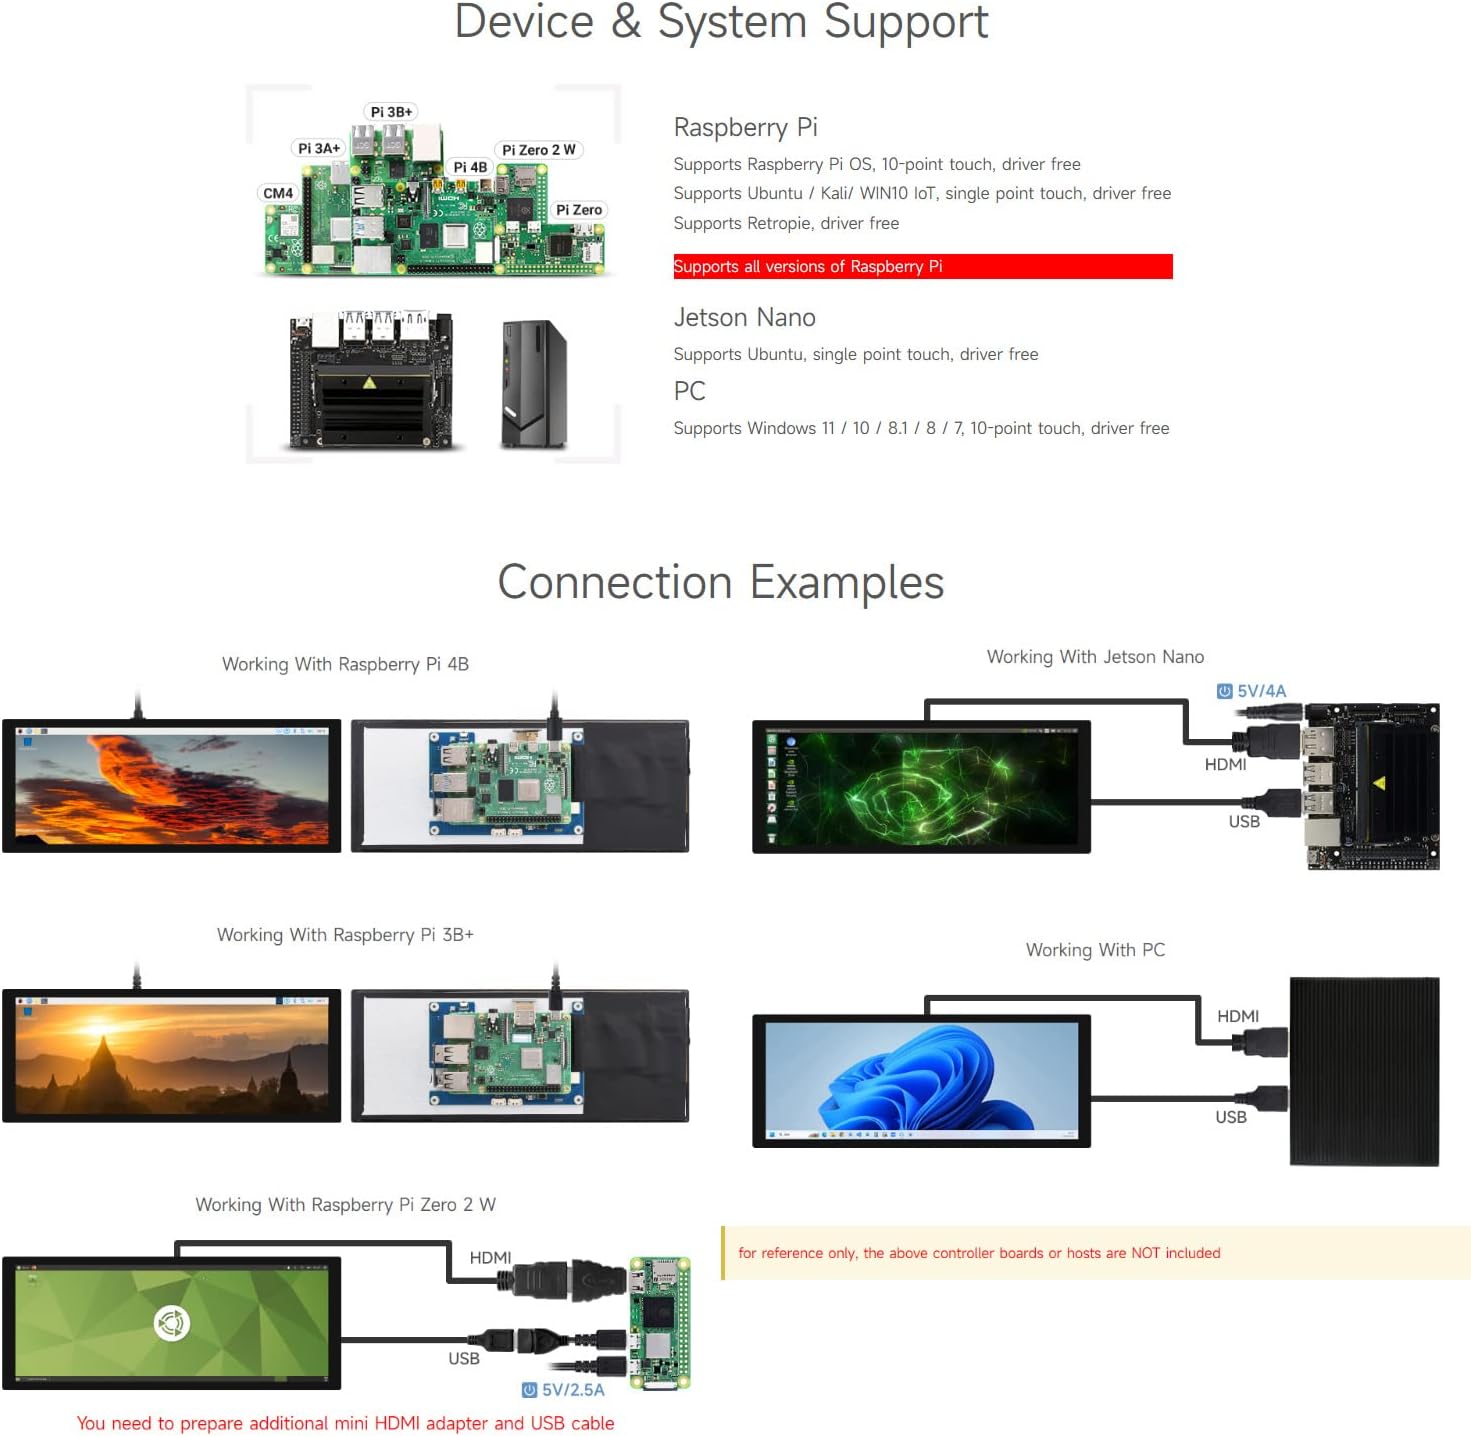
Image: Connection diagrams illustrating how to connect the display to Raspberry Pi 4B, Raspberry Pi 3B+, and Raspberry Pi Zero 2W using HDMI and USB cables. Also shows connection to Jetson Nano.
- Connect the display's HDMI port to your Raspberry Pi's HDMI output using the provided HDMI cable and appropriate adapter if necessary.
- Connect the display's Touch Port (USB-C) to a USB port on your Raspberry Pi using the provided USB-A to USB-C cable. This provides power and enables touch functionality.
- Power on your Raspberry Pi. The display should automatically detect the signal and turn on.
5.3. Connecting to Jetson Nano / Jetson Orin Nano
The display is compatible with Jetson Nano and Jetson Orin Nano boards.
- Connect the display's HDMI port to the Jetson board's HDMI output.
- Connect the display's Touch Port (USB-C) to a USB port on your Jetson board.
- Power on your Jetson board. The display should activate.
5.4. Connecting to Windows PC
The display can function as a secondary monitor for Windows PCs, supporting 10-point touch without additional drivers.
- Connect the display's HDMI port to your PC's HDMI output.
- Connect the display's Touch Port (USB-C) to a USB port on your PC.
- Power on your PC. The display will be recognized as an external monitor and touch device.
6. Operating Instructions
6.1. Touch Functionality
The display supports up to 10-point capacitive touch, providing a responsive and intuitive user experience.
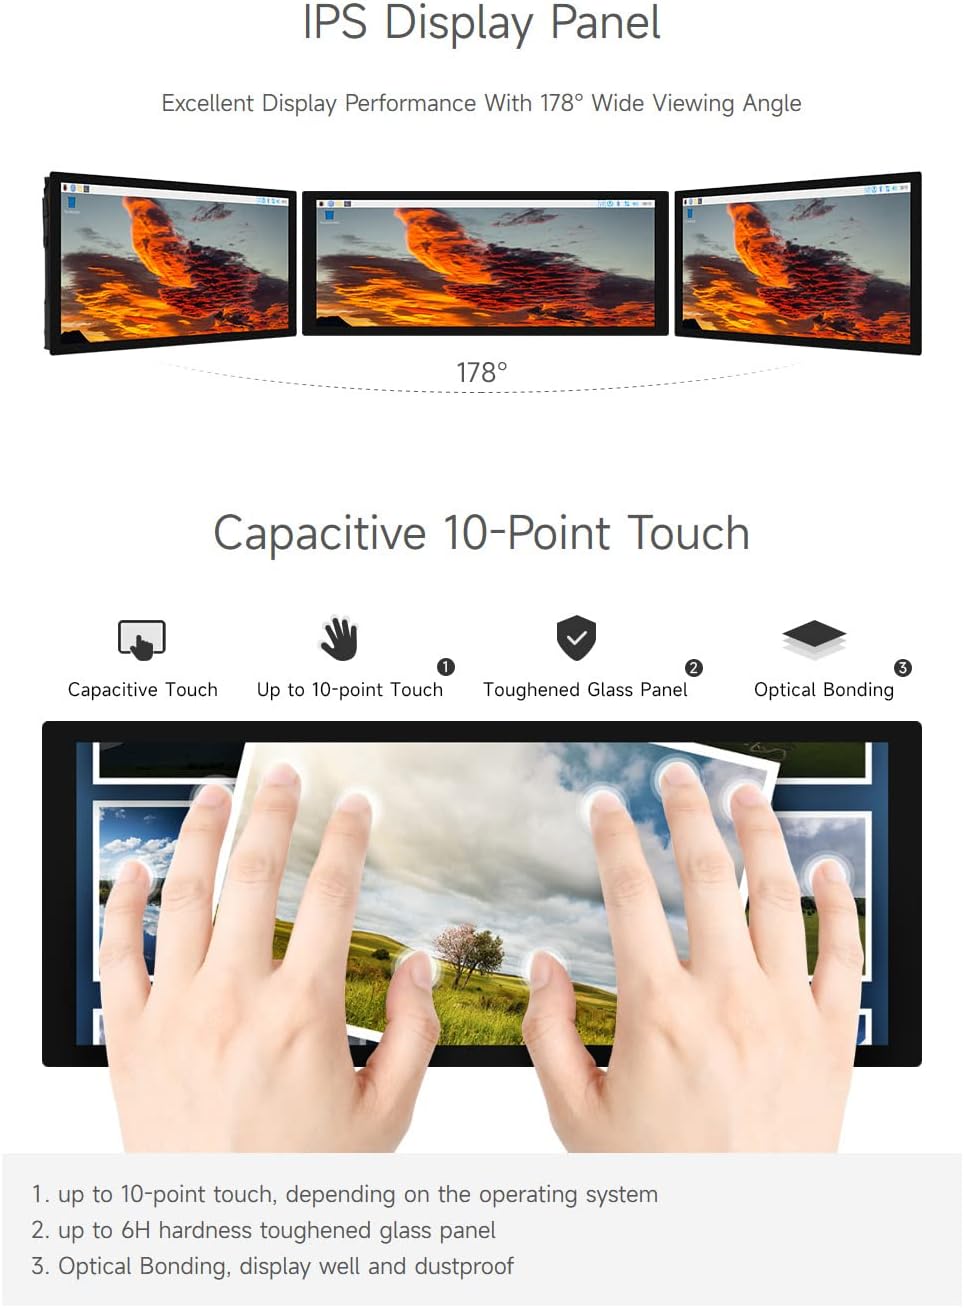
Image: A hand interacting with the display, illustrating its 10-point capacitive touch capability. The toughened glass panel and optical bonding enhance durability and visual clarity.
For Raspberry Pi, single-point touch is typically supported driver-free. For Windows, 10-point touch is supported driver-free. Ensure the USB-C Touch Port is connected to enable touch input.
6.2. Brightness Adjustment
The display supports DDC/CI brightness adjustment, allowing you to control the backlight via software or the optional button board.
Image: The display's interface, indicating the Button Board Header which can be used for OSD menu access and brightness adjustment.
If using the optional button board, connect it to the Button Board Header. This allows access to the On-Screen Display (OSD) menu for brightness and other settings. Alternatively, brightness can be adjusted through the operating system's display settings if DDC/CI is supported.
6.3. Display Orientation
The display orientation can be adjusted through the operating system settings of your connected device. Refer to your device's documentation for specific steps on changing display orientation.
7. Specifications
| Feature | Specification |
|---|---|
| Screen Size | 9.3 Inches |
| Resolution | 1600 x 600 |
| Display Panel | IPS |
| Viewing Angle | 178° |
| Touch Type | Capacitive |
| Touch Points | Up to 10-point |
| Touch Panel Tech | Toughened Glass, Optical Bonding |
| Hardness | Up to 6H |
| Display Interface | HDMI |
| Touch Port | USB Type-C |
| Brightness Adjustment | DDC/CI Support |
| Product Dimensions | 0.36 x 2.82 x 7.17 inches |
| Item Weight | 1.41 pounds |
7.1. Dimensions

Image: Detailed technical drawing illustrating the physical dimensions of the waveshare 9.3-inch display, including length, width, and thickness in millimeters.
8. Troubleshooting
- No Display: Ensure both HDMI and USB-C (for power) cables are securely connected. Verify your device's video output settings.
- No Touch Input: Confirm the USB-C Touch Port is connected to your device. For Raspberry Pi, ensure the operating system is configured correctly for touch. For Windows, touch should be plug-and-play.
- Incorrect Display Resolution: Adjust the resolution settings on your connected device to 1600x600.
- Flickering Screen: Check cable connections. Ensure your power supply meets the display's requirements.
- Brightness Issues: Use the optional button board to access the OSD menu or adjust via your operating system's display settings (if DDC/CI is supported).
9. Maintenance
- Cleaning: Use a soft, lint-free cloth to clean the screen. For stubborn smudges, lightly dampen the cloth with water or a screen-safe cleaner. Avoid harsh chemicals.
- Storage: Store the display in a cool, dry place away from direct sunlight and extreme temperatures.
- Handling: Handle the display with care to avoid dropping or impacting the screen.
10. Warranty and Support
For warranty information and technical support, please refer to the documentation provided with your purchase or visit the official waveshare website. Keep your proof of purchase for warranty claims.
Video: A tutorial demonstrating the usage and connection of DSI screens, including software configuration and hardware setup. This video provides general guidance for DSI display integration.


