Important Safety Information
Read all safety warnings and instructions before operating any of the tools in this kit. Failure to follow the warnings and instructions may result in electric shock, fire, and/or serious injury. Keep all warnings and instructions for future reference.
- Always wear appropriate personal protective equipment, including eye protection, hearing protection, and sturdy footwear.
- Ensure the work area is clear of debris, children, and pets before operation.
- Do not operate power tools in explosive atmospheres, such as in the presence of flammable liquids, gases, or dust.
- Remove the battery pack from the tool before making any adjustments, changing accessories, or storing the tool.
- Use only battery packs and chargers specified by the manufacturer.
- Do not expose battery packs or tools to fire or excessive temperature.
- Maintain tools with care. Keep cutting tools sharp and clean.
Product Overview
This WORX Power Share kit includes a 40V Cordless Lawn Mower, a 20V GT 3.0 Grass Trimmer/Edger, a 20V Hedge Trimmer, and a 20V Turbine Blower, along with compatible batteries and a charger. Each tool is designed for specific outdoor maintenance tasks.
What's Included

Figure 1: Components of the Worx 40V 14" Cordless Lawn Mower kit, including the mower, two 20V 4.0 Ah batteries, and a dual-port charger.

Figure 2: The Worx 20V GT 3.0 Grass Trimmer/Edger, 20V Hedge Trimmer, and 20V Turbine Blower, shown with two 20V batteries and a charger.
- Worx 40V 14" Cordless Lawn Mower: Features Intellicut technology and 2-in-1 mulching or bagging capability. Powered by two 20V 4.0Ah batteries.
- Worx 20V GT 3.0 Grass Trimmer/Edger: A versatile tool that converts from a trimmer to an edger in seconds, with command feed auto line advance.
- Worx 20V Hedge Trimmer: Equipped with a 22-inch blade and soft over-mold grip for comfortable operation.
- Worx 20V Turbine Blower: Offers high and low-speed settings for efficient debris clearing.
- (2) Worx 20V 4.0Ah Power Share Batteries: Provide power for all tools in the kit.
- Dual-Port Charger: For recharging the 20V batteries.

Figure 3: The Worx Power Share system, demonstrating battery compatibility across 20V, 40V, and 80V tools.
Setup and Assembly
Battery Charging
- Connect the dual-port charger to a standard power outlet.
- Insert the 20V Power Share batteries into the charger slots. Ensure they are fully seated.
- The indicator lights on the charger will show the charging status. A solid green light typically indicates a full charge.
- Once fully charged, remove the batteries from the charger.
40V 14" Cordless Lawn Mower Assembly
- Handle Assembly: Unfold the mower handle and secure it in place using the quick-release clamps or knobs provided. Ensure the handle is firmly locked.
- Grass Collection Bag: Assemble the grass collection bag if it came disassembled. Attach it securely to the rear discharge opening of the mower.
- Battery Installation: Open the battery compartment cover. Insert two fully charged 20V batteries into the designated slots until they click into place. Close the cover.
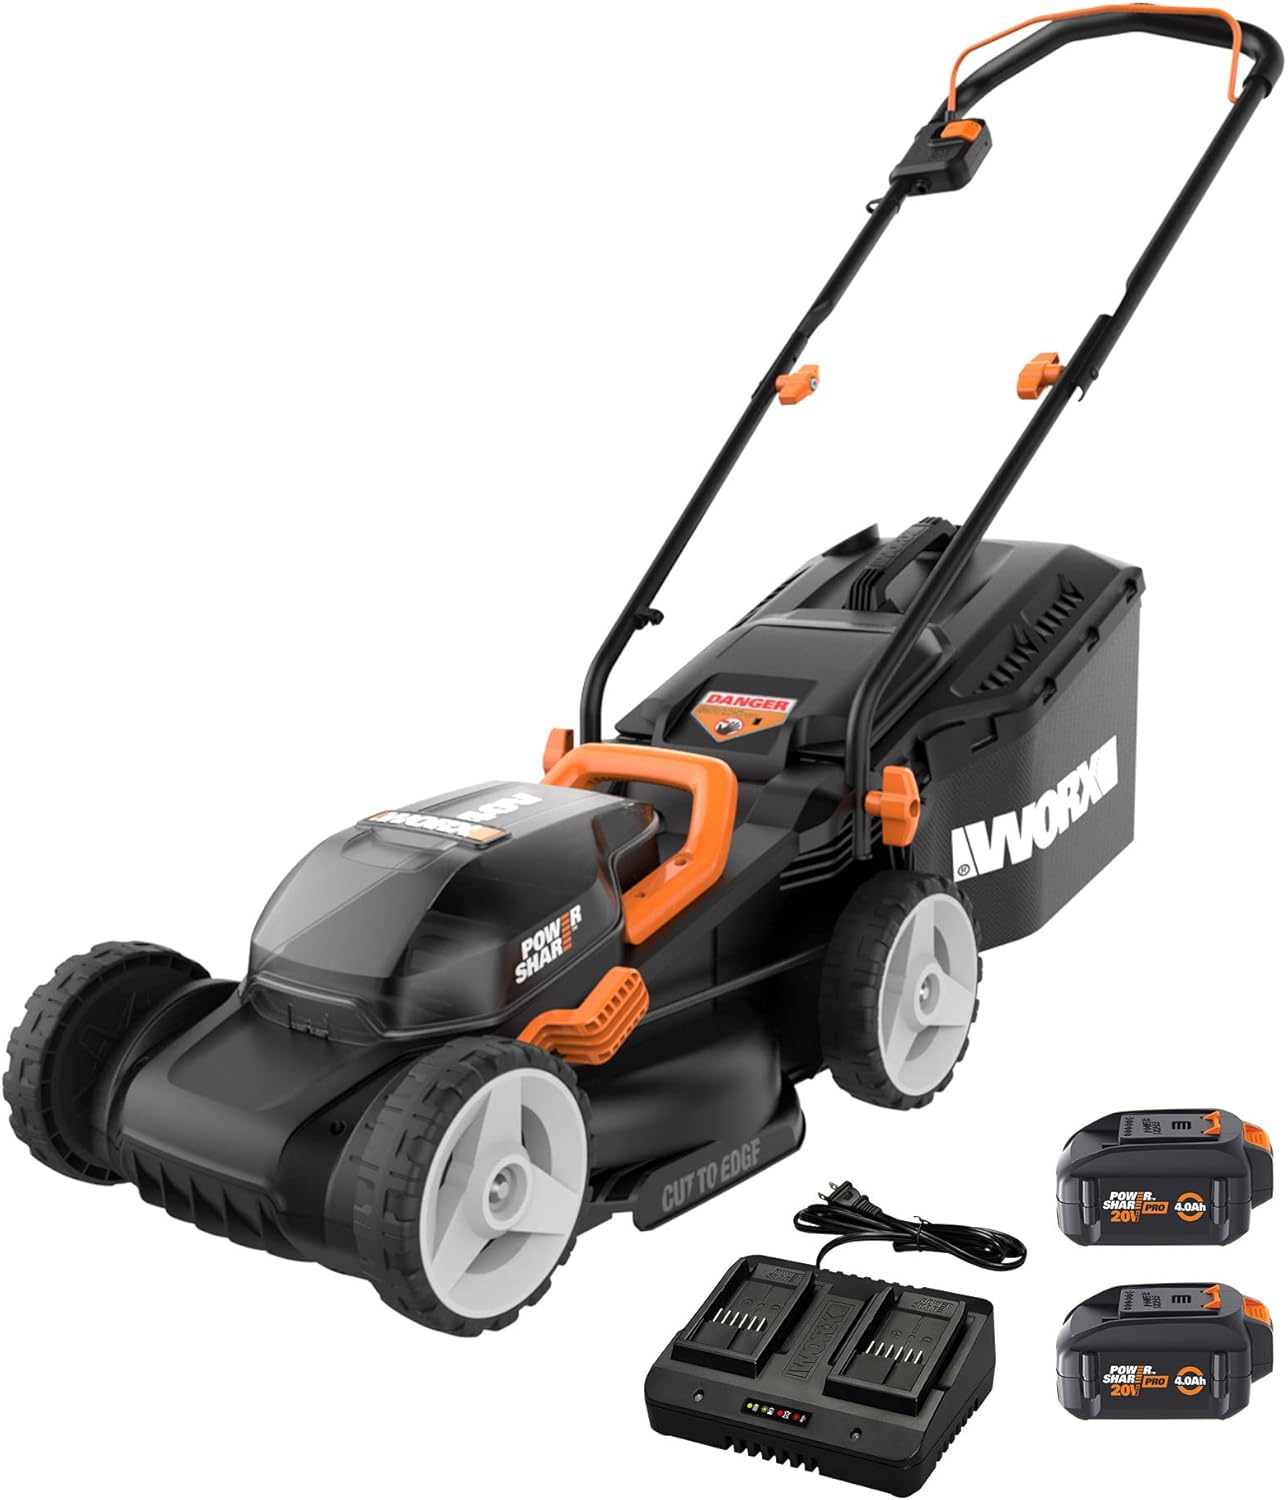
Figure 4: The Worx 40V 14" Cordless Lawn Mower with batteries and charger, illustrating the complete setup.
20V GT 3.0 Grass Trimmer/Edger Assembly
- Auxiliary Handle: Attach the D-handle to the trimmer shaft at a comfortable position. Tighten securely.
- Guard Installation: Secure the safety guard onto the trimmer head.
- Battery Installation: Insert a fully charged 20V battery into the battery slot on the trimmer until it clicks.
20V Hedge Trimmer Assembly
- Handle Adjustment: Adjust the front D-handle to a comfortable grip position.
- Battery Installation: Insert a fully charged 20V battery into the battery slot on the hedge trimmer until it clicks.
20V Turbine Blower Assembly
- Nozzle Attachment: Attach the blower nozzle to the main unit. Ensure it is securely fastened.
- Battery Installation: Insert a fully charged 20V battery into the battery slot on the blower until it clicks.
Operating Instructions
40V 14" Cordless Lawn Mower
- Adjust Cutting Height: Use the single-point height adjustment lever to select one of the 6 cutting height positions (2.5" to 3.5").
- Start the Mower: Press and hold the safety button, then pull the bail switch lever towards the handle.
- Intellicut™ Technology: The mower automatically adjusts torque for thicker grass. For tougher areas, the Intellicut system provides additional power.
- Mowing Technique: For best results, mow in straight, overlapping lines. Avoid overloading the mower by cutting excessively long grass in one pass.
- Mulching/Bagging: The mower supports both mulching and bagging. Ensure the grass collection bag is attached for bagging, or remove it and insert the mulching plug (if included) for mulching.

Figure 5: The Worx 40V 14" Cordless Lawn Mower demonstrating its 2-in-1 mulching or bagging capability.
20V GT 3.0 Grass Trimmer/Edger
- Trimming: Hold the trimmer firmly with both hands. Press the trigger to start. Move the trimmer in a sweeping motion, keeping the cutting line parallel to the ground.
- Edging: To convert to edger mode, rotate the head 90 degrees. Use the guide wheel to maintain a consistent cutting depth along sidewalks or driveways.
- Line Advance: The command feed system automatically advances the line as needed. Avoid hitting hard surfaces to prolong line life.
20V Hedge Trimmer
- Starting: Ensure both hands are on the handles. Press the safety switch and then the trigger to start the blades.
- Trimming Technique: Use a smooth, sweeping motion. For vertical cuts, move the trimmer up and down. For horizontal cuts, move it across the top of the hedge.
- Blade Capacity: The 22-inch blade is designed for efficient cutting of hedges and shrubs. Avoid cutting branches thicker than the recommended capacity.

Figure 6: A user operating the Worx 20V Hedge Trimmer, showcasing its 22-inch blade for large cutting capacity.
20V Turbine Blower
- Starting: Press the power button.
- Speed Settings: Use the speed selector to choose between low speed for delicate areas or high speed for maximum clearing power.
- Blowing Technique: Direct the airflow towards the debris. For stubborn debris, use short, powerful bursts.
Maintenance
Regular maintenance ensures optimal performance and extends the lifespan of your tools.
General Maintenance
- Always remove the battery pack before performing any maintenance or cleaning.
- Clean the tools after each use with a damp cloth. Do not use harsh chemicals or abrasive cleaners.
- Inspect all parts for damage, wear, or loose fasteners before and after each use. Replace damaged parts immediately.
- Store tools in a dry, secure location out of reach of children.
Lawn Mower Maintenance
- Blade Inspection: Regularly check the mower blade for sharpness and damage. A dull or damaged blade can affect cutting performance and balance. Replace or sharpen as needed.
- Deck Cleaning: Clear grass clippings from the underside of the mower deck to prevent buildup and ensure proper airflow for mulching/bagging.
- Grass Bag: Empty and clean the grass collection bag regularly to maintain efficiency.
Trimmer/Edger Maintenance
- Line Replacement: Replace the trimmer line when it runs out. Refer to the product specifications for the correct line diameter.
- Guard Cleaning: Keep the safety guard free of grass and debris.
Hedge Trimmer Maintenance
- Blade Cleaning: After each use, clean the blades of sap and debris. A light coat of machine oil can help prevent rust and ensure smooth operation.
- Blade Sharpening: If the blades become dull, have them professionally sharpened or replace them.
Battery and Charger Maintenance
- Store batteries in a cool, dry place away from direct sunlight and extreme temperatures.
- Do not store batteries in a discharged state for extended periods. Charge them periodically if not in use.
- Keep charger contacts clean and free of debris.
Troubleshooting
This section addresses common issues you might encounter with your WORX Power Share tools.
| Problem | Possible Cause | Solution |
|---|---|---|
| Tool does not start. | Battery not charged or improperly inserted. Safety switch not engaged. | Ensure battery is fully charged and correctly inserted. Engage safety switch before pulling trigger/bail. |
| Lawn Mower cuts unevenly or stalls. | Dull or damaged blade. Grass too long/wet. Battery low. | Sharpen or replace blade. Mow dry grass. Raise cutting height. Recharge battery. |
| Trimmer line does not advance. | Line tangled or empty. Debris in head. | Remove battery, clear debris, untangle line, or replace spool. |
| Hedge Trimmer blades jam. | Cutting branches too thick. Debris caught in blades. | Do not cut branches exceeding tool capacity. Remove battery, then carefully clear debris. |
| Blower has low air output. | Nozzle obstructed. Battery low. | Remove battery, clear any obstructions from nozzle. Recharge battery. |
If you encounter issues not listed here or if solutions do not resolve the problem, please contact WORX customer support.
Specifications
General
- Brand: WORX
- Model: WG779
- Power Source: Battery Powered (WORX Power Share)
- Battery Type: Lithium-Ion (20V 4.0Ah)
40V 14" Cordless Lawn Mower
- Cutting Width: 14 inches
- Cutting Height Adjustment: 6 positions (2.5 inches to 3.5 inches)
- Max Cut Area per Charge: Up to 5000 sq ft (with two 4.0Ah batteries)
- Features: Intellicut™ Technology, 2-in-1 Mulching/Bagging
20V GT 3.0 Grass Trimmer/Edger
- Functionality: 2-in-1 Trimmer and Edger
- Line Feed: Command Feed Auto Line Advance
- Head Rotation: 90° pivoting cutting head
20V Hedge Trimmer
- Blade Length: 22 inches
- Grip: Soft over-mold grip, D-handle
20V Turbine Blower
- Speed Settings: High and Low
Official Product Videos
Watch these official videos for visual guidance on product features and operation.
Worx Product Overview (0:43)
This video provides a general overview of the Worx outdoor power tools, demonstrating their key features and benefits.
Worx Tool Demonstration (0:41)
A short demonstration video showcasing the operation and versatility of the Worx tools in various outdoor tasks.
Warranty and Support
WORX products are backed by a manufacturer's warranty. For specific warranty details, registration, or technical support, please refer to the warranty card included with your product or visit the official WORX website.
For customer service inquiries, please contact WORX customer support directly.


