1. Introduction
This manual provides essential instructions for the safe and effective installation, operation, and maintenance of your VEVOR SS1380-ZW Gun Safe. Please read this manual thoroughly before using the product and retain it for future reference. Proper understanding of these instructions ensures optimal security and longevity of your firearm storage solution.
2. Safety Information
- Always store firearms unloaded and locked within the safe.
- Keep emergency keys and registered fingerprints confidential and away from unauthorized individuals, especially children.
- Ensure the safe is securely mounted to a wall or floor to prevent tipping or unauthorized removal.
- Do not store flammable materials or liquids inside the safe.
- Regularly check the battery level and replace batteries as needed to ensure continuous operation of the electronic lock.
- This safe is designed to deter theft and unauthorized access. It is not fireproof or waterproof unless explicitly stated.
3. Package Contents
Verify that all items listed below are included in your package:
- 1 x VEVOR SS1380-ZW Gun Safe
- 2 x Emergency Keys
- 5 x Expansion Bolts (for mounting)
- 1 x External Power Box
- Removable Pistol Rack(s)
- Adjustable Rifle Rack(s)
- Bullet Storage Boxes (on door panel)
- User Manual (this document)
4. Product Overview
The VEVOR SS1380-ZW Gun Safe is a robust security cabinet designed for the secure storage of firearms. It features a durable steel construction and advanced locking mechanisms to protect your valuables.
Key Features:
- High Capacity: Stores up to 5 rifles and a minimum of 4 pistols.
- Flexible Storage: Features removable and adjustable rifle racks, a removable pistol rack, and three bullet storage boxes on the door panel.
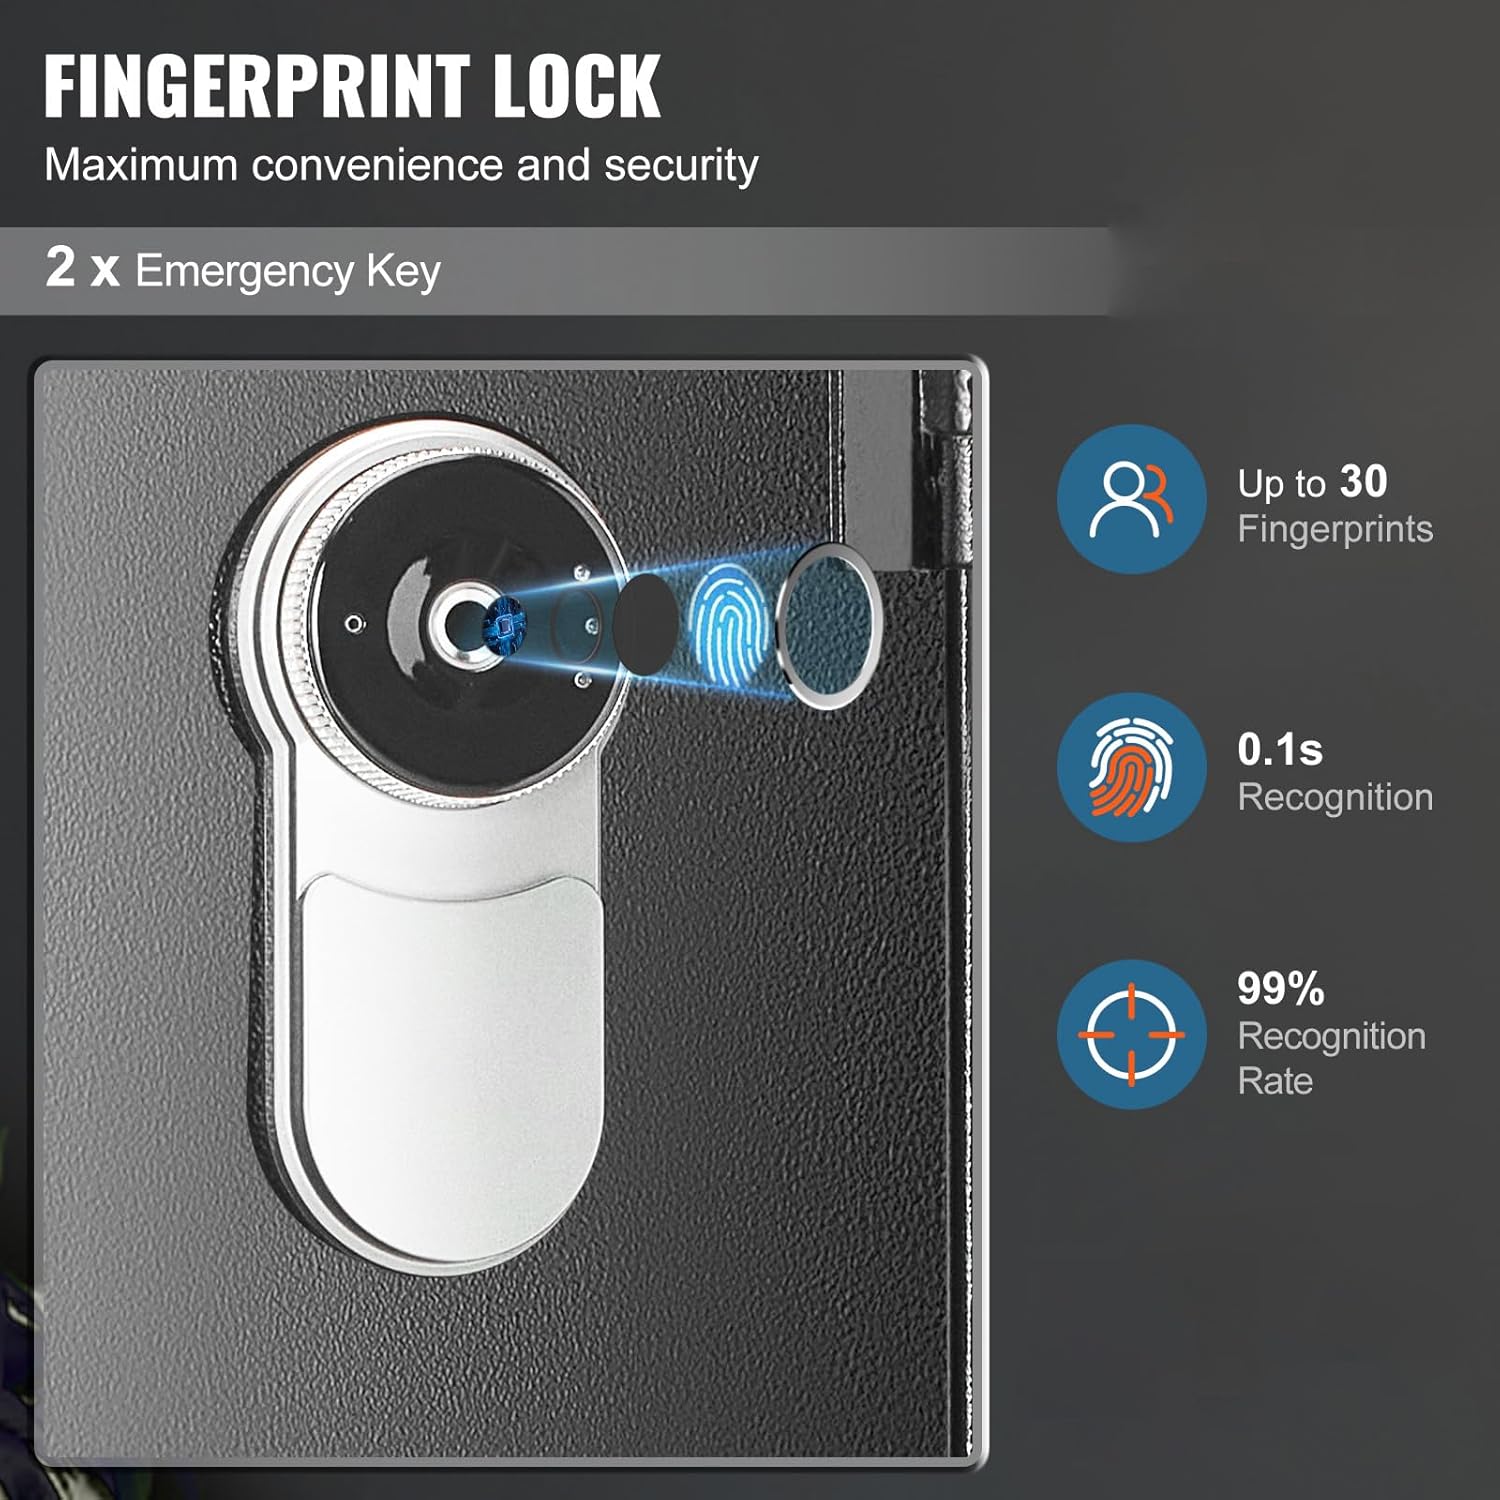
- Biometric Fingerprint Lock: Offers quick and secure access, capable of storing up to 30 unique fingerprints with a recognition rate of 0.1 seconds and 99% accuracy.
- Emergency Key Access: Includes two emergency keys for manual override.
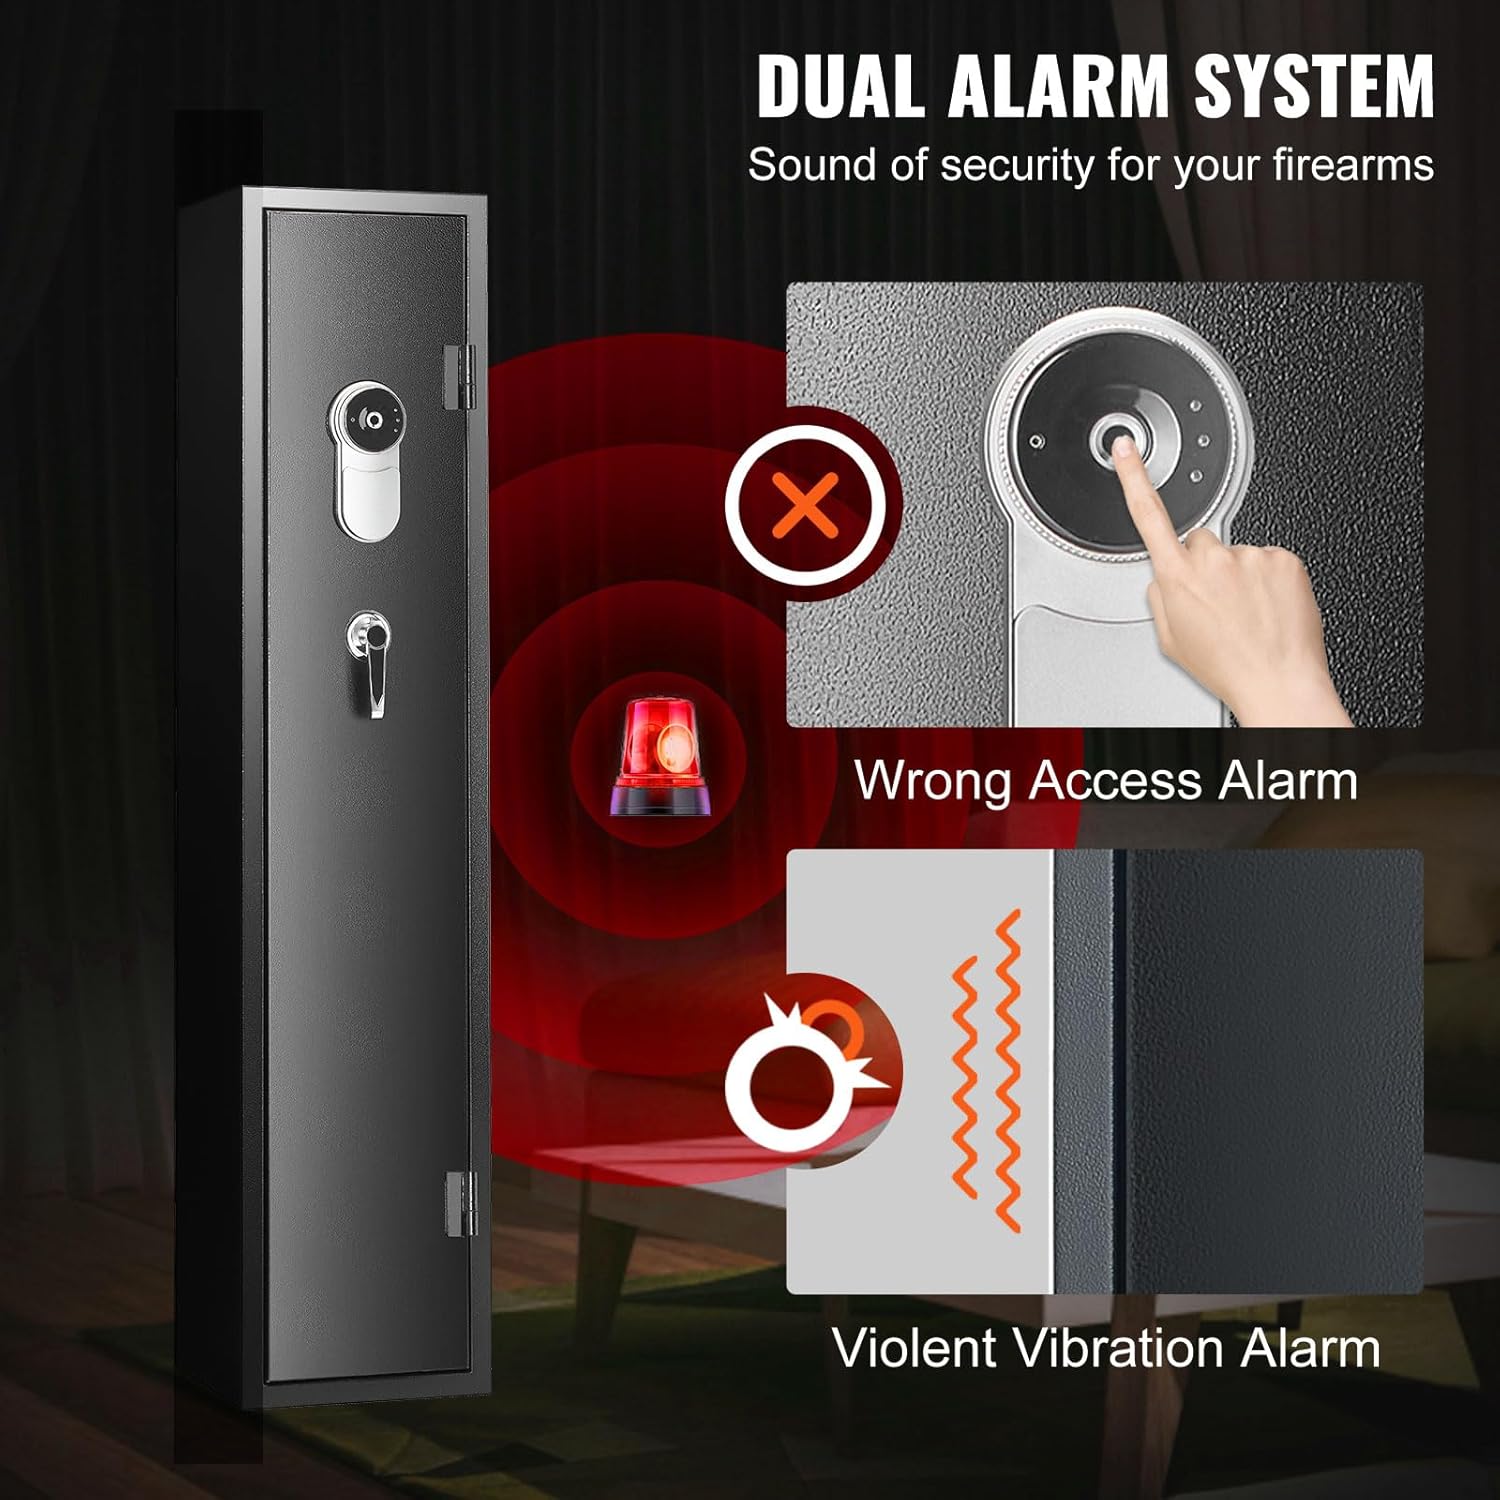
- Dual Alarm System: Equipped with an alarm that activates upon multiple incorrect access attempts or violent vibrations/tampering.
- Wide Door Opening: The door opens 180 degrees for full and easy access to the interior.
- Automatic LED Light: An internal LED light illuminates the safe's interior when opened.


5. Specifications
| Feature | Specification |
|---|---|
| Model Number | SS1380-ZW |
| Product Dimensions (L x W x H) | 300 x 280 x 1380 mm (11.8" x 11" x 54.3") |
| Rifle Storage Capacity | 5 |
| Pistol Storage Capacity | Minimum 4 |
| Material | Q235 Cold-Rolled Steel Plate |
| Cabinet Wall Thickness | 1.1 mm |
| Door Plate Thickness | 1.8 mm |
| Lock Type | Biometric Fingerprint, Emergency Key |
| Fingerprint Capacity | Up to 30 |
| Power Source | 4 x AA Batteries |
| Mounting Options | Floor Mount, Wall Mount |
| Locking Bolts | 3 |
| Mounting Holes | Bottom: 4, Back: 6 |

6. Setup and Installation
6.1 Unpacking
Carefully remove the safe from its packaging. Inspect for any damage during transit. Retain packaging materials for potential future transport or returns.
6.2 Battery Installation
- Locate the battery compartment, typically on the inside of the door or the lock mechanism.
- Insert 4 AA batteries, ensuring correct polarity (+/-).
- Close the battery compartment cover. The safe should emit a beep, indicating power.
6.3 Mounting the Safe
For maximum security, it is highly recommended to securely mount the safe to a solid surface (wall or floor).
- Choose a discreet and secure location for the safe.
- Using the pre-drilled mounting holes (4 on the bottom, 6 on the back) as a template, mark the drilling points on the wall or floor.
- Drill pilot holes using an appropriate drill bit for your mounting surface.
- Align the safe with the drilled holes and insert the provided expansion bolts.
- Tighten all bolts securely to firmly anchor the safe.
7. Operating Instructions
7.1 Initial Opening (Emergency Key)
Before setting up fingerprints, use the emergency key to open the safe for the first time.
- Locate the emergency keyhole, usually concealed behind a cover on the lock panel.
- Insert one of the emergency keys and turn it.
- Rotate the handle to open the safe door.
7.2 Registering Fingerprints
The safe can store up to 30 unique fingerprints.
- With the safe door open, locate the 'SET' or 'Enroll' button inside the safe, usually near the lock mechanism. Press it.
- Place your finger firmly on the fingerprint scanner. The safe will beep and the indicator light will flash.
- Lift your finger and place it again, slightly adjusting the angle, for a total of 4-5 times until the safe confirms successful registration (e.g., a long beep or green light).
- Repeat the process for additional fingers or users.
7.3 Opening with Fingerprint
- Place a registered finger firmly on the fingerprint scanner.
- If recognized, the safe will unlock (indicated by a beep and/or green light).
- Rotate the handle within a few seconds to open the door.
7.4 Using the External Power Box
If the internal batteries are depleted and you cannot open the safe with a fingerprint, use the external power box:
- Insert 4 fresh AA batteries into the external power box.
- Locate the external power port on the safe's lock panel (often a small circular port).
- Plug the external power box into the port.
- Immediately place a registered finger on the scanner to open the safe.
- Once opened, replace the internal batteries.
7.5 Alarm System
The safe is equipped with a dual alarm system:
- Wrong Access Alarm: If multiple incorrect fingerprint attempts are made, the alarm will sound.
- Violent Vibration Alarm: If the safe detects significant impact or tampering, an alarm will be triggered.
To silence the alarm, use a registered fingerprint to open the safe or use the emergency key.
8. Maintenance
- Battery Replacement: Replace all 4 AA batteries when the low battery indicator appears or if the safe becomes unresponsive. Always use new, high-quality batteries.
- Cleaning: Wipe the exterior of the safe with a soft, damp cloth. Do not use abrasive cleaners or solvents. Keep the fingerprint scanner clean and dry.
- Mounting Check: Periodically check that all mounting bolts are tight and secure.
- Internal Organization: Ensure firearms and accessories are stored in a way that does not obstruct the locking mechanism or door closure.
9. Troubleshooting
| Problem | Possible Cause | Solution |
|---|---|---|
| Safe does not open with fingerprint. | Finger not registered; incorrect placement; low batteries; dirty scanner. | Ensure finger is registered. Place finger firmly and completely on scanner. Replace batteries. Clean scanner. Use emergency key. |
| Safe is unresponsive. | Dead batteries. | Use the external power box to open, then replace internal batteries. |
| Alarm sounds unexpectedly. | Multiple incorrect attempts; safe was moved or impacted. | Open the safe with a registered fingerprint or emergency key to silence. Avoid tampering. |
| Door does not close properly. | Obstruction; misaligned locking bolts. | Check for items blocking the door or locking bolts. Ensure the safe is level. |
10. Warranty and Support
VEVOR products are designed for reliability and performance. For warranty information, technical support, or service inquiries, please refer to the warranty card included with your product or visit the official VEVOR website. Please have your model number (SS1380-ZW) and purchase details ready when contacting support.


